Dear Bill of March 2020,
It’s Bill of October 2023.
How are you? Don’t bother to answer. I remember.
I’ve been meaning to write to you for some time about what’s in store for you. I won’t talk about the big historical events; Julie Nolke has that topic covered.
Instead, I’m going to tell you about the perils and pitfalls of 3D printing.
Anyone who’s done any 3D printing is well-aware of everything I’m going to write about. If they were to peek over your shoulder and read this letter with you, they’ll learn nothing new. If I’m being honest (and who can I be honest with, if not you?) I’m writing more to reminisce and vent than to inform. Still, I’d like you to know what you’re getting into.
It’s going to be a long letter, about as long as a novella. But there’ll be pictures and videos. I know you like that.
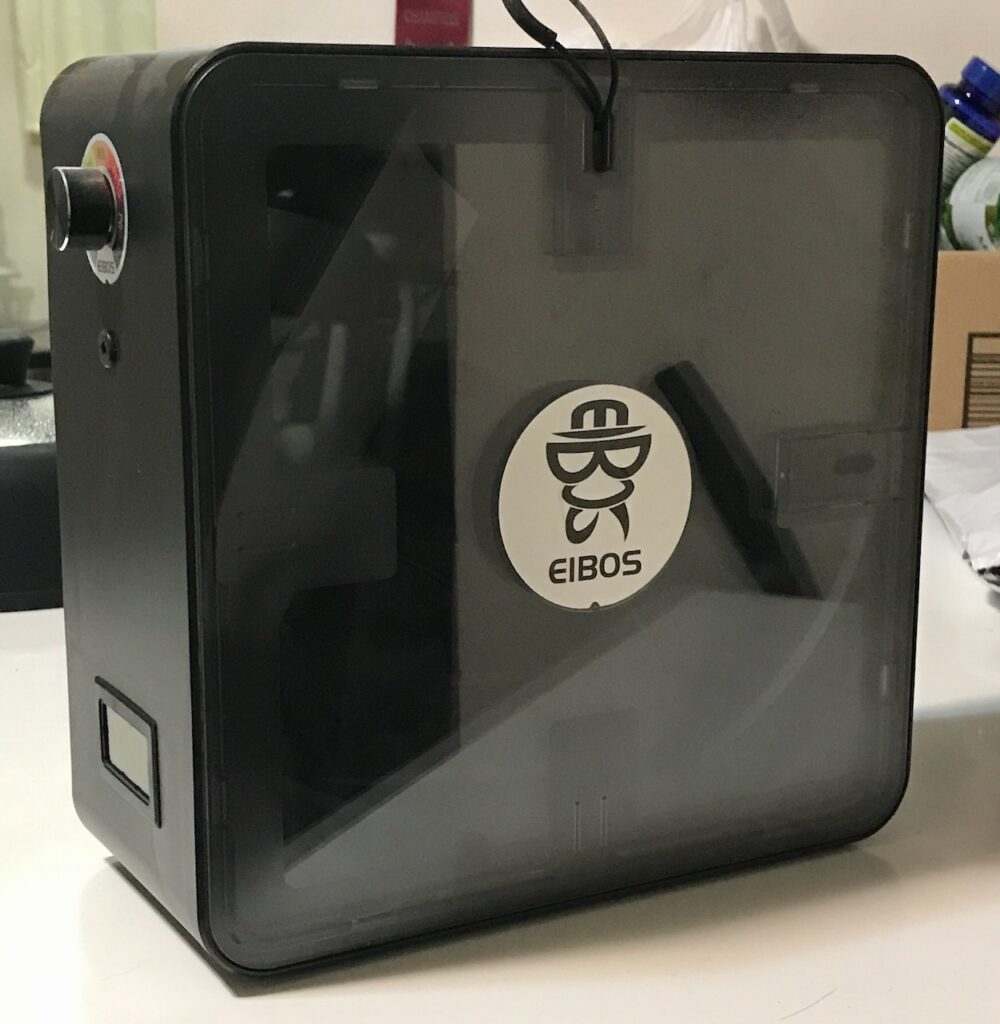
Buccaneer

If you’ll recall, you’d been interested in personal 3D printing for a few years. You were one of those who bought a $2000 laser printer back in the 1980s, so being on the cutting edge of a new printing technology was familiar to you. However, what little you heard about the complexities of 3D printing sounded more daunting than whether a laser printer had enough memory for all the fonts.
In 2013, you thought you found an answer. A new company called Pirate3D started a crowd-funding project on Kickstarter for a 3D printer called the Buccaneer. The idea was this was the first true consumer-level printer that would be simple and automatic to use. You pledged over $400 for a unit. Others did too. In total, the Buccaneer Kickstarter raised over $1.4 million.
You looked forward to the day that you could start 3D printing on your own. A friend of yours who was more familiar with the world of 3D printing (let’s call him M) warned you that, given the technology of the time (and even today, a decade later) that this idea was too good to be true.
It was.
Pirate3D struggled for two years to release a marketable product. It was a notorious failure. There has been much “Monday-morning quarterbacking” about why they failed, including accusations that the owners stole the money. If we take the owners’ statements at face value, the blunt reality is that M was right: It was too soon to make a 3D printer that was a simple appliance like an oven.
One example: they spent much of their resources trying to design a unit that would get UL approval. That required that the 3D printer would not harm a consumer if it were dumped into water while in use. You don’t know of any 3D printer that would pass such a test; you don’t even know of any toasters that would. That was just one of the UL requirements.
This was coupled with other issues that often plague crowd-funded projects from inexperienced creators. They underestimated the cost of shipping the units from Singapore. They also underestimated their manufacturing costs. It eventually turned out that the cost to make and ship a Buccaneer would be more than the $400 I’d pledged in the first place!
A few people, mostly in Singapore, received their Buccaneers. As a consumer-level device, the Buccaneer required an internet connection to a central server to download and print models. When Pirate3D folded, that server went down and those printers became useless.
You were disappointed, of course. On the other hand, you had no pressing need for a 3D printer. You had spent money and waited two years for a toy that you never got. You have to admit that this was not just a #FirstWorldProblem, but a #ZerothWorldProblem.
Tainted Grail
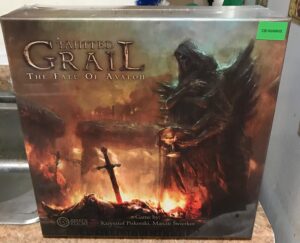
You received the board game Tainted Grail late in 2019. It marked a couple of interesting thresholds in your life. For one thing, it cemented your ability to paint miniature figures.
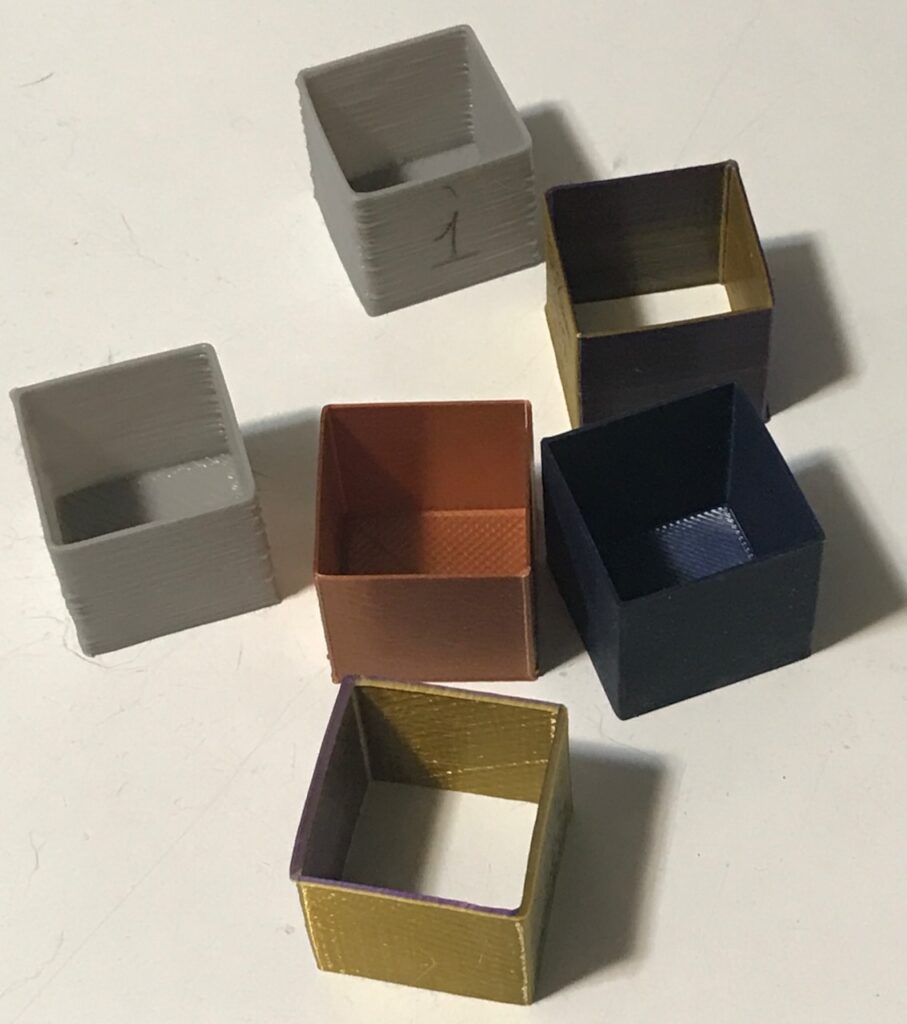
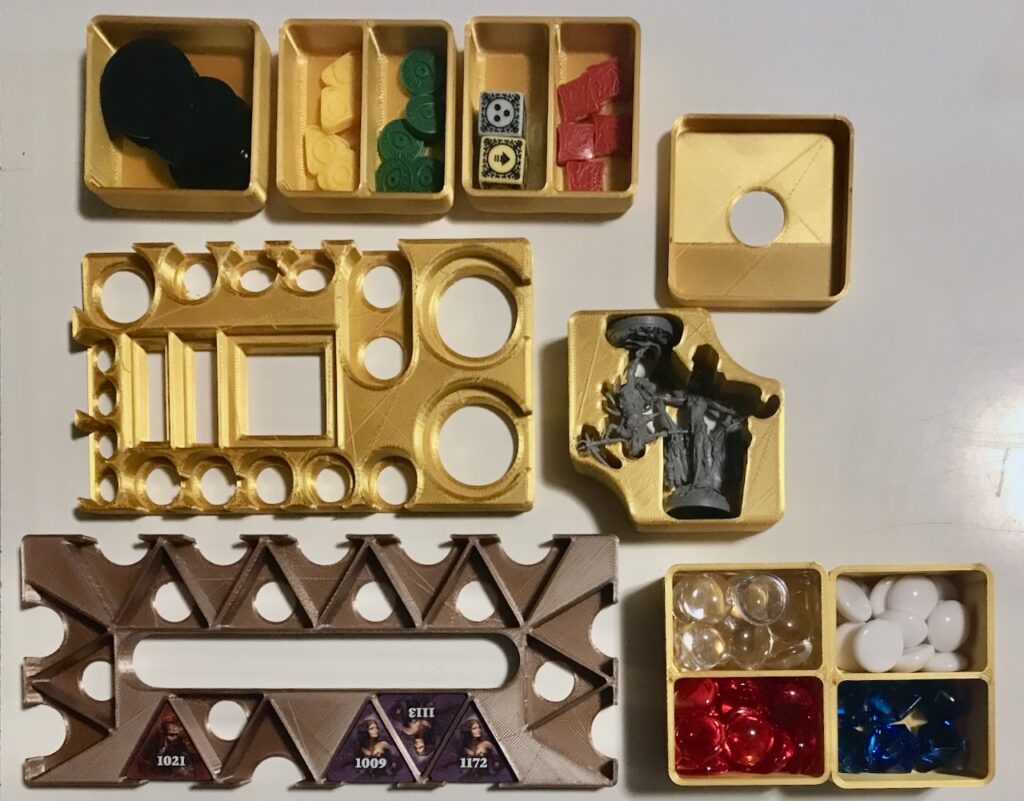
It also introduced the issue of how to organize the game’s bits and pieces. Tainted Grail is a campaign game, meaning that you wanted to preserve the game’s characters’ states in-between sessions. You could keep detailed notes. But you also looked into organizers for the components such as the cards for skills you purchased.
As home-based 3D printing became more common, the 3D-printing community had moved into designing organizers for various high-end board games like Tainted Grail. One company that sells designs for such inserts is Next Level Board Gaming. You purchased the 3D-printing files (“.stl files”) for their Tainted Grail quickplay inserts for just a few dollars.
You had the files. The next step was to get them printed. You’d already become accustomed to using Shapeways, a 3D-printing service, for your Kickin’ Wiccan jewelry shop. Why not use them to print the character inserts?
Answer: price. There are four characters in Tainted Grail. Each one needed an insert. The insert had two main pieces: a top and a bottom. To print one piece in their least-expensive plastic, Shapeways wanted $75. With four character and two pieces for inserts, it would have cost over $600 to print them. That was far more than the cost of the original game.
You thought, “$600? That’s more than it would cost for me to buy my own 3D printer and print the inserts myself!”
It is such thoughts that lead us to doom.
Picking a 3D printer
There are many different kinds of 3D printers out there. For this letter, there are only three worth mentioning to you:
-
Powder bed fusion – Intersecting laser beams fuse powder together. Since the print is in a powder bed, they don’t need support. These printers are only used by industries (like Shapeways), so you’ll never consider them for yourself. But I’ll bring them up later.
-
Resin printing – This works by using light (usually from an LED screen) to harden resin in a vat. You didn’t really think about them before March 2020, and they would still be bad choice for you now. The problem is that they involve handling some nasty chemicals and require ventilation, which you can’t arrange in your apartment. They also involve various post-processing and curing steps after the print.
However, resin printing does produce very accurate high-resolution prints for the money they cost. That’s why they’re popular among 3D-printing hobbyists; M has one, for example. M also has many containers of used foul-smelling liquids associated with resin printing that he has to dispose of someday, which you will handle when you help him move.
-
FDM, or Fused Deposition Modeling. This lays down material layer-by-layer. This is the only kind of 3D printer you considered. Wise choice!
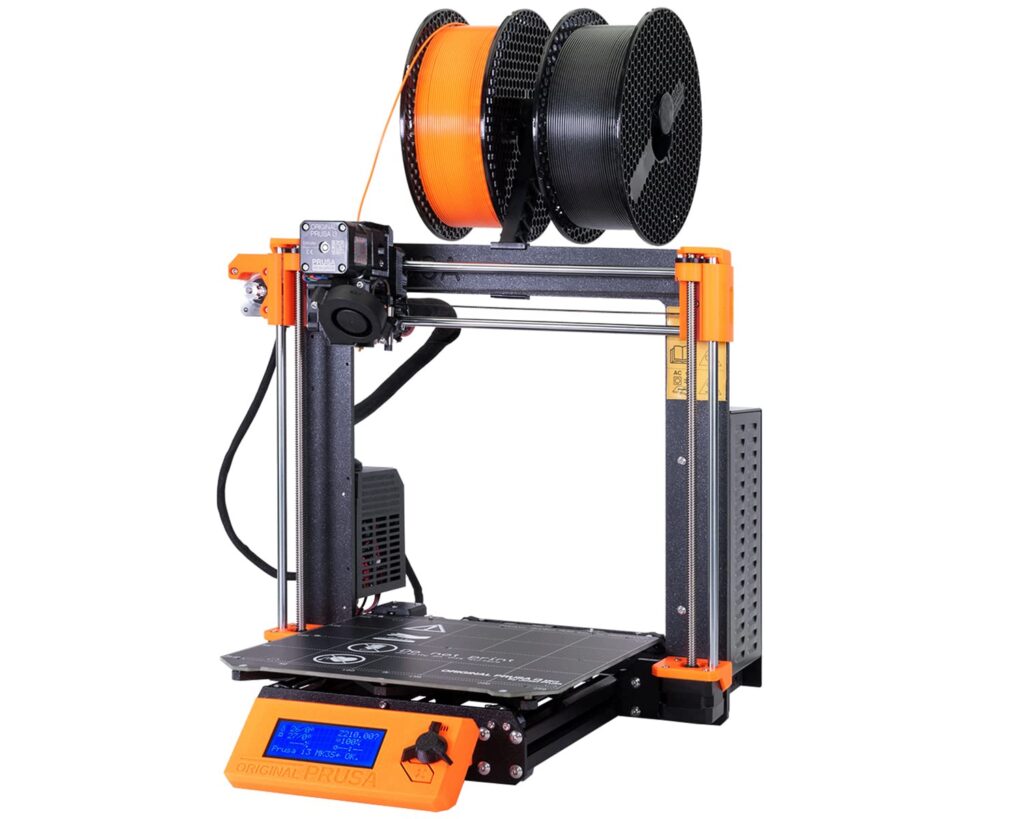
Within the category of FDM printers there are several sub-categories. M recommended a Prusa Mk3, which is a “cartesian” printer. As you were shopping for 3D printers in the wake of your birthday party, you strongly considered the Prusa. It was pricier than many of the available printers, but as M put it, the Prusa is the Macintosh of the 3D printing world: You pay more, but you get a better user experience.
You ultimately decided against the Prusa, not because of price, but available space. The “traditional” way of placing a new 3D printer in a household was to pick up a Lack table, but you didn’t have enough room in your apartment for another table. (Eventually that will turn out not to be true, but there’s a difference between a game table you can disassemble versus a permanent installation like a 3D printer.) You measured the size of the one remaining bookshelf top, and a Prusa simply wouldn’t fit.
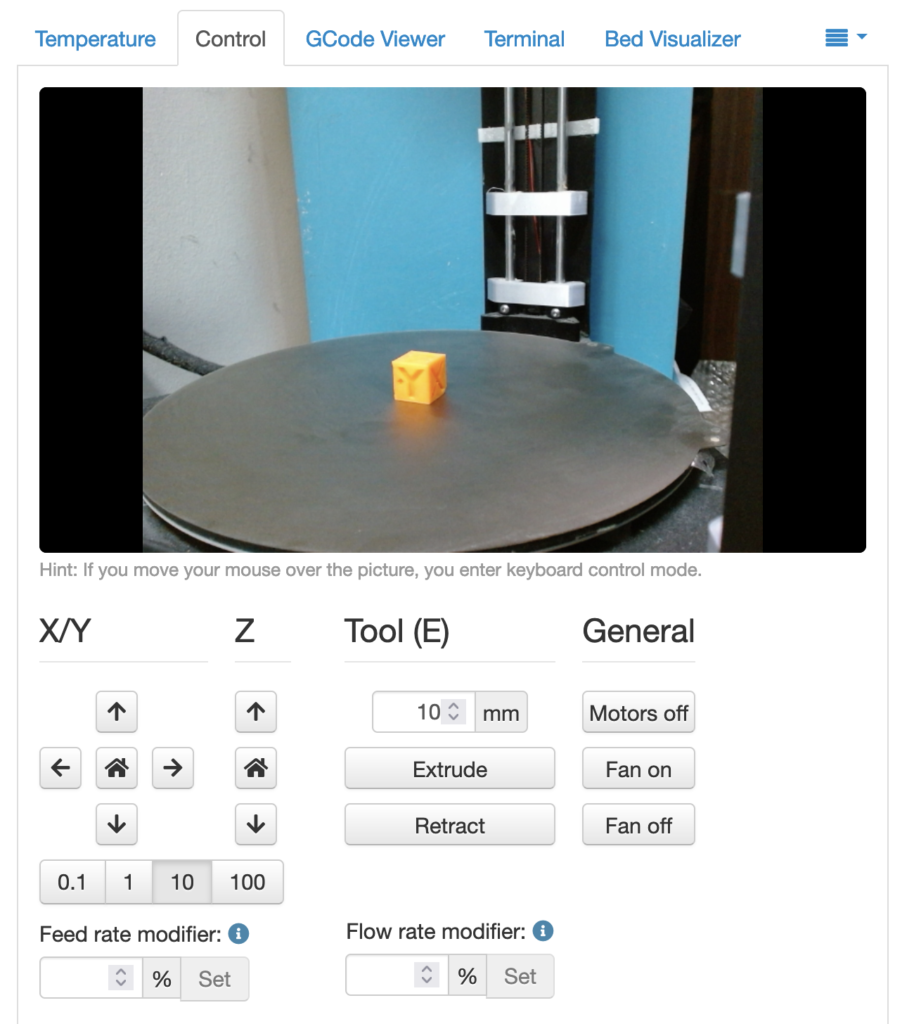
Based on a review in the site All3DP, you finally decided on the FLSun QQ-S Pro. At $330, it was less than that Buccaneer pledge seven years earlier. Despite the smaller footprint, with a 270mm circular bed you thought it would be big enough to print those Tainted Grail inserts. (You were wrong. You forgot to account for the rectangular insert shape poking outside the boundary of the circular plate.)
The shipping was prompt. The printer arrived just at the time your employer called to tell that the office was closed due to the pandemic. You suddenly had a lot of free time on your hands.
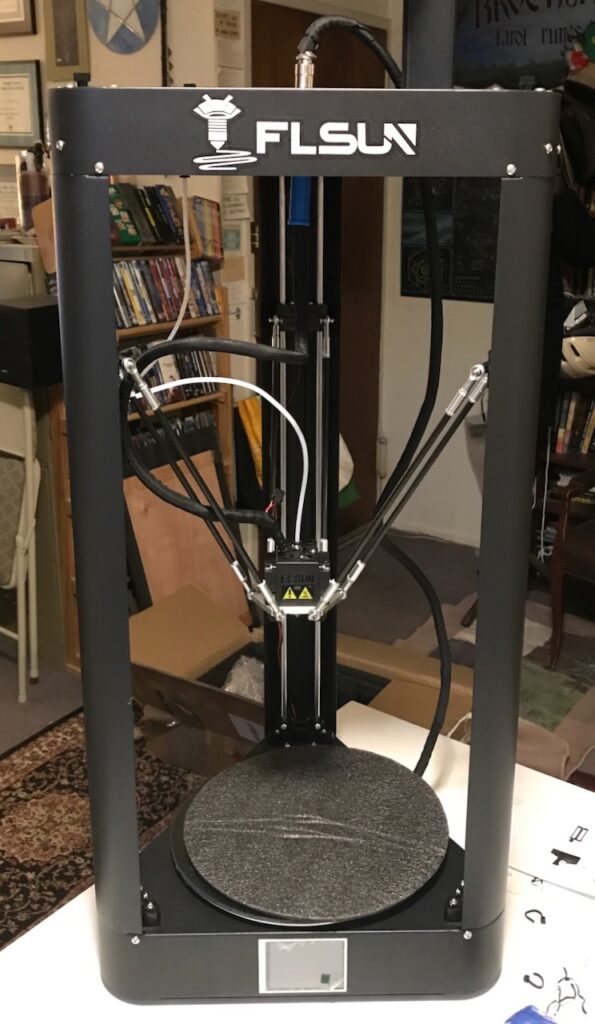
The FLSun is a “delta” printer. In a cartesian printer, the print head is moved simply in x (right and left), y (front and back), and z (up and down); if you look at the picture of the Prusa above, you can visualize the print head being positioned by sliding along the rods. In a delta printer, the print head is moved by multiple angled connecting rods. The end result looks a bit like a dance. It can be hypnotic.
Understanding your 3D printer
Before I go into the problems you will face with this printer, Bill of March 2020, it may help to give you a clearer picture of how a printer like this works.
Picture toothpaste being squeezed from a tube. That’s pretty much it!
Actually, it’s a bit more complicated than that. You’re not working with toothpaste, you’re using plastic filament.
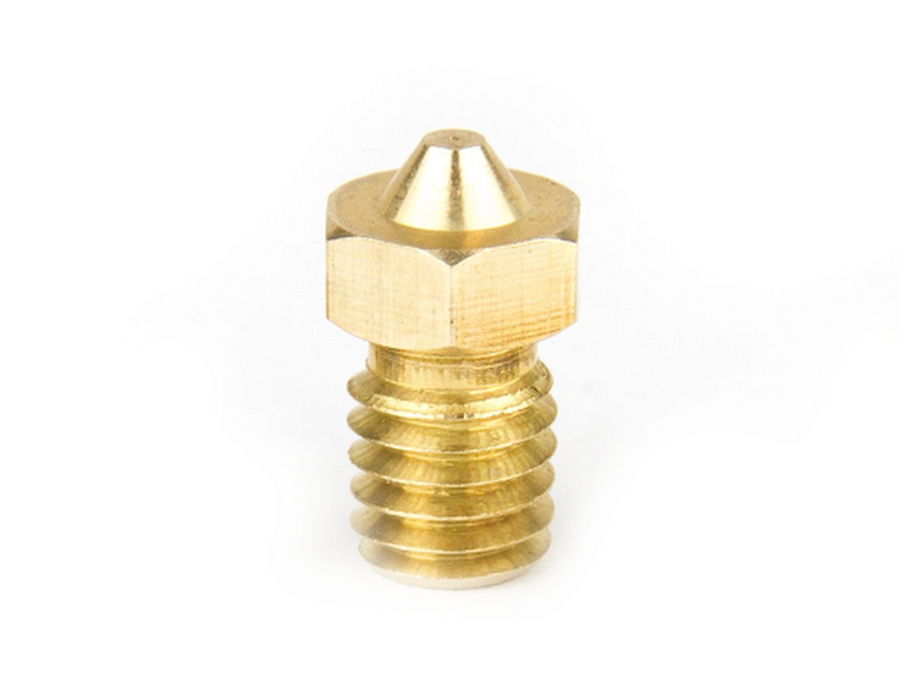
One big difference: toothpaste is soft; all you have to do to get it out of the tube is squeeze the tube. Plastic is hard. To get it through the nozzle, to have to heat it to its melting point. So the nozzle in a 3D printer is heated to temperatures around 200°C. (That’s about 400°F, but the 3D-printing experience is so decoupled from the oven-cooking experience that you’ll never convert the measuring systems; you’ll just remember DON’T TOUCH!) The nozzle doesn’t look like the one on a toothpaste tube:
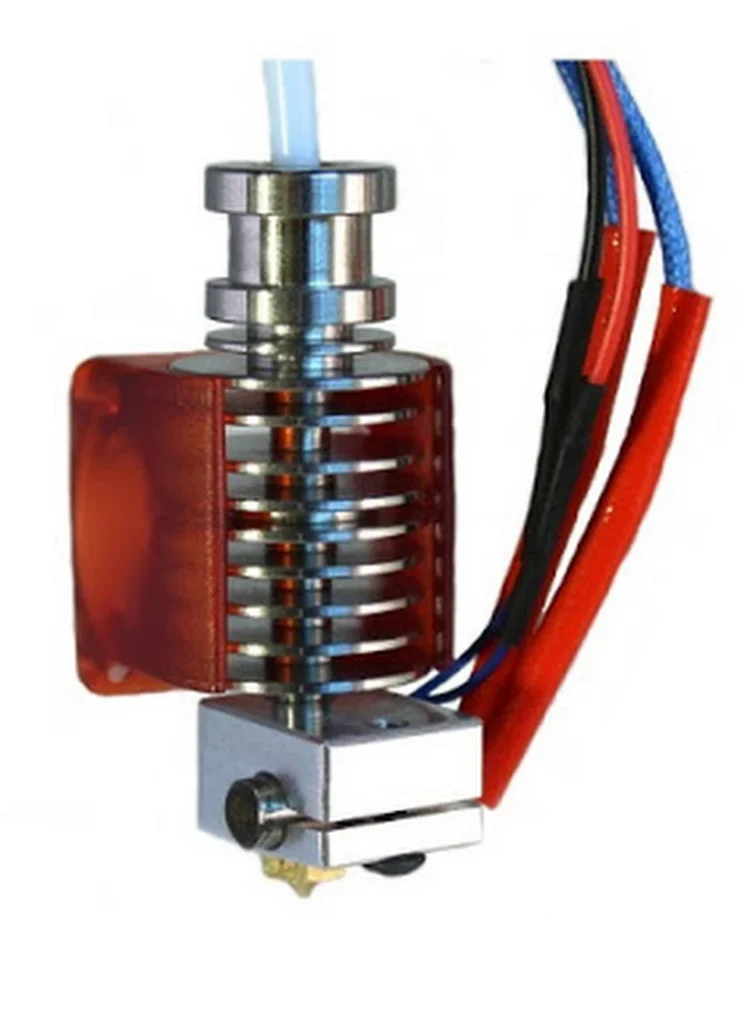
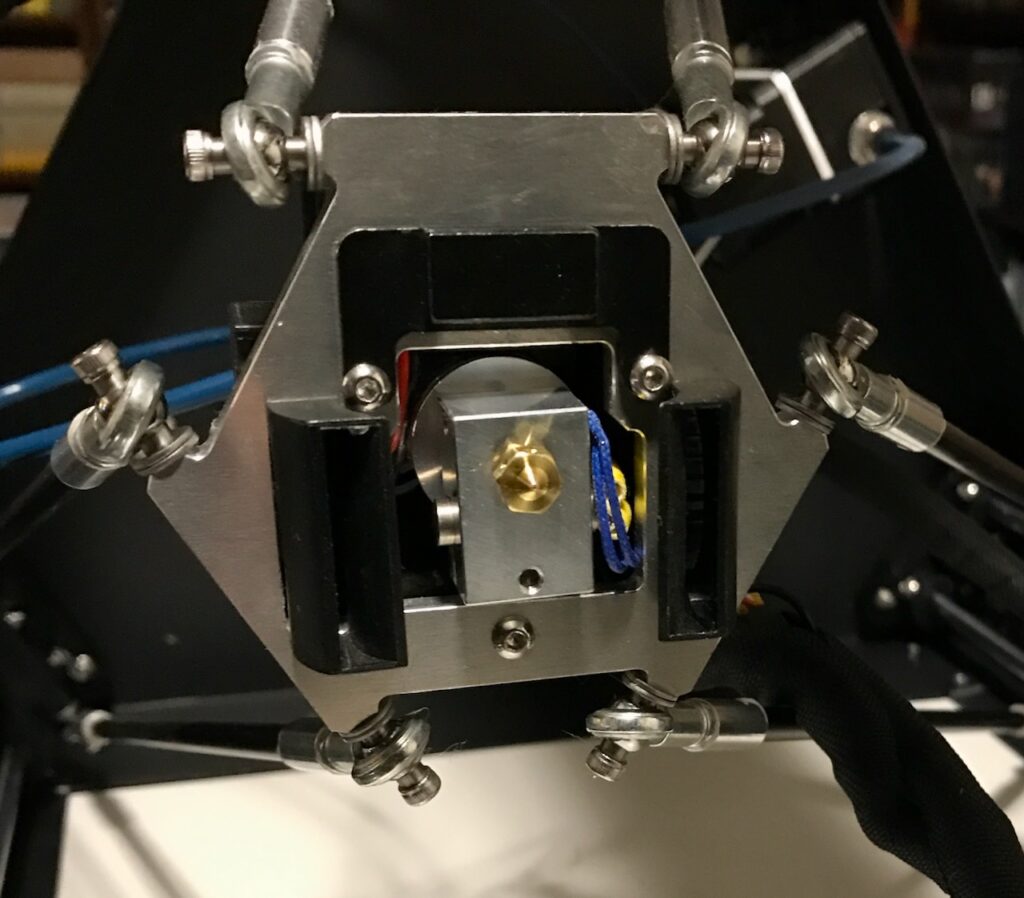
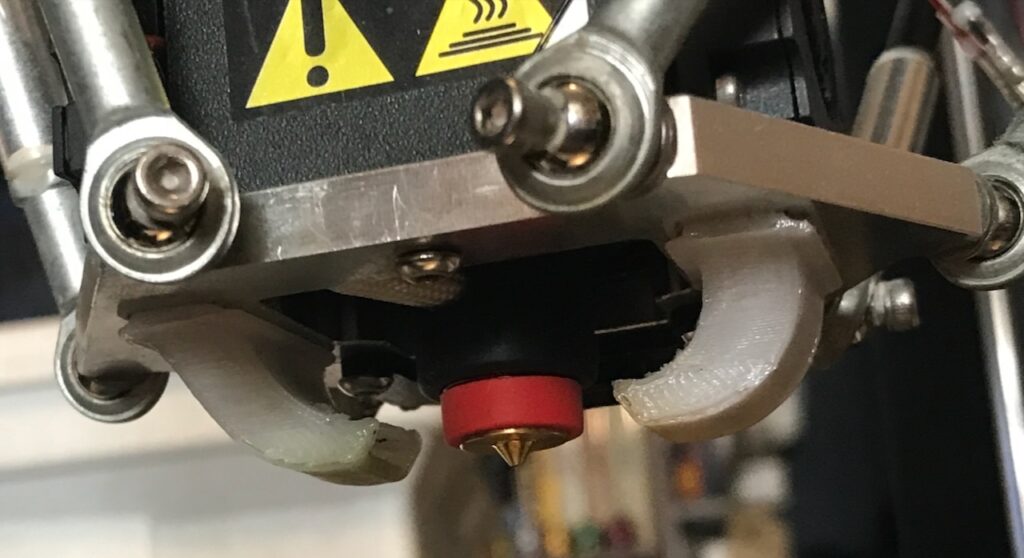
The filament goes into the base of the hot nozzle. The plastic melts and flows through the tip. The whole set-up by which the plastic is guided, heated, and squeezed out is called the “hot end”:
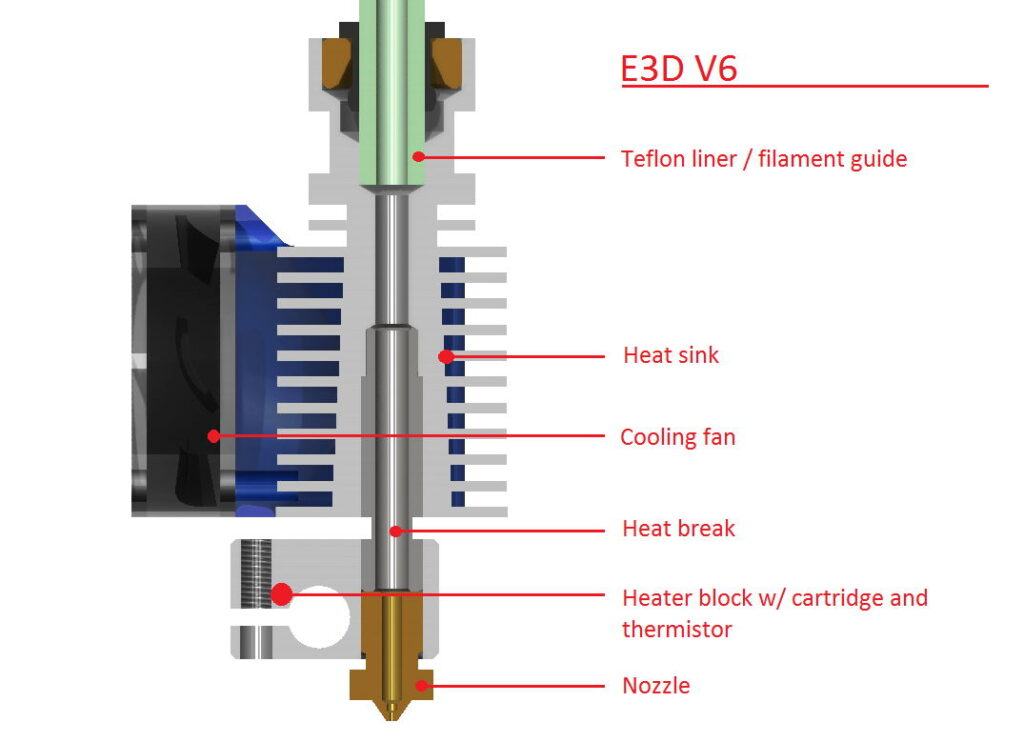
The hot end looks more elaborate than you might expect, but for a good reason: The nozzle is the only part of this set-up that you want to get to the temperatures needed to melt plastic. Every other part of the hot end has to be cool enough so that the filament can be pushed through smoothly.
One of the chief reasons that you’ll need to replace the hot end (or at least a part of it) is “heat creep”: the plastic melts further up the metal tube above the nozzle; this causes a clog in the tube that’s so difficult to clear that replacing the entire tube is easier.
But we’ll get to maintenance later.
The part of the hot end that heats the nozzle is called (take notes; this will be on the test) a “heater”. In the diagram, there’s a circular hole in the “heat block” into which the cylindrical heater is inserted. The heater works by electrical resistance, like an old-fashioned light bulb (although nothing glows here): when current flows through, it gets hot.
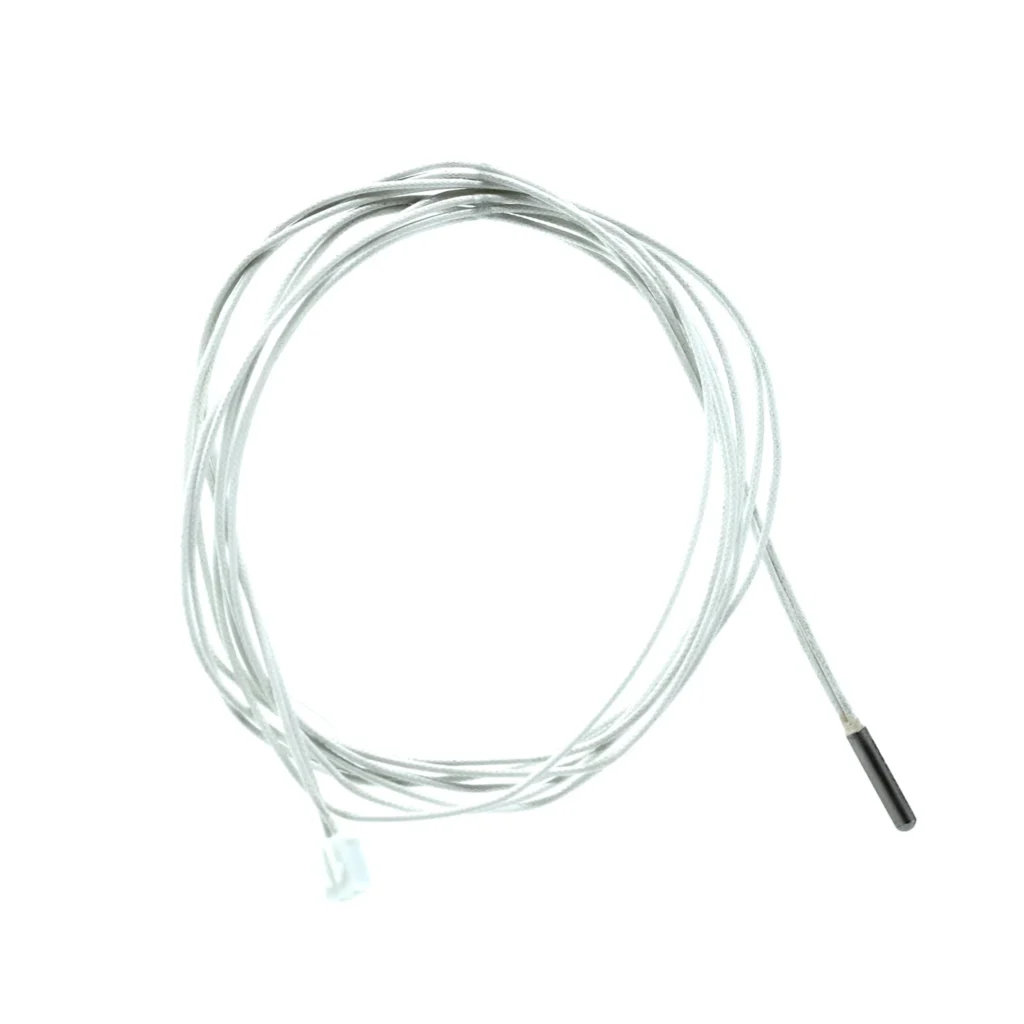
Another device that goes into the heat block, also not shown in the diagram, is the thermistor. As the name suggests, a “thermistor” is a device for measuring temperature using electrical resistance. If the resistance across the thermistor goes down, it means the temperature has gone up.
Part of what the 3D printer electronics has to do involves a feedback loop between the heater and thermistor: If the thermistor registers too high a temperature, the heater is turned off; if the thermistor reads too low a temperature, the heater is turned on. The set-up is normally good enough to keep the temperature to within ±0.1°.
However, the set-up can and will break on you: If the heater is broken, nothing heats up and the plastic does not flow; if the thermistor is broken, the printer’s electronics can keep heating the hot end until something burns out. Fortunately, the FLSUN QQ-S Pro has thermal protection to shut down the printer if that feedback loop stops working.
The filament is pushed into a metal tube that’s kept cool by a fan and a radiator (“the heat sink”) until it gets to the nozzle. Then the plastic melts in the nozzle and flows out, where it solidifies almost immediately into a thin thread.
How thin? That’s determined by the size of the hole at the tip of the nozzle. The most commonly-used nozzle diameter is 0.4mm. That’s the size of the nozzle that came with your printer, and the one you’ll use most often in your prints. You’ll occasionally use a larger-diameter nozzle (0.6mm or 0.8mm) when you want to print more rapidly, at the expense of the printer layers being more visible.
I keep using that verb “push”. In 2020, you won’t fully understand what’s doing the pushing, so I’ll explain it to you. The contraption that shoves the filament into the hot end is called an “extruder”:
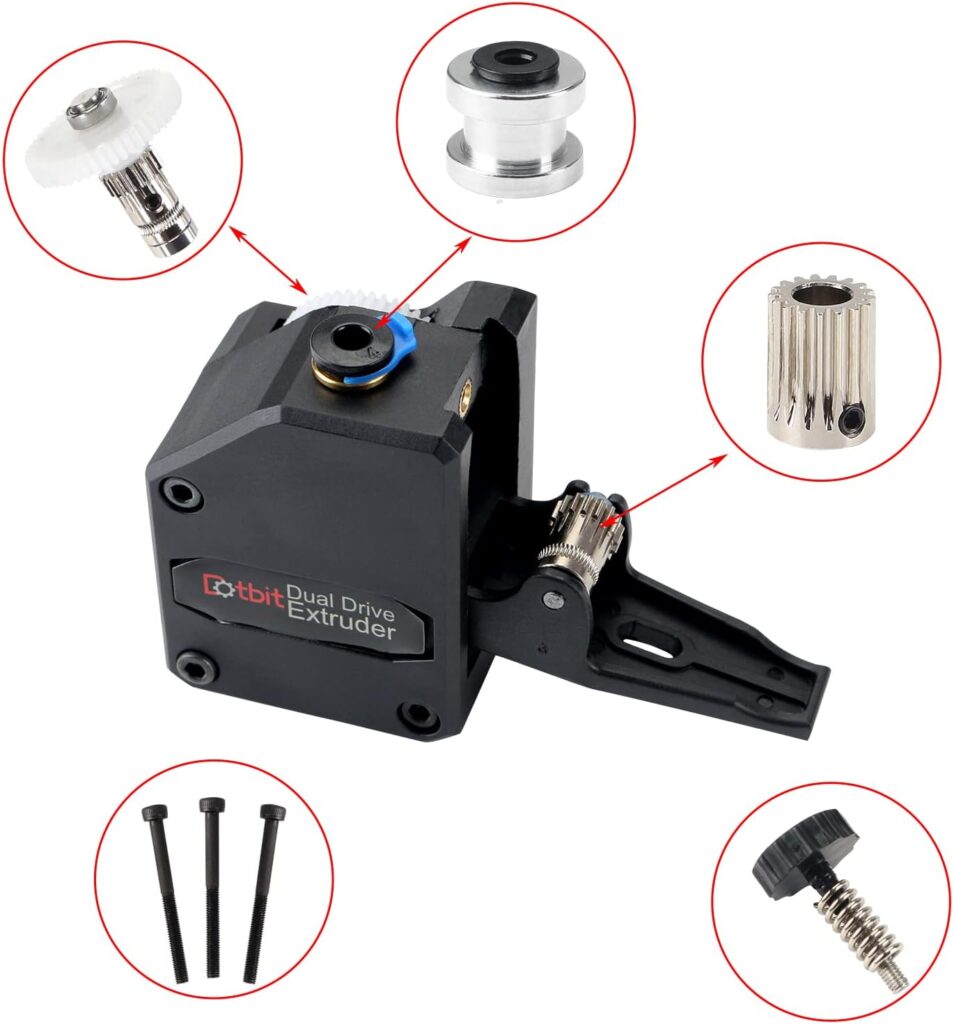
The filament is pulled off the spool by the extruder into the hole at the top. Gears within the extruder grip the filament and push it downwards, where it will eventually enter the top of the hot end.

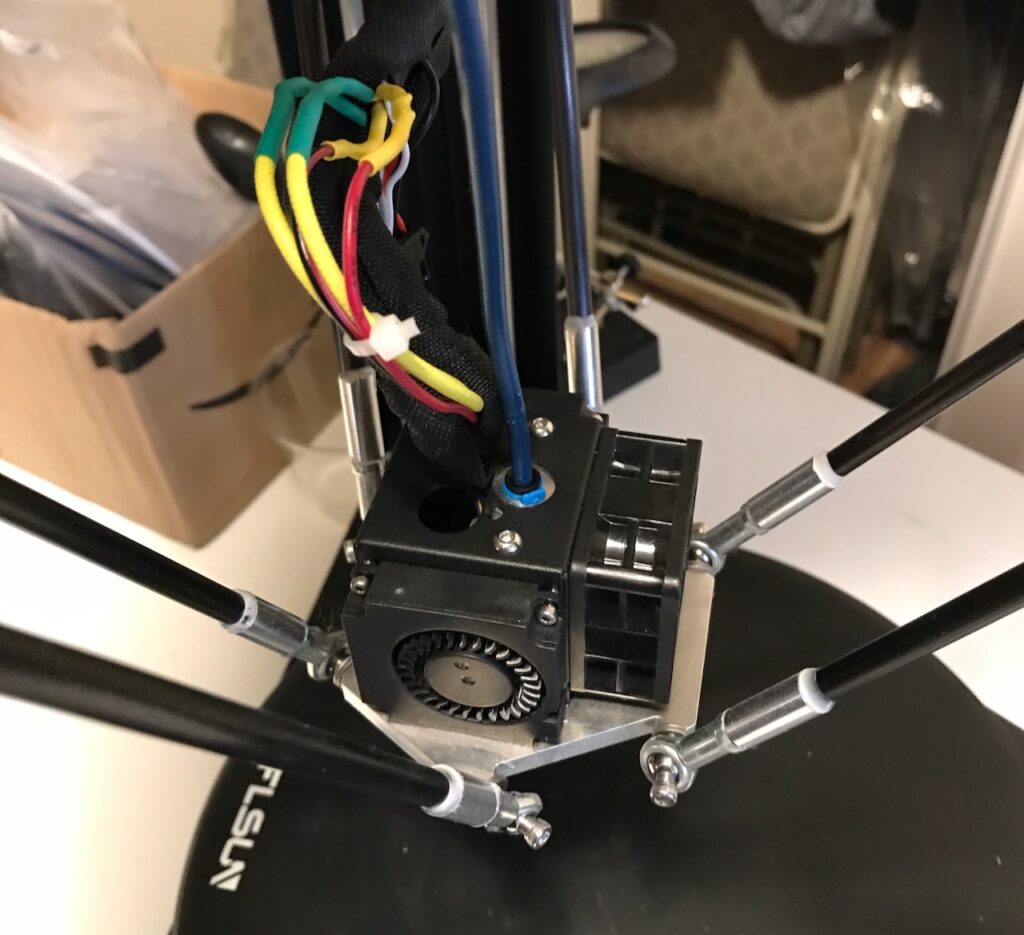
If you look carefully in the above photo, you’ll see that there’s a motor attached to the side of the extruder. Altogether your 3D printer has four motors: one for the extruder, and three to control the position of the “effector” that contains the hot end:
All of this may sound quite complicated to you. You ain’t heard nothin’ yet!
While this seems complex for a $300 gadget, it’s not unusual in the maker/hobbyist world. You’ve seen RC car hobbyists playing with their remote-controlled vehicles in parks and such. You may have thought the cars were toys, but if you ever spoke with their owners (as you did at Hobbytown) you learned that these “toys” had transmissions, brakes, belts, stepper motors, and so forth; they were actually sophisticated devices. So is your 3D printer.
You’ll find yourself tinkering with your 3D printer as much as the RC hobbyists do with their devices.
Modifications
The Buccaneer’s appeal was that it would “just work”: You select a file, insert the filament, and your perfect print would emerge sometime later. In the decade since then, printers have come closer to that ideal, but we’re not there yet. The FLSun QQ-S Pro was certainly never intended to operate on that level.
When you first get the printer, the prints that will came out are pretty decent. Then you will start having problems that you will attribute to the nozzle becoming clogged. You will decide to replace the nozzle. Among the first videos that FLSun released to YouTube were on the printer’s maintenance. You’ll follow the directions in their video. This is their current video on how to do that. Their 2020 video (since deleted) omitted a key instruction: You have to heat the nozzle to about 220°C before you try to remove it.
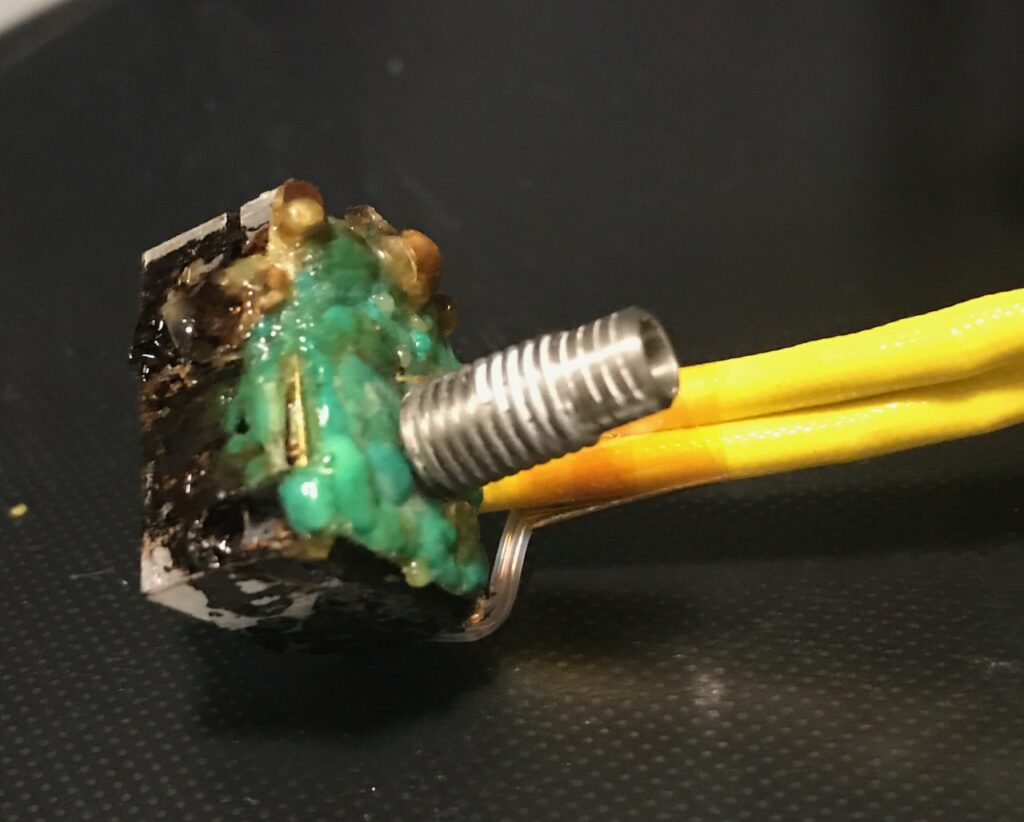
You didn’t heat the nozzle at all. You couldn’t understand why it wouldn’t turn. You kept adding pressure. Bill of 2023 will scream at you, but Bill of 2020 won’t listen.
You will break the nozzle inside the heat block.
Once you understand what is happening, it will be too late. The only cure is to open up the effector and replace at least part of the hot end. If you watch that current FLSun nozzle-swapping video, you can see how fiddly the procedure is.
By the way, that video is incomplete. It doesn’t show how to put the effector back together, which is harder than taking it apart. It also doesn’t show the correct procedure for the final tightening of the nozzle.
By that point, you will discover the FLSun owners group on Facebook. Over the years, this group would prove an invaluable resource. At that time, as you look over the guides, you will see that some owners had installed a different hot end, the E3D V6, that was superior to the one that came with the FLSun.
In for a penny, in for a pound. If you were going to have to take apart the thing anyway, you might as well put in something better.
Let me take a bit of tangent here: You won’t blame FLSun for any of this. They’re a Chinese company that, in 2020, was relatively new. They sold a $300 printer which, both then and now, is quite a low cost for a 3D printer. Of course they cut corners, using less-expensive components and manufacturing techniques.
Also to be fair to them: The printer will come with a full set of tools for repairs, along with a selection of spare parts including an extra hot end and a nozzle or two. Strictly speaking, you won’t have to spend any extra money to repair or enhance the printer. But you will want to.
It also won’t help that (as I’ll describe below), the printer will arrive just at the start of the pandemic. This will cause an explosion in popularity for 3D printing. FLSun’s printers, due to their low cost and good reviews, will sell out quickly. They’ll be overwhelmed with support requests. They were a small player that will be suddenly thrust onto a big stage.
The poor quality of their early support videos is understandable in this context. They will never really answer any questions that you will email to them (though other users will be more fortunate). You will have to solve problems on your own.
Your adventure into printer modifications, with all the frustrations you’ll experience, will be entirely self-inflicted.
In the end, as of October 2023 you’ll have spent roughly $3500 for parts, tools, and supplies for a $300 printer. Again, to be fair to everyone involved, about $500 of that will be on the main consumable of a 3D printer, the plastic filament.
Let’s go over the modifications to the printer that you’ll make over the years.
The hot end
I’ve already mentioned one, replacing the hot end.
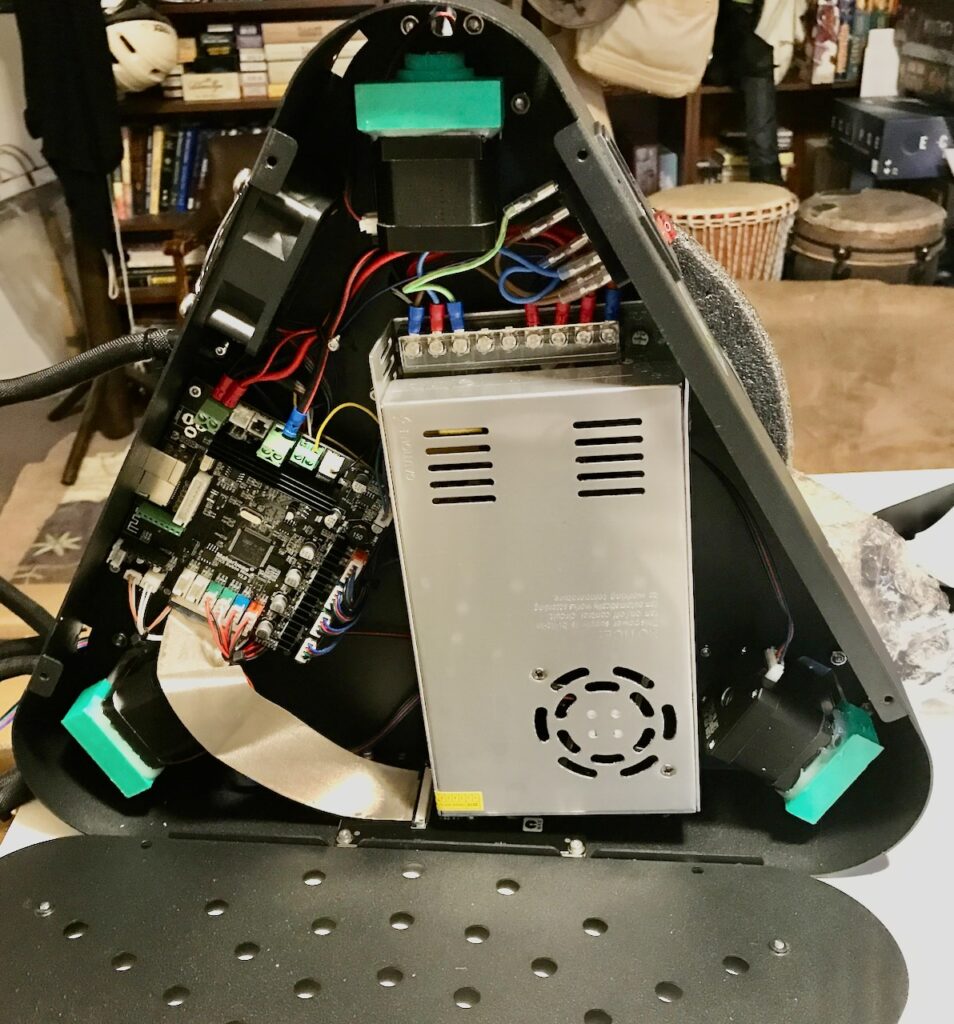
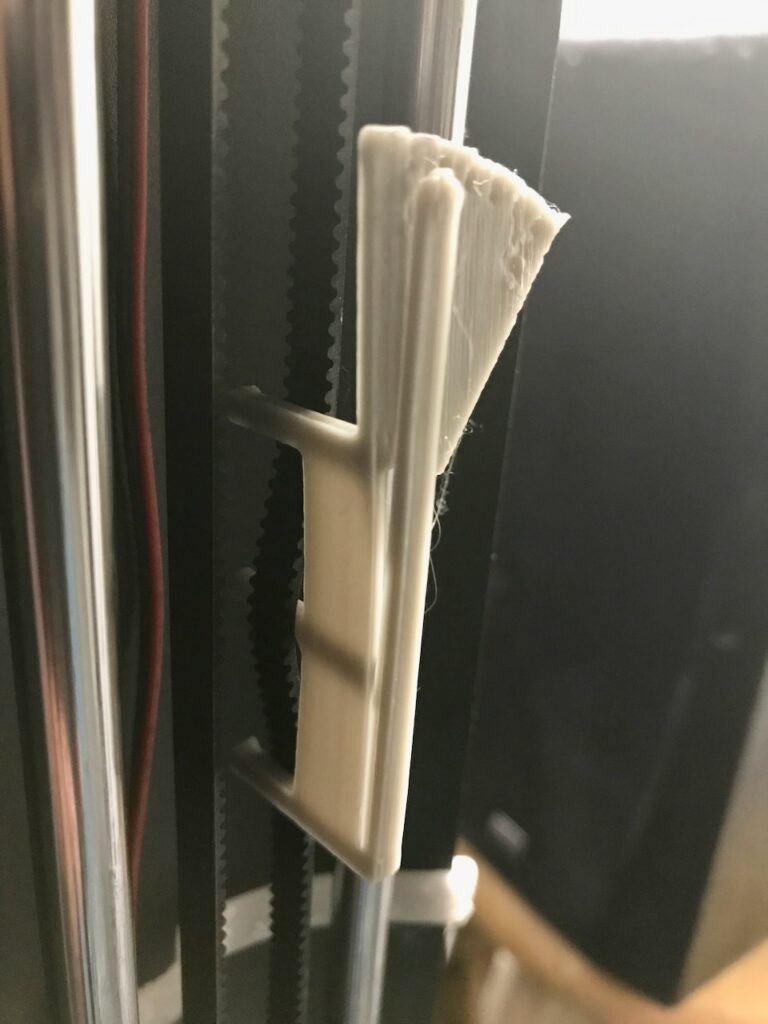
Replacing a hot end in its entirety (including the heater and the thermistor) required replacing some of the wiring as well. Let’s take another look at the photo of how the printer looked when you first got it:
In this photo, the white tube from the top of the effector to the (not visible) old extruder is the most obvious visual element. Look carefully, and you’ll see that there’s a thick black cable that goes from the top of the effector to the underside of the top of the printer. It goes through a connector, and then down on the outside to the printer’s base. That is the wiring cable.
In the QQ-S Pro as it was originally shipped, all the wires attached to the effector (thermistor, heater, and fans) were continuous solid wires that went along the wiring cable into the circuit board that you can see in one of the above photos. This was convenient for manufacturing (I assume), but it was not convenient for maintenance. You will have to clip those wires and solder new connections.
That was not the last time you’ll have to take the effector apart to replace the hot end. There were times when the metal tube (a “heat break”) that connected the filament tube to the nozzle will clog due to heat creep. Sometimes you won’t tighten the nozzle correctly after you replace it. Once you won’t tighten the effector screws correctly and the nozzle will start wobbling.
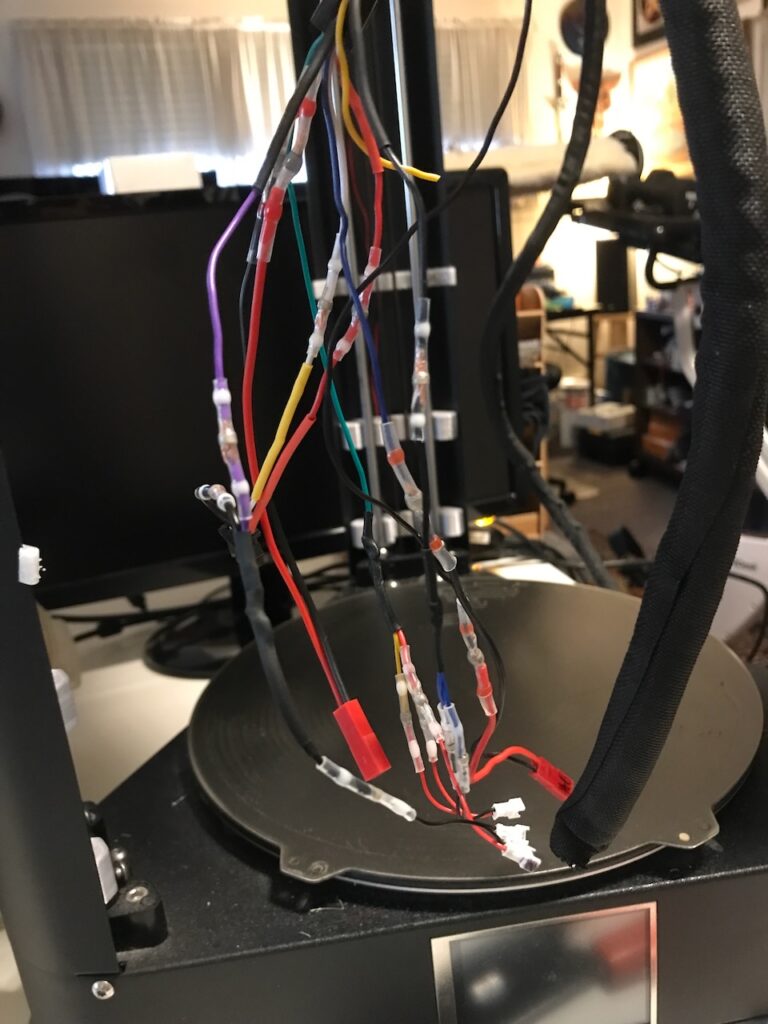
Continual solder-splicing the wires will became impractical. So you’ll install connectors at the end of the wires permanently. After that, when you change something in the effector, you can just unplug the wires instead of cutting them.
Eventually you’ll settle on the E3D Revo V6 hot end. The chief reason is that the Revo system makes it easy to change nozzles. Before the Revo, you will risk damaging the hot end if you want to switch nozzles. Afterwards it will just take a few minutes to swap nozzles, mostly to heat the nozzle to pull the filament out, then let the nozzle cool down and unscrew it.
Of course, you can predict our luck: After some months, the thermistor or the heater (you’ll never isolate the problem) will break on the Revo and you will have to replace it again. But thanks to all the wiring changes, it won’t be as bad as it could have been.
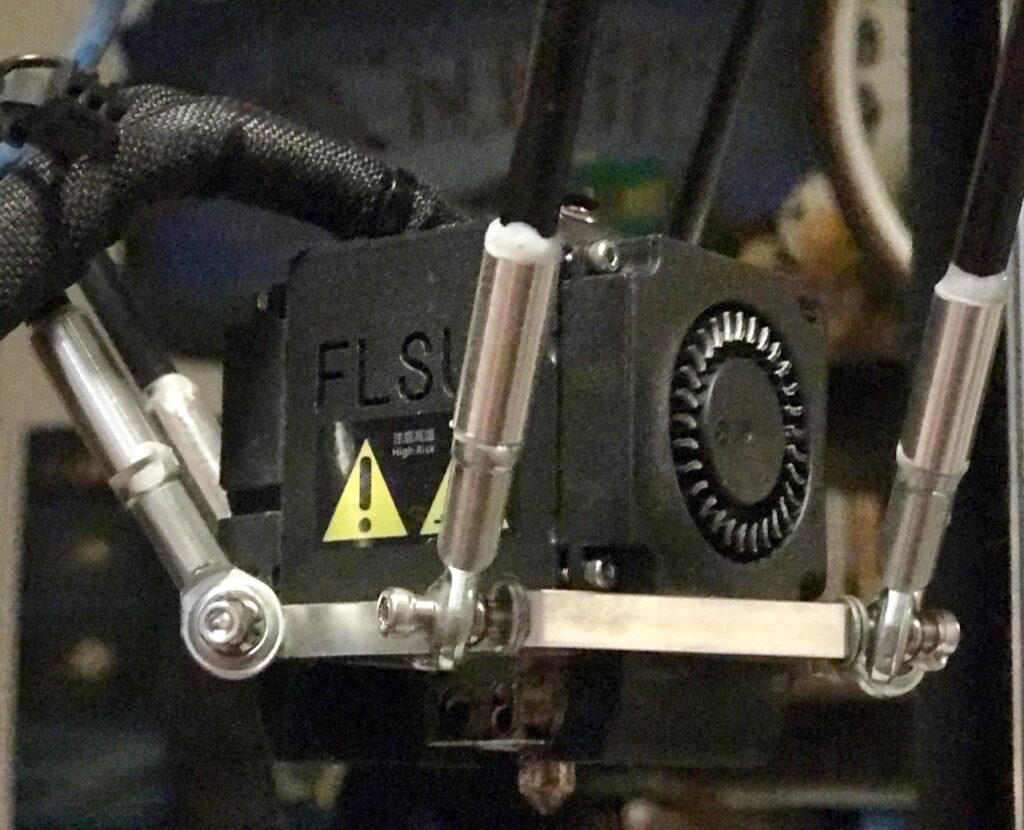
You’ve been paying attention, haven’t you? Then you noticed that the fan ducts in an earlier photo were black, but in the photo above they’re white. We’ll get into fans a little bit. But you should know that the E3D hot end has a slightly different position in the effector than the original hot end, so you’ll need to print new fan ducts in PETG (again, we’ll get into filament types later).
Bowden tube
As you saw in the captions above, the white tube in the printer turned blue. That’s because you will replace the original PTFE tube that came with the printer with a Capricorn tube.
We already know that the purpose of the extruder is to push the filament into the nozzle. In some 3D printers (such as the Prusa pictured above), the extruder is directly attached to the hot end. Other printers have the extruder shove the filament into a smooth low-friction tube that leads to the hot end; this is called the Bowden tube.
The advantage of the Bowden tube set-up, especially for a delta printer, is it means that the effector assembly is lighter. If you look at the first video in this letter, you’ll see that the effector is moving around all over the place, changing its velocity and acceleration. A heavier chassis makes motion changes more difficult.
There are disadvantages to a Bowden set-up too. We’ll get to that when we talk about calibration.
The white Bowden tube that came with your printer is made of PTFE. Initially it worked fine, but as you continue to have misadventures with your hot end, it will have a tendency to burn a bit where it touches the heat break. (The heat break is never supposed to get that hot, but that’s the definition of “misadventure.”)
The Capricorn tubing is supposed to be more temperature resistant and have other better characteristics; e.g., its inner diameter is supposed to be more precise for filament. Compared to other printer modifications, replacing the Bowden tube is simple.
You’ll be replacing it a lot. Many of your hot end incidents will end with plastic fusing the hot end to the Bowden tube, or with the hot end’s connector to the tube refusing to disconnect. You can only clip the end of the tube so many times before you’ll have to put in a new one. As of Nov 2023, you’re on your third or fourth Capricorn tube.
Fans
The effector has three fans. One is a fan that moves air across the heat sink of the hot end, to help keep the heat break cool. There are two more, one on either side of effector; they are “blowers” to move air just below the tip of the nozzle. That’s the purpose of the fan ducts in one of the above pictures.
This will be difficult for you to understand at first. At the instant the plastic comes out the tip of the nozzle, it’s liquid. You want that liquid to solidify as soon as possible. These fans send air directed to cool down the plastic after it comes out of the nozzle. If everything is working, the plastic will still be warm enough that it will stick to the layer of plastic just below it instead of being blown to one side by these blowers.
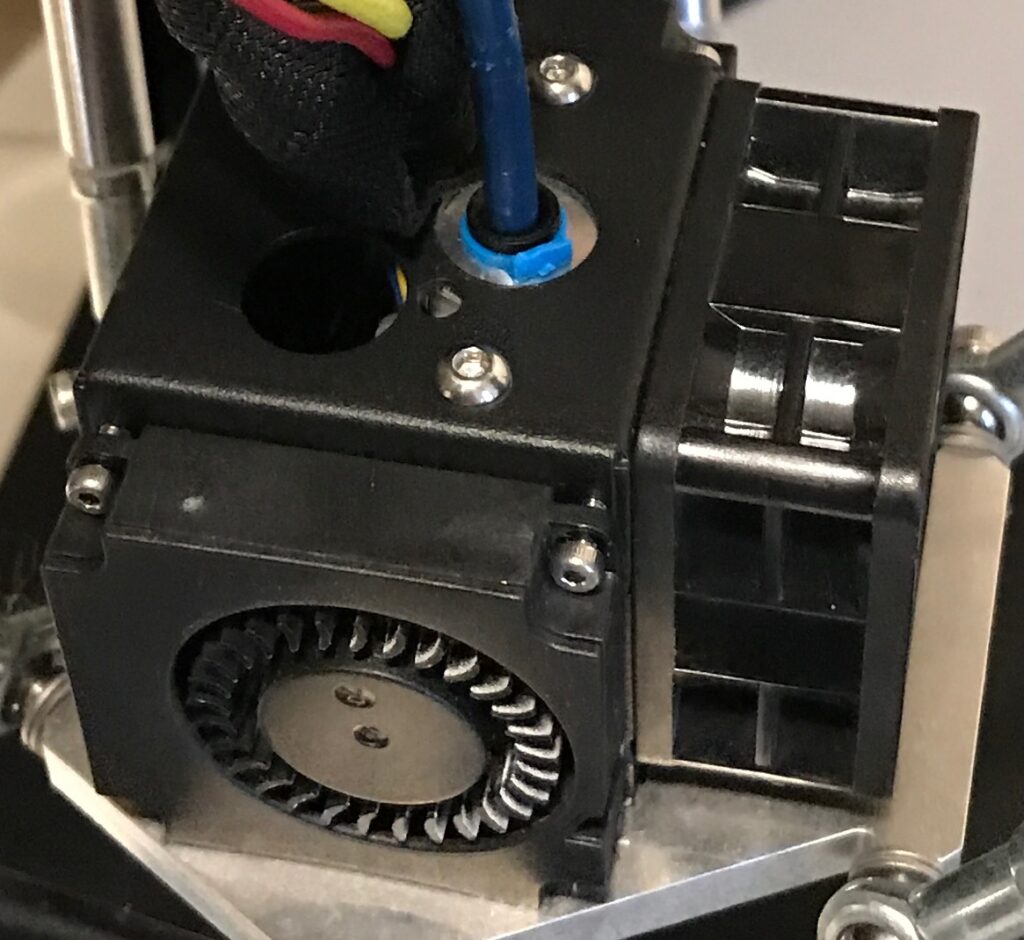
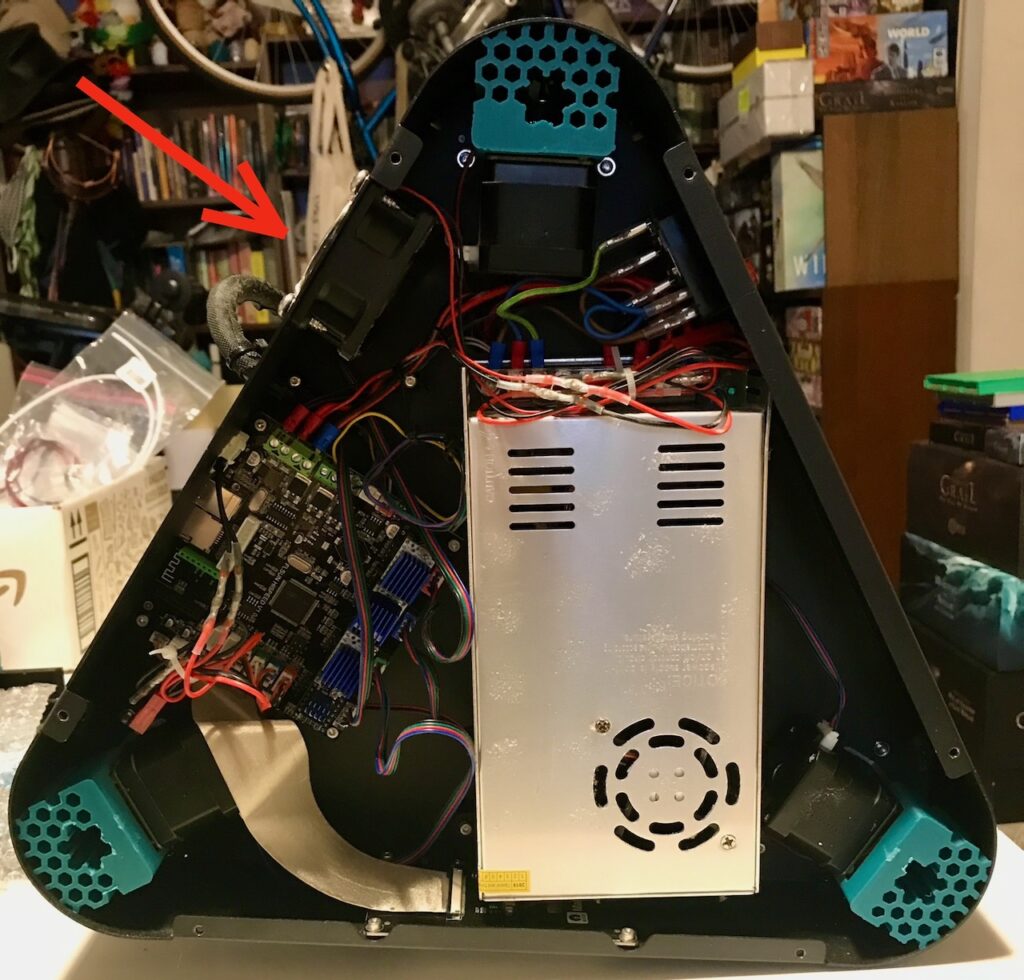
There are also two fans in the base of the printer. One cools down the power supply; you’ll never touch that fan since you’ll never be brave enough to open the power supply case. The other blows air across the printed-circuit board.
The fans that came with the QQ-S Pro were inexpensive and loud. You’ll replace all but the power-supply fans with brushless ones that are quieter.
These modifications were not without perils of their own. You’ll have to learn more about the exact size and specifications of different fans than you want to know. You’ll learn the difference between axial and radial fans (hint: blowers are radial). In the end, you’ll wind up with a toolbox filled with many useless fans because you bought the wrong ones. Unfortunately, they weren’t the kind of fans you could use in your HomeKit and air-conditioner project.
Again, all of these fans had wires that connected them directly from the effector to the circuit board in the base. You’ll eventually install sets of JST connectors for all of them.
Belts
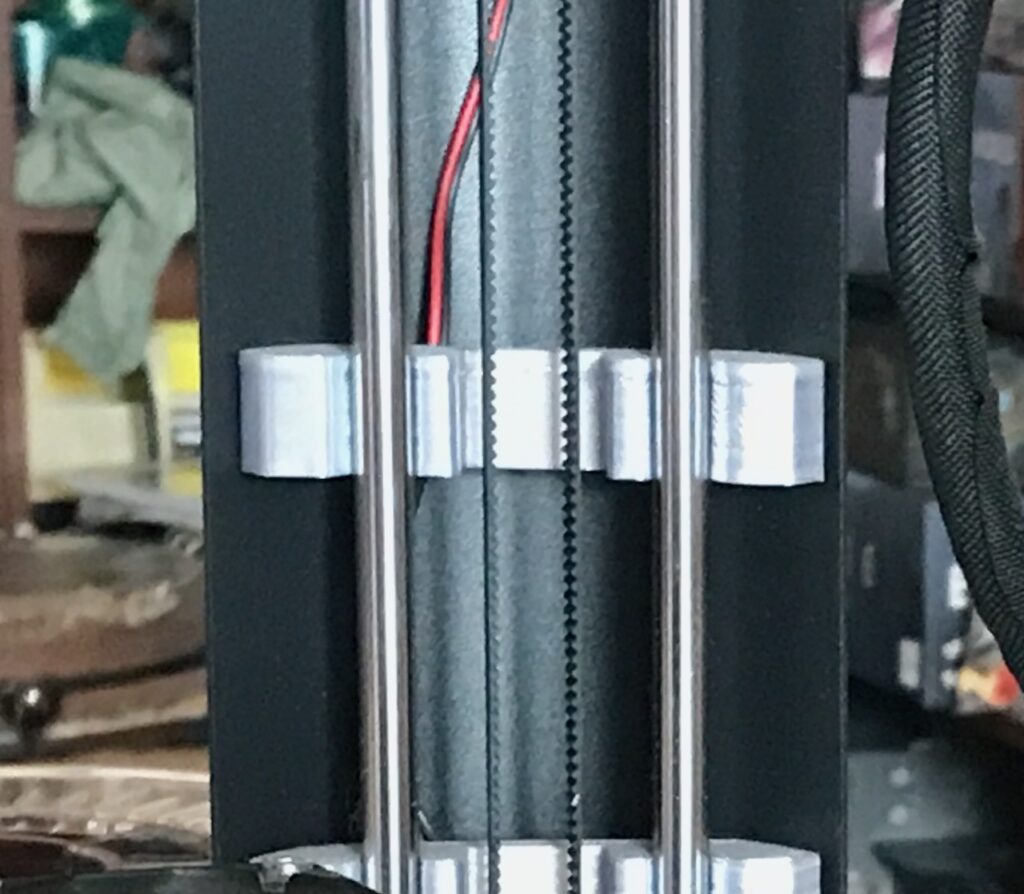
Take another look at the printer in operation, especially in the first half of this video:
You can see some small modifications that you will 3D print in order to dampen vibrations, such as the silvery clamps at the base of the rods and the rubber-band holders. After all the wiring modifications you’ll make, you’ll need to wrap the electronics cable with your own cable sleeves, held in place with Velcro cable ties.
Of course, the “dramatic” part of the video is the interaction of the three robots arms to deposit the plastic. They are positioned via the upper part of the arms sliding along the smooth metal rods. You can’t see it in the video, but the way those arms are controlled is via timing belts. The motors in the base of the printer (see the photos of the inside of the base above) are what move the belts. The printer uses industry-standard GT2 6mm timing belts, used not only in 3D printers but in other hobby gadgets such as RC vehicles.
In general, under heavy use, belts like these will last a year or more. In your case, there’ll be a time in which you’ll have to replace the belts every three months or so, under light use. The main reason is that, in the instructions that came with the printer, FLSun recommended a method of setting the belt tension that was later considered much too high.
Too-high belt tension leads to the belts stretching as they repeatedly run over the belts’ pulleys. Even after you replaced the belts twice, you still had problems that you attributed to belt tension. Unfortunately for you as a scientist, most of the advice you receive about belt tension was subjective; e.g., “You can tell by their feel.” Eventually you decide to 3D print a crude tension meter.
Your eventual conclusion is that you buy cheap belts. The usual recommendation is to get Gates belts. You will ignore the suggestion because Gates belts of this type were not available on Amazon. This is yet another reminder that Amazon does not yet sell the world.
After installing Gates belts, there haven’t been any belt-related issues that you’ll spot… as of October 2023.
Changing the belts is about as fiddly a procedure as changing the hot end. The FLSun instructional video on changing the belts makes it look much easier than it actually is. In particular, the part about using the old belt to pull the new belt through the base (roughly from 0:48 to 1:20 in the video) is prone to failure, whether you use tape or a staple. If the belts separate, you’ll have to set the printer on its side and open the base to get the belt around the motor pulley.
Getting that tiny black insert to hold the belts in place is another tricky task for you. At least you’ll never lost one of those pieces, nor any of the tiny screws that hold the cover on the slider.
Note how the FLSun video does not include any instructions on how to tension the belts. Even they had problems coming up with a reliable method!
Motherboard
By far, the most ambitious upgrade you’ll make is to the FLSun QQ-S Pro’s controller board.
The QQ-S Pro came with a circuit board board labeled “Makerbase MKS Robin Mini V2.0”. The name “Makerbase” is a bit of a clue: FLSun had purchased circuit boards from another manufacturer and adapted them for their own printers.
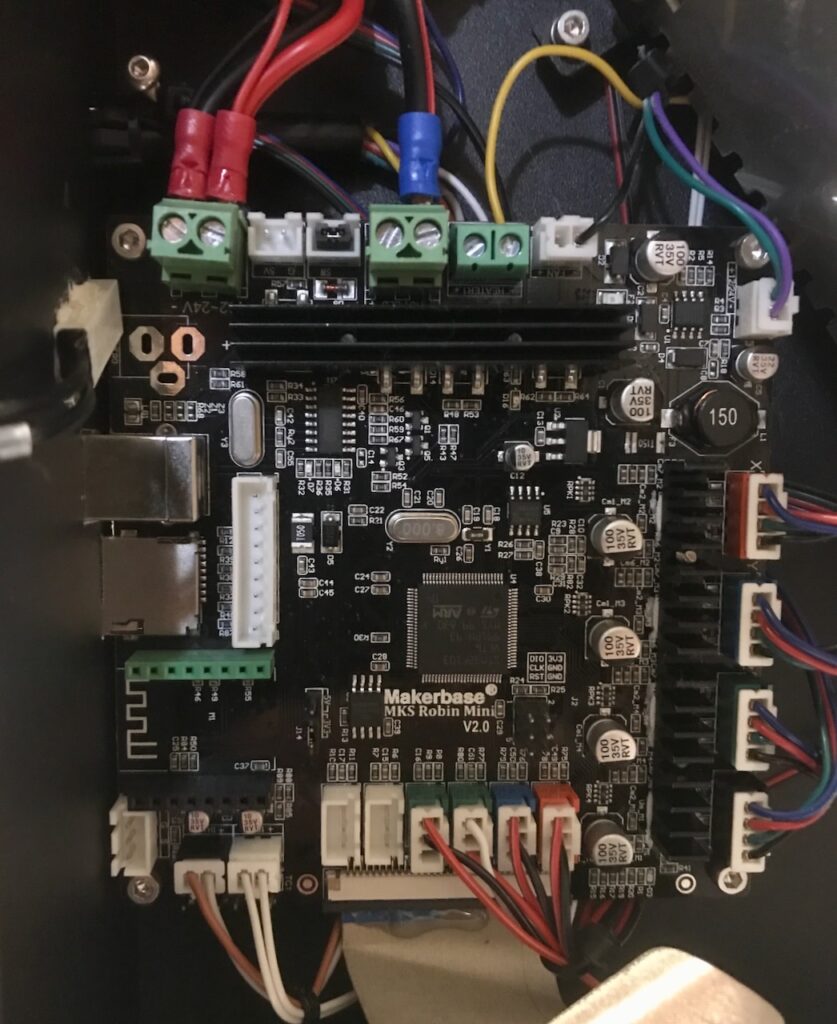
This circuit board worked, but you’ll want better. The firmware installed on the board had some flaws; for one thing, it “forgot” its bed leveling after a couple of weeks. (We’ll get into what that means when I tell you about calibrations). Also, it was an 8-bit board; the most obvious effect of this is that its control of the four stepper motors (three in the base, one in the extruder) was cruder and this made the motors noisy. Finally, FLSun kept their software proprietary, which meant that there were changes to the printer’s operational parameters (for example, the temperature during nozzle changes) that you won’t be able to make.
The printer noise, especially during retractions (again, we’ll get to that in calibrations), was getting hard to take. You will decide to upgrade to a newer board, a 32-bit system that was compatible with the QQ-S.
It was a risky upgrade on several levels. You have a vague electronics background (which you discussed in your series of posts on building your air-conditioner controller) but you won’t be confident that your limited skill is up to the task; you will verify that no soldering of the circuit board would be needed. Also, you’ll purchase the board from that most reliable of sources, some dude you’ll meet in a Facebook group.
The new board will be labeled “FLSun HISPEED V1.0”, which suggests that FLSun will get into manufacturing its own boards for its own printers. To your surprise and relief, the operation will be a success:
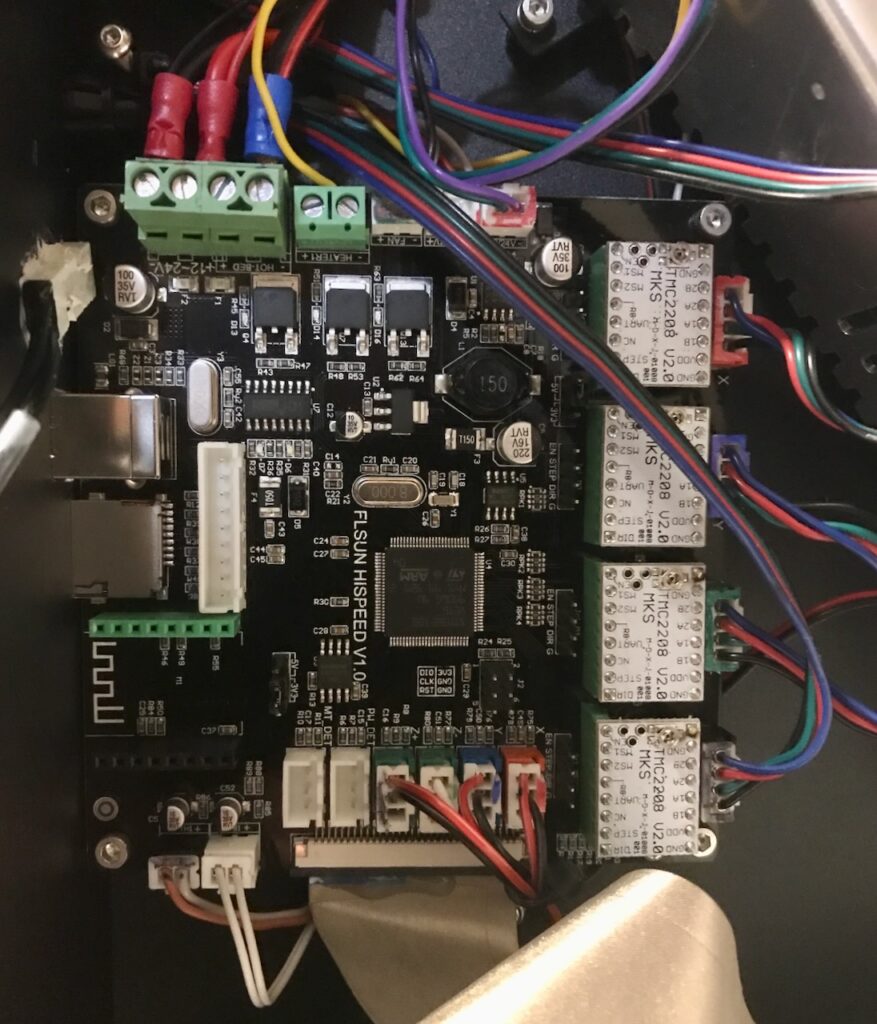
In above photo, you’ll see four white IC chips labeled TMC2208. These are the main reason you purchased the board. They’re called “stepper drivers”, and are used to send signals to the stepper motors (four motors, four chips). The old board had its stepper drivers built-in, and they could not be changed. This new board allowed you to choose which stepper drivers were on the board. You’ll eventually upgrade those drivers to TMC2209, which provides even better control of the motors.
A nerve-wracking part of those stepper drivers is that you’ll have to set their currents manually. If you look at the chips in the photo, you can see a slightly large silver circle next to three holes in a triangle pattern near the top of the chip. That circle is actually a variable resistor. You’ll purchase a non-metallic screwdriver to adjust the voltage while the printer is on. You’ll hold a probe of a voltmeter on one of those silver knobs as you carefully turn the screwdriver with the other hand. All the while, you’ll know that if the probe slips and connects the wromg two knobs, you could fry the chip.
You’ll have to do this separately for each of the TMC2208s and the TMC2209s! Oh, joy! Fortunately, there will be no disasters.
There is a way of controlling those currents via the printer’s firmware. However, this board isn’t designed for that. People have published board modifications to enable this feature, but that would involve soldering components onto the board. You’ll decide not to try it.
In contrast, you’ll have few problems upgrading, compiling, and re-upgrading the printer’s firmware whenever you feel like it. You’ll have to tweak the printer’s parameters occasionally; for example, when you switch from TMC2208 to TMC2209, you’ll edit the firmware so that motors turn in the opposite direction.
This will amuse you. On Facebook, you’ll read of people making all sorts of mechanical alternations to their printers, but who are scared to edit the firmware. You’re a sysadmin. Upgrading and recompiling software is what you do. But you’ll balk at cutting new holes in the base, for example.
We all have our strengths.
The most immediate result of this work is that your 3D printer will become much quieter. You will have it running and guests won’t be able to it’s on. There’ll still be some fan noise, but if you don’t point it out most folks will attribute the fan sound to your computer.
Calibrations
The new software will also improve your ability to calibrate the printer. Now it’s time to share a hard truth with you, Bill of 2020: 3D printers don’t simply work out-of-the-box.
That’s not quite true anymore. If you use the filament that came with the printer, and print only the models that come with the printer, these days you can be printing within ten minutes of turning a printer on for the first time. But that won’t be true of your QQ-S Pro in 2020. There are two main reasons why: the calibrations and the slicing. Let’s take them in order.
Getting a 3D print to look good is a problem with a multi-dimensional phase space. There are the mechanical characteristics of the printer, and the material characteristics of the plastic filament.
Mechanical calibration
The printer’s electronics sends out a command: “Move the hot end to x=0.35mm, y=4.2mm, z=10mm and move the extruder forward by 0.2mm.” You’d like the mechanical components of the printer to do exactly that, or at least something close to it, perhaps to within 0.05mm. The goal of mechanical calibration is to make sure the printer is operating within acceptable tolerances for the work you’d like to do.
In one sense, it’s amazing that a $300 device can come anywhere near that level of accuracy. Many commercial appliances cannot. For example, an experienced home baker knows that you can’t trust an oven to be at the temperature you’ve set on a dial, even if the oven has a digital readout; you have to use a device like an infra-red sensor, or a chemical trick like testing when sugar melts, to know the actual temperature in the place you’re putting the bread pan.
It’s like that with 3D printing. For your printer to create good prints, you have to calibrate it. You’re going to spend hours on the Teaching Tech calibration page, running tests over and over again, to find the correct performance parameters for your printer. You’ll have to repeat these tests after each modification you make to your printer. You’ll have to repeat some of them every time you use a new filament; we’ll go over the filament issues later.
One of the biggest issues is bed leveling. This may seem trivial; flat is flat, yes? But you’ll want to understand the “bumpiness” of your printer bed down to 0.1mm or so. Almost anything can distort the bed in some way:
- The bed may be tilted at a slight angle. All it takes is one screw being a quarter-turn off somewhere to introduce a bias.
- The bed surface may be subject to uneven thermal expansion. All modern 3D FDM printer have a heated bed. The reason is that it helps the first layer of plastic stick to the surface; when the print is done, the bed cools and it becomes much easier to remove the print from the bed. But even if an unheated bed is flat, a heated bed might not be, especially if the heating element is not perfectly flat itself.
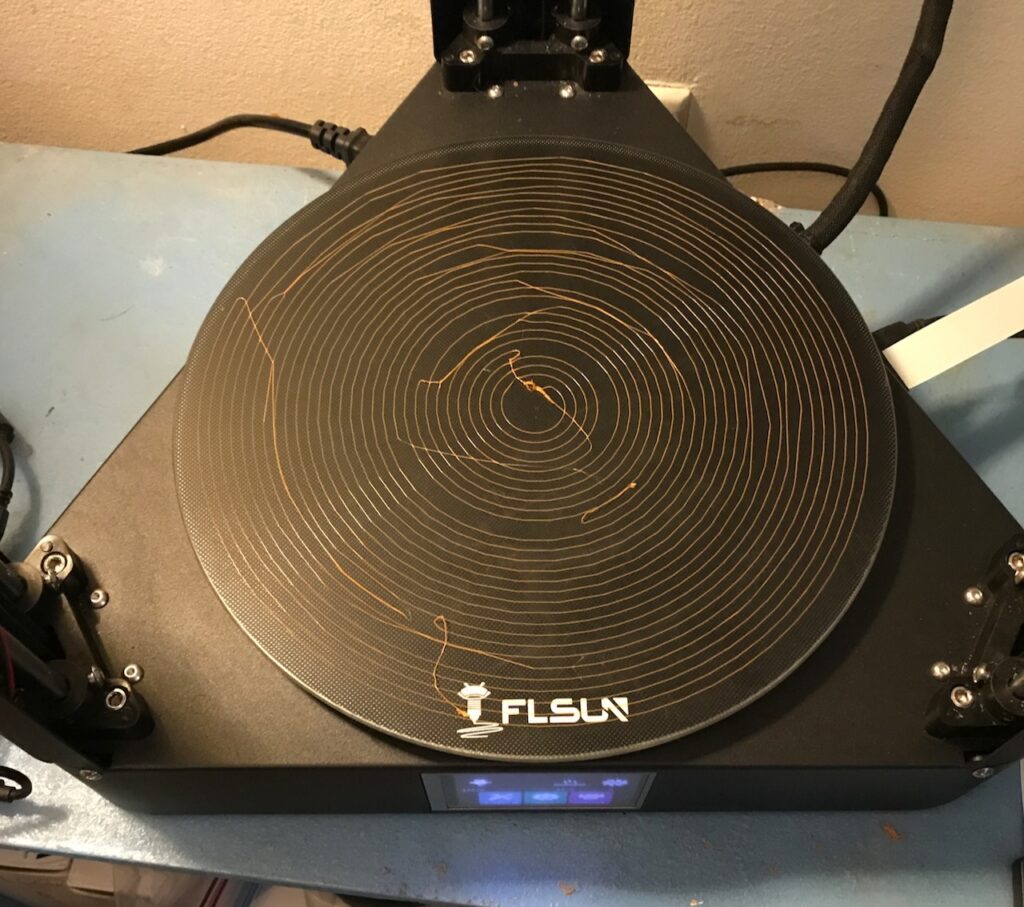
- Your printer will start with a nice glass bed.
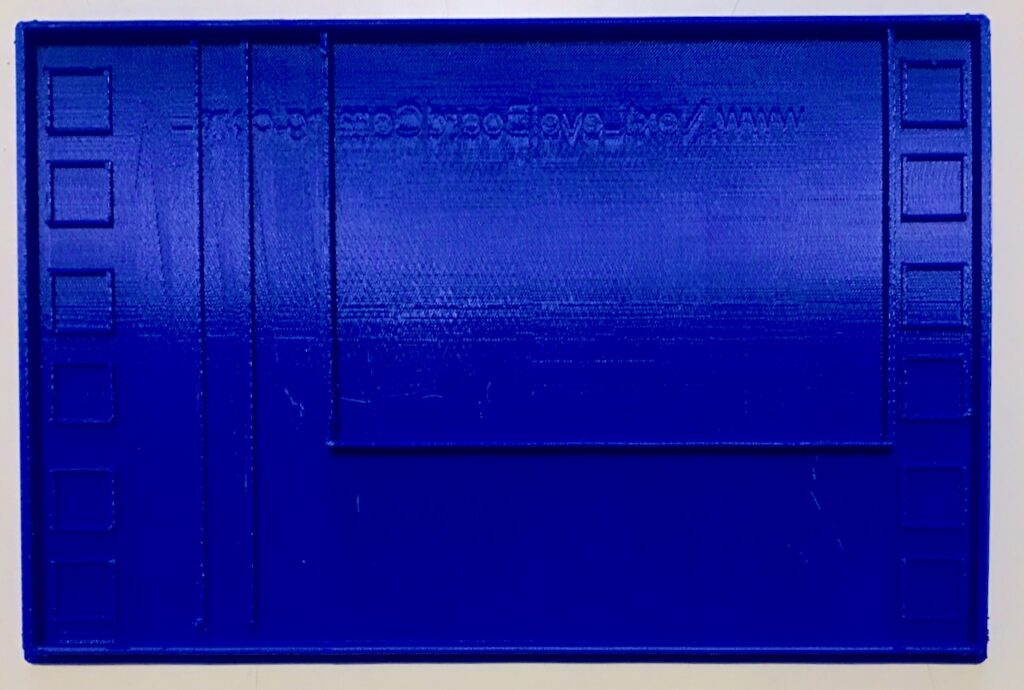
A bed-level test print on the original bed that came with your printer. Over time, you’ll ruin that surface. There’ll be the occasional stuck print for which you’ll use too much force to remove (later you’ll figure out that ice cubes are a nice way to deal with a stuck print), or you’ll make a mistake in the bed-leveling calibration or the Z0 adjustment (more on that later) and cause the nozzle to dig into the bed, leaving grooves behind. Some of your bed surfaces will have spiral scratches left behind by failed bed-level tests.
You’ll purchase a secondary bed surface that sticks on top of the original bed. It features a removable steel sheet that sticks magnetically on your new bed. The sheet has the advantage that you can remove it after a print, then curve the sheet to remove the print.
Actually, you’ll purchase several such circular steel sheets. There will always be some difficult print that leaves a permanent mark on the bed’s surface. After enough bad prints, you’ll get a new sheet.
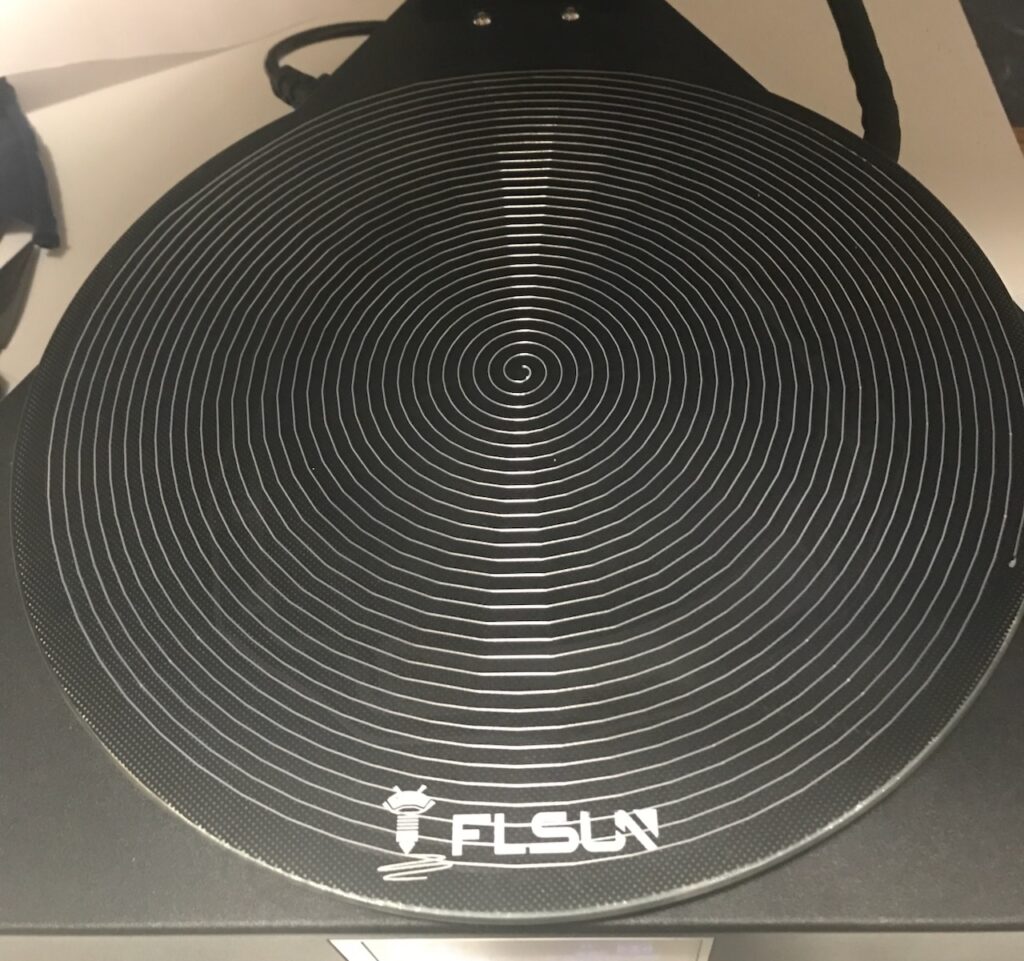
A bed-level test on the steel sheet. Note that there’s a bit of an issue at about 8:30 on the outermost edge of this pattern; such are the perils of bed-leveling. In addition to the thermal issues this introduces (the heat has to pass through the new bed layer), you’ll never be able to replace that steel sheet exactly the way you took it off. This means that the bed surface won’t be exactly the same, at least not to the 0.05mm level.
Fortunately, your 3D printer has an automatic bed-leveling feature. That’s the “Pro” in “FLSun QQ-S Pro”; the QQ-S didn’t have this ability. This is a sensor that, working with the hardware, can measure the relative heights of sections of the bed surface. The sensor magnetically clips to the bottom of the effector, and connects with the wires to the main wiring harness:
Here’s how it will look in operation. The machine probes gently until the sensor hits the surface of the steel plate:
Looks pretty, doesn’t it? You’ll grow tired of it soon enough. You have to re-level the bed every time you move that steel plate, or if you leave the printer off for more than a month or two.
Newer high-end 3D printers have the bed-level sensor embedded in the nozzle. Such printers level the bed before every single print. You’d level the bed before each print too, except that attaching and detaching the bed-level sensor grows tedious.
We’re not yet done with bed issues!
Automated bed leveling (and another process, delta-rod calibration, from which I’ll spare you) measures everything with respect to the tip of that automated sensor. But for the printer to “know” where the bed is, it has to know the distance from the tip of the sensor to the actual position of the tip of the nozzle. This is known as “Z0”.
There’s no automated way to determine Z0. This bed-leveling video from FLSun shows the procedure; the Z0 part starts at 1:36. Basically, you carefully adjust the z-position of the nozzle until you can just drag a sheet of paper between the nozzle and the bed.
What that video does not show is that if you move the nozzle a bit too far down, it will dig into the bed. If it does that by even a little bit, the printer won’t be able to recover the z-position; the belts will have moved even though the nozzle didn’t. So every time you go a bit too far, you have to retract the hot end to its home position and move it back down to the bed again. This becomes tedious.
You will have to do this every time you change the hot end in any way, even to replace a fan or adjust a wire; you can’t tell what will affect the nozzle’s position. Fortunately, once you switch to the Revo hot end, you won’t have to adjust Z0 for nozzle changes, only for other hot end changes (like replacing the entire Revo).
There are other mechanical calibrations you’ll have to make: PID tuning, which you’ll have to do every time you make changes to the hot end (though fortunately not with Revo nozzle swaps); E-steps calibration, which you’ll have to do if you make changes to the extruder.
Filament calibration
There are many types of filaments used in FDM printers. One of the first things you’ll learn is that each one performs differently. In a sense, you will have to become a practical materials scientist, investigating the interactions of each brand of filament with the particular hardware characteristics of your 3D printer.
There are only three kinds of filament that you’ll use in your 3D printer:
- PETG (Polyethylene Terephthalate Glycol) – This filament is used for printing stiffer parts that can withstand higher temperatures. If you look through the photos above, you’ll see the parts you’ll print in PETG: the replacement fan ducts for your hot end, and the clips to hold the red-and-black wires in the printer’s tower. You’ll print a couple of other PETG parts, but they won’t prove useful and you’ll never really the hang of printing with it. As of October 2023, you will have only purchased a single spool of PETG, and have come nowhere close to finishing it.
-
TPU (Thermoplastic Polyurethane) – This produces flexible parts, with about the same texture as gummy bears. Apart from a single flexible container, you’ll use it to print parts to use as padding.
This corner protector is printed in TPU. It doesn’t protect the corner; it protects you from the corner when you bump into it. You can see that the surface of this print is not particularly even or smooth, reflecting the difficulties you’ll have working with TPU and with your printer in general. One of the issues with TPU is storing it. TPU will absorb moisture from the atmosphere, which can cause it to “spit” when it goes through the hot nozzle. TPU has to be stored with a lot of desiccant and in a sealed bag.
As with PETG, you will only purchase a single spool of TPU, and will have plenty left by October 2023. - PLA (Polylactic Acid) – Almost all your prints will use this kind of filament. The reasons:
- It’s generally easier to work with. That may be difficult to believe given the litany of calibration woes that we’ll get into in a bit. That may give you some idea of why you won’t print much in TPU or PETG.
- It’s considered more “environmentally friendly” than other 3D-printing materials. You’ll feel compelled to put that in quotes because it’s only relative. PLA is made from corn by-products (unlike other plastics, which typically are petroleum by-products), and it biodegrades faster than similar materials. But “faster” means it biodegrades in only a few hundred years instead of a few thousand years.
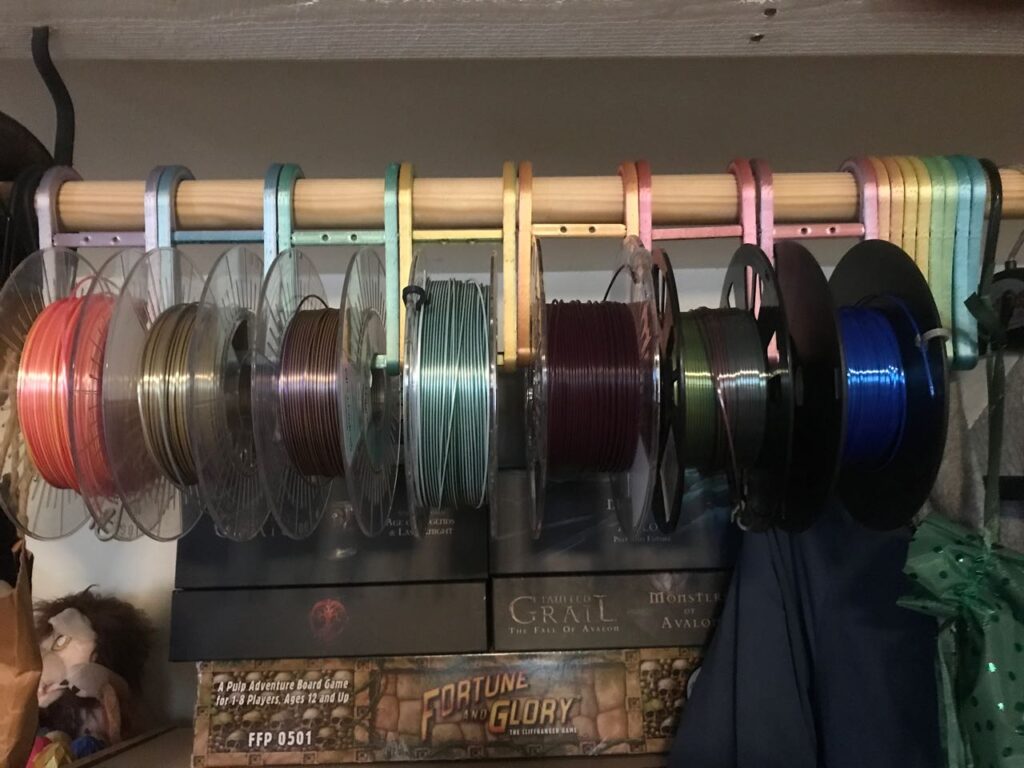
- It doesn’t absorb moisture from the atmosphere anywhere near as quickly as TPU or PETG, which is why you’ll mostly store old spools out in the open, as you can see in one of the above photographs. You’ll eventually get a dehumidifier specifically made for drying out filament rolls, but the results won’t lead you believe that it’s necessary.
The filament dryer you’ll purchase.
However, different manufacturers have different formulations for their PLA. Even within the same manufacturer, different colors or qualities of PLA will have different printing specifications. For example, red- and black-colored filament seem to need different printing parameters than other filaments from the same supplier; silky filaments (as opposed to matte filaments) tend to be fussier about print speeds and temperatures.
The reality is that you may have to go through the flow, temperature, retraction, speed, and even acceleration calibrations for each spool of filament you purchase.
Let’s take a quick look at each of these. to give you some idea of what you’re getting into.
Flow
We briefly discussed “E-steps” before. That calibration checks that if the printer gets the command “Move the filament forward 10mm”, the extruder receives the correct signals to push 10mm of filament forward. This depends on things like the diameter of the gears in the extruder, which is why you have to re-do this calibration if you make changes to the extruder.
What “flow” measures is how much filament actually comes out of the nozzle in response to a certain amount of filament being pushed by the extruder. To continue our analogy with the toothpaste tube: If you squeeze the toothpaste tube at one end, how much toothpaste will come out the other end? That’s what the “flow” parameter adjusts.
This depends on the viscosity of the melted plastic, so it depends on nozzle diameter, temperature, type of filament, etc. That’s why you have re-calibrate flow for each new spool of filament.
Temperature
Your printer will squirt hot plastic out of a nozzle. What happens to that plastic once it exits the nozzle depends a lot on the temperature. If the temperature is too low, the plastic’s flow will be sluggish and it won’t adhere as well to the layer of plastic below it. If the temperature is too high, the plastic will sag a bit and not be a good support for the next layer.
Each spool of filament you’ll buy will have a suggested temperature range written on it. You’ll find that range to be nice starting guide, but that’s all. The best temperature for a given filament depends on nozzle diameter and other mechanical factors associated with your printer. Again, you’ll be doing a temperature calibration for each new spool and, of course, for each nozzle change.
If you change the nozzle, even with the Revo, you have to recalibrate the temperature for each filament you plan to use with that nozzle, even if you’ve done a temperature calibration for that filament already.
But that’s just the nozzle temperature calibration. There’s also a separate bed temperature calibration.
As we discussed earlier, your printer comes with heated bed. You have to determine the best temperature for that bed. Too low, and the first layer of filament won’t stick very well. Too high, and it will stick too well; it will be difficult to remove the print from the bed.
Fortunately, you’ll won’t have to calibrate the bed temperature more than a couple of times: when you add that steel sheet to the bed assembly, and when you switch to a completely different type of filament (from PLA to TPU, for example).
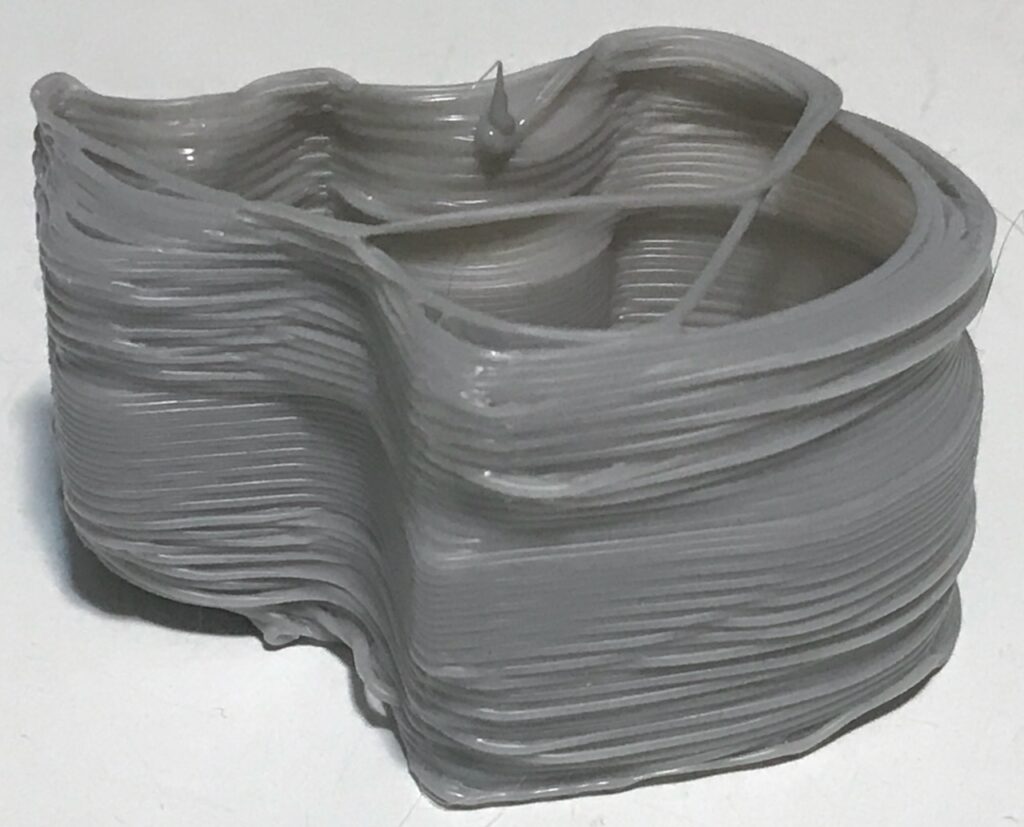
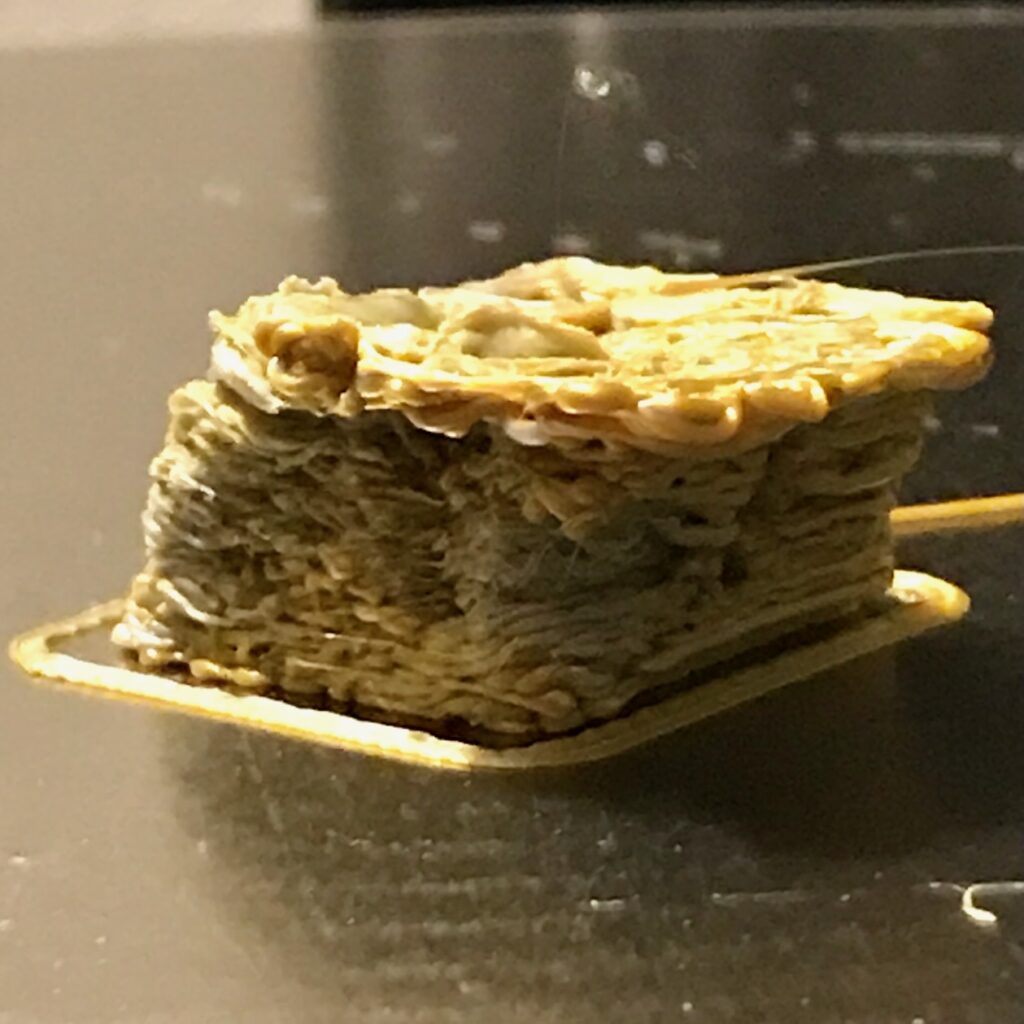
Why did this spiral test fail? It could be:
- the bed temperature is too low;
- the filament temperature is too low;
- the bed isn’t properly leveled;
- the Z0 is set too high;
- the bed is not quite sticky enough, and it needs to be either cleaned with alcohol or get a spritz of hair spray (or both).
Figuring out which is the cause is part of the joy of 3D printing.
Retraction
Bill of 2020, this will be a hard one for you to understand.
Consider the toothpaste tube again. You apply pressure at one end. The toothpaste comes out, but there’s usually a “tail” of toothpaste at the end. Since you’re going to stick the brush in your mouth anyway, that doesn’t matter.
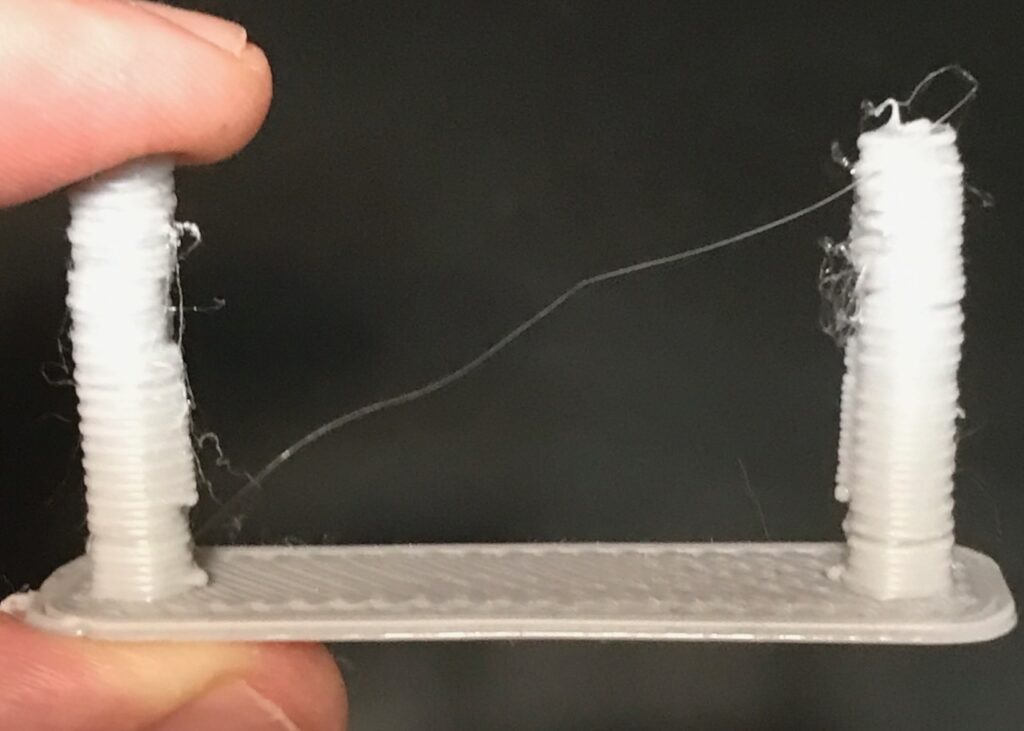
Plastic is gooey. You’re using it to lay down lines of filament. At some point, if you’re not printing in a continuous spiral (“vase mode“), the tip of the nozzle will have to travel from one point to another without depositing any filament. If you don’t account for the “gooey-ness” of the plastic, you’re going to leave a plastic string as the nozzle travels.
The problem of strings can be minimized by “retraction”: Pull the filament back up just before the nozzle starts to travel, then push it back down again just before you start extruding plastic again. This results in a two-dimensional calibration study: How far do you pull the filament back up? How fast do you pull it up?
The retraction values depend on all the factors I’ve described above: temperature, flow, nozzle diameter, type of filament, etc. You’ll be doing a lot of retraction tests.
Part of the reason for all these tests: Remember that the extruder is at the top of a long Bowden tube, and it’s the extruder that’s pushing and pulling at the filament. There’s a natural delay between a pull at the top and movement of the filament at the bottom of the tube, just like it takes the toothpaste a moment to flow when you squeeze the end of a toothpaste tube. Retraction parameters are more of an issue for Bowden-tube printers than they are for direct-drive printers.
Speed
The faster the printer can lay down plastic, the less time it will take to print something. That’s obvious.
There’s a maximum speed your printer can go to print a decent part. If it goes too fast, the plastic won’t lay down evenly, you’ll get stringing (no matter what your retraction settings), and you’ll get funny surface artifacts due to “ringing”: rippling patterns on the side of prints caused by the metal rods vibrating as they’re shoved back-and-forth.
The FLSun QQ-S Pro is supposed to be able to print up to 100mm/s. You’ll never reach that limit, at least not after you replace the hot end for the first time. You’ll be lucky to reach 60mm/s.
Again, you’ll have to do a speed calibration for every nozzle change, filament change, etc.
Acceleration
As you can see in the videos, the nozzle goes back-and-forth during most prints. A change in speed is “acceleration”. If the printer accelerates too fast (like stomping on the brakes in a car), the mechanical components can’t respond fast enough. That’s another source of ringing that you can see on the surface of the print.
You’ll find that the effective acceleration (and a related parameter, “jerk”) that will work for you is lower than what was set when the printer was originally shipped to you. That probably reflects some issue caused by your taking apart the effector so many times. The result is that it will take somewhat longer for models to print.
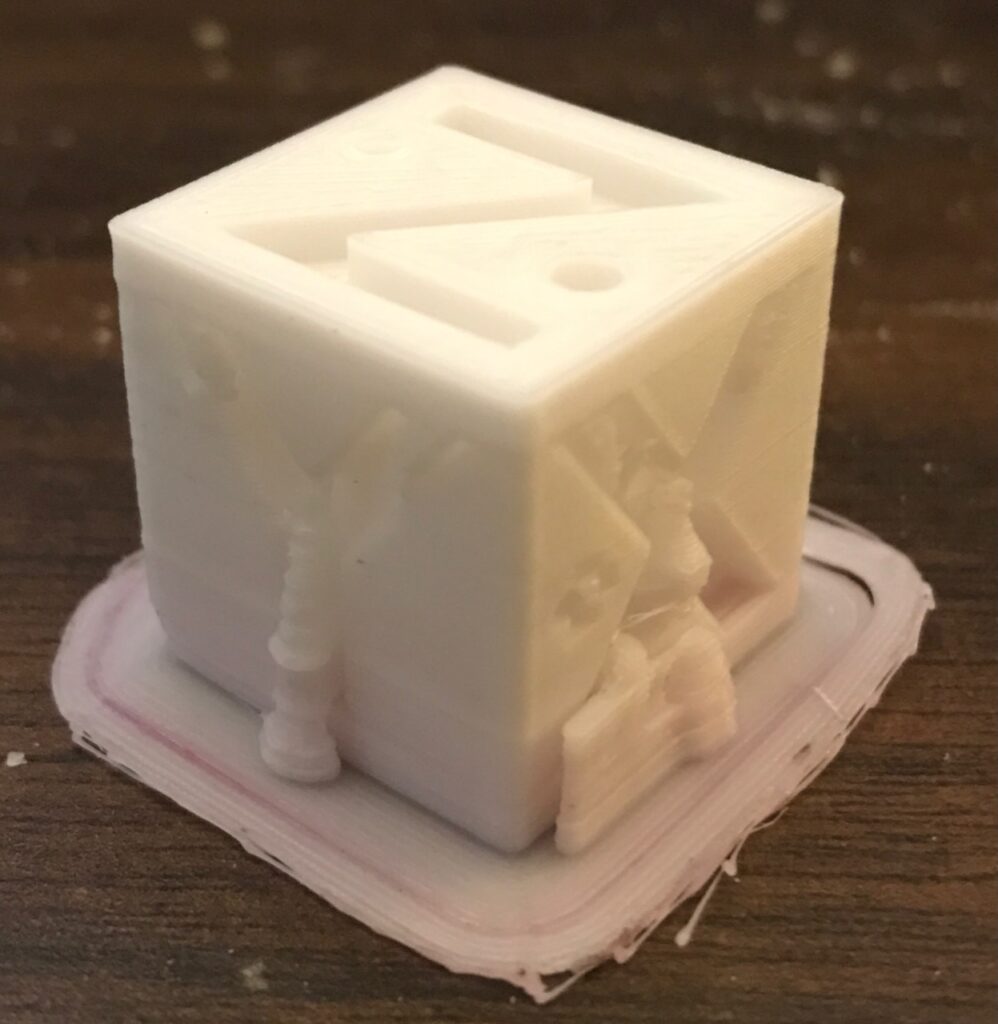
Cubes and Tugboats
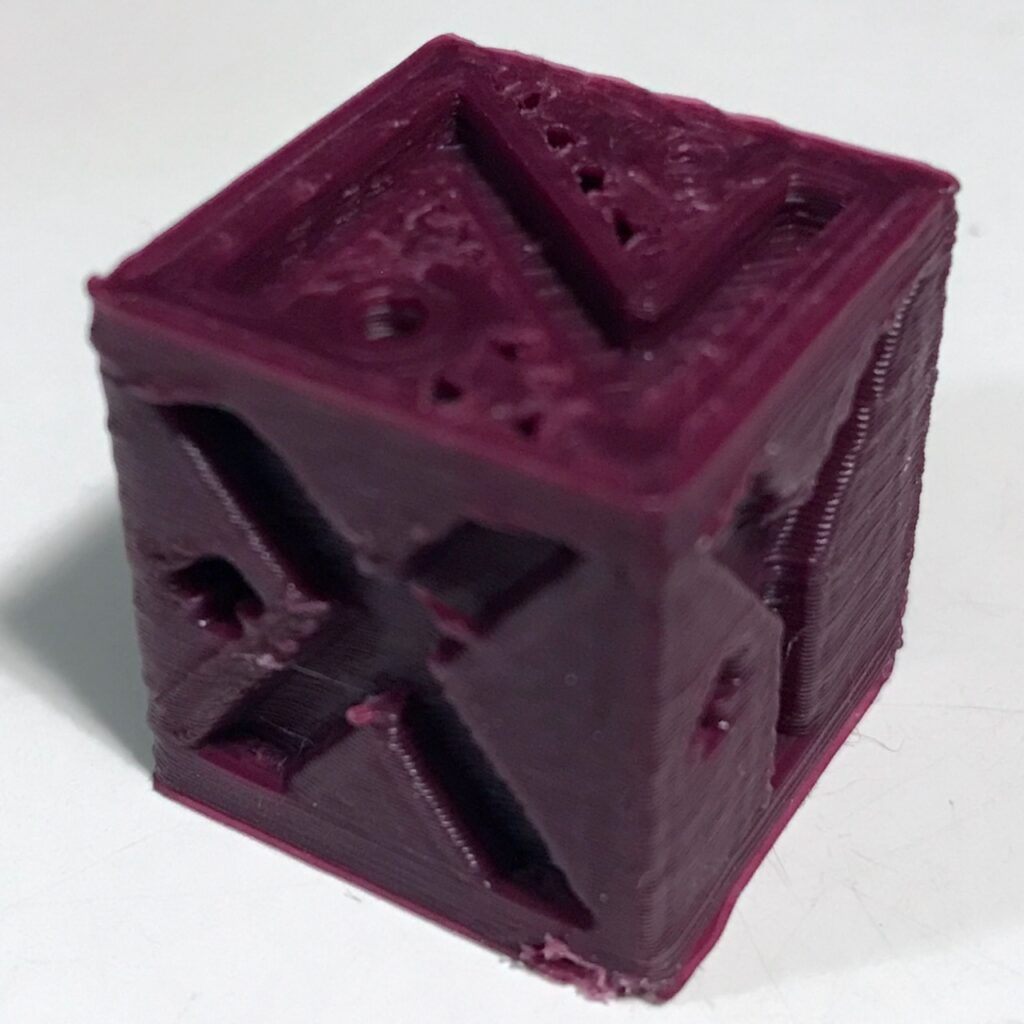
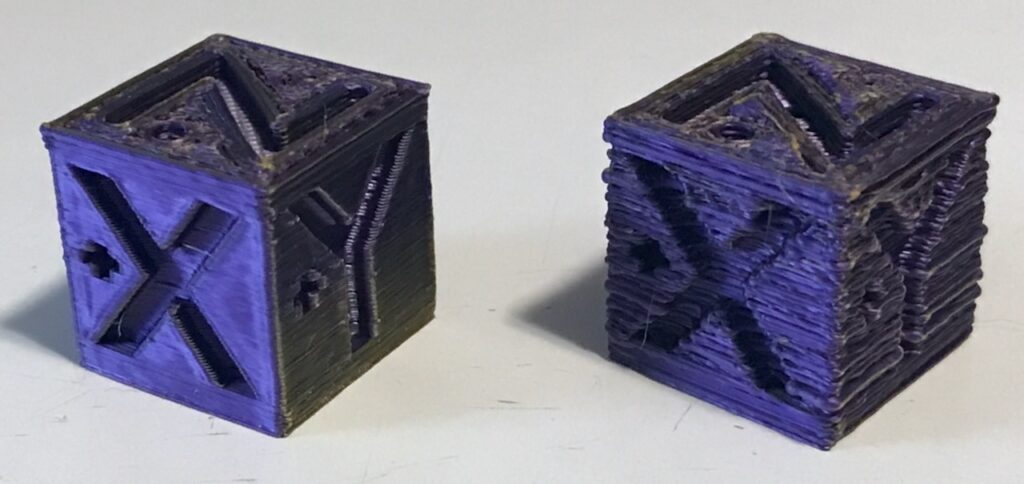
Your standard print, after the calibration tests, will be a “calibration cube”:
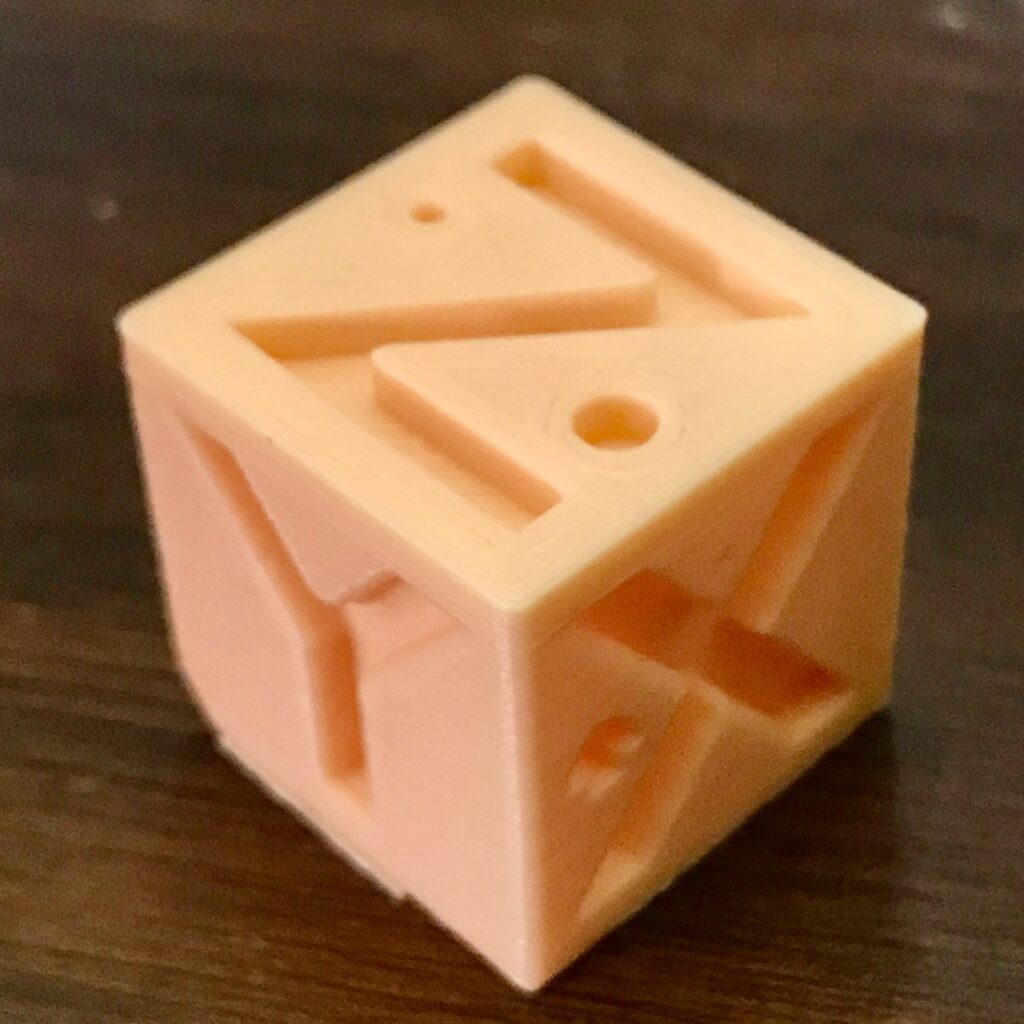
You’ll find these cubes to be a valuable tool for detecting and diagnosing problems with your printer. For one thing, compared to other diagnostic 3D prints (we’ll get to the tugboats in just a minute), they print relatively quickly: from 20 to 45 minutes, depending on your printer settings. For another, if the calibration cube won’t print correctly, longer and more elaborate tests or prints won’t print correctly either.
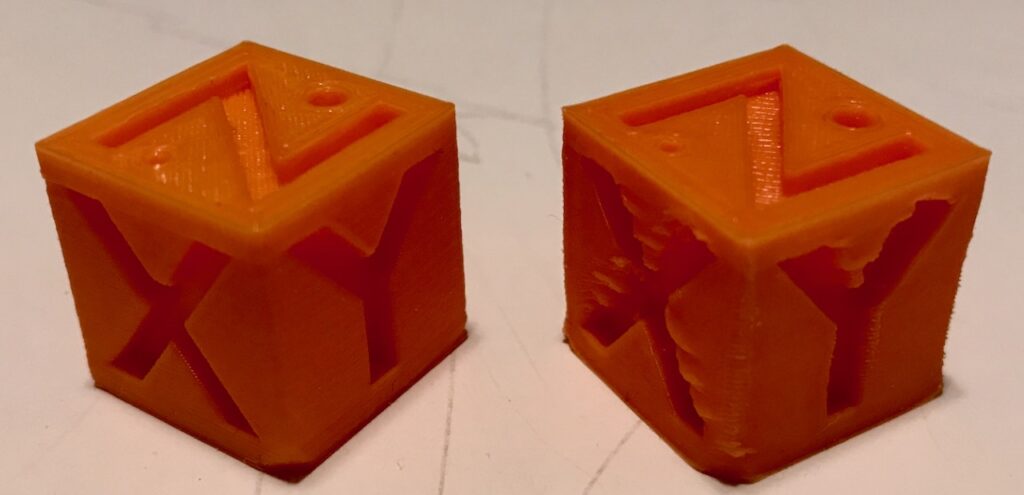
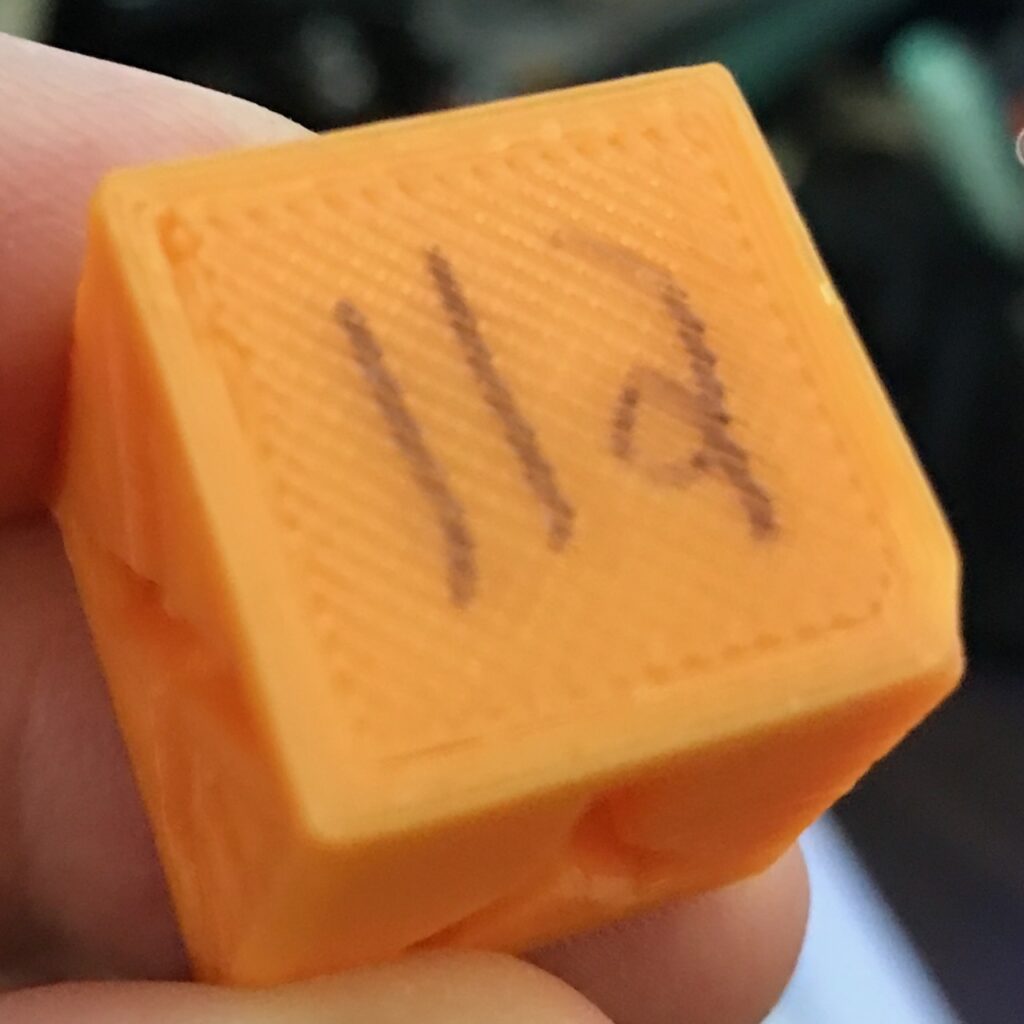
After a while, your skills as a scientist will finally kick in. You’ll keep detailed notes about each cube so you can, in theory, track down those parameters that produce better prints. Here are the notes you made on Cube 112:
Cube 112 - Paramount 3D PLA Orange

20230617_CalibrationCube-k1

Goal: Back to testing Linear Advance. Tests with the Marlin generator at https://marlinfw.org/tools/lin_advance/k-factor.html suggest that a k-factor of 1.0 might be better.

Verdict: Hard to say. Some slight improvements on the downward points of X and Y.

Initial layer height = 0.2mm

Print time: 23:28

Layer height = 0.2mm

Line width  - 0.4mm

Wall thickness 1.6mm

Top/bottom thickness 0.8mm

Infill 10%

Printing temperature 200C

Bed temperature 64C

Initial Bed temperature 72C

Flow rate 91%

K-factor 1.0

Print speed 60mm/s

Infill speed 100mm/s

Outer wall speed 40mm/s

Inner wall speed 80mm/s

Top/Bottom speed 30mm/s

Travel speed 120mm/s

Initial layer speed 30mm/s

Initial layer print speed 30mm/s

Initial layer travel speed 60mm/s

Skirt/brim speed 30mm/s

Acceleration 1500 mm/s^2

Jerk 16mm/s

Retraction distance 6.5

Retraction speed 40

Fan speed 100%

Regular fan speed at layer 2
As we discussed earlier, you will print at least one calibration cube for each new spool of filament. Often you’ll print more when trying to diagnose a problem, or dialing in a parameter for a difficult filament (like silky PLA) which the standard calibration tests did not reveal.
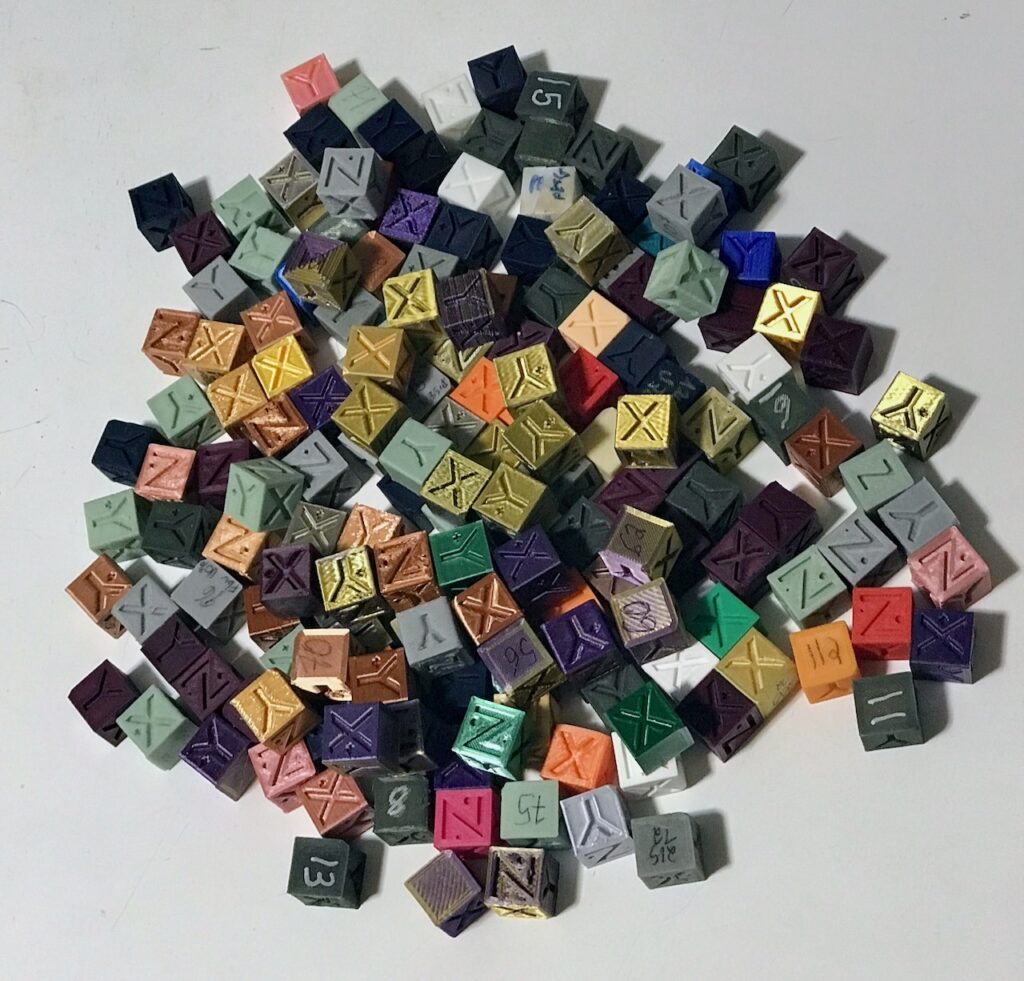
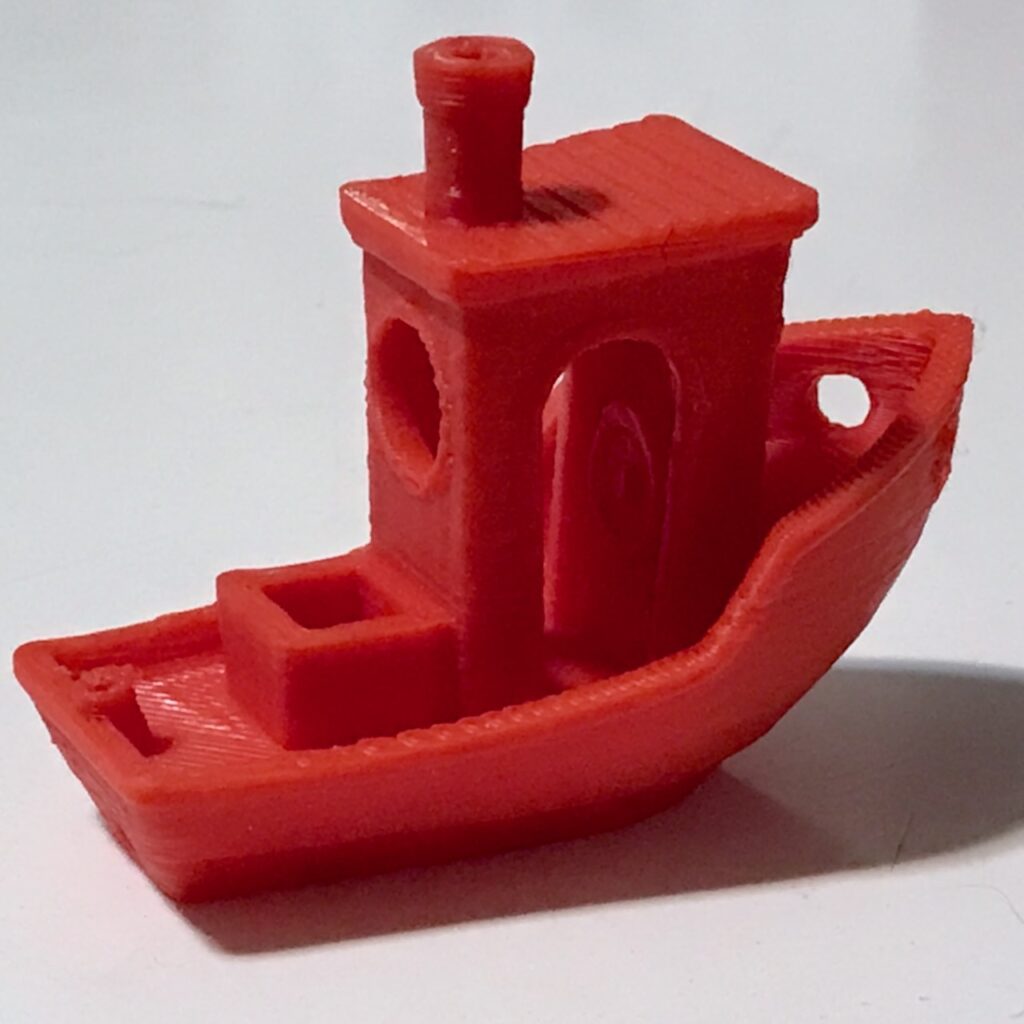
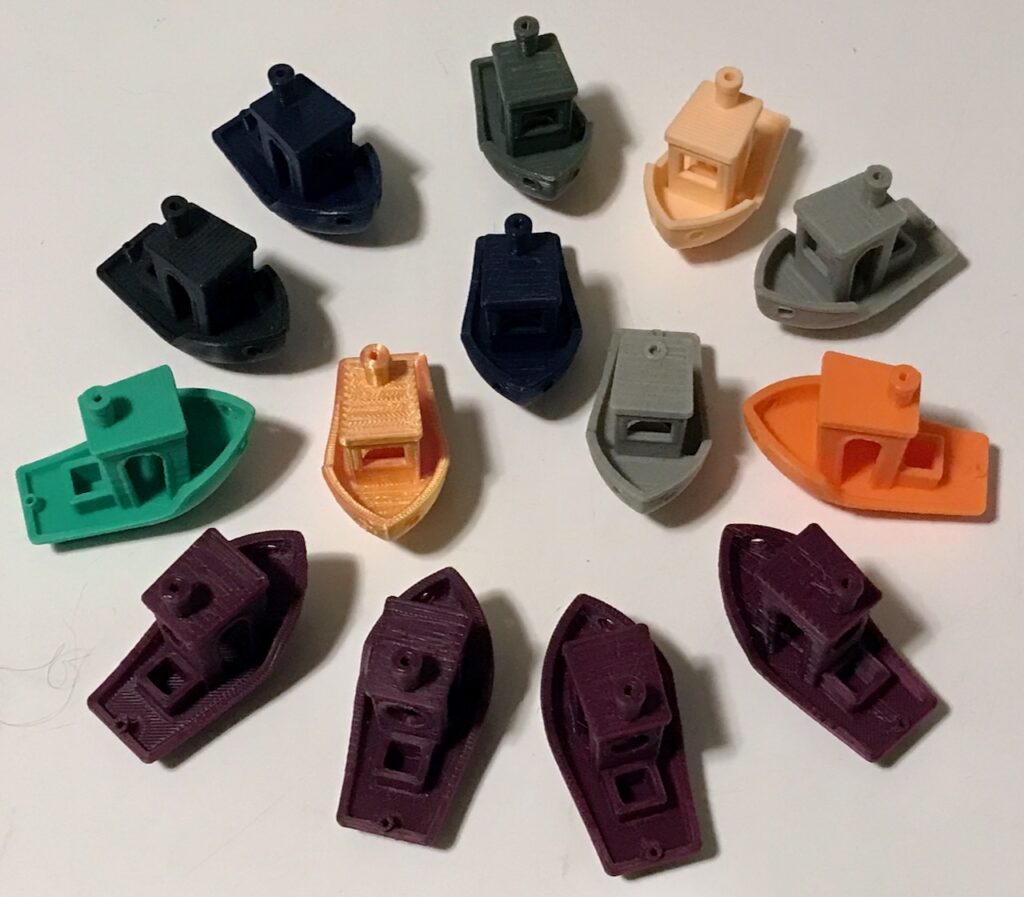
The calibration cubes are good for discovering problems with layers, edges, flat surfaces, etc. However, they aren’t good for discovering other problems, such as printing curved surfaces or stringing. For that, the 3D community has settled on a model called 3DBenchy. You won’t print as many of these as you will calibration cubes; as of October 2023 your most recent one is labeled 34 though you started printing them earlier than that.
In the eyes of Bill of 2020, they probably just look like tugboats. No, they don’t float.
Picking a filament
You’ll try filaments from several manufacturers. While at first price will be your biggest concern, eventually you’ll look for a manufacturer whose filament properties seem stable despite the color of the filament.
For your first year or so of 3D printing, you’ll try sticking with Hatchbox PLA for matte PLA, with SUNLU as your source of silk PLA. But problems with availability and the need to recalibrate between filaments will have you experimenting with Amazon Basics filament.
As of October 2023, your “goto” filament manufacturer is Paramount 3D. You can put in a new color of matte PLA from them and, after checking with a calibration cube, be confident that you won’t have to go through a full set of recalibrations for that spool. (As of October 2023, you’re not as confident with their silk filaments, after a bad experience with their Colossus Copper.)
Slicer
One important thing that you did not understand, Bill of 2020: How vitally important a program called a “slicer” was to the process of 3D printing.
Assume you have a 3D model of something. Perhaps you created it yourself, perhaps you downloaded it off the web, perhaps you paid to have it created. A slicer takes that 3D model and turns it into a format that a 3D printer can understand.
When printing a model, FDM and resin 3D printers deposit material layer-by-layer. The slicer “slices” the 3D model into those horizontal layers. But it does more than that: It determines how each of those layers are to be printed. Remember that long discussion of calibration earlier in this letter, the part you scrolled past? (Don’t lie to me, Bill of 2020. I know you.) Most of those different calibration parameters are inputs into the slicer.
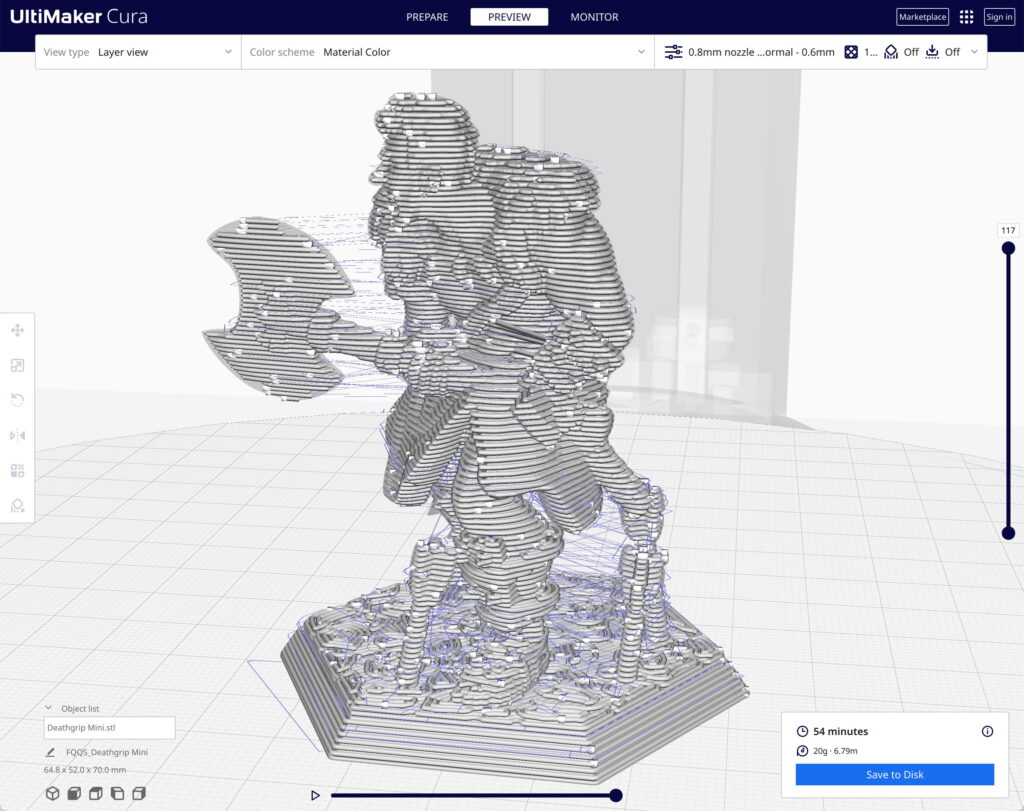
Some pictures may help. Let’s take a 3D model that you will purchase from Hero Forge, a web site that uses automated tools to construct models intended for miniatures in tabletop role-playing games. Here’s your Half-Orc Barbarian character, Deathgrip:
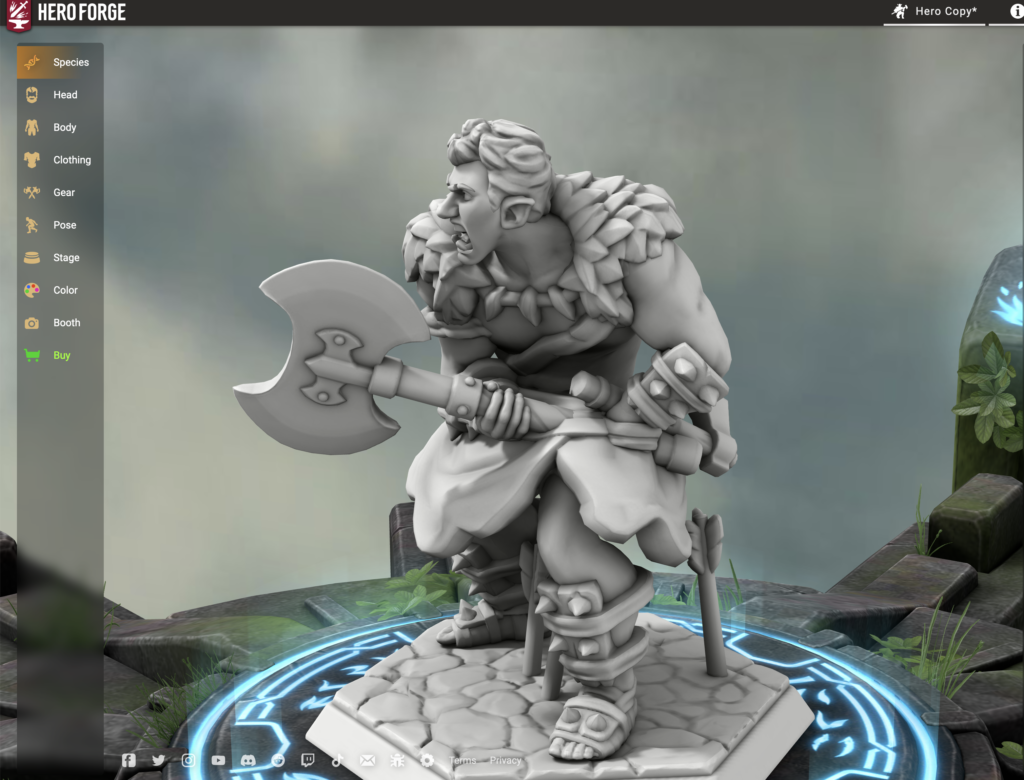
There are many formats for 3D-model files. For hobbyist-level 3D printing, by far the most common is STL (Standard Tessellation Language). The file names end in “.stl”, so the file you’ll download from Hero Forge is “Deathgrip.stl”. (You’ll also use files in the OBJ format when you’ll work with TinkerCAD; while you’ve worked with DAE files in connection with color models for Kickin’ Wiccan, you won’t use them for your personal 3D printer.)
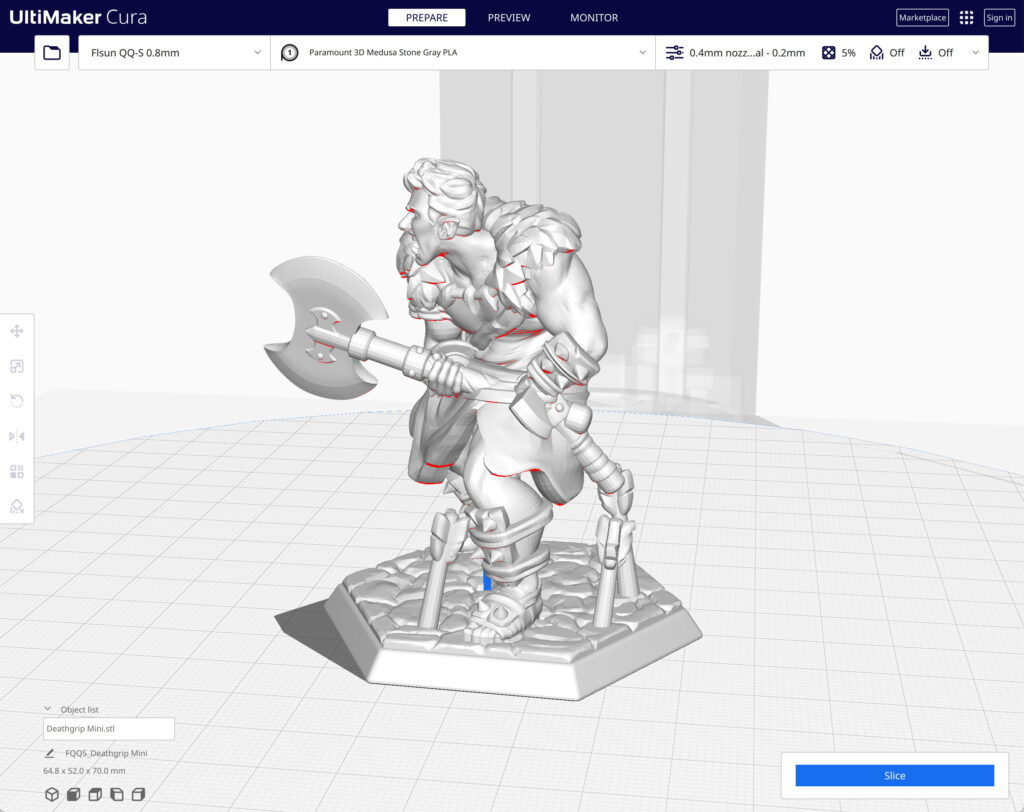
The slicer you’ll use is Ultimaker Cura, mainly because it’s the software that will be included with your FLSun QQ-S Pro. You’ll try a couple of other slicers, but you will become used to Cura and you’ll stick with it.
When you open Deathgrip.stl in your slicer, you will see something like this:
When you’ll instruct Cura to slice the model, you may see something like this:
In this picture, you can see the layers determined by the slicer. You can also see the white dots; those indicate the points at which the slicer has determined that the printer will start and stop the layer. The faint blue lines are “travel” lines; they show the path the nozzle will take outside the model without extruding any filament (remember our discussion of retraction?).
Actually, this is an exaggerated view of slicing, with very coarse layers so the slicing process is visible on the screen. Here’s a more realistic choice for layer thickness that one might pick for a detailed miniature figure like this:
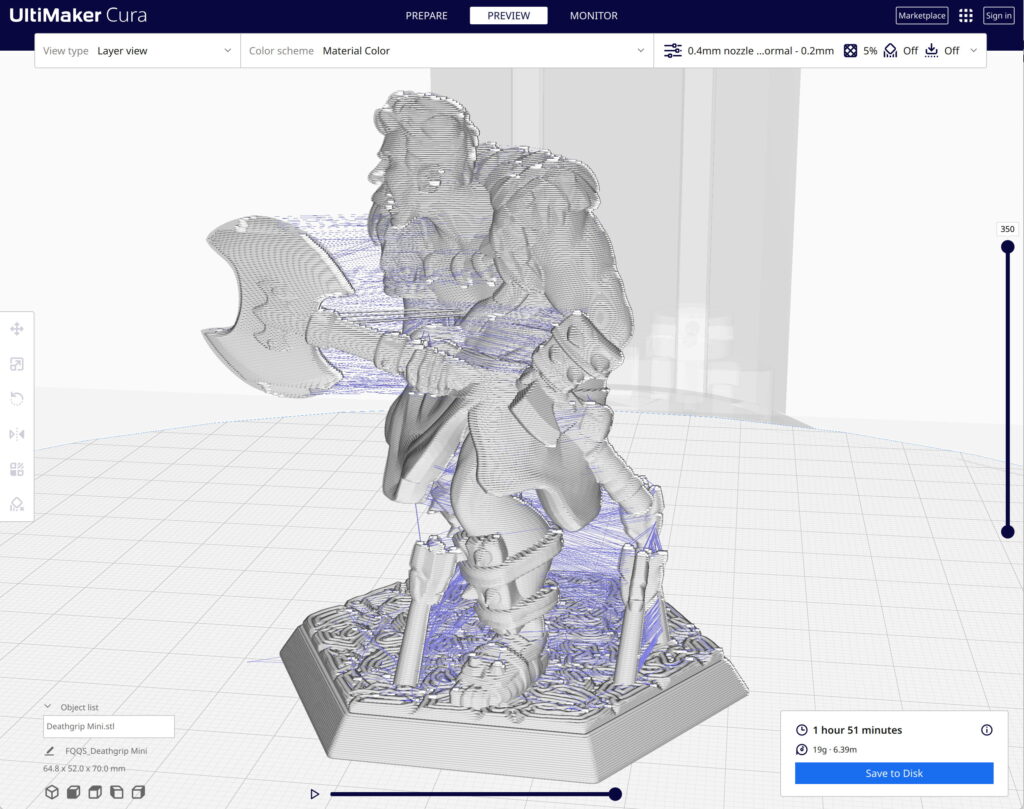
By the way, don’t believe the time estimates you see in the lower right-hand corner. To create these pictures, Bill of 2023 will use a “slicing profile” that he normally uses to print boxes. For printing finely-detailed miniatures, he’d print more slowly.
Supports
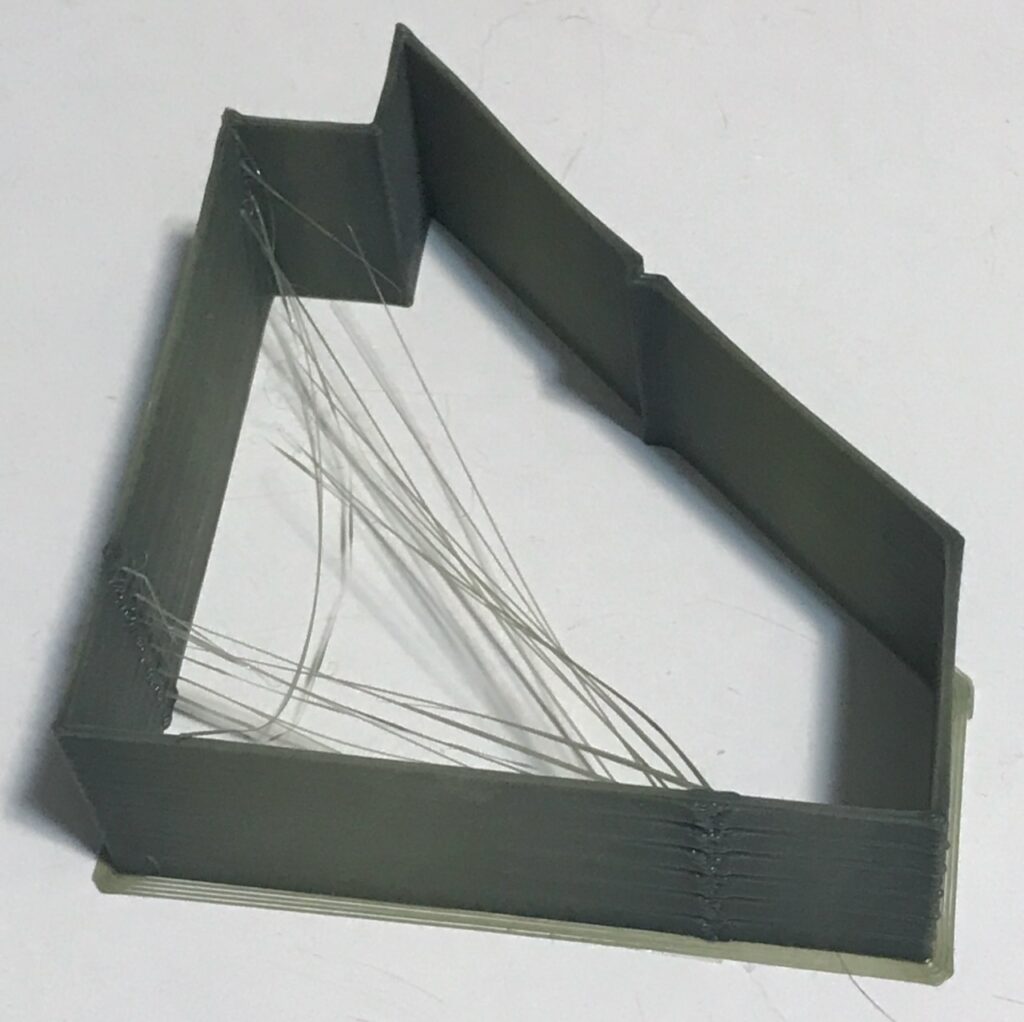
There’s a big problem with both of those slicing results. Can you spot what it is?
Cura lets you see the anticipated printing process layer-by-layer, via that scroll bar on the right. Let’s look at a couple of points of progress:

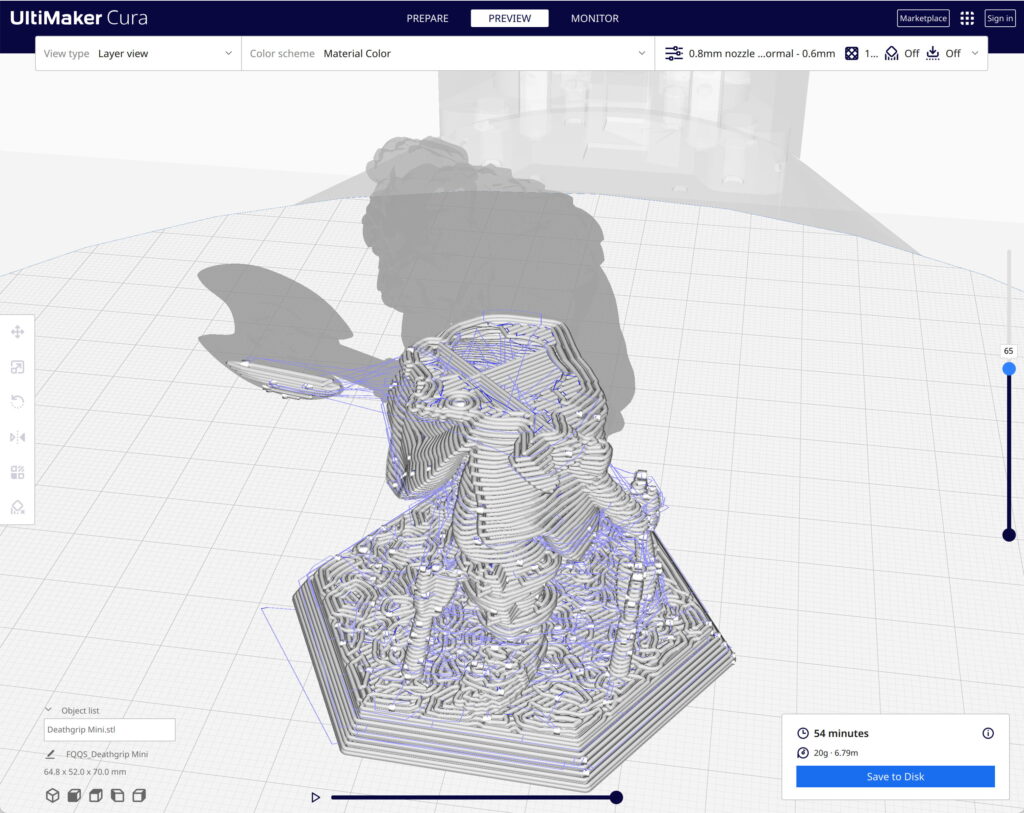
If you were to send this sliced model to the printer, it would fail. That’s because, as it is right now, the 3D printer is being instructed to print in mid-air. What would actually happen is that the filament that you see as part of the ax would fall to the ground.
The slicer provides a solution: supports. It can be set to automatically generate extra material that will keep overhangs in place as the model is printed.
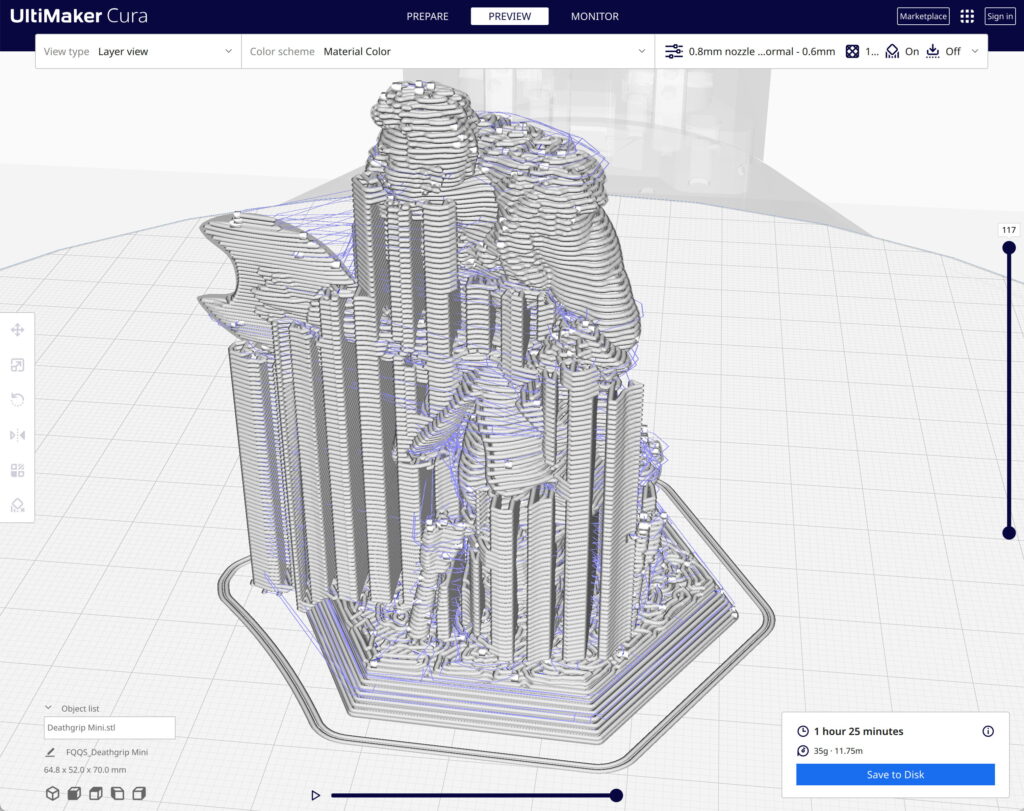
As you look at that picture, you may ask: How difficult is it to remove those supports? The answer is that it varies from model to model. For small models with detailed features, like miniatures, the supports can be difficult if not impossible to remove.
Bill of 2023 doesn’t have any pictures of miniatures with the supports still on them (we’ll have some mini pictures later), so here’s a different example. A friend asked me to 3D-print a snow scoop; that is, you stick the scoop into a pile of snow and press the handles together to compress the snow into a shape. In this particular case, the snow scoop contains the mold of a duck:
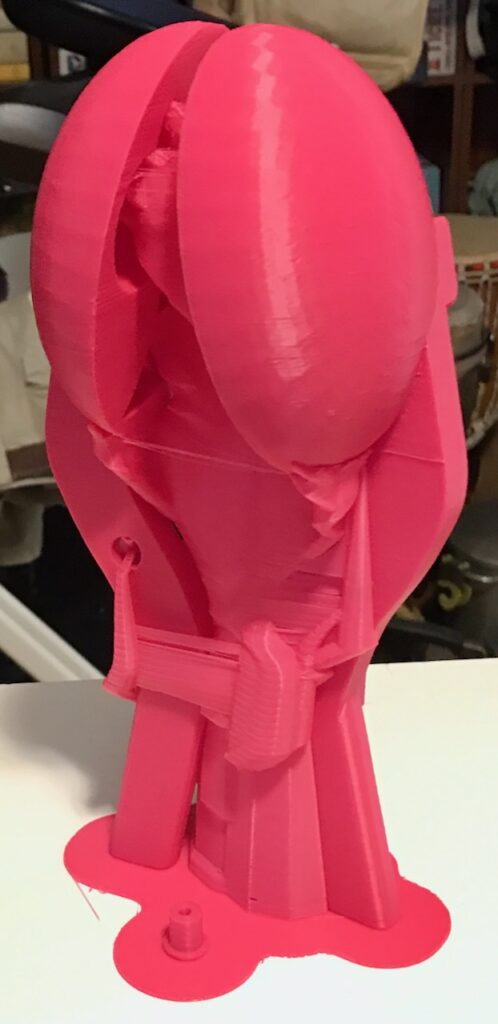
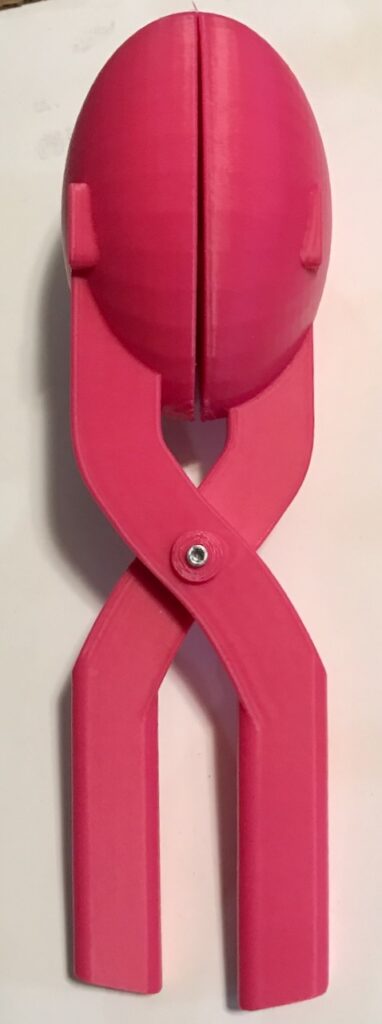
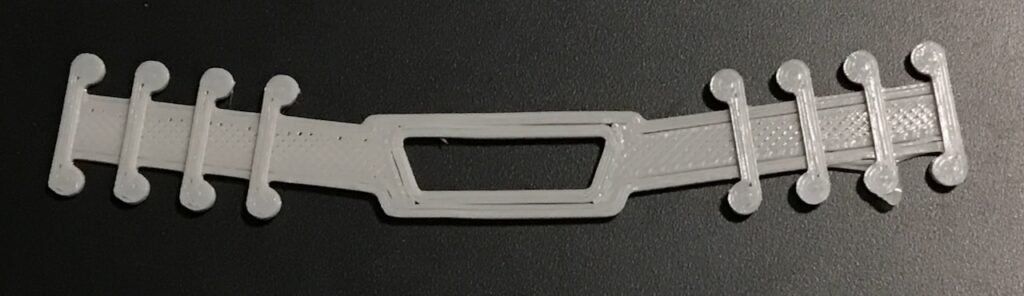
Remember those Tainted Grail game inserts that inspired you to purchase a 3D printer in the first place? You won’t be able to print them horizontally, but you can print them vertically with enough supports.
G-code
The slicer does much more than generate supports. To get some idea of what it’s doing, it may help to consider the actual output of the slicer: G-code. This is a standard programming language used to control computerized mechanical devices.
It’s not new, and you’ve worked with it before. Back in 1985, at the start of your graduate research in physics, you created a program that output G-code files to control a numerically-controlled milling machine for shaping segments of a particle detector.
Not many people bother creating G-code directly. While occasionally you’ll type a brief G-code command into your QQ-S Pro (we’ll get into how in a little bit), you’re going to let the slicer generate the G-code for you. Here’s an example of G-code, which Bill of 2023 randomly picked from one of the many “.gcode” files you will save:
M107

G1 F3000 Z1.194

G0 F2945.5 X2.481 Y-22.751 Z1.194

G1 F3000 Z0.194

G1 F3600 E0

G1 F2700 X5.252 Y-22.673 E0.08943

G1 X6.064 Y-22.661 E0.11563

G1 X6.641 Y-22.625 E0.13429

G1 X9.12 Y-22.411 E0.21456

G1 X9.548 Y-22.345 E0.22853

G1 X10.151 Y-22.209 E0.24848

G1 X11.049 Y-21.988 E0.27831
Initially it looks like random garbage, doesn’t it? But you’ll learn (or remember) enough about G-code so that it will make sense. First is obvious: the reason why this is called “G-code” is that most of the commands begin with “G”. Typically a “G” command means “go”, in the sense that you’re telling something to go somewhere.
As you look at those lines:
- Fxxxx is the feed rate, that is, the speed with which the effector is moved, or the filament is pushed.
- Exxxx is how much filament the extruder should push out.
- X, Y, and Z are the positions that the nozzle should be moved to.
The slicer is not just doing a geometric task of dividing the model into layers. It’s also performing a four-dimensional analysis (x, y, z, and the extruder) for exactly how much the motors will move in each direction. The distances that separate the points are affected by the speed and acceleration in the slicer controls; parameters like flow and line width affect the amount the extruder is told to extrude.
Not shown in that brief fragment are other printer control commands such as bed and nozzle temperature. The slicer is responsible for creating the G-code command lines that control every active aspect of the 3D printer.
Not bad for a program that you can download for free!
Operating the printer
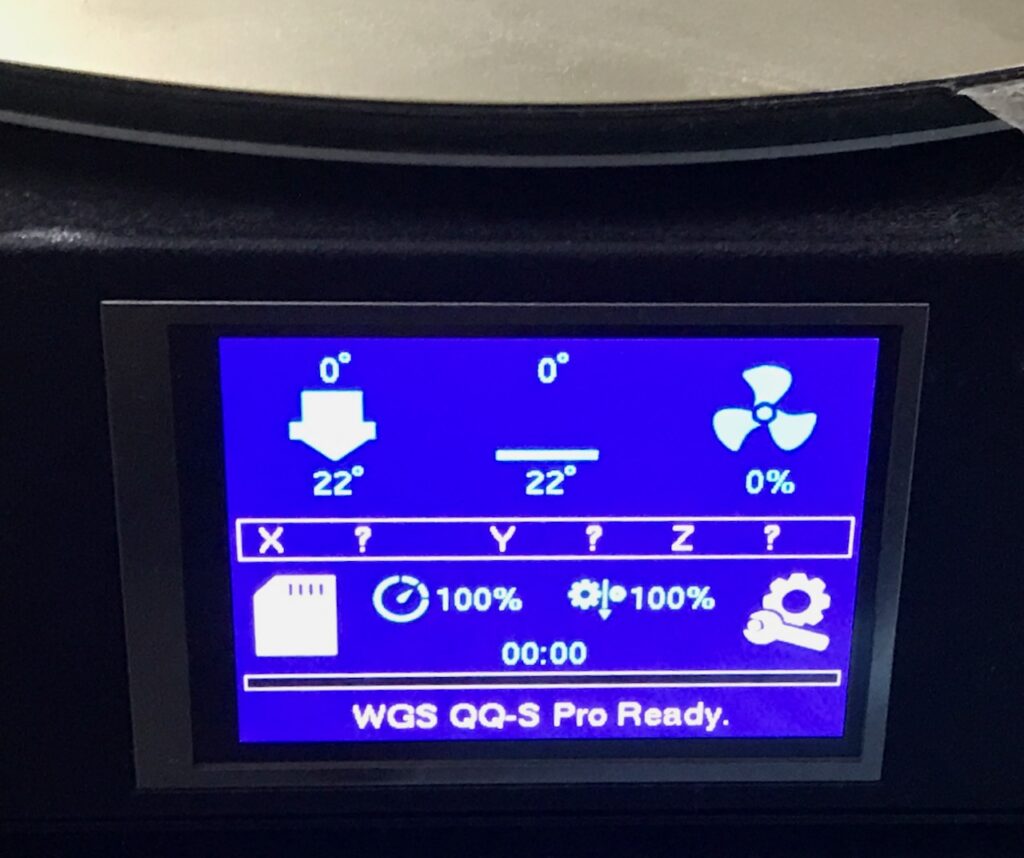
You will be able to operate the printer “by hand” if you wish. With the printer software you’ll have installed by 2023, this is the main screen you’ll see on the printer’s control panel:
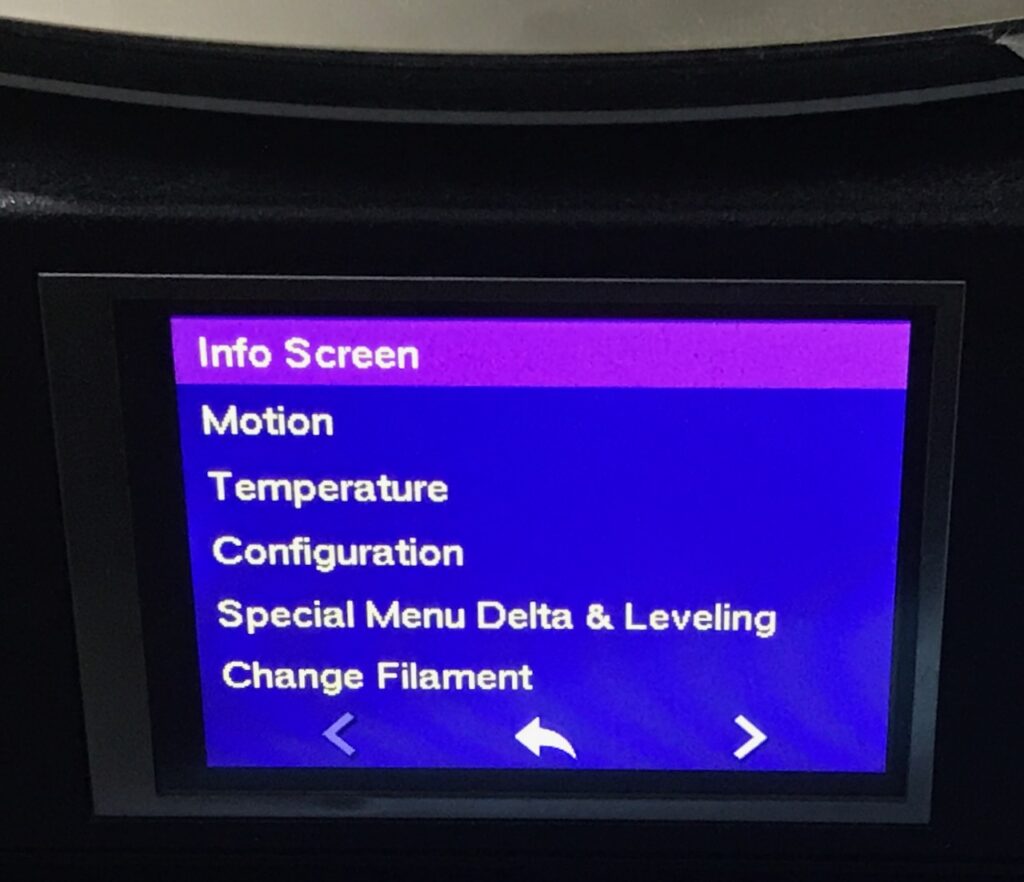
If you touch the gear/tool icon on the screen, this is what you’ll see:
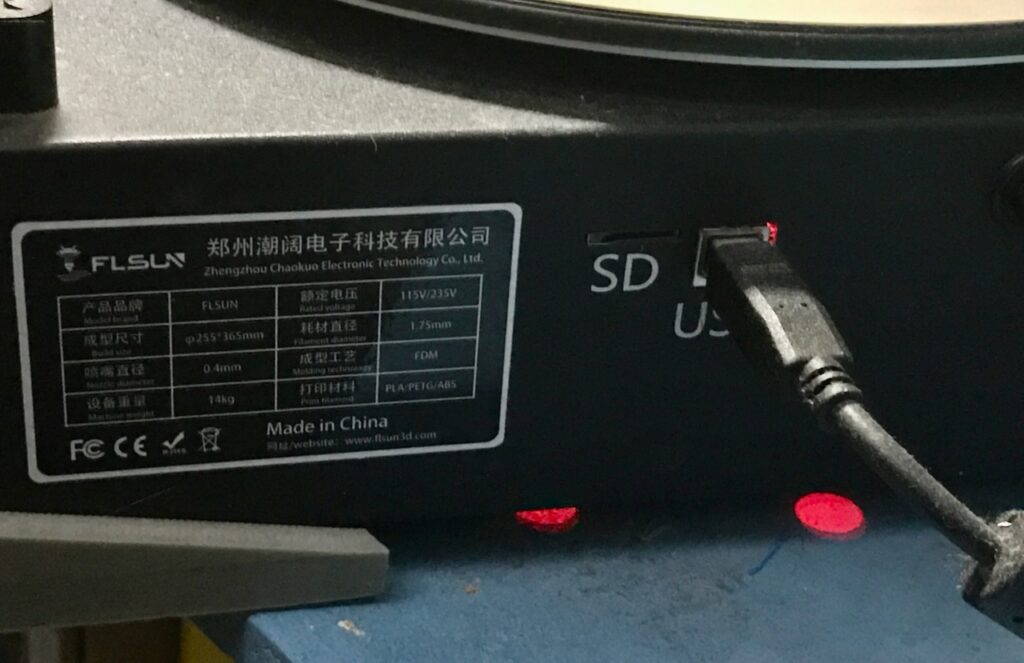
How do you actually print something? The “vanilla” way of getting the .gcode files into the printer is via MicroSD cards. There’s a slot in the side of the printer that can accept these tiny cards:
You’ll print only a few models this way, mostly for calibration tests just after you’ve made modifications to the printer. You’ll find a better way to control the printer than hunching over a control panel and fiddling with teeny SD cards that beg to slip through your clumsy fingers.
Octoprint is a web-based method for controlling 3D printers. The standard way of running Octoprint is to install it on a Raspberry Pi, as part of a complete operating-system image called OctoPi. Fortunately, you’ve previously had experience with a Raspberry Pi as part of your air-conditioner project. Installing and configuring OctoPi will be fairly simple compared to that task. In the long run, the only problem is that you’ll start with cheap MicroSD cards that tend to go bad, forcing you to reinstall Octopi once or twice.
This how the set-up will look:
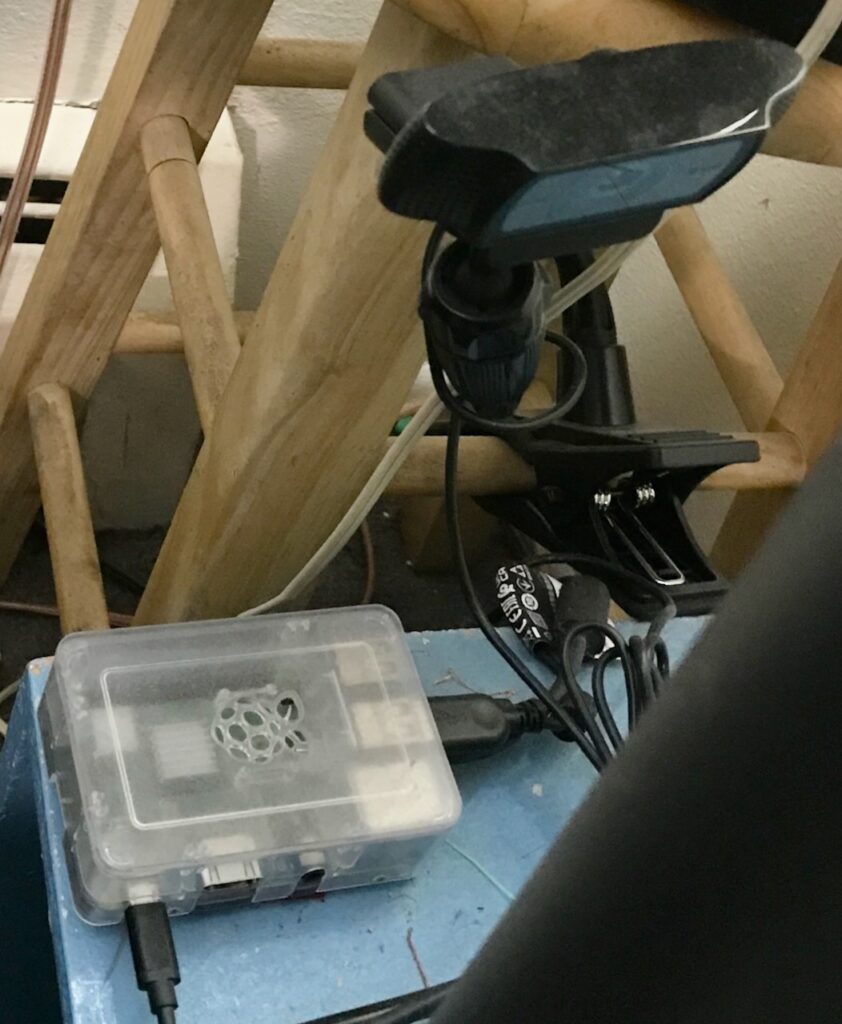
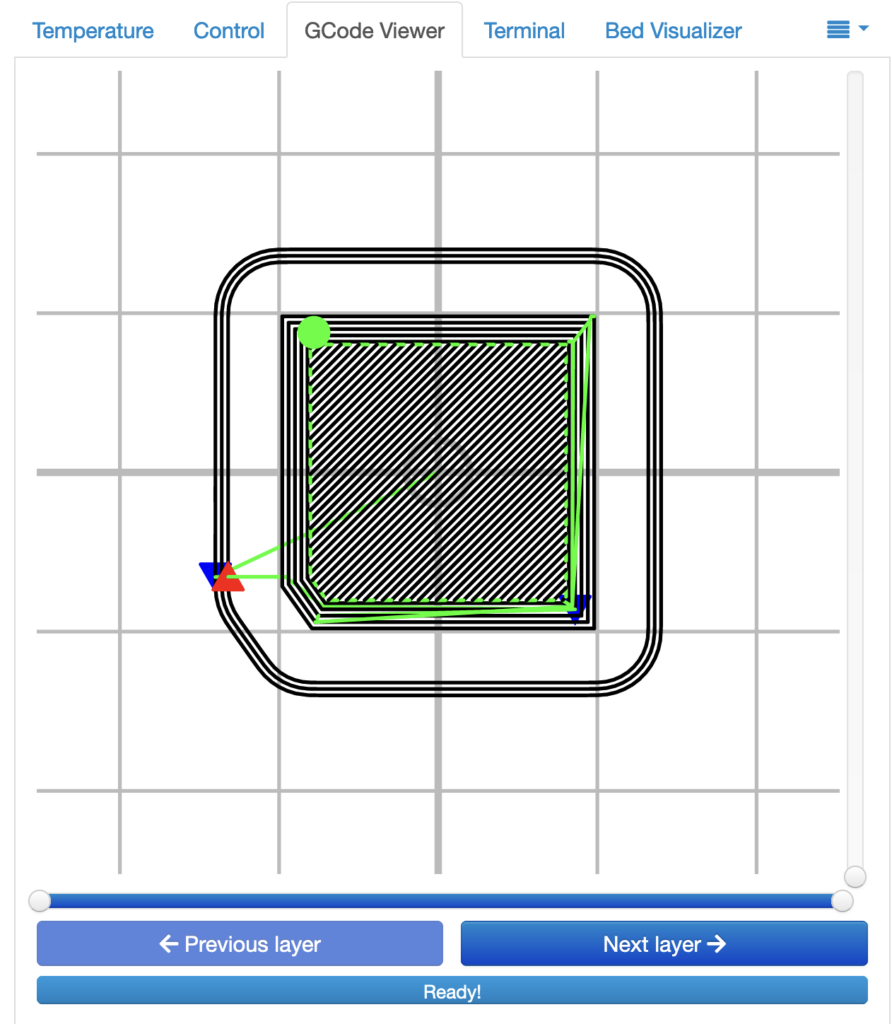
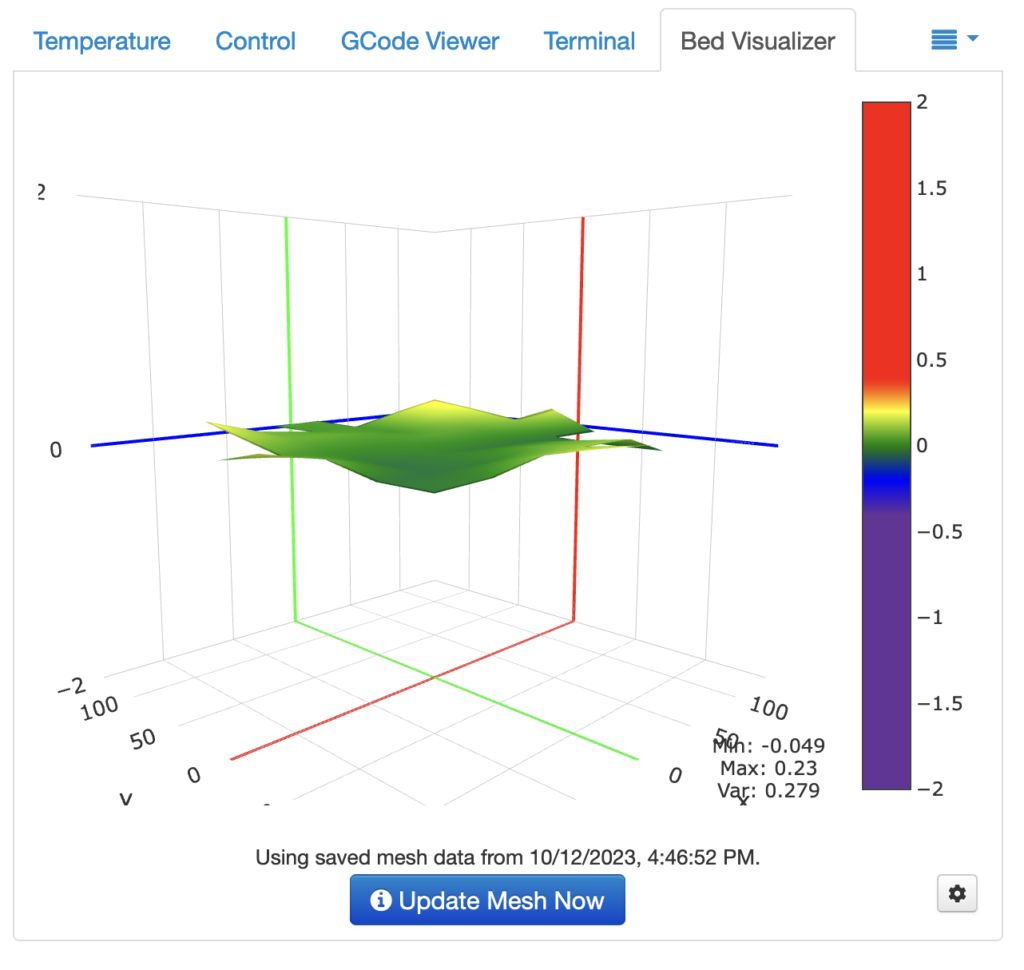
Your Mac will connect to the Pi via wifi. (The QQ-S Pro has internal software that’s supposed to connect to a wifi network, but you’ll never get it to work; it’s not clear if that’s because the wifi chips were never installed, or because you never configured the software correctly.) Once connected, you’ll use Octoprint via your web browser to upload, manage, and send G-code files to the printer. Here are a few screenshots:
Having the web camera lets you use another plugin called Octolapse to make time-lapse videos of your prints. You’ll only do this for a few prints. They’re fun but brief to watch:
If all goes well, your basic “development cycle” will be:
- Obtain a .stl file.
- Use the Cura slicer to create a .gcode file.
- Upload the .gcode file into Octoprint.
- Click on the Print button on Octoprint’s main screen.
- Go and do something else for the hours it takes to print.
Optional steps will include:
- Weep/scream/sigh over a bad print.
- Print many calibration cubes to find the correct slicer parameters to solve the problem.
- Re-slice the original model with the better parameters.
- Print with the new parameters.
- Discover that you haven’t actually fixed anything, or you introduce a new problem.
- Rinse and repeat.
Pandemic
The main reason 3D printers became so popular during the pandemic is that those with 3D printers were called upon to print PPE (Personal Protective Equipment) for the medical workers. As soon as I understood how to print anything at all, I started producing face masks:

I donated dozens of these visors to the ambulance corps near where I live.
It’s the 3D-printing achievement of which I am the most proud.
But by “most proud”, I have to acknowledge that in long run I didn’t feel much pride. For one thing, after a couple of months, the medical community announced that these face visors did not provide significant protection against COVID-19. To be fair, we didn’t know this at the time. In the long run, almost certainly those face visors that I printed for the EMS were simply thrown away; they did very little good.
What would have been more useful, and what some of my 3D-printing friends did, was to print hundreds of these and donate them:
The real “at-home heroes” of the pandemic were those who sewed cloth face masks for hospital workers during the shortage of the N95 masks. Hail to ye all!
Printing projects
Here’s the part I know you’ve waited for, Bill of 2020. What cool things will you eventually print, despite all the problems?
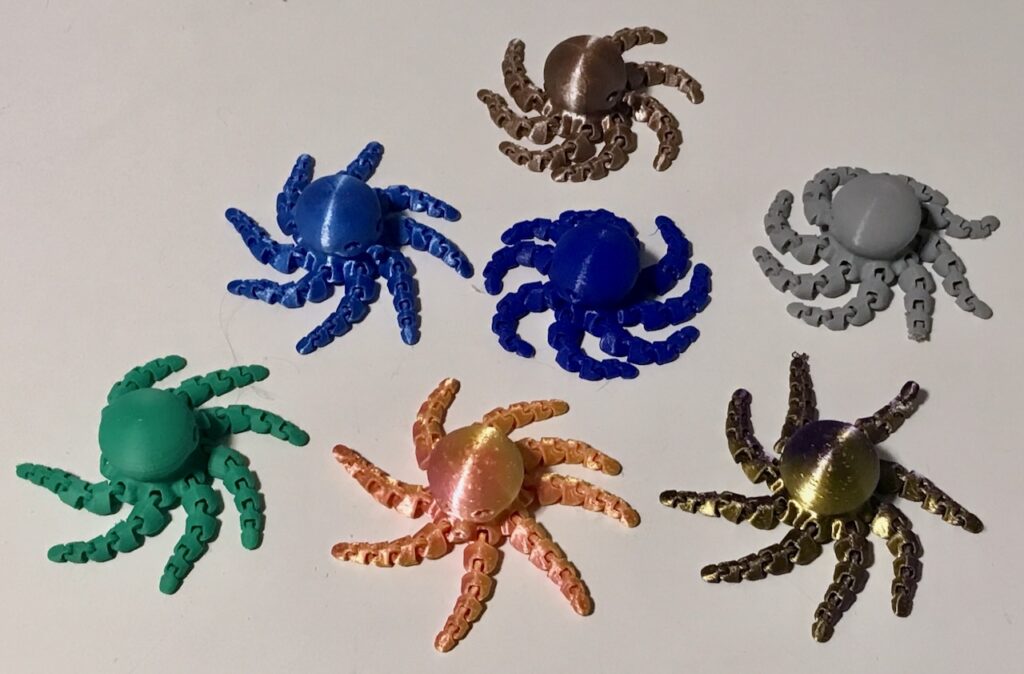
The octopuses demonstrate something that’s easier to 3D print than it is to manufacture by other means. The links in the arms are printed flat, then become flexible as soon as you pull the octopus from the plate. This time lapse shows how one of them prints:
Here’s a video of another flexible print, a “flexible dragon”:
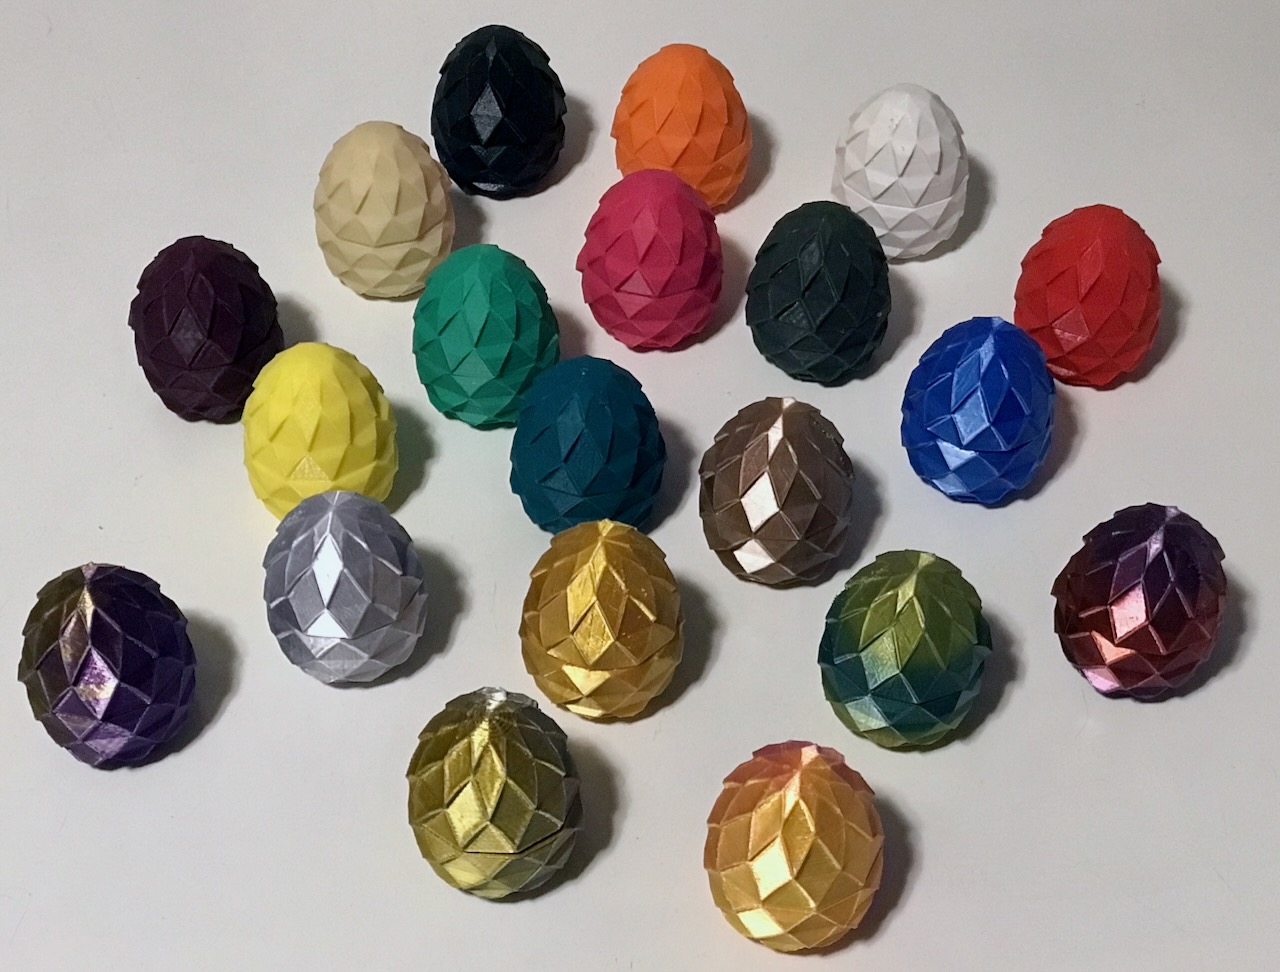
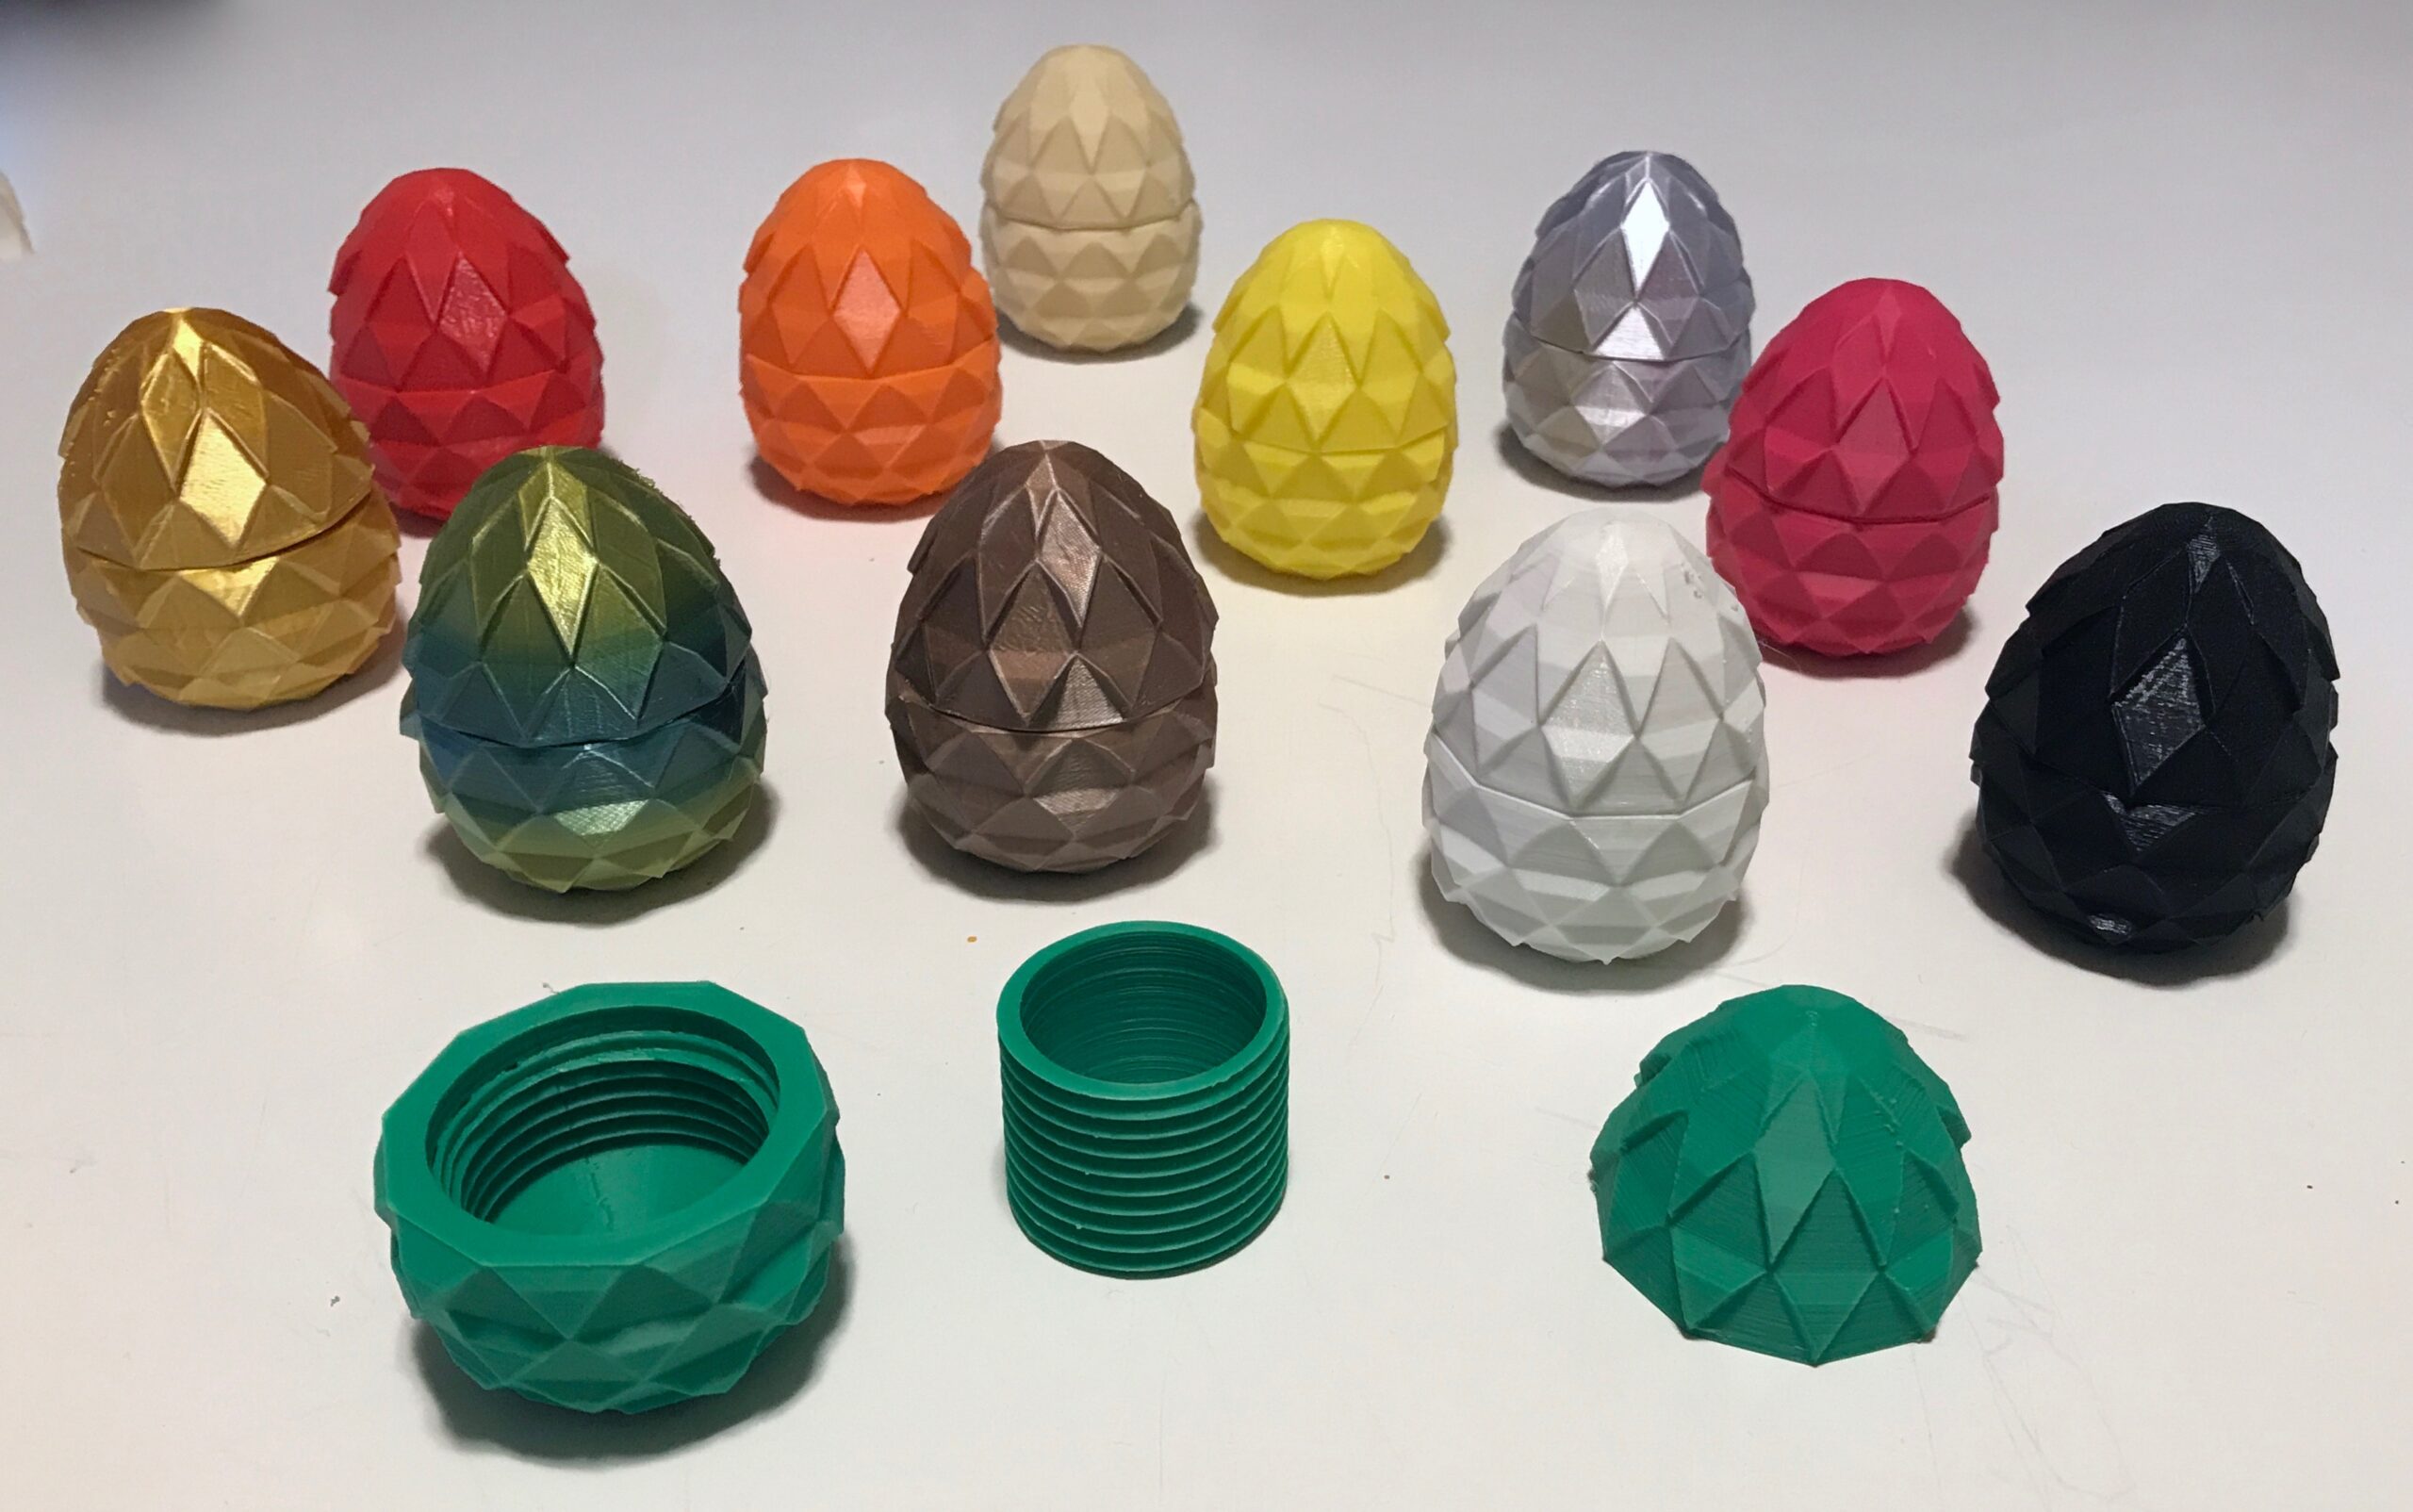
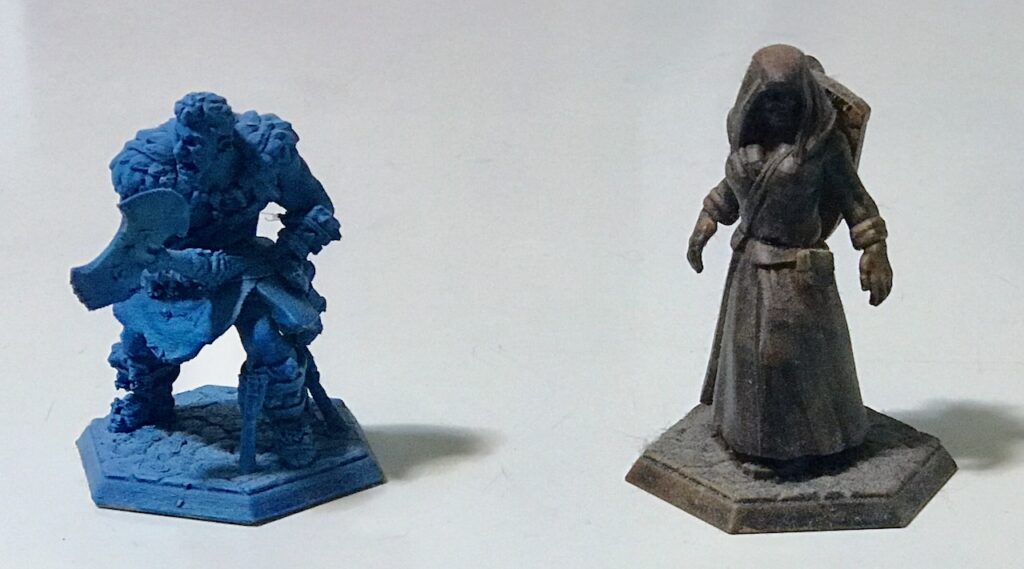
You’ll eventually print your miniature figures:
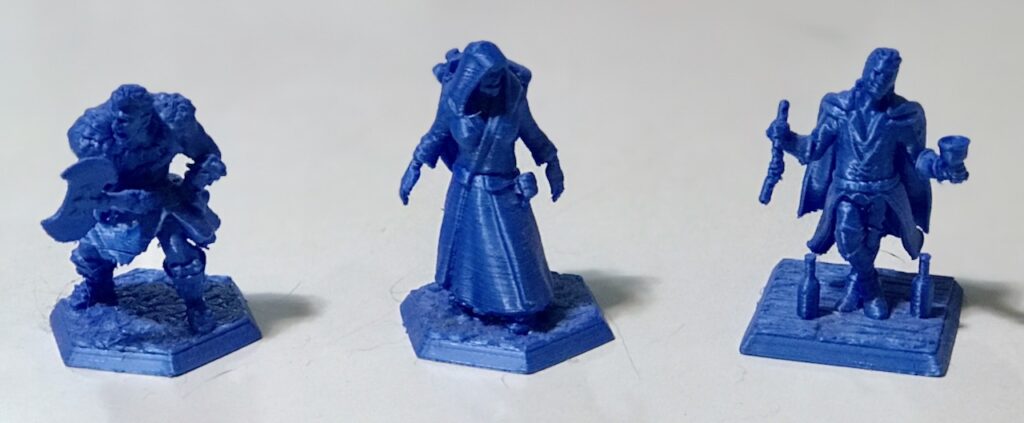
For every miniature that you successfully print, there are three or four that fell apart when you attempted to remove the supports. While part of that can be attributed to your natural clumsiness, the rest of the blame can be assigned to Hero Forge. Their miniatures are almost aggressively designed to be difficult to print on FDM printers. In particular, the ankles snap with very little force. They’re meant to be printed using powder-bed fusion:
Here’s a fun toy. It demonstrates both the power of gravity, and the color shift of rainbox filament.
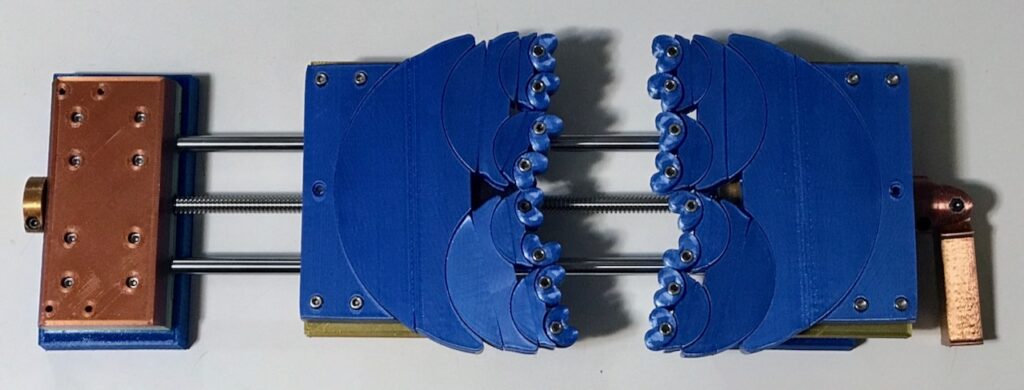
I may not have many vices, but I have my vises:
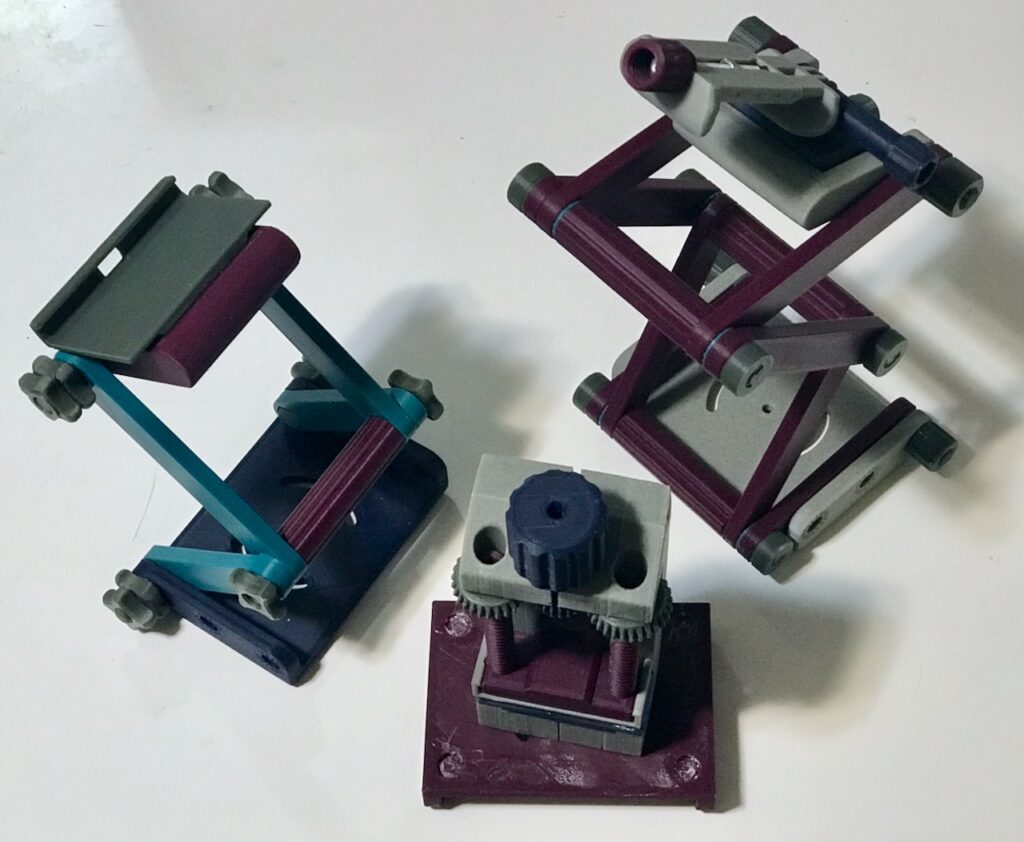
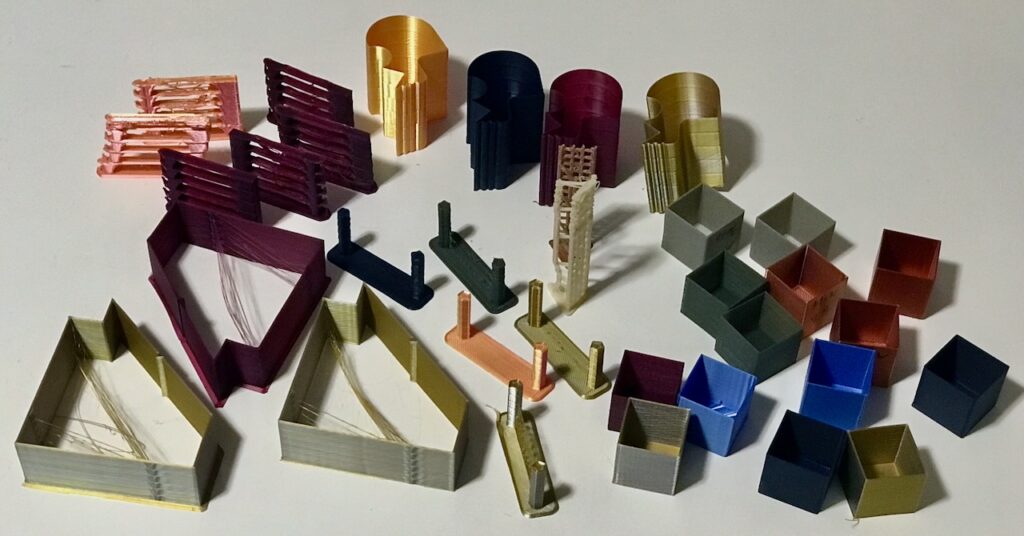
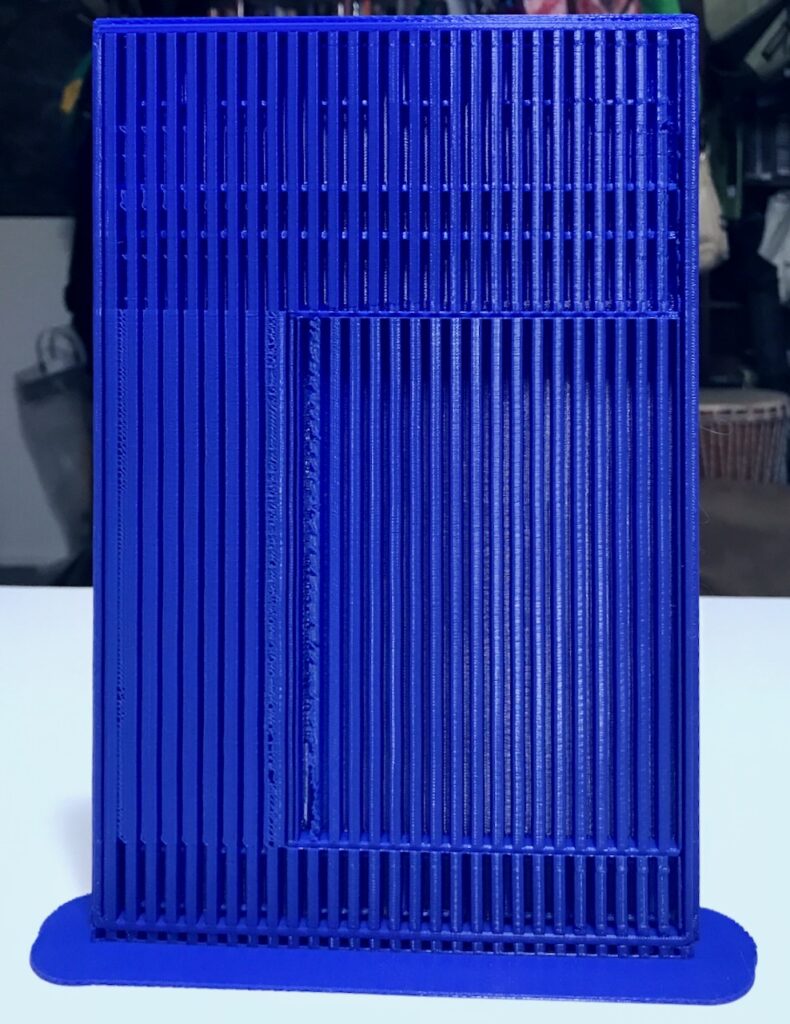
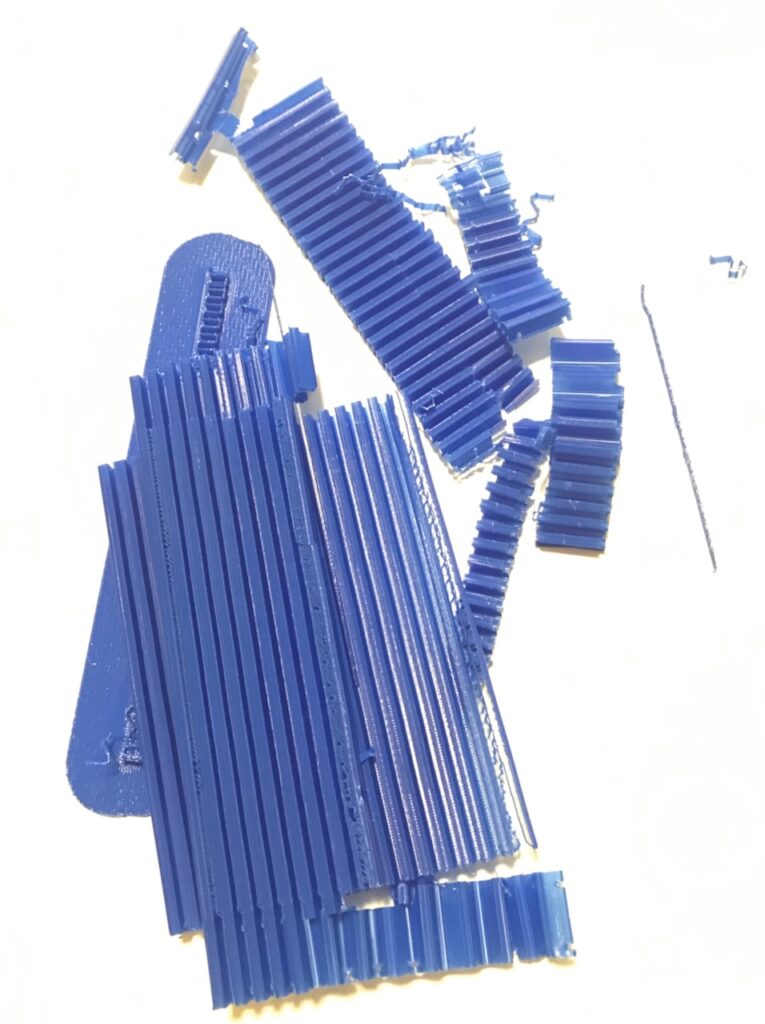
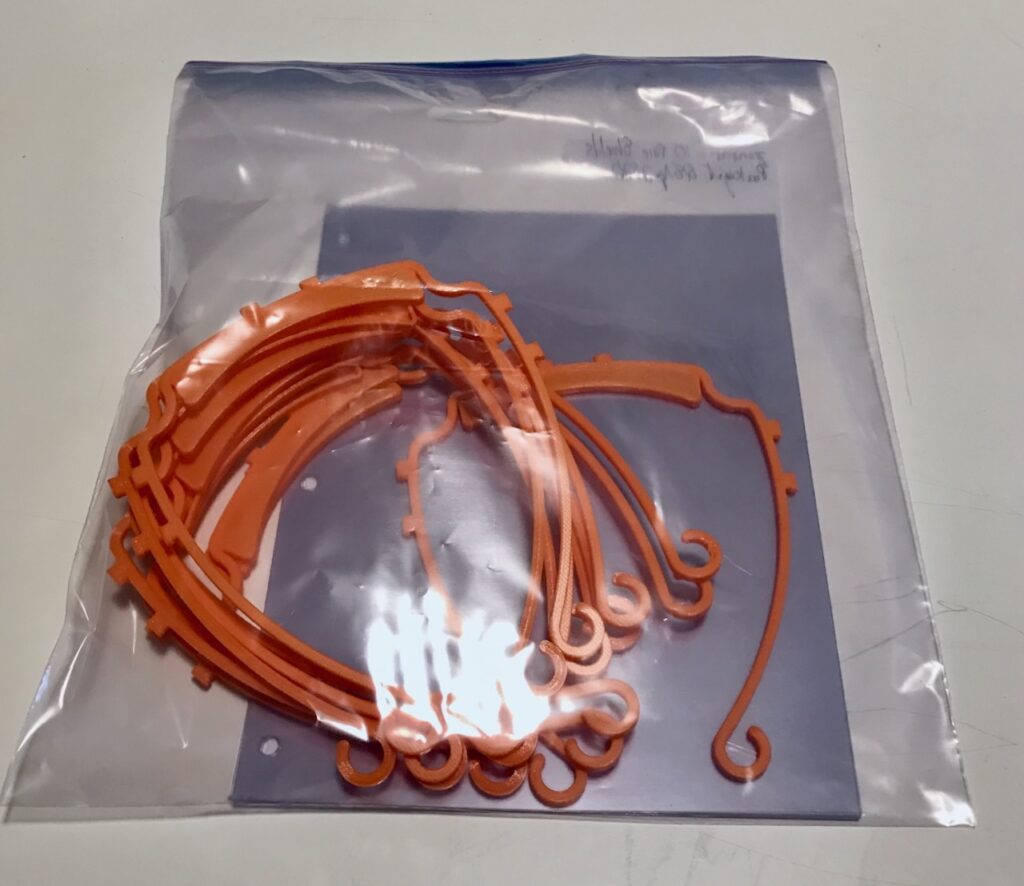
You’ll continue to print inserts for your collection of high-end board games:
There are a couple of related blog posts you’ll write:
- 3D printing 13 bowls, with more examples of 3D design, and pictures of both failed and successful prints.
- Making a holder for miniature figures, in which you’ll go through a complete design process from using 3D software through slicing in Cura.
Time for some honesty
There’s something you’ll have to accept, Bill of 2020: All of these calibrations, recalibrations, test prints, cubes, and tugboats are needed because of the choices you made.
In 2023, current 3D printers have better features (like sensors that tell you if your filament spool has run out) and better support. In particular, current printers come with slicers that have printing profiles for that machine, and with filament profiles for a wide family of plastics. If you don’t make modifications to the hardware or firmware, and you stick with their recognized filaments, you can just slice and print.
At this point, you’re deep in the “sunk cost” fallacy. Having spent so much time, money, and energy on your current printer, you don’t want to invest in a new unit.
Besides, your available bookshelf space hasn’t grown any larger. There still aren’t many printers that can fit in the same space that could make prints as large as your current printer can. Basically the only one you might choose is the FLSun Super Racer, the latest version of the printer you’ll receive in March 2020. This review suggests that it’s necessary to go through the whole multi-dimensional calibration rigamarole for this printer as well.
What else?
There’s so much we haven’t discussed:
- What RepRap means.
- Delta-rod calibration.
- PID tuning.
- E-steps calibration.
- The difference between the jerk and the acceleration parameters.
- 12V vs. 24V electronics (the FLSun QQ-S Pro uses 24V).
- Why I didn’t use the even quieter fans from Noctua (it’s because I didn’t want to mess with a buck converter, an explanation which is of course crystal clear).
- What an “idler” pulley and an “idler” gear are.
- Elephants foot, which plagued many of your 3D prints until you set a separate initial-layer bed temperature.
- Linear advance.
- Key slicing parameters like wall thickness, infill, and seam control (the “white dots” in those Deathgrip slicer pictures).
- Skirts versus brims versus rafts; you can even see a skirt in the G-code viewer picture above.
- The difference between “normal” supports and “tree” supports. (Hint: In the pictures above, the Deathgrip mini has normal supports and that duck scoop has tree supports.)
- Printer profiles and filament profiles in the slicer.
- The differences between Repetier and Marlin firmware.
- How to set up Octolapse in the slicer.
- Using hair spray on the printer bed.
- The tool holders and other extensions for your FLSun QQ-S that you’ll print.
- Khaleesi clips.
- Learning how to use TinkerCAD.
- Household items that you’ll print, such as a paper-towel holder for your bathroom.
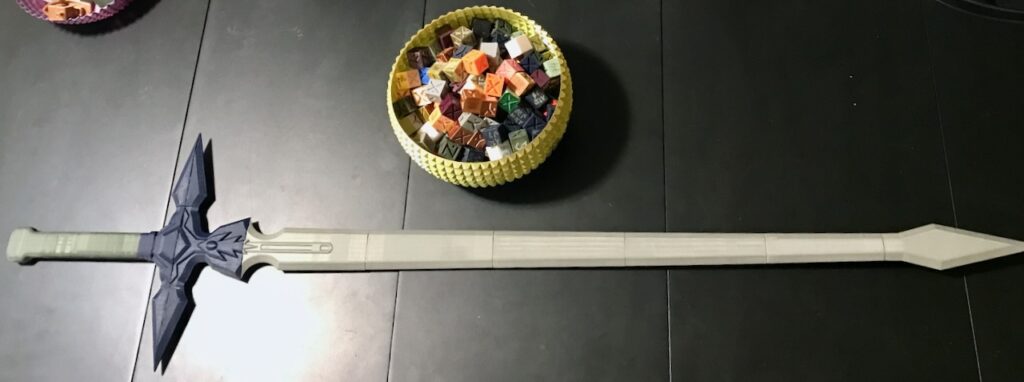
- Your failed attempts to print a lightsaber.
- Recording the weight of new and empty filament spools to judge how much filament you’ve got left in your remaining spools.
- Continuing a print after a power outage (hint: other set-ups can do this; yours won’t).
- Spaghetti prints.
- The YouTube channels to which you subscribe to learn more about 3D printing.
- Why this letter includes Amazon Associates links.
- Why Bill of 2023 has maintained the fiction of writing in second person to Bill of 2020 throughout this long blog post.
- Why this was written as one big blog post instead of being split into smaller posts, as this site has done with most other long tales.
Wrapping it up
Will it all be worth it?
That’s hard to say.
There’ll be a lot of frustrations.
You will scream at the printer more than once. You will even scream at it in the course of writing this letter to yourself; you will want to make a video of a process, and it turned out the firmware had a problem and had to be reinstalled.
There will be times when you print cube after cube to try to track down a problem without success.
There will be months when the printer will just sit there and gather dust.
Despite hours of work, the prints never have the quality of prints made by M (or his partner T).
On the other hand, one day you’ll print a box to hold all the tape cartridges for your label printer.
That will make it worth it. Won’t it?
Now that I’ve vented my spleen at you, Bill of March 2020, perhaps I’ll be able to forge a better peace with the printer I’ve got instead of the printer I wish I had.
Sincerely yours,
Bill of October 2023
Pingback: Baldur’s Gate 3 – The Argothald Journal
Pingback: Baldur’s Gate 3 – Playthrough 11 – Break it down – The Argothald Journal
Pingback: A Windows hater buys a Windows machine – The Argothald Journal