Warning: For the rest of this series of blog posts about this project, I’m going to take a “golly gee-whiz” approach. If you’re an experienced Maker, computer programmer, electrician, or human being you may be bored by them. However, please feel free to read on and (a) laugh at my ignorance, and/or (b) warn me that I’m about to burn down my home.
In the previous post in this series, I went over why I though it was difficult to replace my air conditioner, and so (with substantial help from Dr. Sam Groveman), I planned to create my own Homekit-based controller to turn my A/C on and off.
The first step in the project was to set up a Raspberry Pi, a small computer designed for use in home projects. I purchased the latest model, a Raspberry Pi 3 model B+, as part of a package from Canakit. This included some nice accessories like a case, an HDMI cable (which I never used; see below), and the Raspberry Pi installation software (NOOBS) on an SD card.
I had no problems following the instructions that came with the kit, and inserted the Raspberry Pi in its case:

In the picture, you can see that I installed the optional aluminum heat sinks
on the processor and Ethernet/USB controller; those are the gray vertical ridges you see in the central area of the board. They help keep the chips from overheating during intensive computer tasks. This is not a computationally intensive project, but I decided to play it safe.
Next comes the installation of the Raspberry Pi’s operating system, Raspian. The SD card that came with the Canakit had the software, but I needed a way operate the Raspberry Pi during that installation: a keyboard, mouse, and computer monitor.
There are four USB ports in a Raspberry Pi, and I had plenty of spare USB keyboards and mice that I could take out on loan from work. However, for video display the Raspberry Pi only has an HDMI port, and all the available spare monitors at work were old and only had VGA ports. Foreseeing this, I purchased an HDMI-to-VGA adapter.
When I cabled up the Raspberry Pi to all these devices, it looked like this:

In the lower right is the adapter, with a VGA cable plugged in (the adapter doesn’t come with one). The adapter’s power comes from a USB connector plugged into the Raspberry Pi’s right-hand side, along with the USB keyboard and USB mouse. On the bottom of the Raspberry Pi, the HDMI connector from the adapter is plugged into the HDMI port. The last connector on the lower left is the Raspberry Pi’s power cable, which connects to a power dongle that fits into a standard power outlet.
Again, there were no problems with the software installation. It took a few minutes for NOOBS to install Raspian:

Edit: It later turned out that it might have been a bit easier if I did a Raspian image install instead of using NOOBS; see part 6.
Following the directions in the Canakit, I logged into the Raspberry Pi and connected it to my WiFi network.
For such a small computer, I was pleasantly surprised at the amount of software that came preinstalled in Raspian. At work I use CentOS and on a Mac there’s Darwin. Raspian is based on Debian, with which I have much less experience. Still, I knew enough to navigate around the directories, look for configurations files, and install my favorite text editor, emacs.
As nice as the Raspian graphical interface was, I wanted to program the Raspberry Pi by connecting to it via ssh from my desktop Macintosh. I enabled the SSH service via one of the preference menus, and noted the IP and MAC address of the Raspberry Pi:
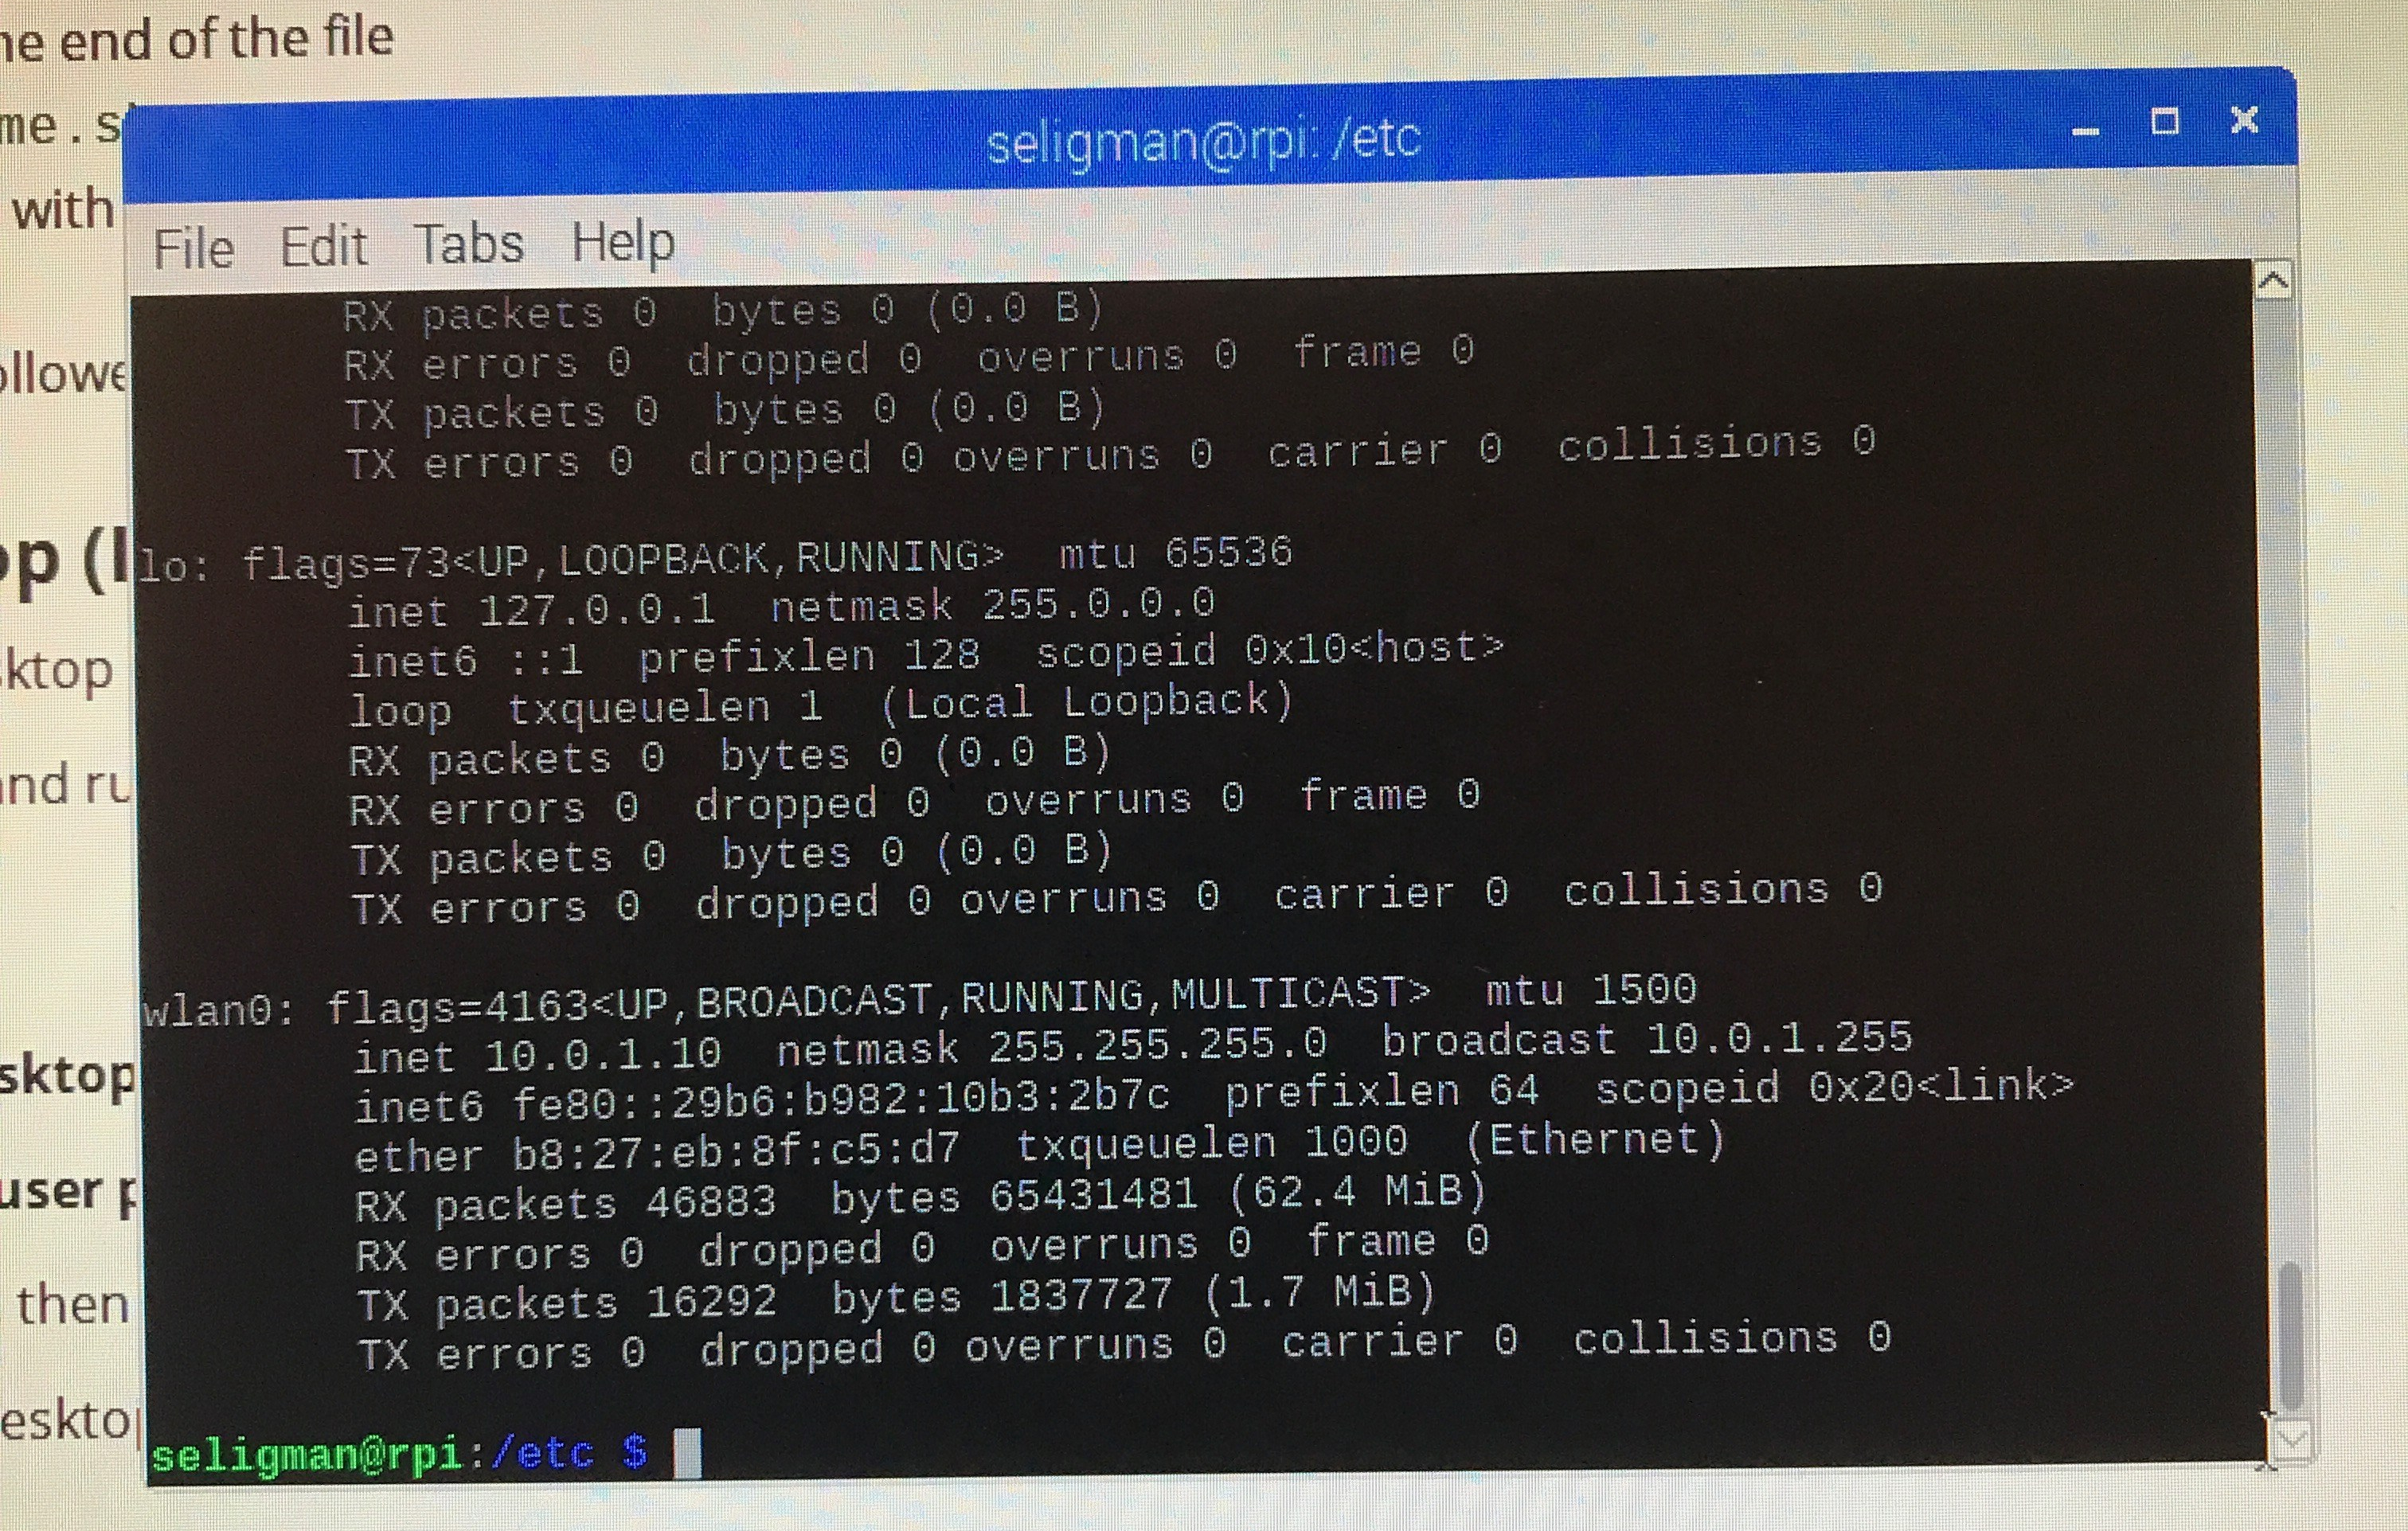
I got the above by running the Terminal program and typing ifconfig on the command line. (If you’re sharp-eyed, you’ll notice that I created a ‘seligman’ account to use instead of the standard ‘pi’ account. I won’t go into how I did this [since most folks will probably be happy to use ‘pi’] but you’ll see why I did this below.)
The output above told me that my WiFi router had assigned the IP address 10.0.1.10 to the Raspberry Pi; it’s the number after the ‘inet’ in the ‘wlan0’ paragraph. I went to my desktop Mac and verified I could connect to the Raspberry with either ssh pi@10.0.1.10 or ssh seligman@10.0.1.10. That was fine, but of course I wanted more.
I went into my WiFi router’s configuration and told it that the MAC address of the Raspberry Pi (it’s after the word ‘ether’ in the above picture) was always to be assigned the IP address 10.0.10.0. That assured me that the Raspberry Pi would always have the same IP address no matter how or when I rebooted it (unless my router went down, in which case I’d have much bigger problems than fiddling with the Raspberry Pi). Then I edited the contents of a configuration file on my desktop Mac:
sudo emacs /etc/hosts
…adding the line
10.0.1.10 rpi
This meant that from now on, my desktop Mac would interpret the IP name ‘rpi’ as the IP address ‘10.0.10.0’. Now I could login to the Raspberry Pi with ssh seligman@rpi.
Good enough? Of course not! Fortunately, with ssh, if you don’t supply an account name, it assumes the same name as the account you’re using to issue the ssh command. On my Mac, that account is ‘seligman’. So I can login to my Raspberry Pi with:
ssh rpi
Is that good enough? Almost. I still have to type the password for the ‘seligman’ account on the Raspberry Pi every single time I login. Since my network is private, why go through that hassle? I set up passwordless ssh from my Mac’s ‘seligman’ account to the Raspberry Pi’s ‘seligman’ account. Now all I have to do on my Mac is type ssh rpi and I’m on the Raspberry Pi, ready to work.
Since I configured remote access to the Raspberry Pi, there’s no need for the keyboard, mouse, and monitor to be attached to it anymore. Here’s the Raspberry Pi, all configured, accessible, and ready for the next phase of the project:

I included the deck of cards so you can get an idea of the size of this small computer.
Next up: Homekit and GPIO
Pingback: 230V Air Conditioner and HomeKit, part 4: HomeKit – The Argothald Journal
Pingback: 230V Air Conditioner and HomeKit, part 8: Power Cords – The Argothald Journal
Pingback: 230V Air Conditioner and HomeKit, part 9: The Box – The Argothald Journal
Pingback: A Windows hater buys a Windows machine – The Argothald Journal