Forward
This was originally a single long essay. I’ve split it into four parts to make it easier on folks using phones to read it. If you see something like “I discuss this below” it refers to the entire article, not just the page you’re reading.
CW: There’s at least one photo in the overall essay with partial nudity. However, because of the split, I’m not sure which section it’s in.
An image with a blue outline is a link you can click on. I suggest you use a desktop browser if you can, because of the photos and any link hovertext.
After working on this essay for a few weeks, I’m beaten to the punch by the excellent Baldur’s Eyes publication of their tutorials. I decided to publish my essay anyway, because their approach emphasizes mods and post-processing to create individual images, while I eschew these tools and focus on creating many images for my fanfic.
Introduction
If you came here looking for beautiful, epic images like those in this Baldurs Gate 3 Virtual Photography Gallery or Zoey Ferox on Gamejolt, I’m sorry to disappoint you. However, if you’re looking for the first baby steps towards VP, ones that don’t involve mods or complex graphics tools, there’s something here for you.
This essay is a sequel of sorts to an earlier post I wrote on BG3 photo mode. Since I wrote that post, I’ve learned a few things, and even developed a style.
Consider my most recent fanfic prior this essay. In the five posts in which I share the stories I wrote for my playthrough 17, I have 374 images. The purpose of this essay is to describe both why my BG3-related posts have moved in the direction of so many images, and how I make them.
I also have a separate post that explains the connection between my playthroughs and my fanfic. Virtual photography (VP) is an important part of that relationship.
Do I know what I’m doing?
If you know anything at all about photography, composition, or design, as I discuss my approach please feel free to say:
- “Duh! That’s obvious!”
- “This guy doesn’t know what he’s talking about.”
I’m aware that I must be (re-)learning or making (stupid) mistakes that are taught in day one of a photography / composition / design class. As I noted above, my fanfic now tends to consist of hundreds of images selected out of thousands, many of them edited with captions, all to create a “comic strip” that almost no one will read (except you, but you’re special). I already plan even more ambitious fanfic for playthroughs 18 and 15, as I discussed in my playthrough and fanfic post.
If I spend too much time improving my technique, it will take even longer than it already has… all to produce a teeny rivulet of personal fanfic against the mighty river of BG3 fanfic, which is in turn only a small part of the ocean of fanfic in general.
I have to impose some limits on this hobby, otherwise it will erase too much of time.
I’ve already had to restrain myself several times from re-doing the story of Laurelin!
Limits
As an example of talent, consider this:

It’s a magnificent image. If you’ve played the game and know Shadowheart’s story, it’s a lovely match of composition and theme.
It’s not mine. It was posted to X by zzenerva. I’m quoting it from from Larian’s Community Update #35.
Once I see a piece like this, I can make some effort to duplicate it:
This illustrates what you’ll see in this post: I’m a technician, not an artist. If I see an idea I can adapt it. Please don’t expect much true creativity in this post, my fanfic, or my VP.
This essay describes my technique. I hope you can use what’s here and create something truly special of your own.
Why?
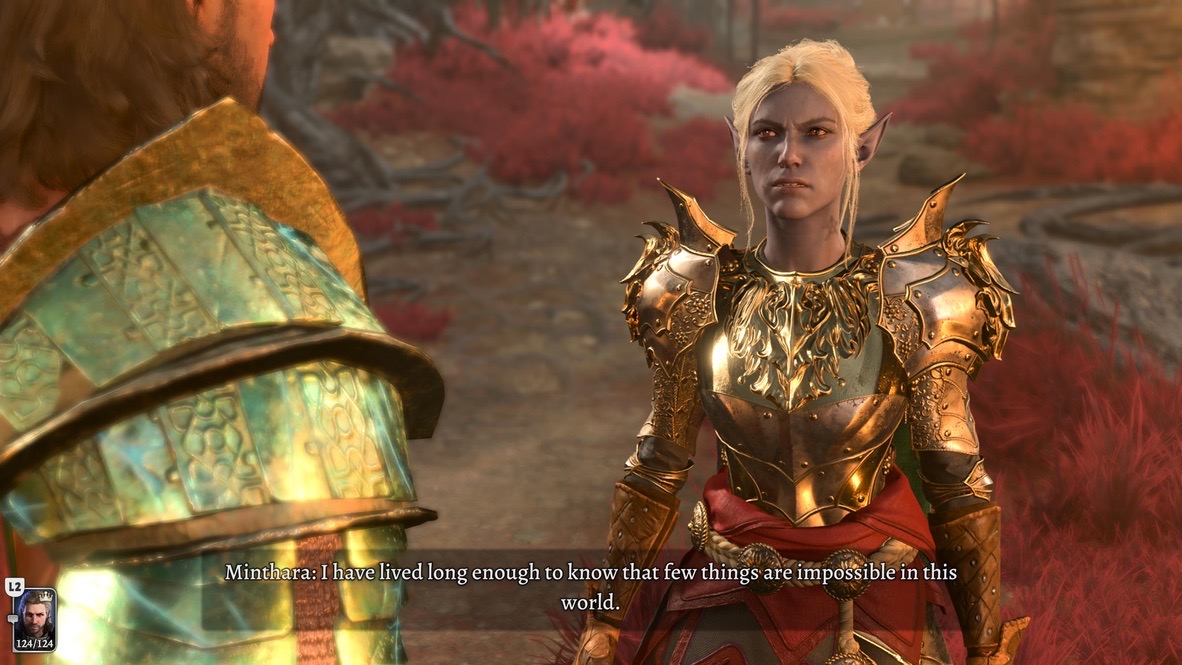
Let’s consider the “history” of my fanfic and images. When I wrote my first fanfic post, I included a few images with large chunks of expository text in-between. The images were entirely screenshots from the game, since at the time Photo Mode was not available in Baldur’s Gate 3.
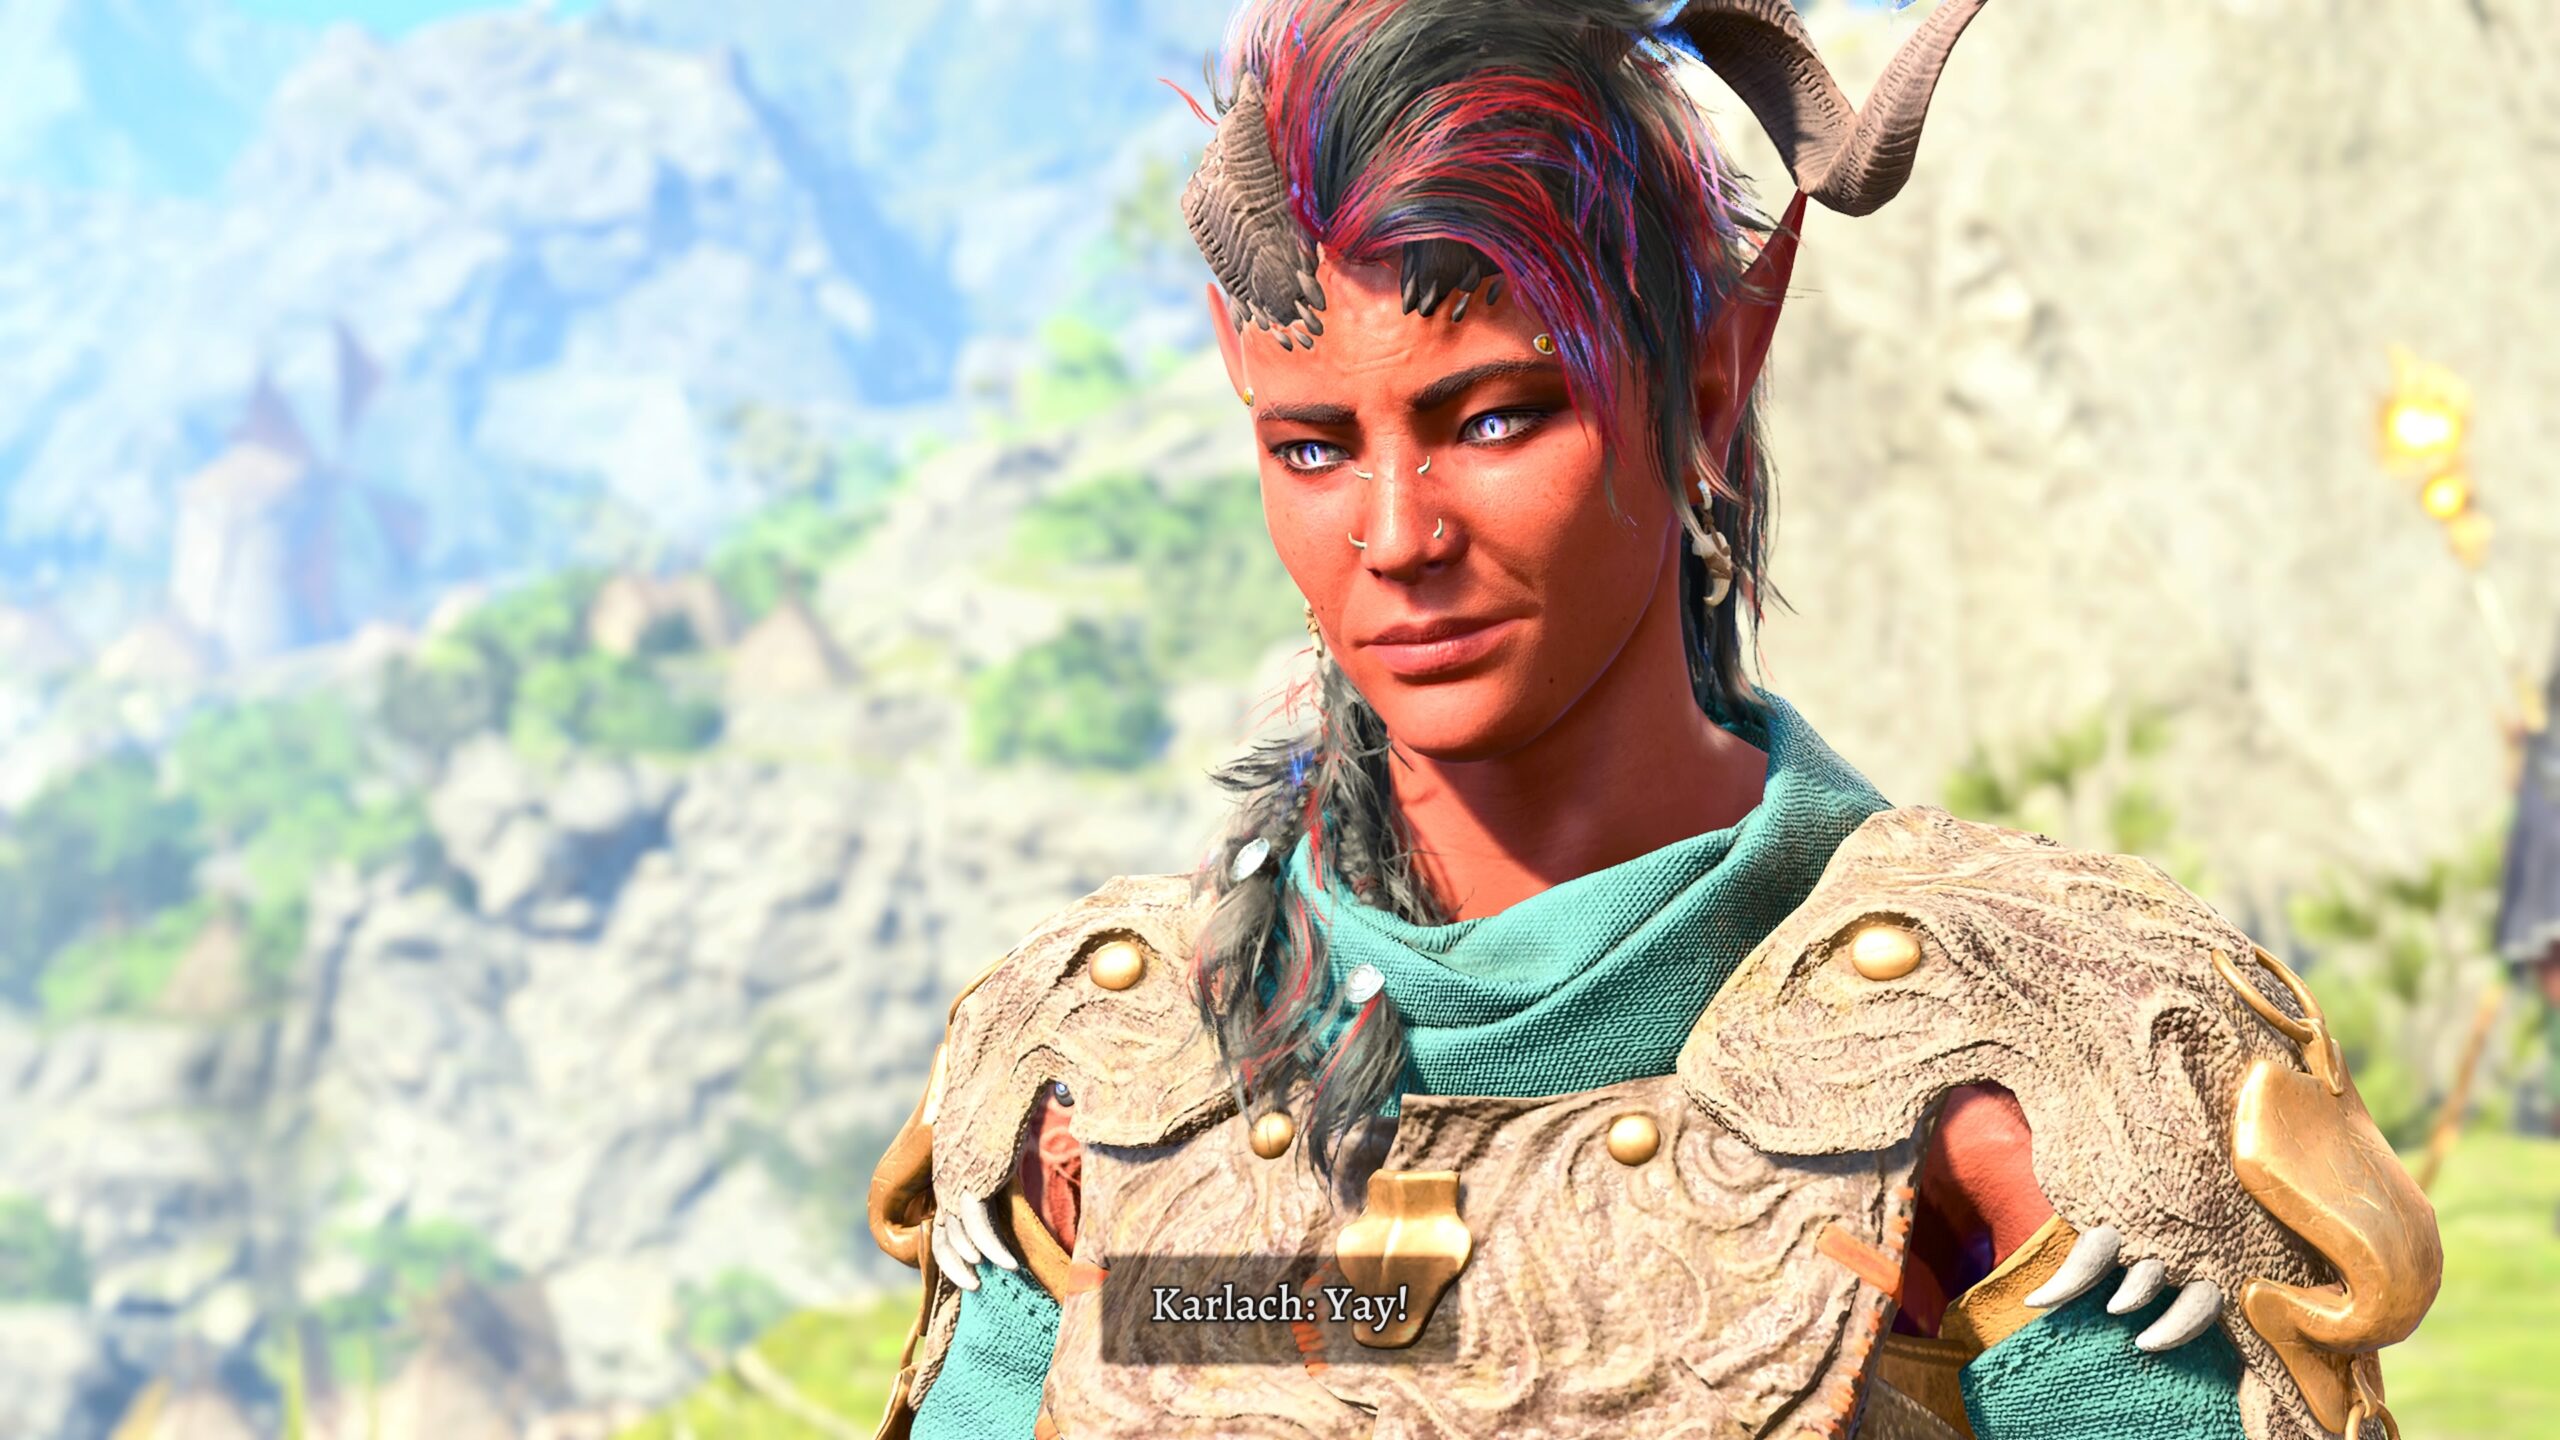
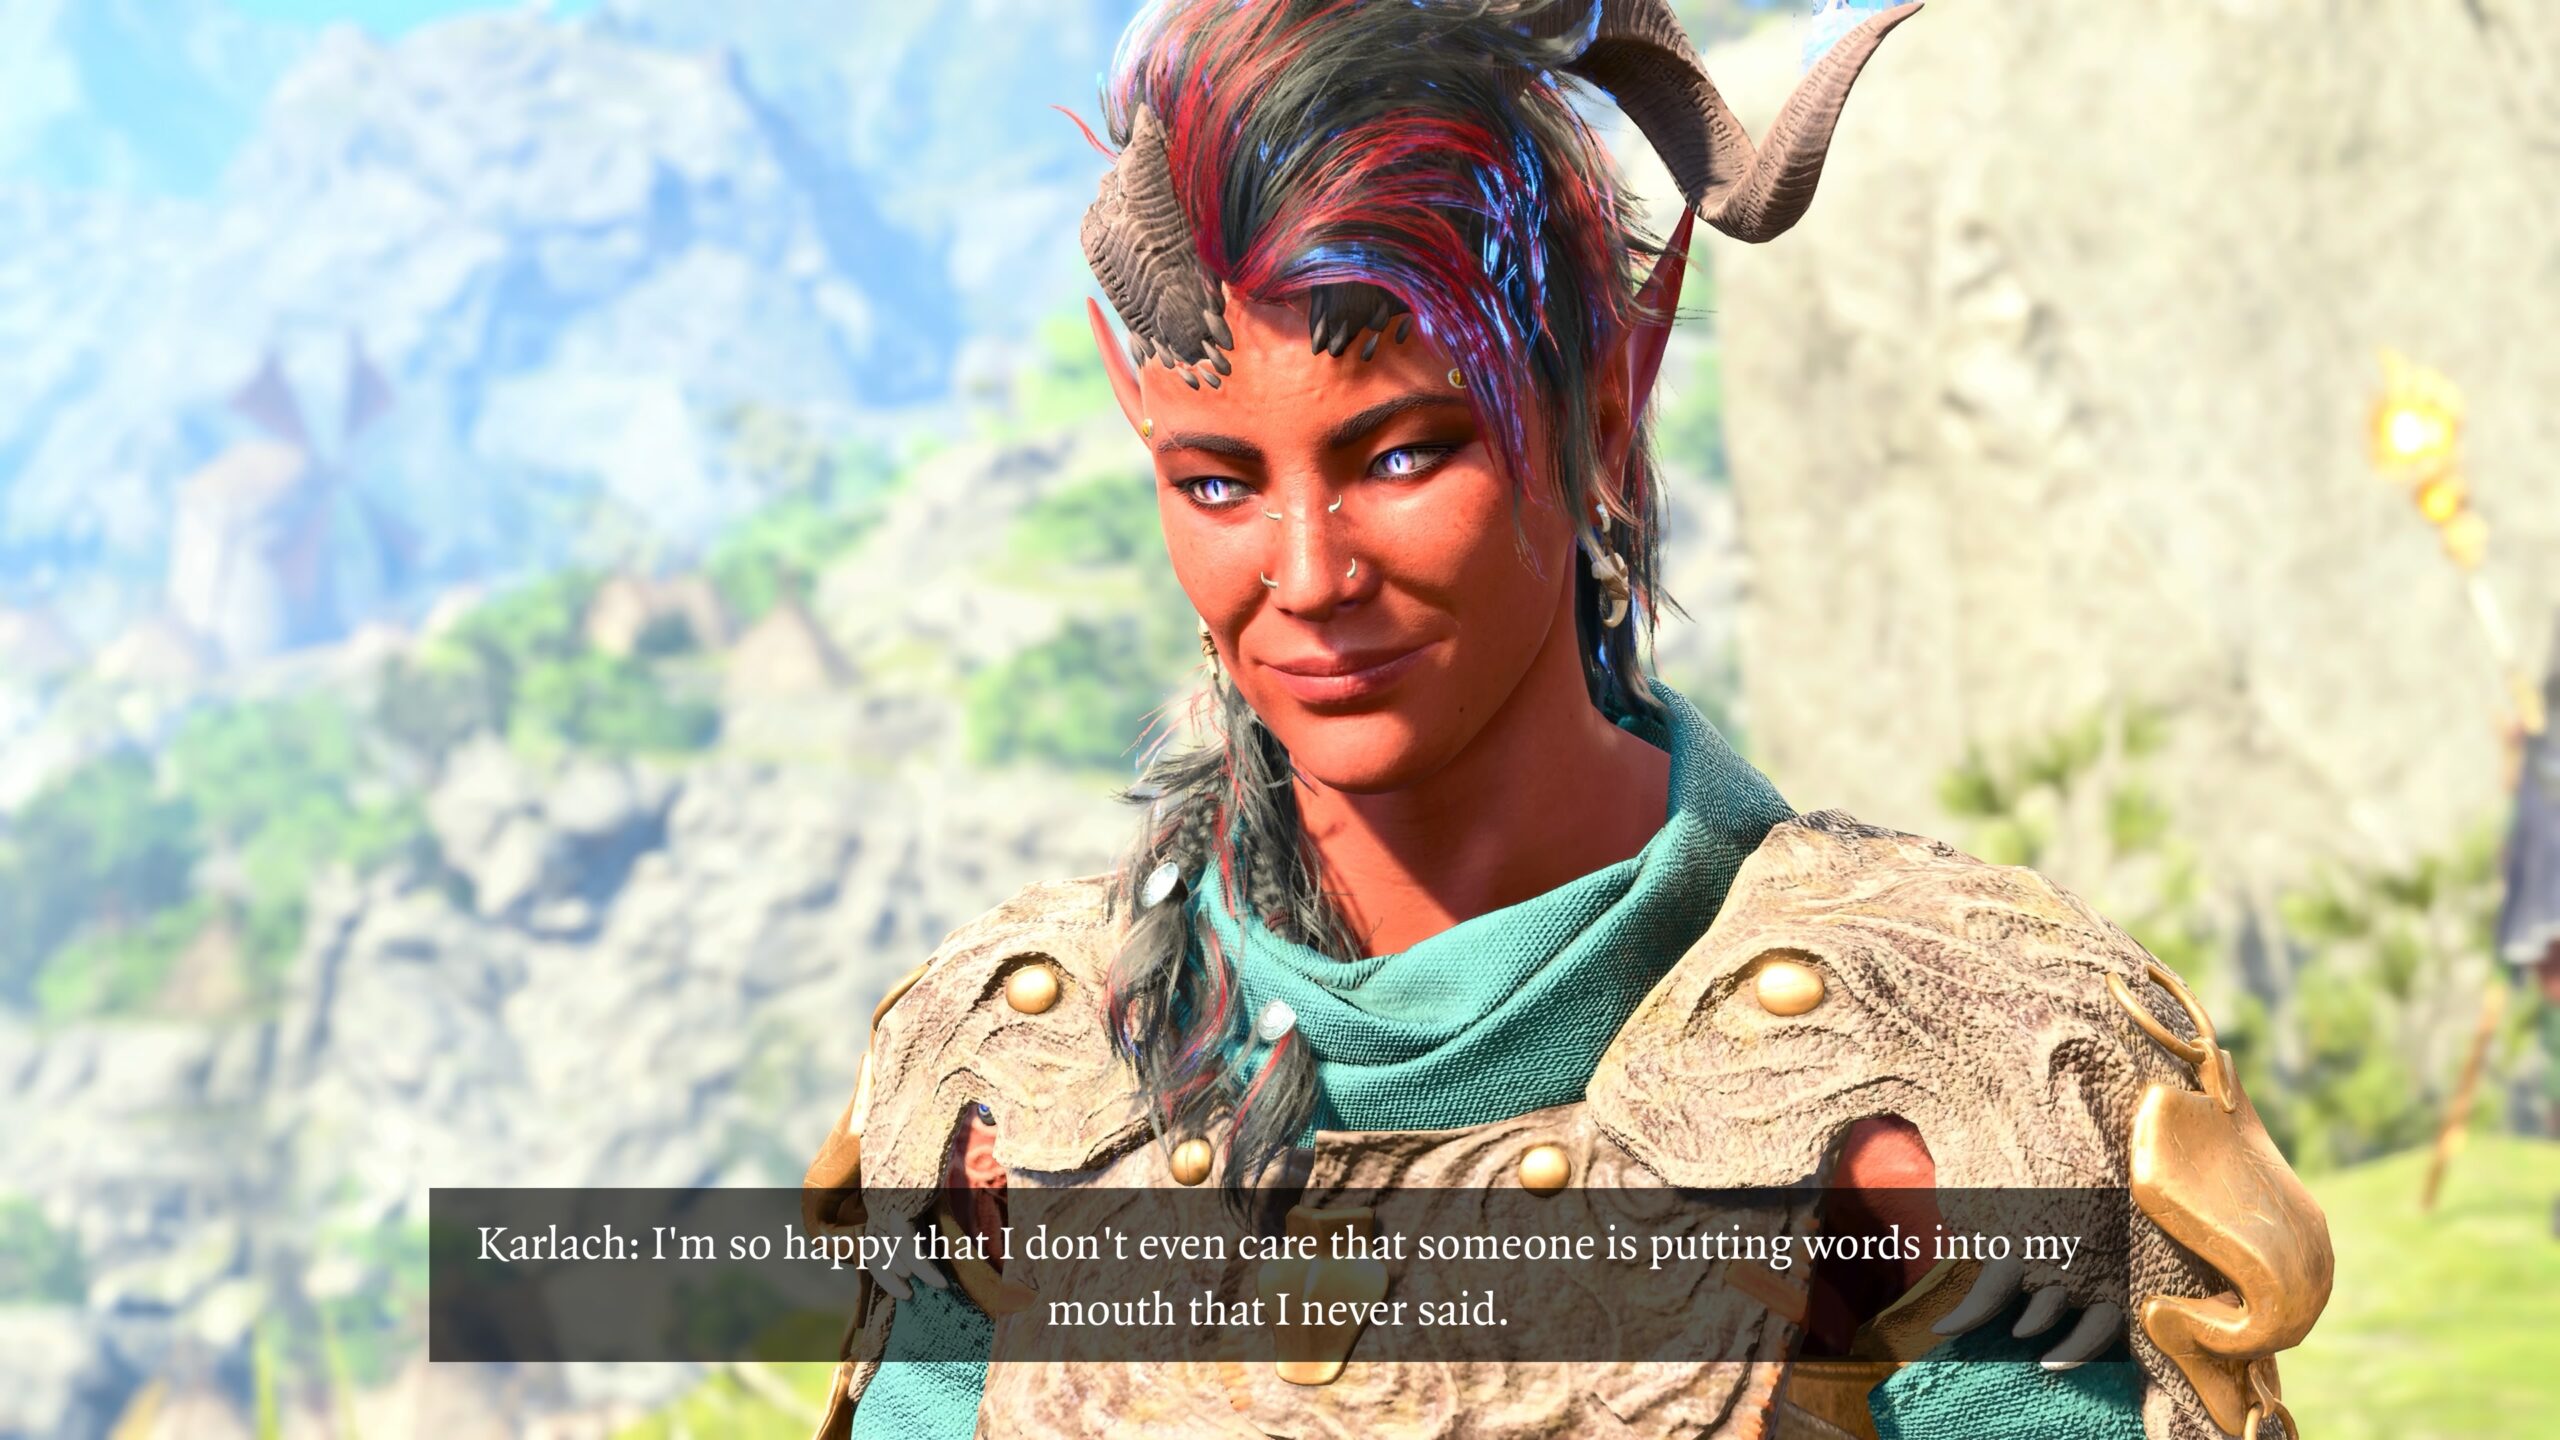
My practice, in both my fanfic and my other BG3-related blog posts, was to engage in a fictional back-and-forth between the game’s captions in the screen-captured images and my text captions. For example:
I get very little feedback about my BG3 posts in general and my fanfic in particular. I know the reasons why:
- My blog is read by very few people, especially now that I no longer announce new posts on FB.
- Let’s be frank: What I write is not particularly compelling.
The only substantial feedback I got on my BG3 posts is that they seem too complicated. In response:
- I reserved the system-related material in my playthrough write-ups to the end, with the story-related stuff near the top. For example, compare my playthrough 7 write-up to the one for my playthrough 10. My idea was to put the icing before the cake.
- I started interspersing more pictures even in my system and rules discussions. The assumption I made is that breaking up text-only sections with pictures made reading the posts more tolerable. You can see the difference in my discussion of the BG3 action economy versus my more recent article on dice checks.
- For the playthrough write-ups, I pulled out any system material and put them in separate articles. I also split up any story or fanfic into multiple sections so that a single post won’t demand too much scrolling, especially on phones. Consider the difference between the long details about the characters’ gear at the end of my introduction of Arctic Druid Angela and the multi-part saga of Sandalwood the Wicked I wrote a year later.
- At this point, even my system or rules discussions are both preceeded and suffixed by fanfic. I hope the fanfic eases the transition into the system discussion, and the reward for going through my prose is some more pretty pictures.
Has this made the posts better? I don’t know. You have to be the judge of that.
In the end, I’m writing these BG3 posts for me: a record of what I’ve done, what I’ve learned, and to set down those stories that pop into my head as I play the game. I hope they please the readers too. If not, well… I’m neither charging for this blog nor selling ads on it. Sometimes, if something is free, you get what you pay for.
I’m certainly not the only one to write BG3 fanfic. However, I’m pretty sure I’m the only one writing about my fanfic creation Arctic Druid Angela and the coterie of characters I’ve built around her. In the midst of the central unoriginality of the conceit (I did not invent the universe of Forgotten Realms, the game Baldur’s Gate 3, nor the characters and events therein) I’ve carved a small piece that feels like mine (though legally it isn’t, of course).
I should also acknowledge that I’m far from the first to assemble materials from a video game in order to tell my own story. The folks who create machinima have done this with video games since the 1980s. Virtual photography is recognized as a storytelling technique.
Lots of pictures
As I shift into all-picture fanfic (pictorials, comic strips, or whatever you’d like to call them), I take an increasing number of pictures.
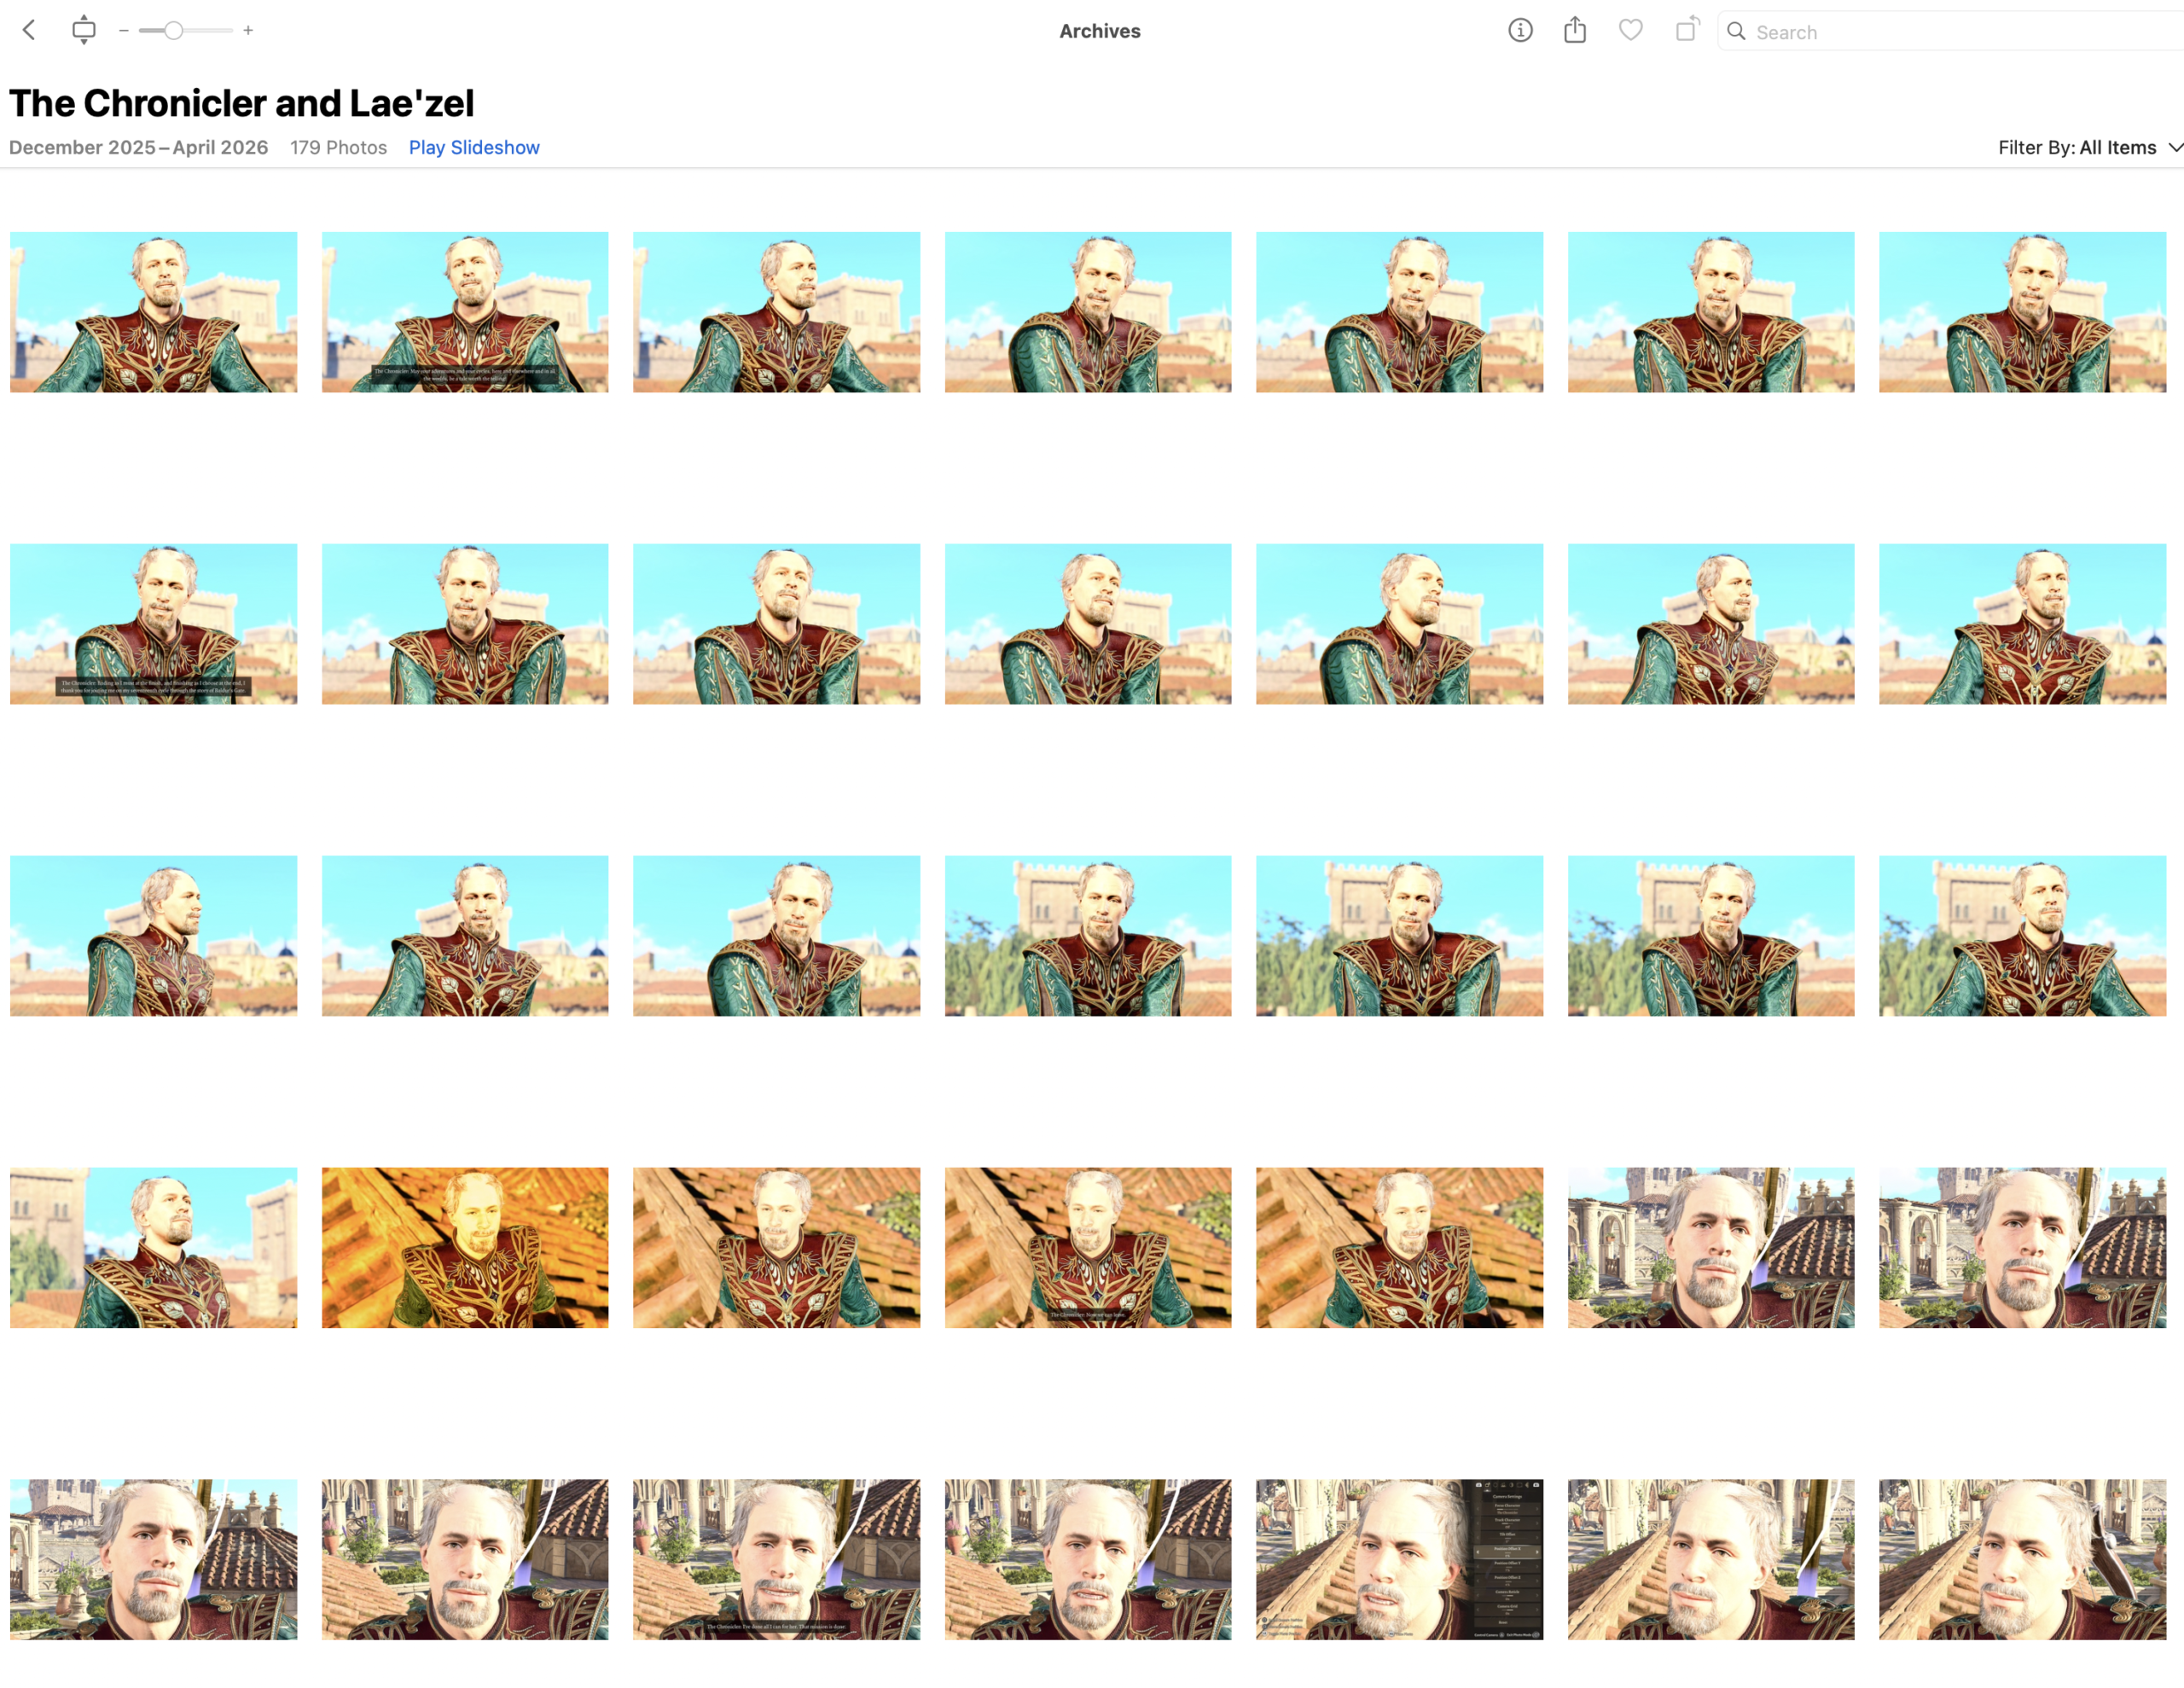
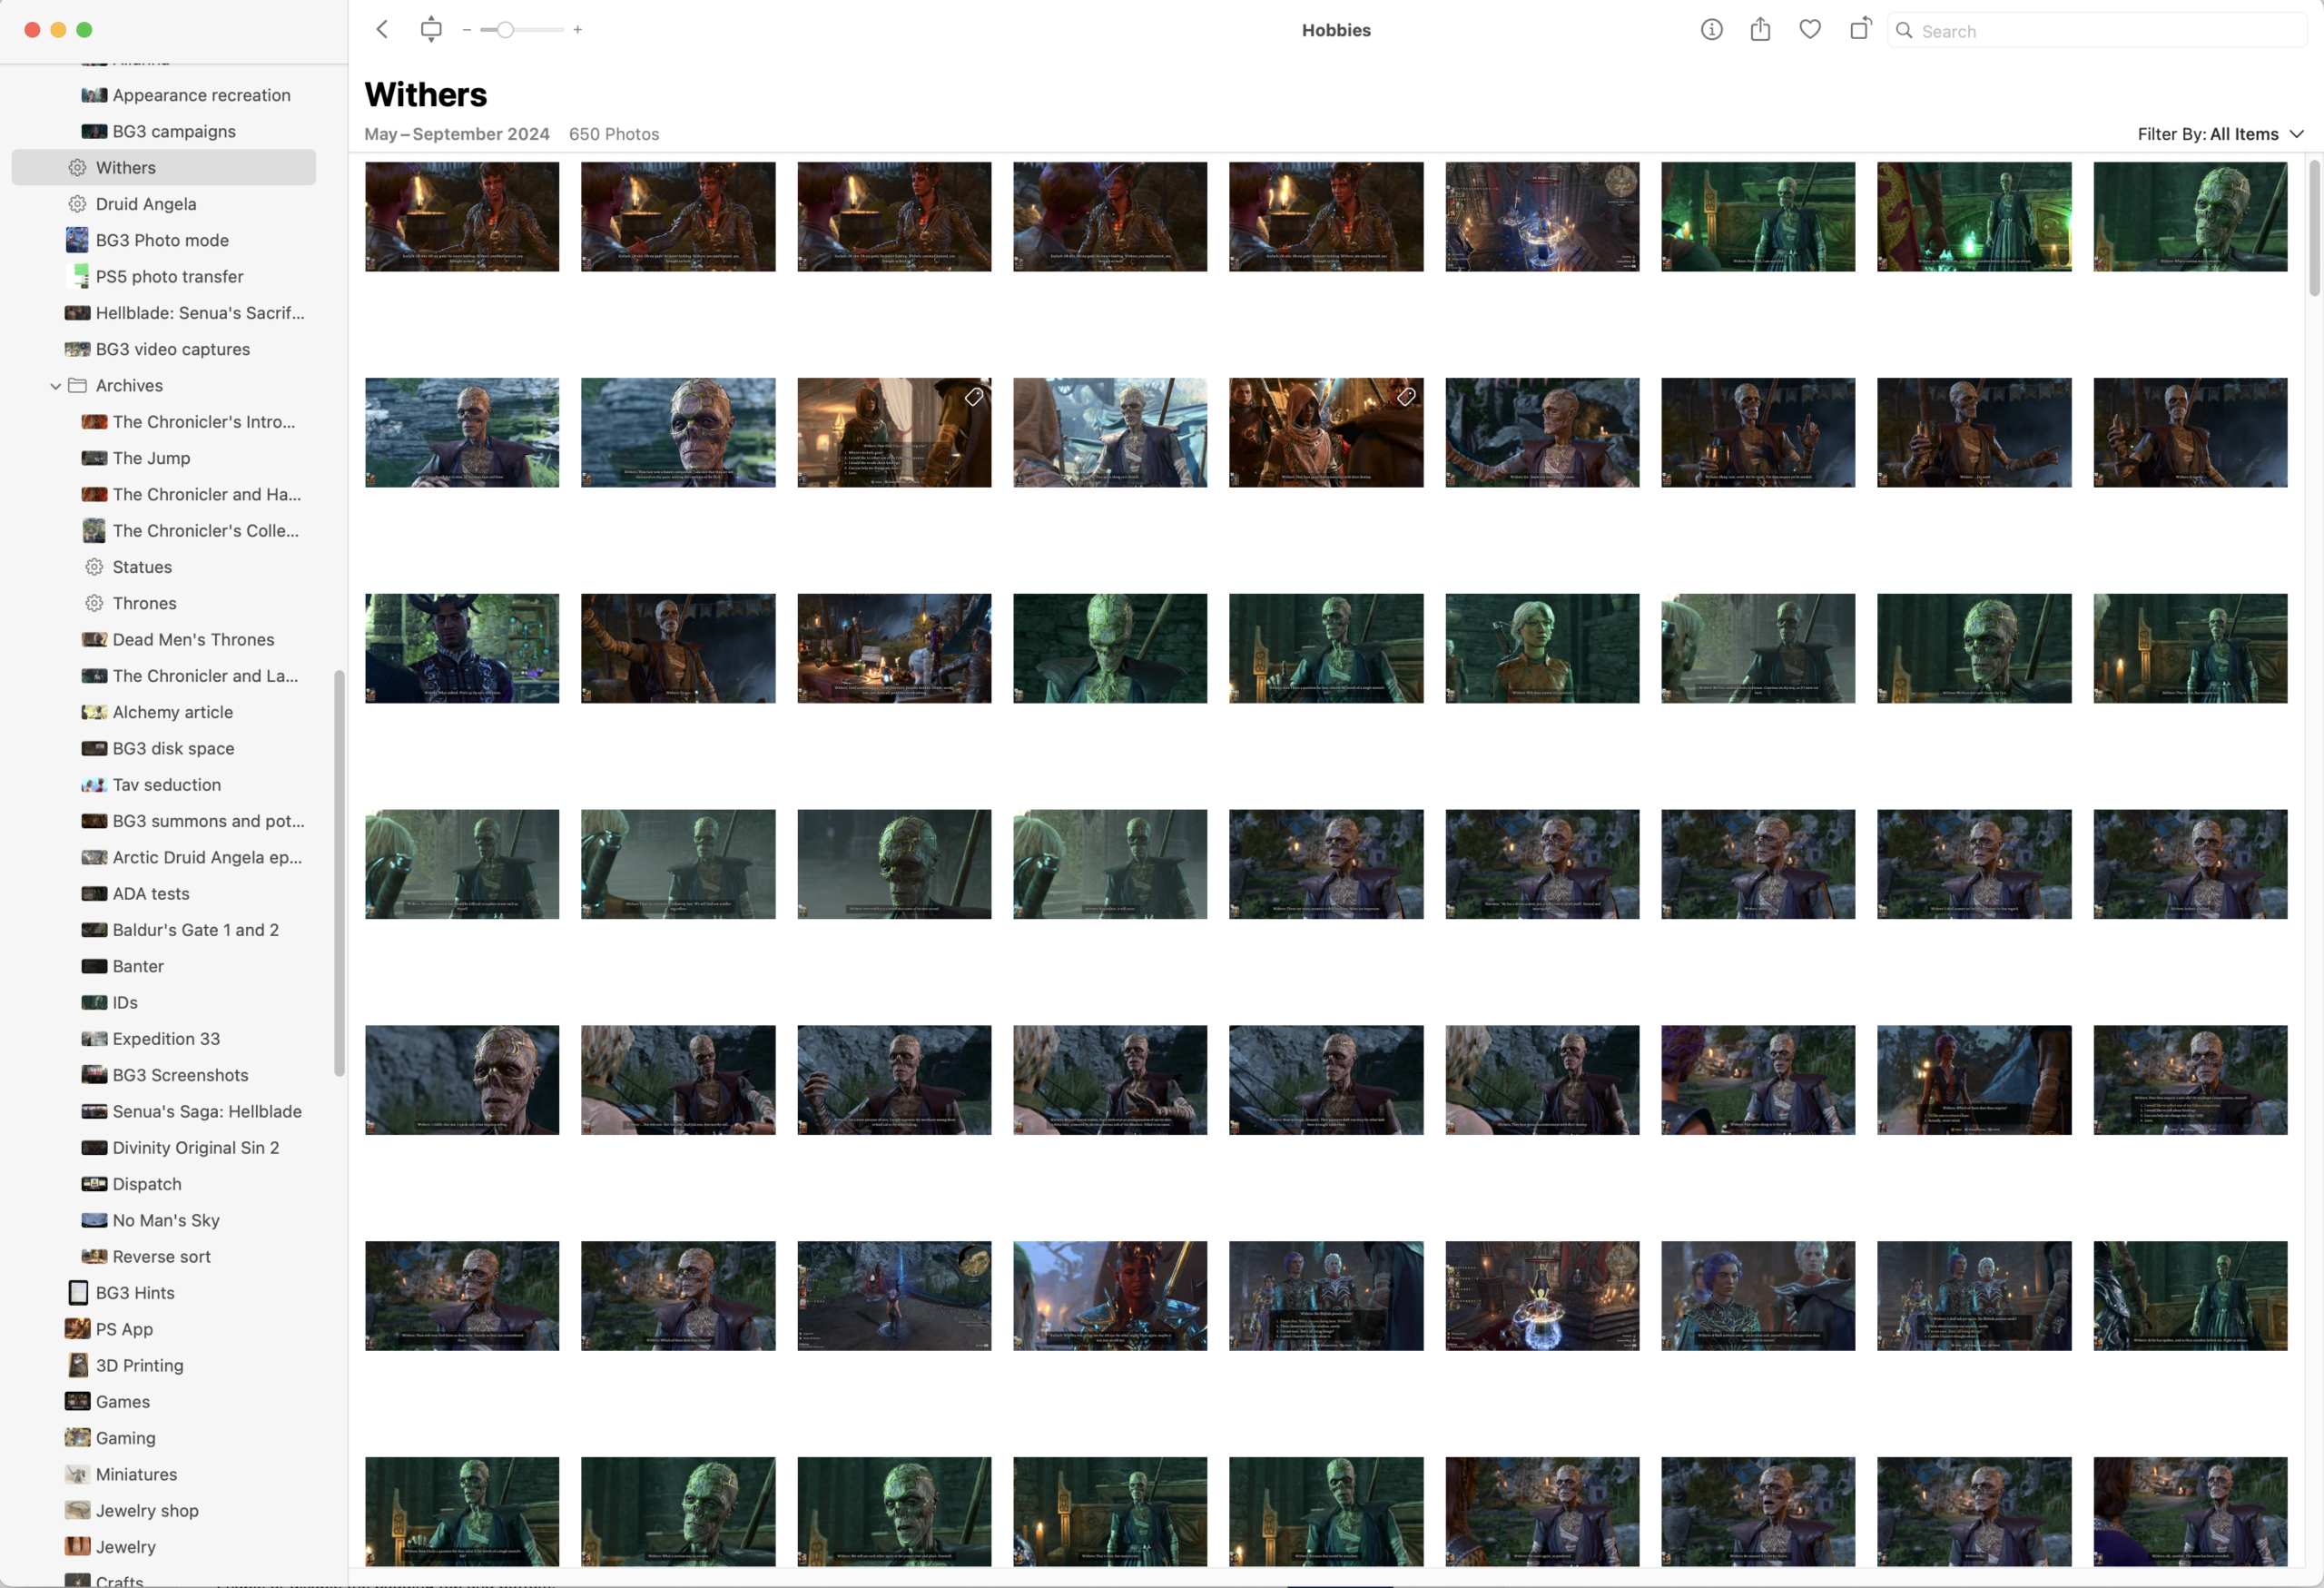
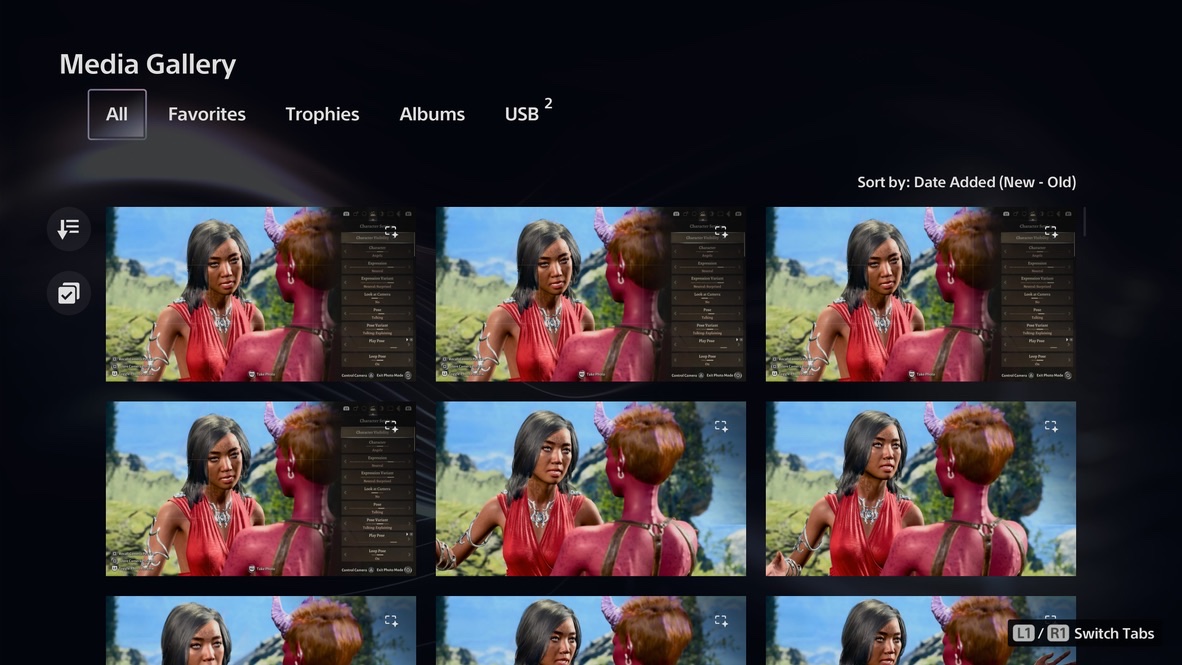
For every picture I put into this blog, I take 5-10 more. As I said, my last piece of fanfic had 374 pictures. Here’s a screenshot from one of the photo albums I used to create one chapter.
My process may not be clear: If I had a perfect grasp of the story I wanted to tell in advance, and had a complete mental image of each photo it would take to tell that story, I’d take far fewer pictures. I’m not that good. I have a vague sense of how each story will go, and I take lots of pictures of characters and scenes with lots of poses and expressions. When it comes time to write the post, I finalize the story and select those images that fit from the pool I have.
There are many, many times when I realize that I don’t have the exact image I want. To get that image, I’d have to go back into the game and position all the characters in the same way I had them before. Sometimes I’m motivated to do that. Most of the time I’m not.
It gets even more complicated if I decide to revise the story. That often means going back to take more pictures to suit the new course of events.
Another example: In the course of preparing this very essay, I took about 1000 pictures for the various examples, including about 350 solely for the fanfic at the end.
Why so many for the fanfic? I took screenshots for the essay over the course of two photo sessions. As I wrote the essay, I saw that the armor worn by a character was not the same in the two sessions. I set up a third photoshoot to retake every fanfic-related picture to tell a consistent story.
Even so, I didn’t take enough pictures of Karlach.
If you look at my BG3 playthrough logbook, you’ll see that I now regularly take thousands of photos for each playthrough. Some are for my own amusement, but the majority are a pool from which I can select pictures to use in the blog.
That’s the basis of my procedure for VP. I need a technique that allows me to take lots of photos in rapid succession, using a fairly standardized procedure. To create full-fledged VP images like these from Frans Bouma would take too much time, and involve tools and talents that I don’t have.
I do what I can with what I’ve got.
Let’s understand the limits of the tools I choose to use.
How
Platform
I play Baldur’s Gate 3 on my PS5. Although I have the option to play on my Mac, that’s not without its problems. Recently I set up a Windows system for reasons I’ll save for another article, but my general antipathy for Windows makes it unlikely I’d use it as my standard gaming machine.
Ergonomically, this is a comfortable setup. I can sit in an easy chair, with an occasional cat on my lap, with a PS5 controller in my hands.
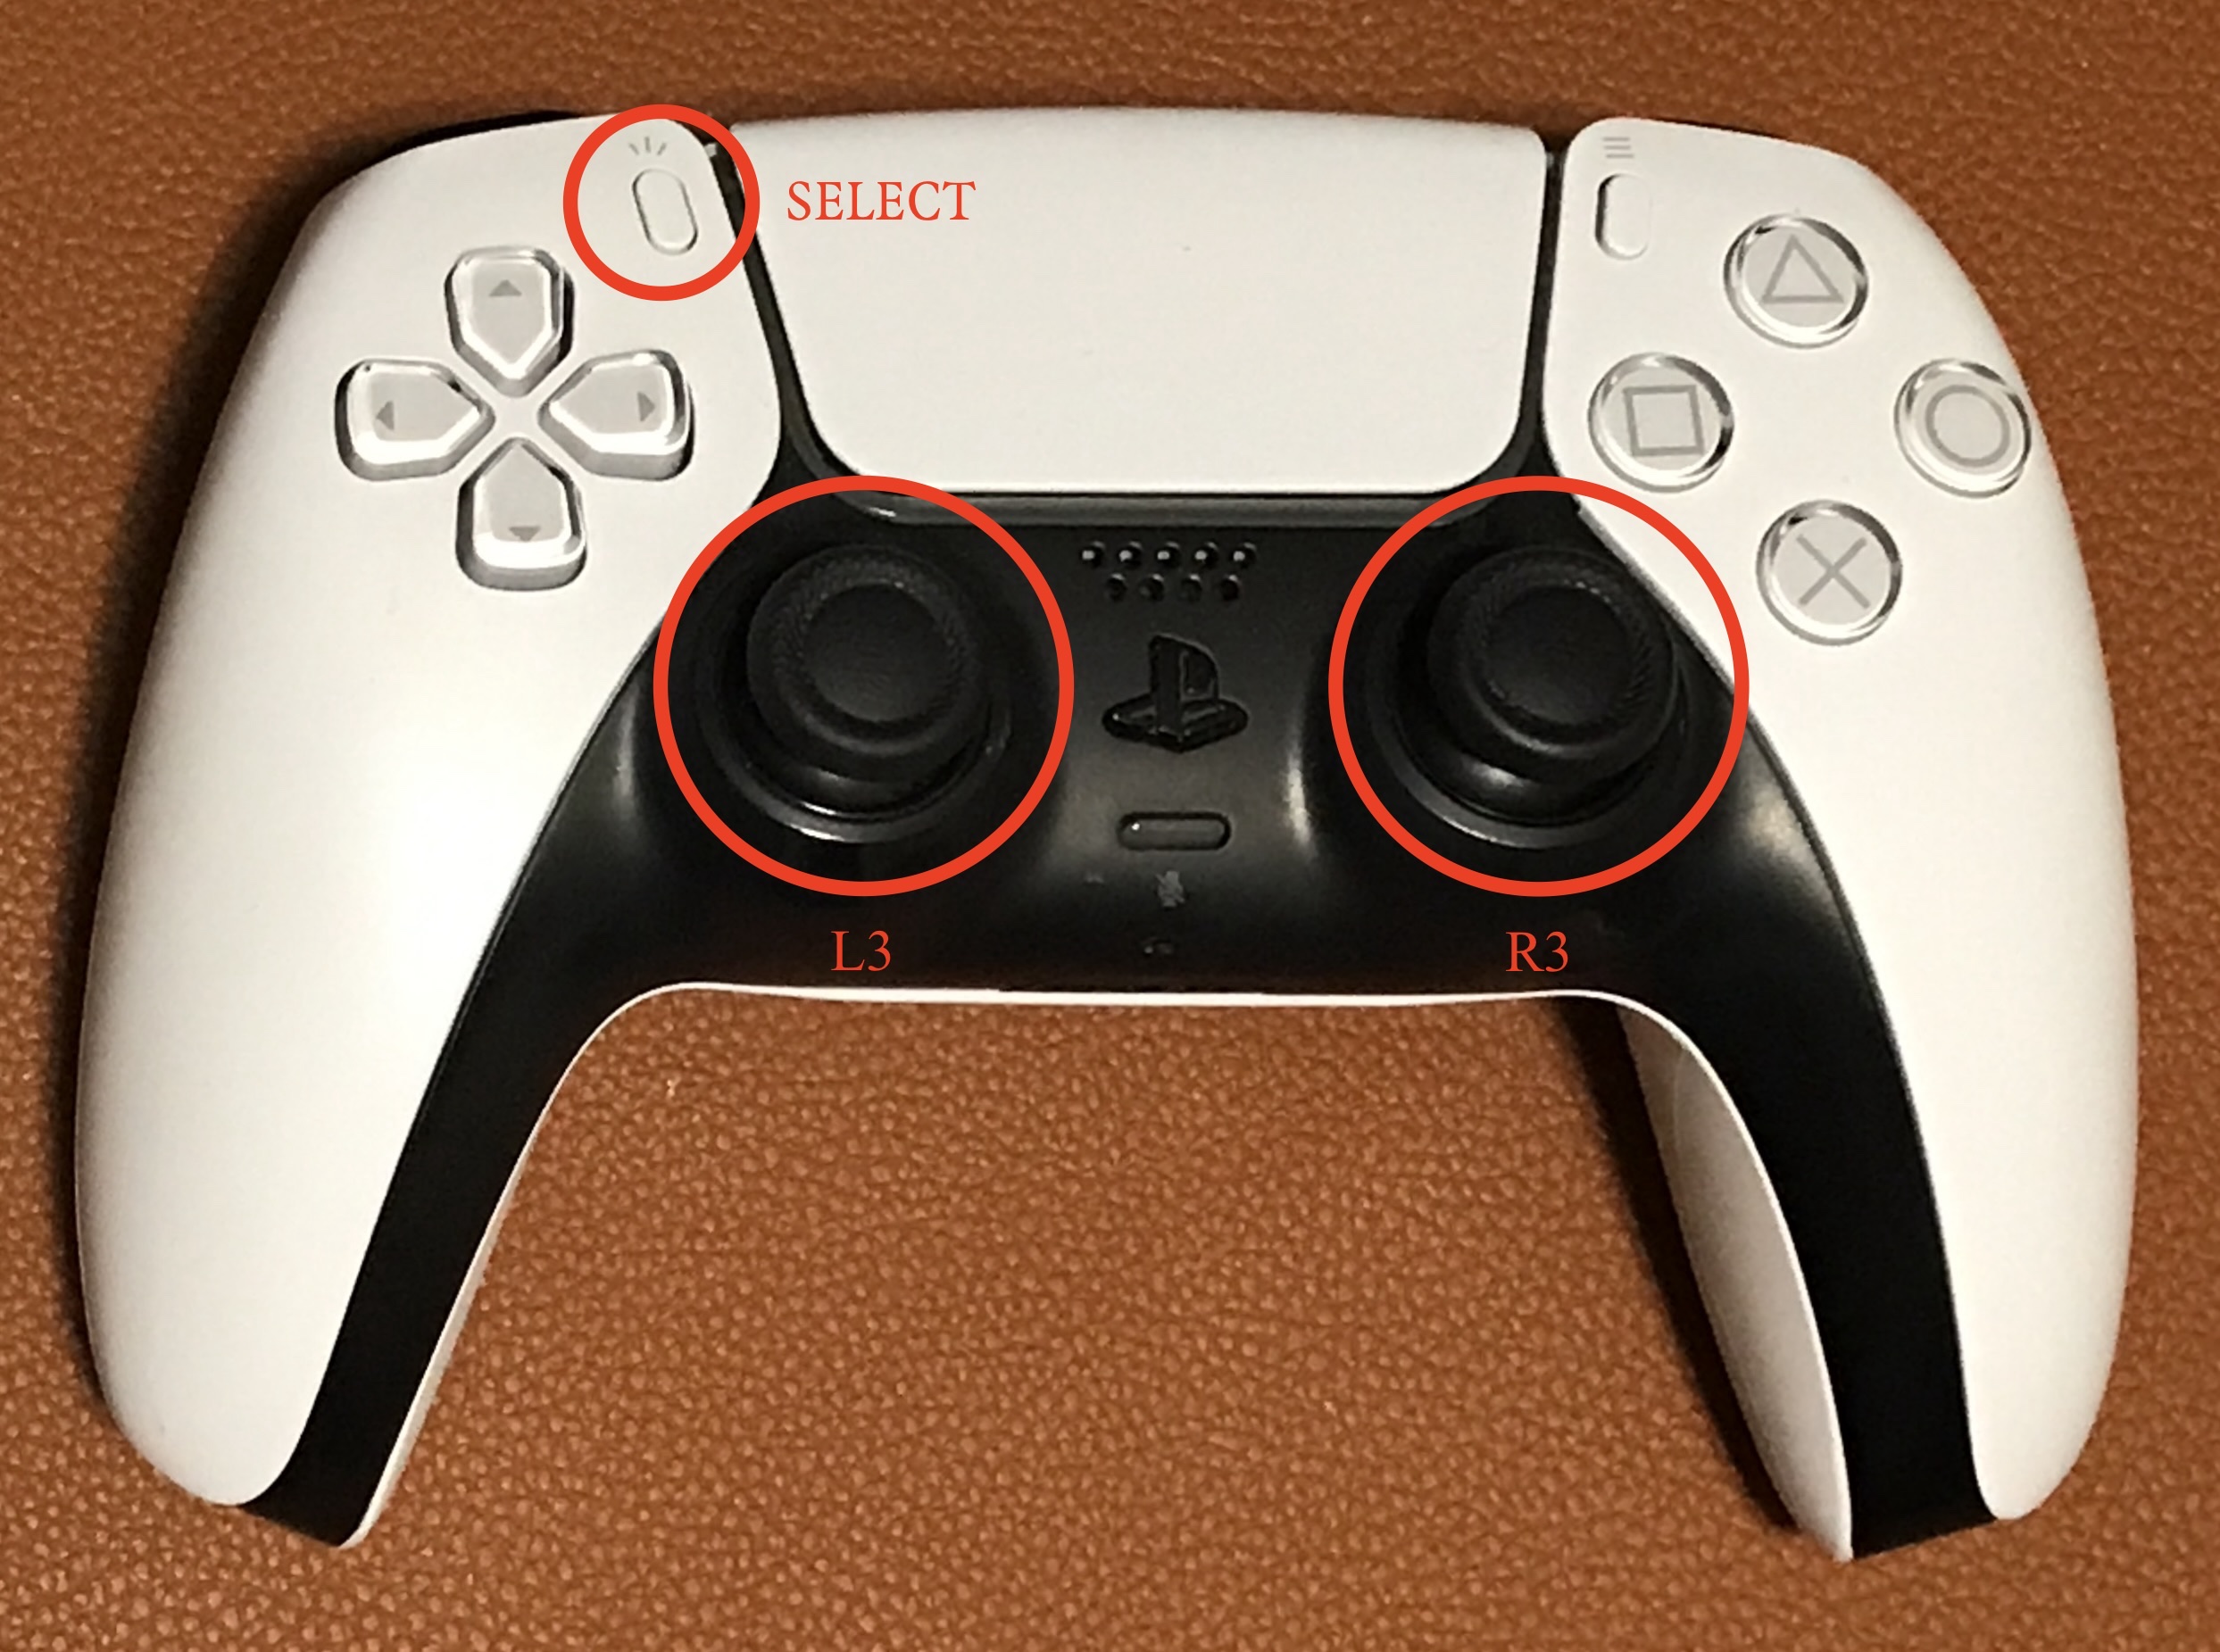
It’s a nice environment for taking thousands of photos. On a PS5, all I have to do to capture an image is hold down the SELECT button, which is just under my left thumb. It only takes a second for me to capture an image, and that’s because I’ve set my PS5 to require a long press on that button instead of a short one to immediately save a picture.
If you’re playing the game on Steam, the equivalent screen-capture button is F12 on the keyboard. However, that’s not as convenient as the SELECT button on the controller (too many therbligs). If you use a controller to play the game on Steam, there’s a non-obvious configuration that will let you re-map that button to Steam’s screen-capture; it’s so arcane that I couldn’t find a simple web page that clearly describes it, so I wrote my own. I’ve used that setup for the few times that I’ve used Mac or Windows to play BG3 and wanted to take pictures the “Playstation way.”
I click a button thousands of times and get thousands of pictures. Before I get into how I compose those images, there’s another issue: How do I get those pictures from my PS5 to my Mac? The PS5 does not have the tools for curating that many photos.
There’s another reason why I prefer to use my Mac to manage the images: Sony. There’s a limit to the number of pictures I can save that has nothing to do with the PS5’s available disk space. It’s probably related to PS5’s per-game limit. The result is that after I take some number of pictures (a few hundred) the system won’t take any more.
On my Mac, I use Apple’s Photos app to manage and organize the images. I won’t claim it’s the best program for the task, but it’s the one I’m used to.
I used to have an involved procedure to transfer the photos from my PS5 to my Mac four at a time. It took me far too long to realize there was a much faster way: sneakernet. I copy the photos in my PS5 library to a USB stick, then put the USB stick into my Mac and drag the files into Apple Photos.
Then I delete the pictures from my PS5, to avoid the wrath of Sony’s file limits.
Photo mode on the PS5
To actually take the pictures, I combine two tools: the game’s Photo Mode and the PS5’s screen capture. To enter Photo Mode on a PS5, I press down on both joysticks (L3 and R3) at the same time.
It should be straight-forward to take pictures in Photo Mode. However, there are two complications with using its built-in Take Photo function.
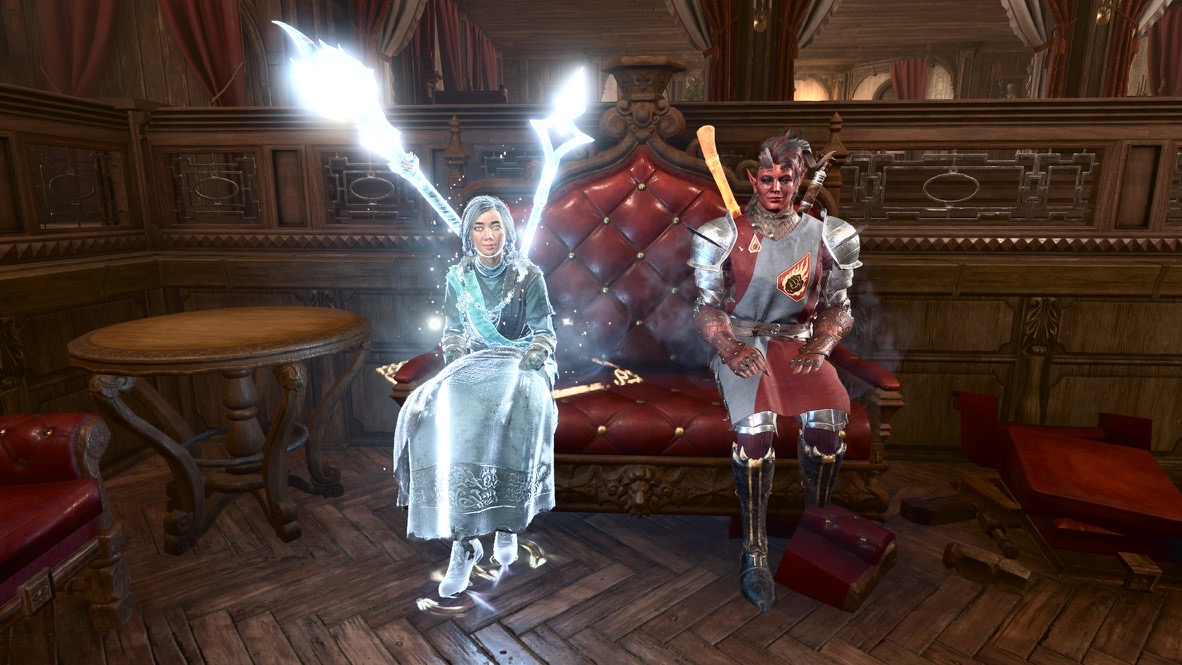
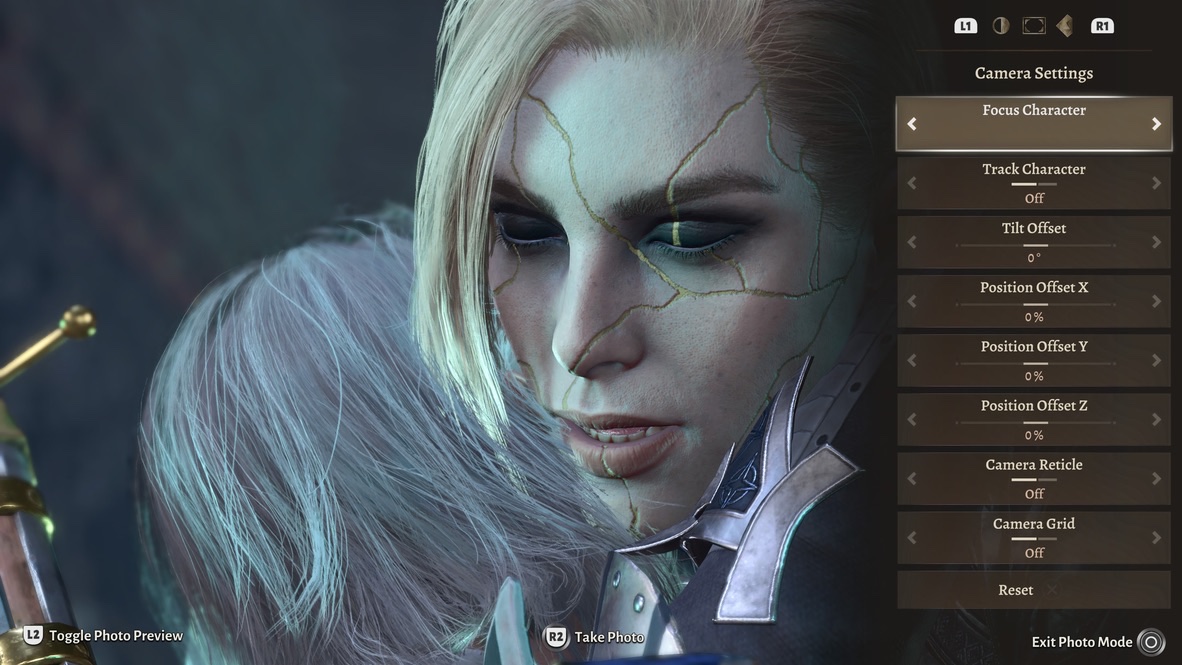
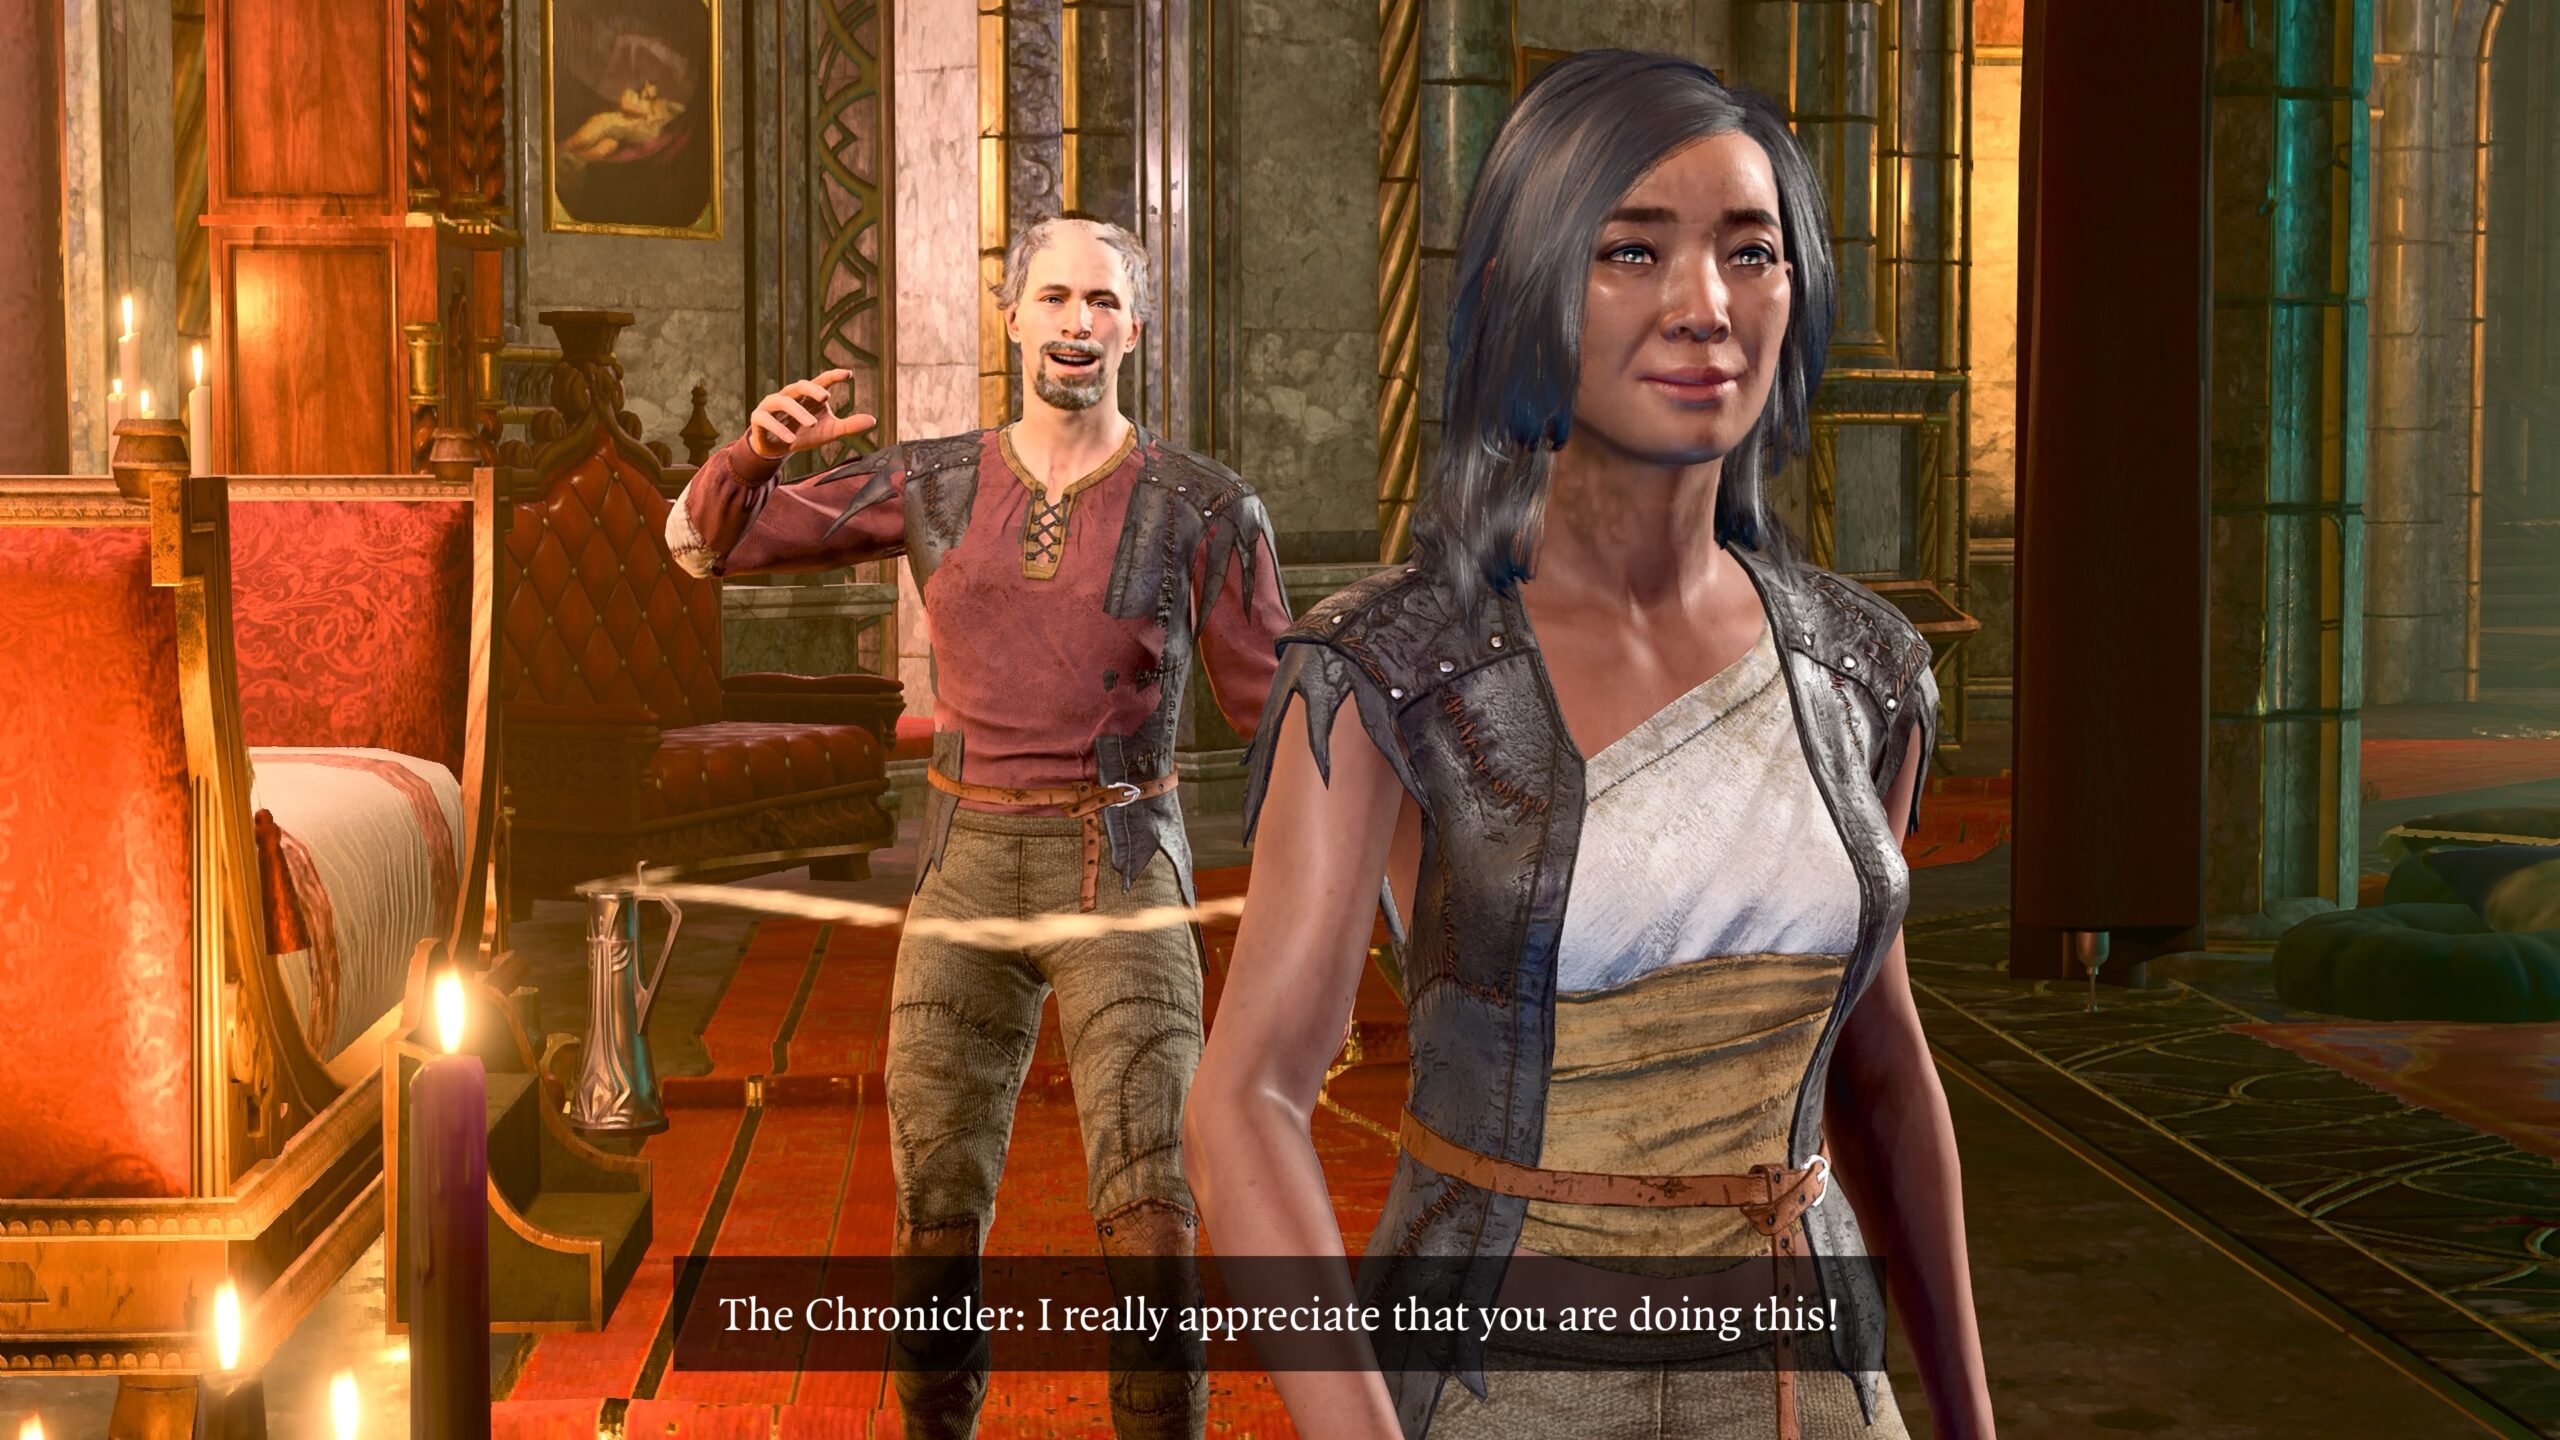
The first is that it sometimes it saves the picture I intended, and sometimes it takes a screenshot including the camera controls. Consider this image:
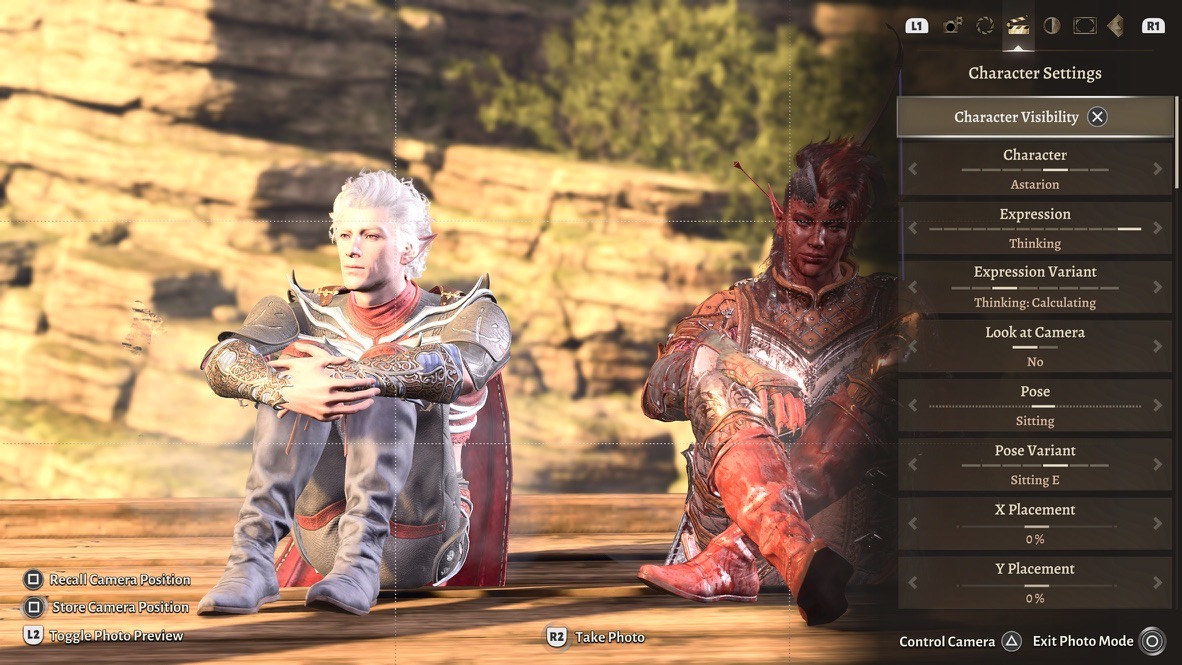
When I took this image, I clicked on R2, just as it says at the bottom center of the screen. But instead of saving the plain image of the two models sitting down, what it saved was the image with the camera-control overlay. I didn’t see the error until I examined the PS5 Media Gallery some time later. By then it was too late: Instead of the image I spent time to pose and arrange, I had a “dud” picture.
There was a point at which I’d click R2, switch to the PS5 Media Gallery, check if the picture was good, switch back to BG3, take another picture, go back to the Media Gallery…
Rinse and repeat as I bounced back and forth between the two programs.
The second complication was that the images shifted from being stored in the Media Gallery from JPEG format to PNG. This increased the size of the image files, from under 1GB to 15GB each. I checked the PS5 capture options, and verified it was set to JPEG. BG3 Photo Mode was bypassing that somehow.
Given the disk-space problems I mentioned earlier, I only wanted JPEG images. For a while I was copying them in PNG format to my Mac and using GraphicConverter‘s batch mode to convert them to .jpg files.
I found a way past both those complications: Click on L2 for Toggle Photo Preview. Then use the PS5’s “native” screen-capture of the preview, by pressing the SELECT button.
Pictures
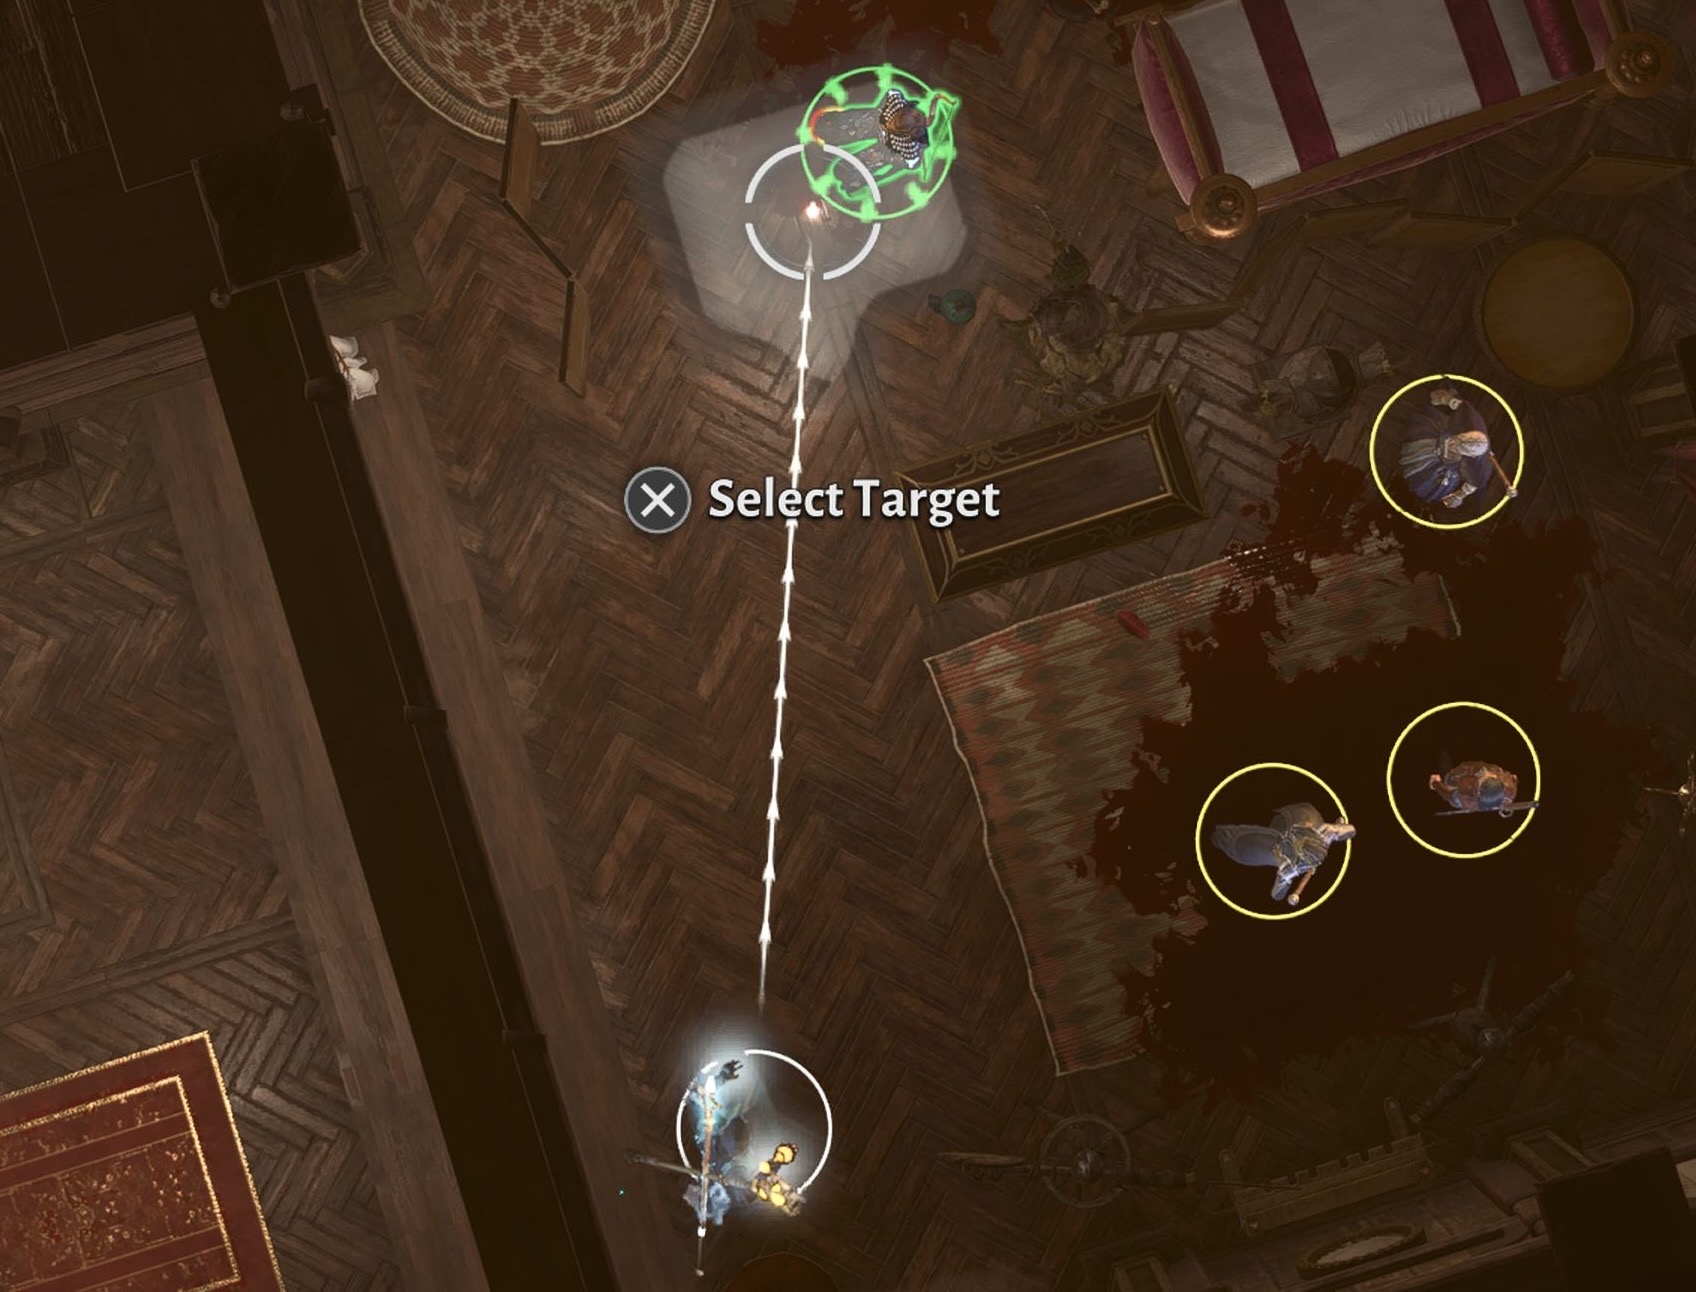
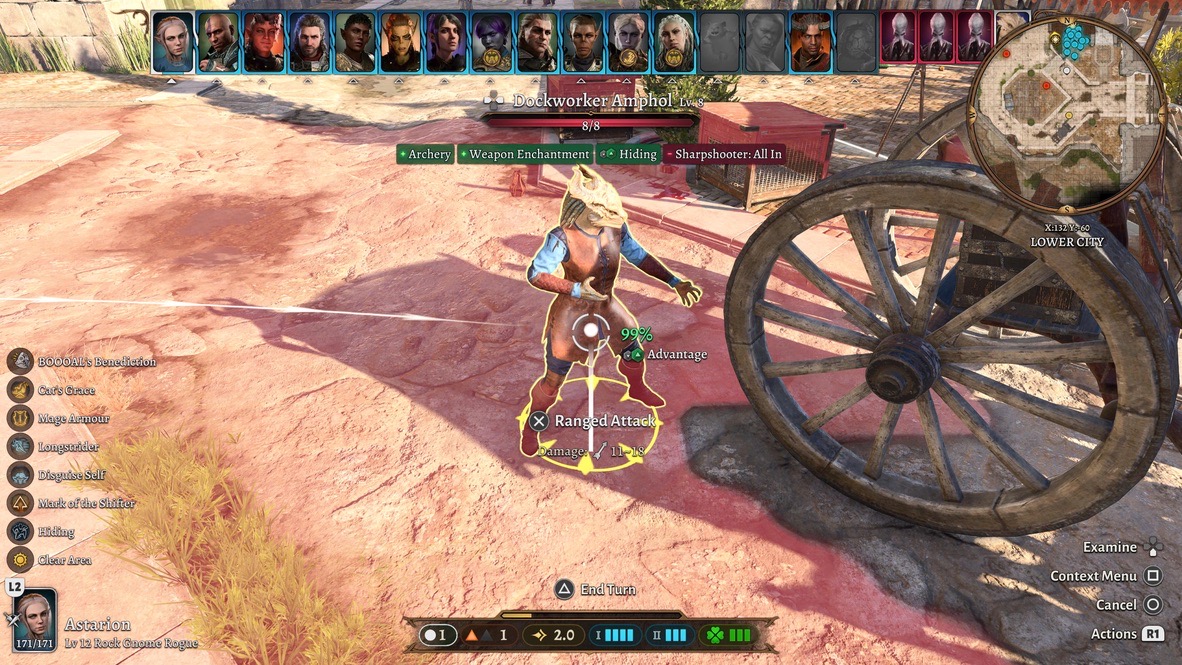
As I said above, before Photo Mode came out, the only game photos I could take were screen captures. Photos taken in mid-combat are usually more confusing than useful.
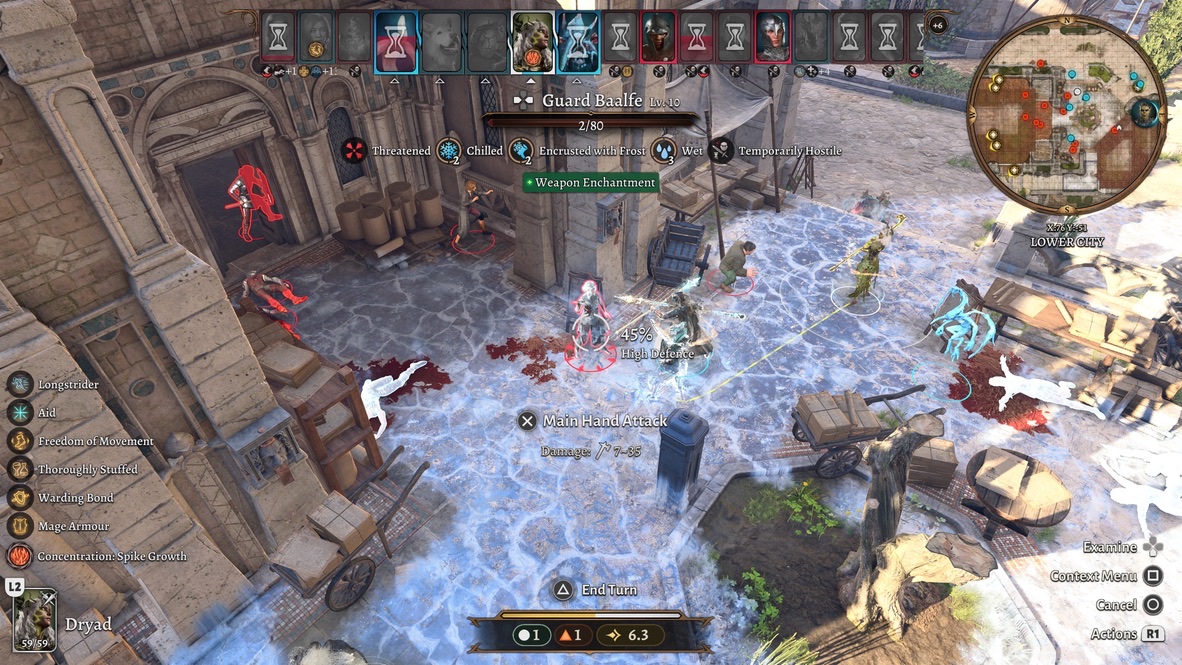
I never found mid-game photos to be interesting. Even in an article that required them (like the one I wrote on throwing potions) I did my best to stage the shots and crop the images so they wouldn’t look so busy.
For my blog posts, most of the pictures were screen captures from cutscenes. At the time, the game could not be paused in order capture an image. I watched some cutscenes with my thumb poised over the SELECT button, ready to jab down when I saw a moment I liked.
When BG3‘s Photo Mode came out, I could now freeze a cutscene mid-play to take a screenshot. It wouldn’t include any captions, and I couldn’t move the camera within the scene. (To contrast, in Senua’s Saga: Hellblade, when you enter Photo Mode in the middle of a cutscene, you can move the camera around.)
As you’ve already seen, it was enough for me to illustrate my playthroughs and make smart-aleck remarks.
BG3‘s Photo Mode permitted more than that. When a cutscene wasn’t playing, you could “freeze the world” and move the camera in it.
BG3‘s Photo Mode also allows you to choose facial expressions and postures for the character models, and move those characters within the game’s environment. It’s like playing with dolls, only this time the “dolls” are computer models of Karlach, Shadowheart, and so on.
The bulk of this essay consists of the details on how I use the tools within Photo Mode. I’ll go over those tools in the order they’re presented when you start it up.
Camera
Within Photo Mode, I mentally divide the controls into two categories: the camera and the models.
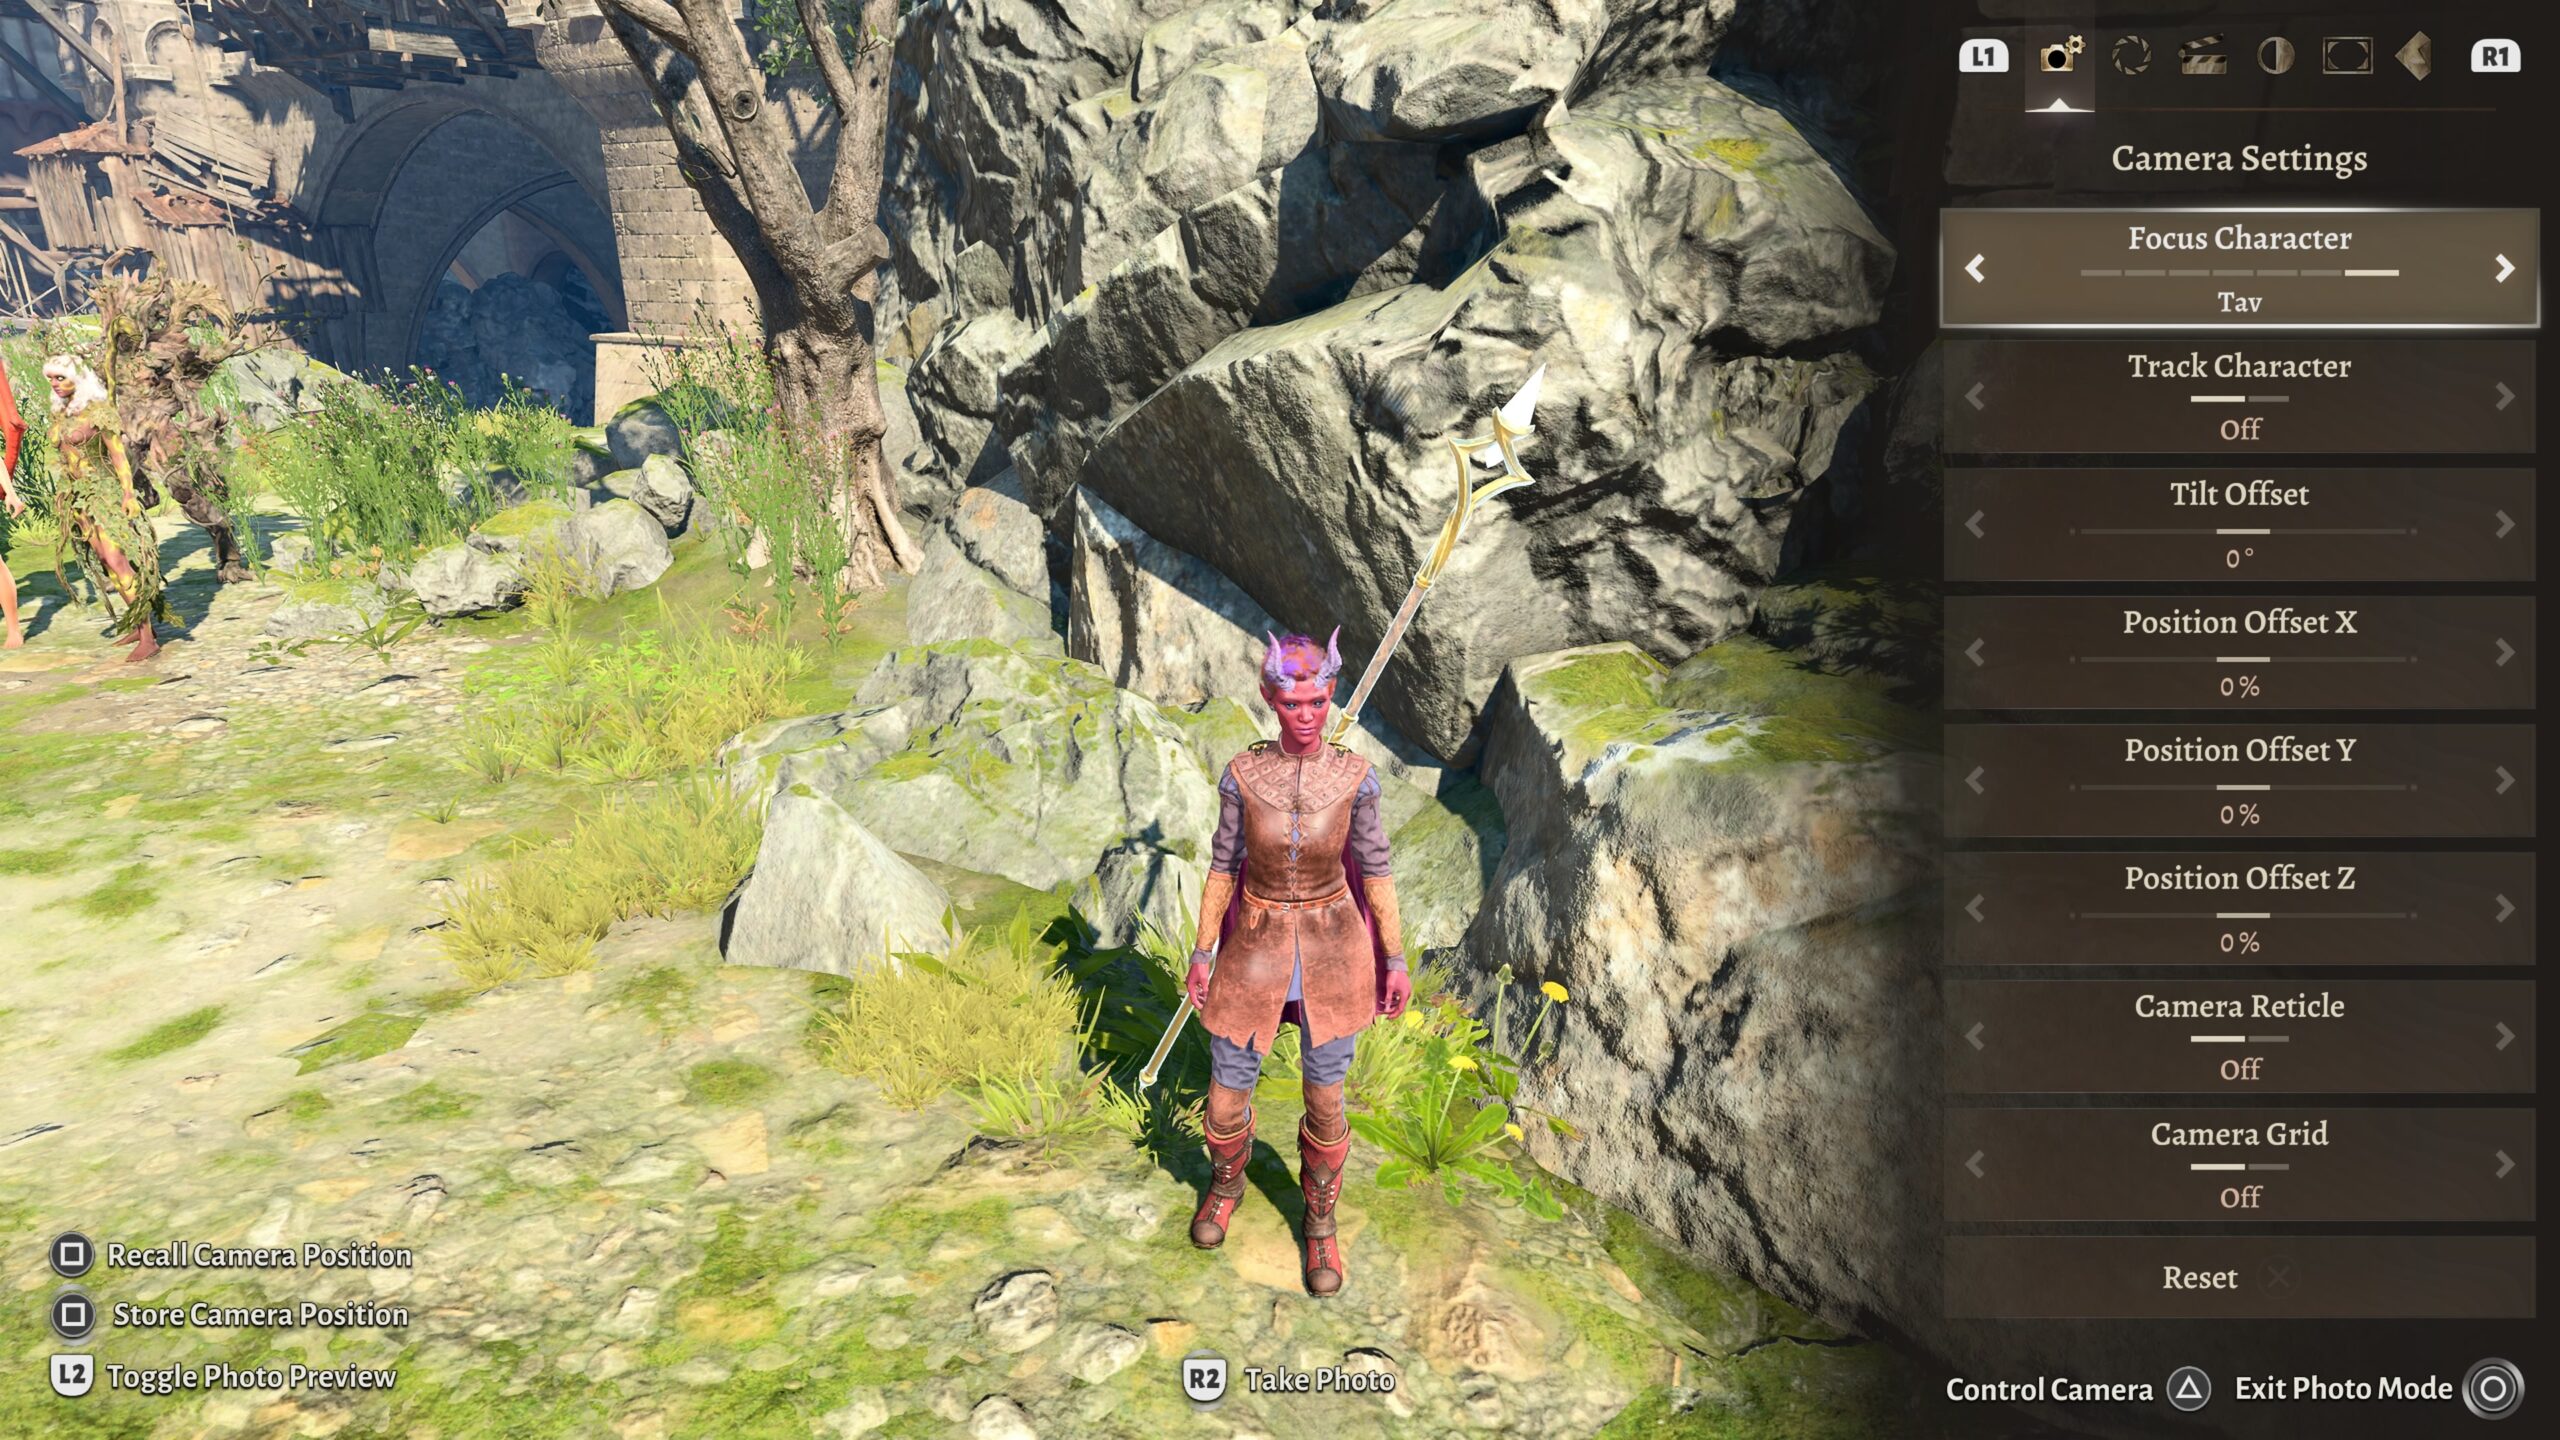
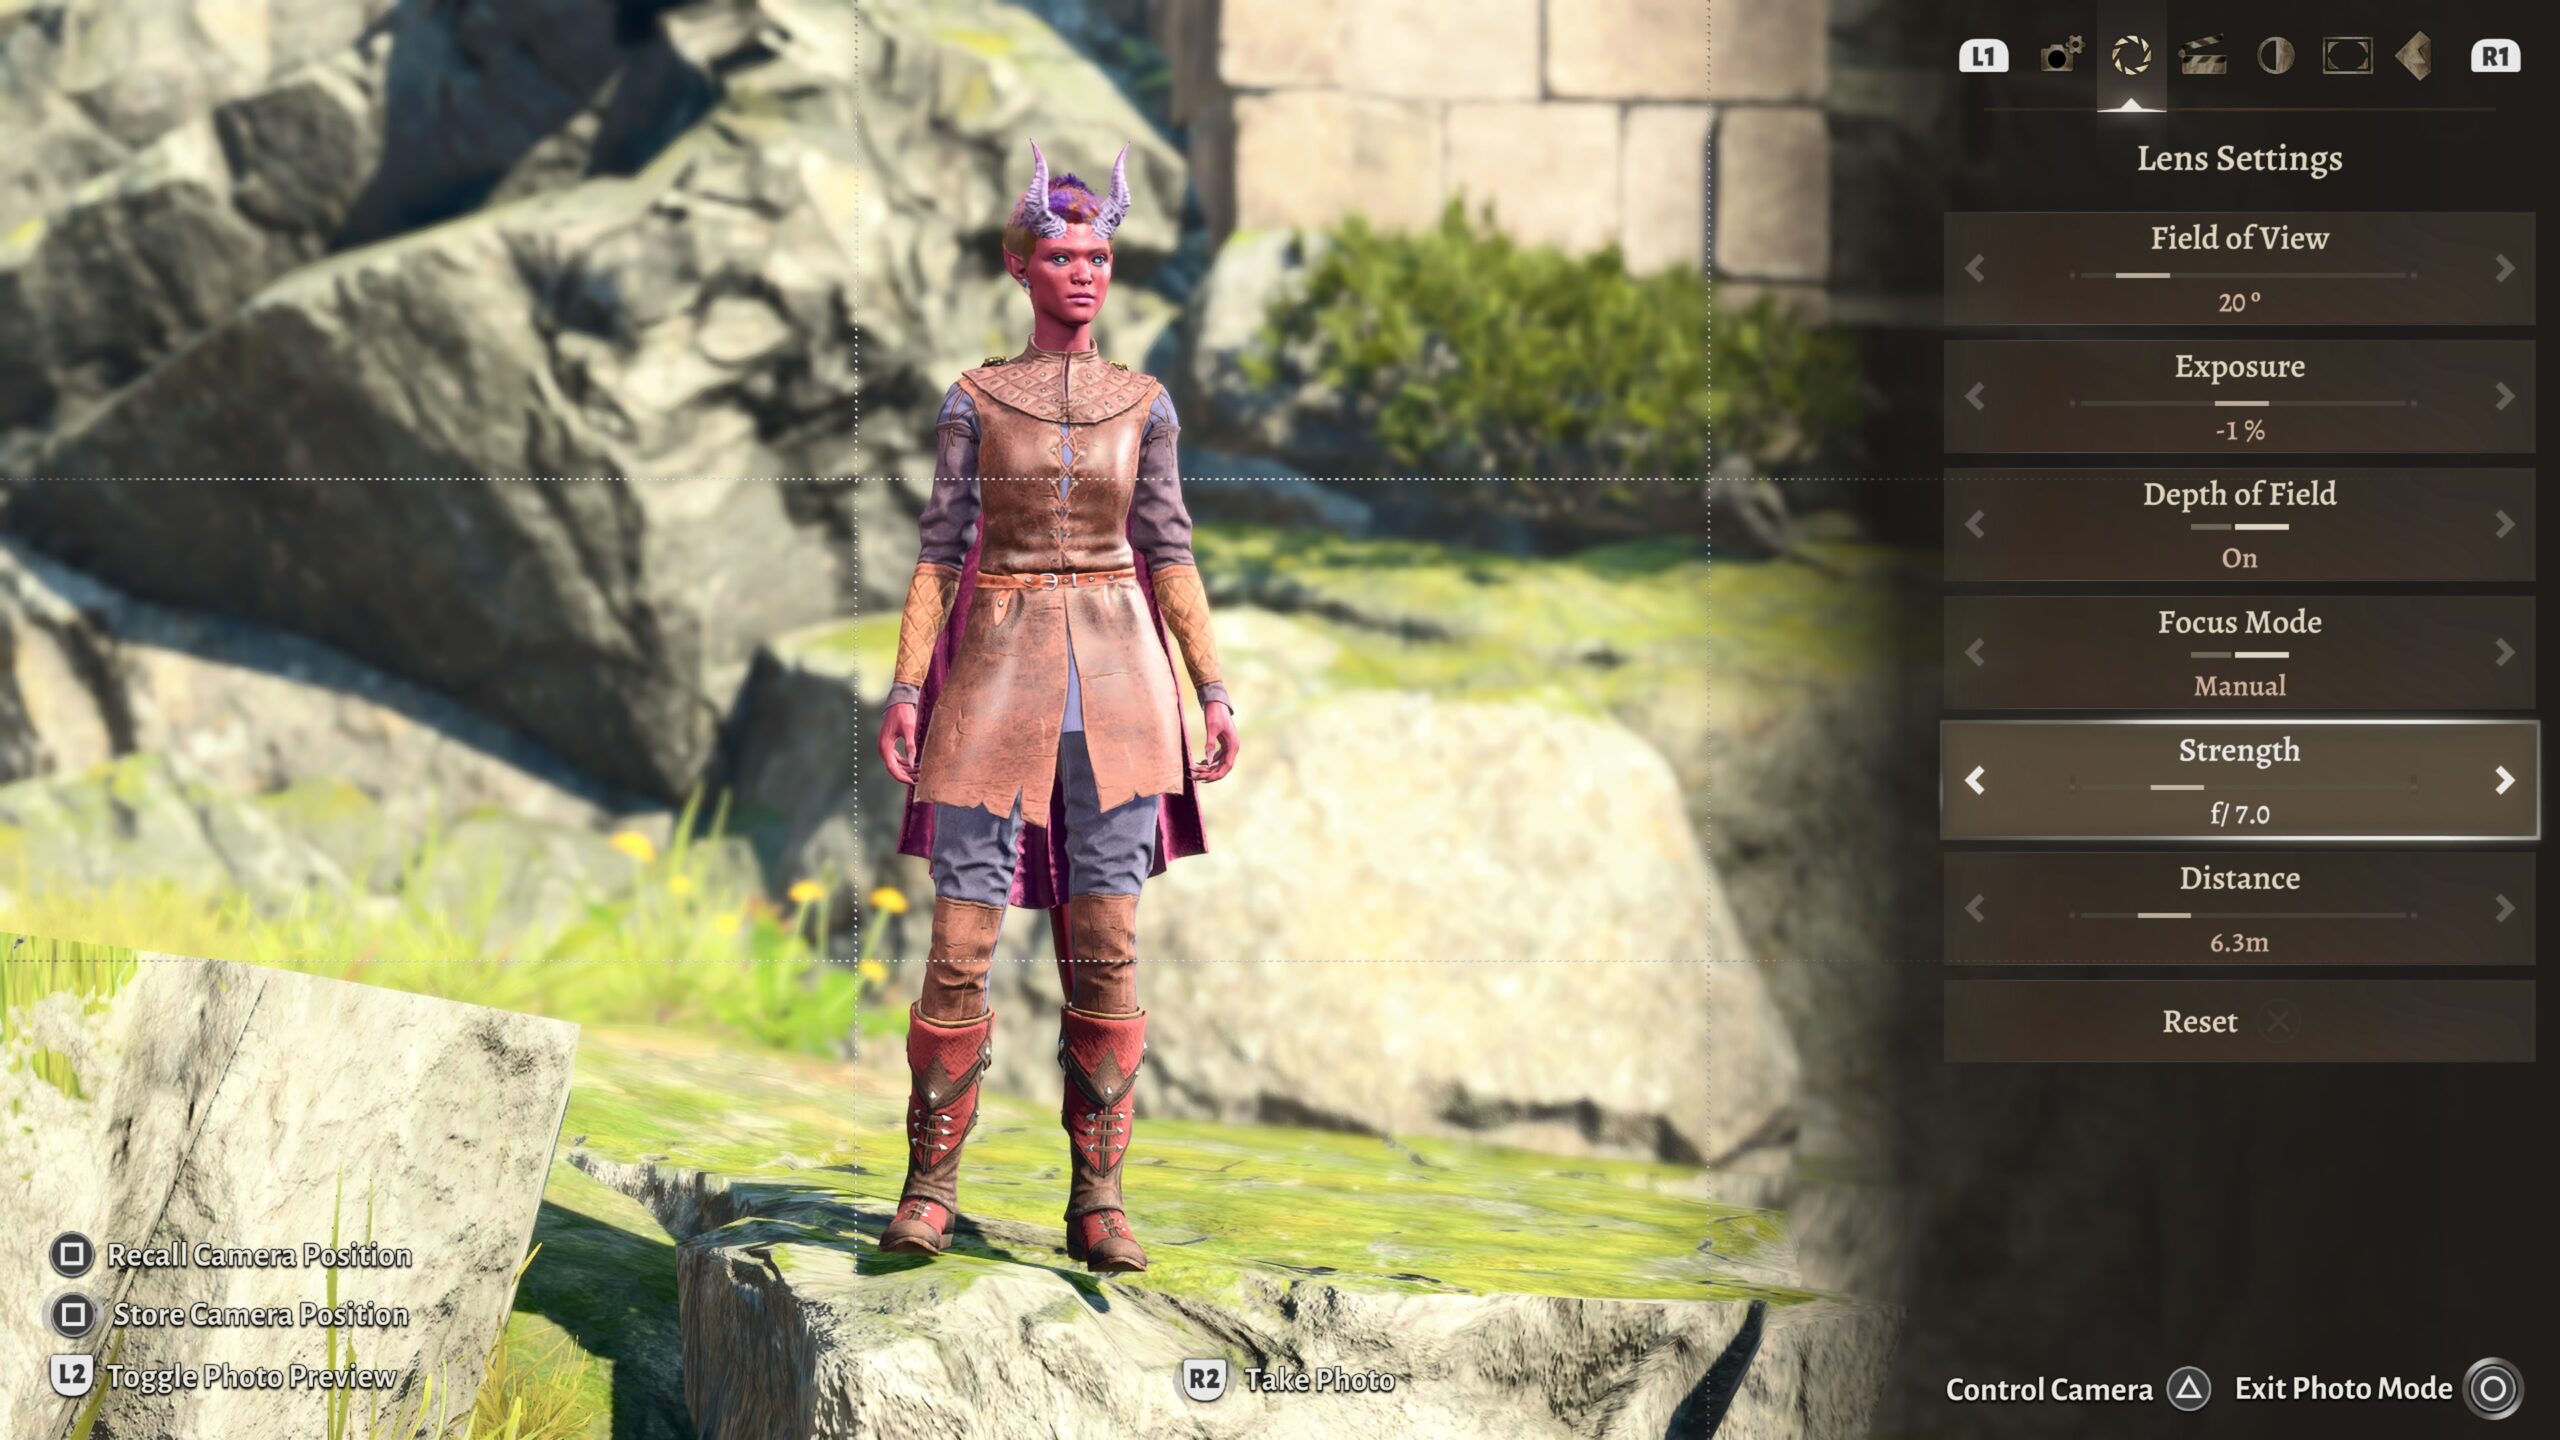
To set up a shot, I enter Photo Mode with L3 and R3. I see something like this:
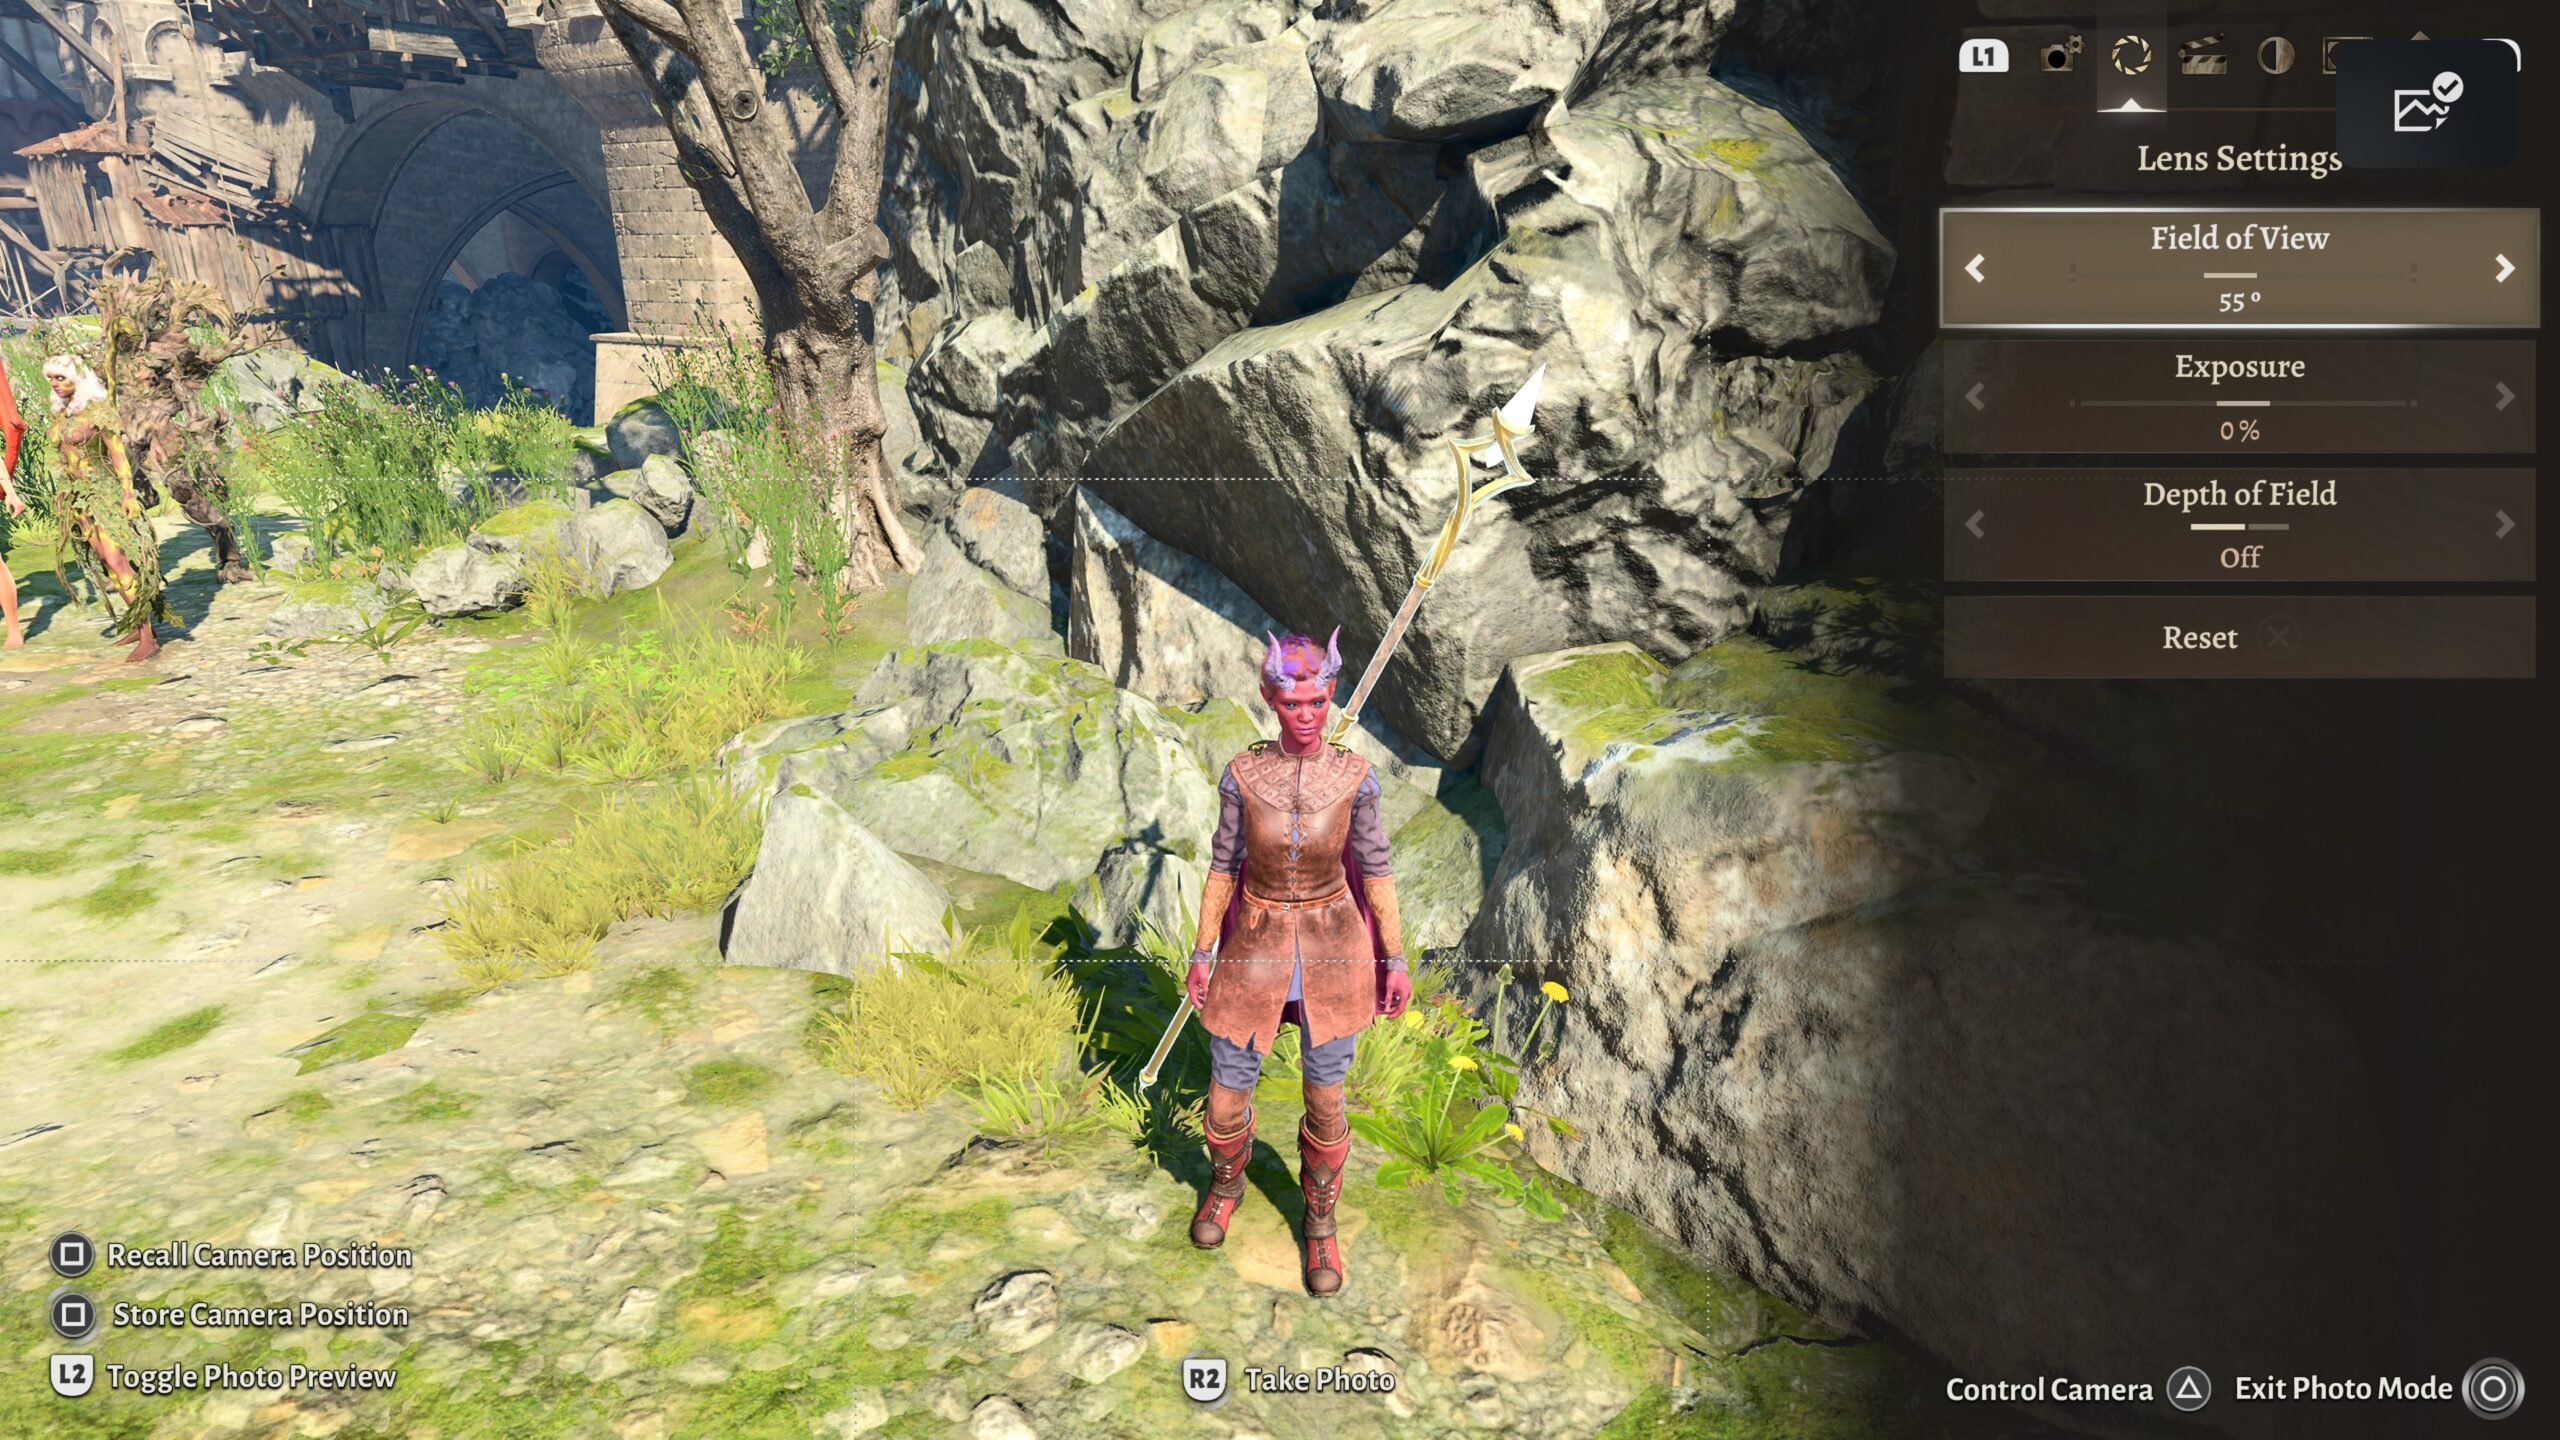

Field of View
“Zoom” is a simple magnification of a portion of an image. In Photo Mode, that can be simulated by re-positioning the camera; we’ll get to those controls below.
Field of View is angular. If you think of your entire visual world projected onto a sphere with you at its center, Field of View is how much of that sphere is included in the image.
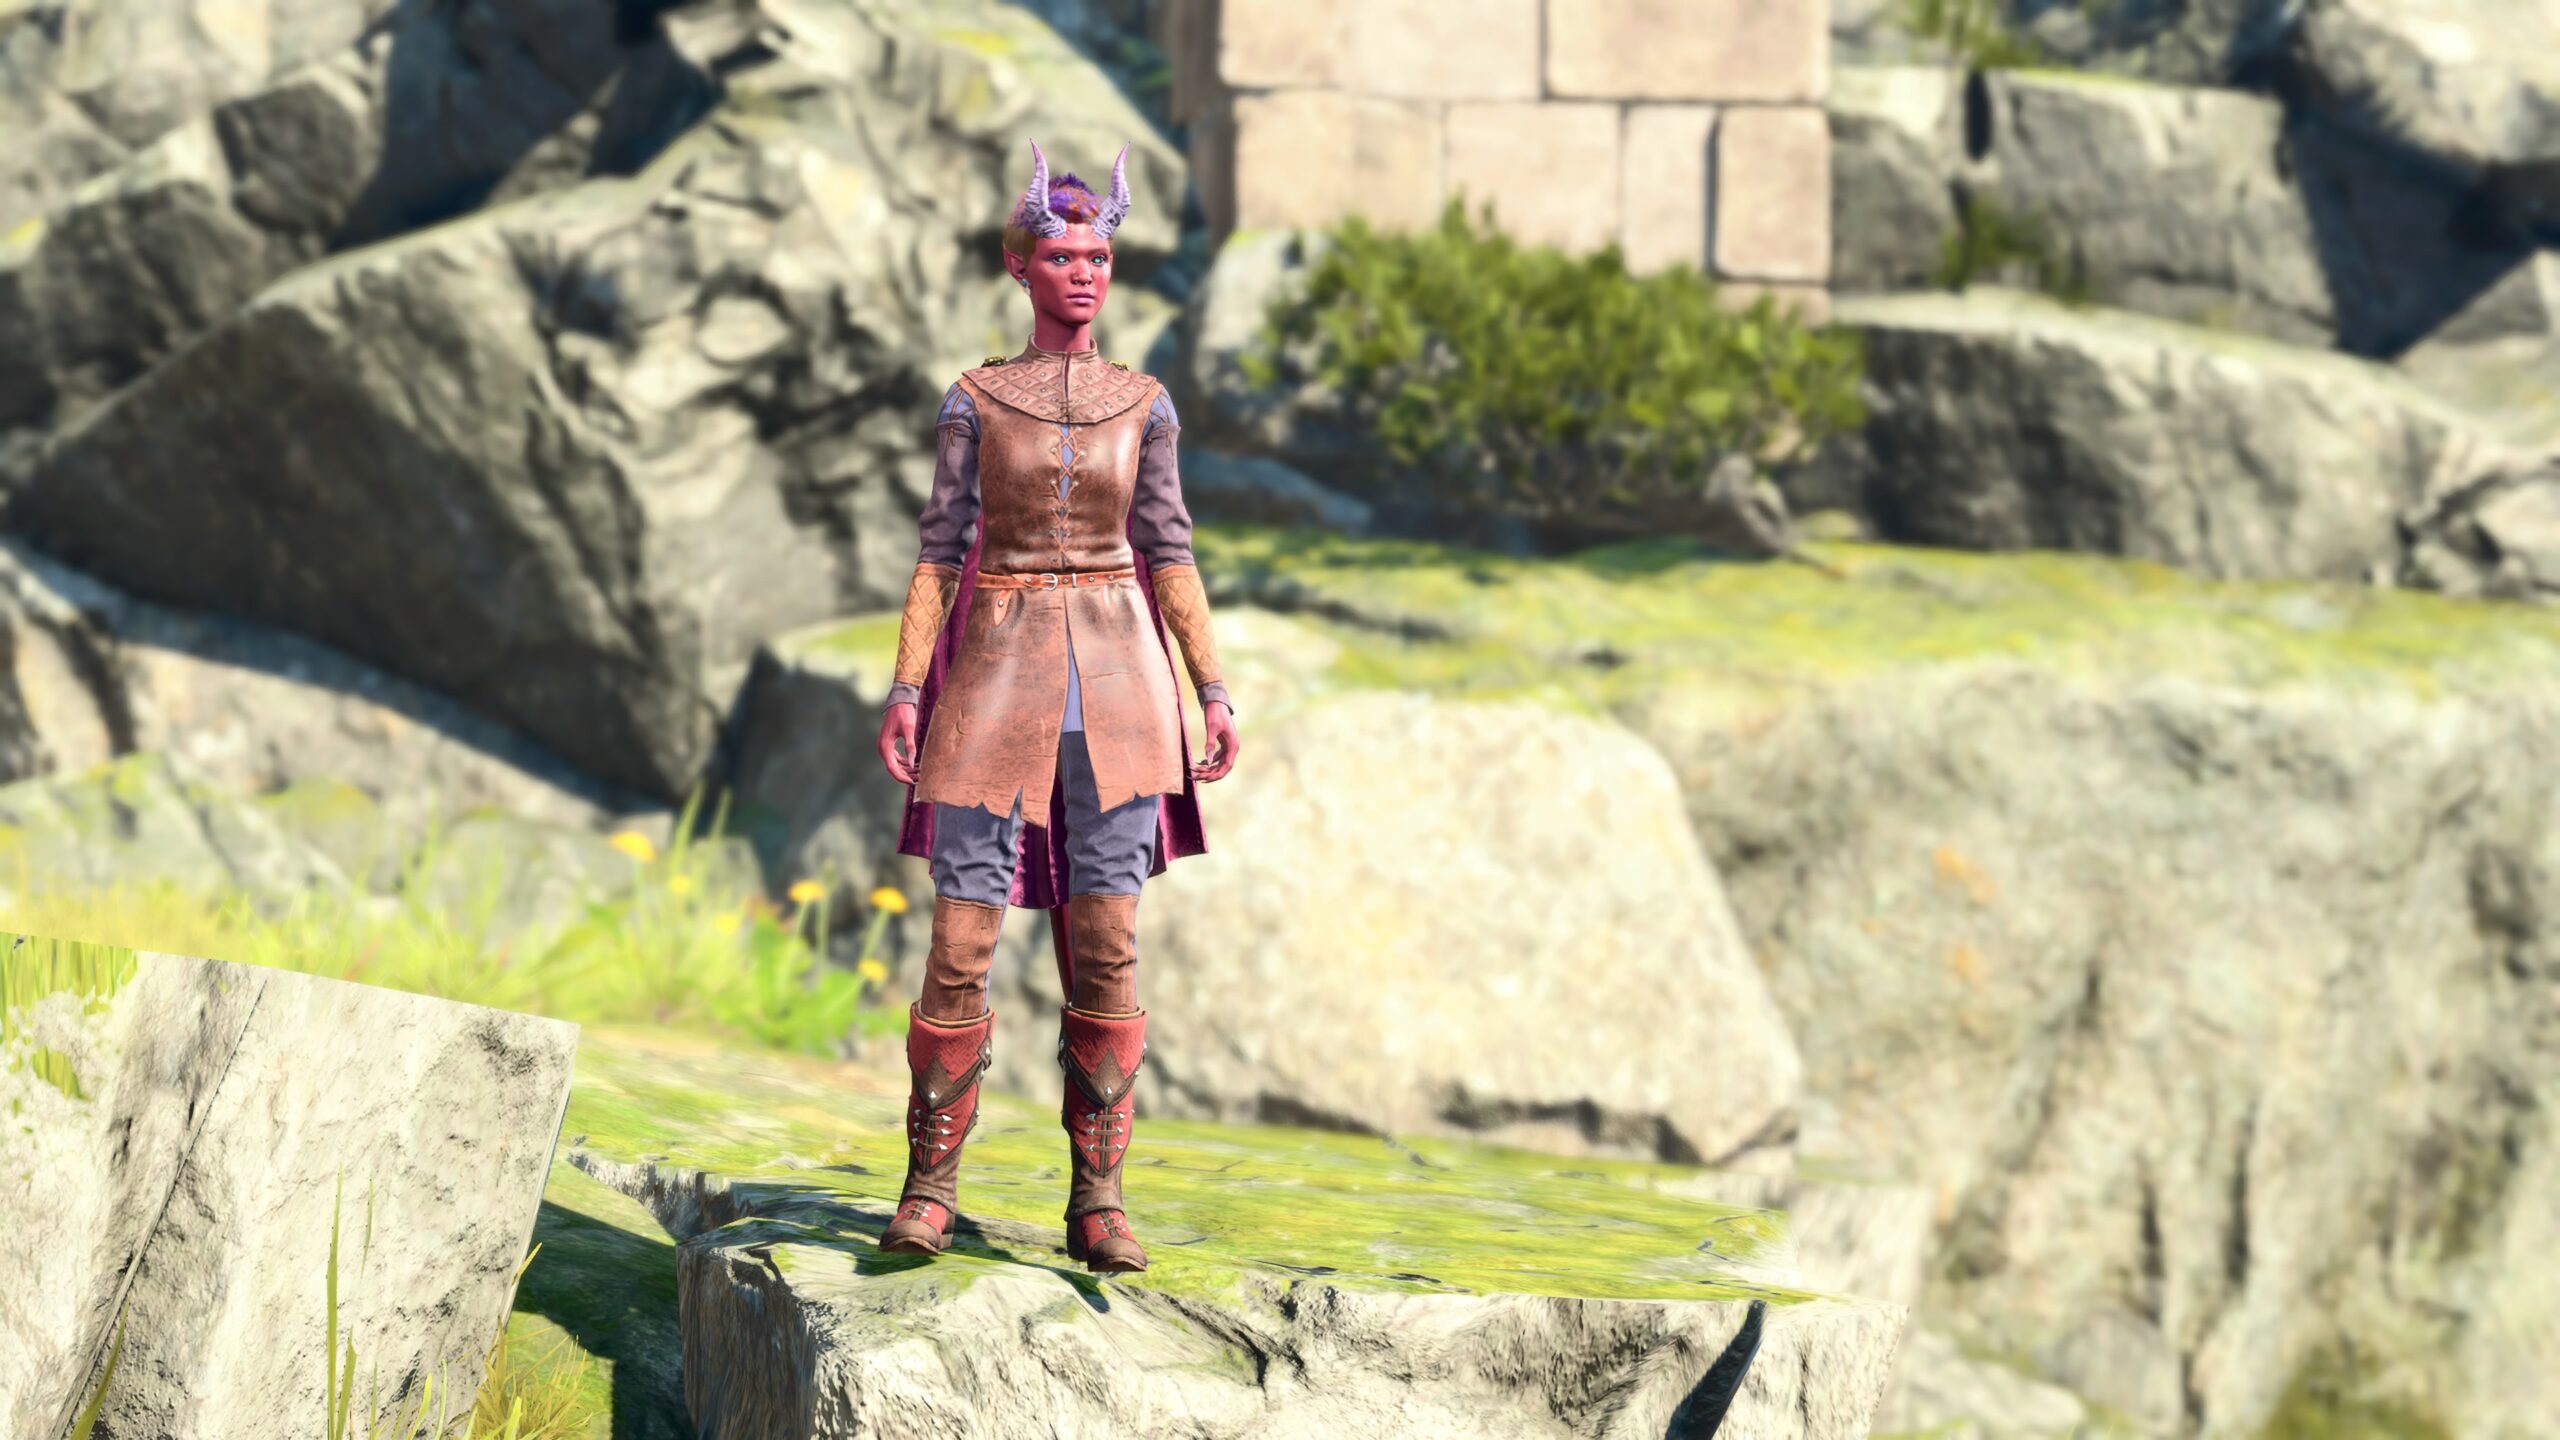
Here are a couple of examples to demonstrate why this is significant for the pictures I make.
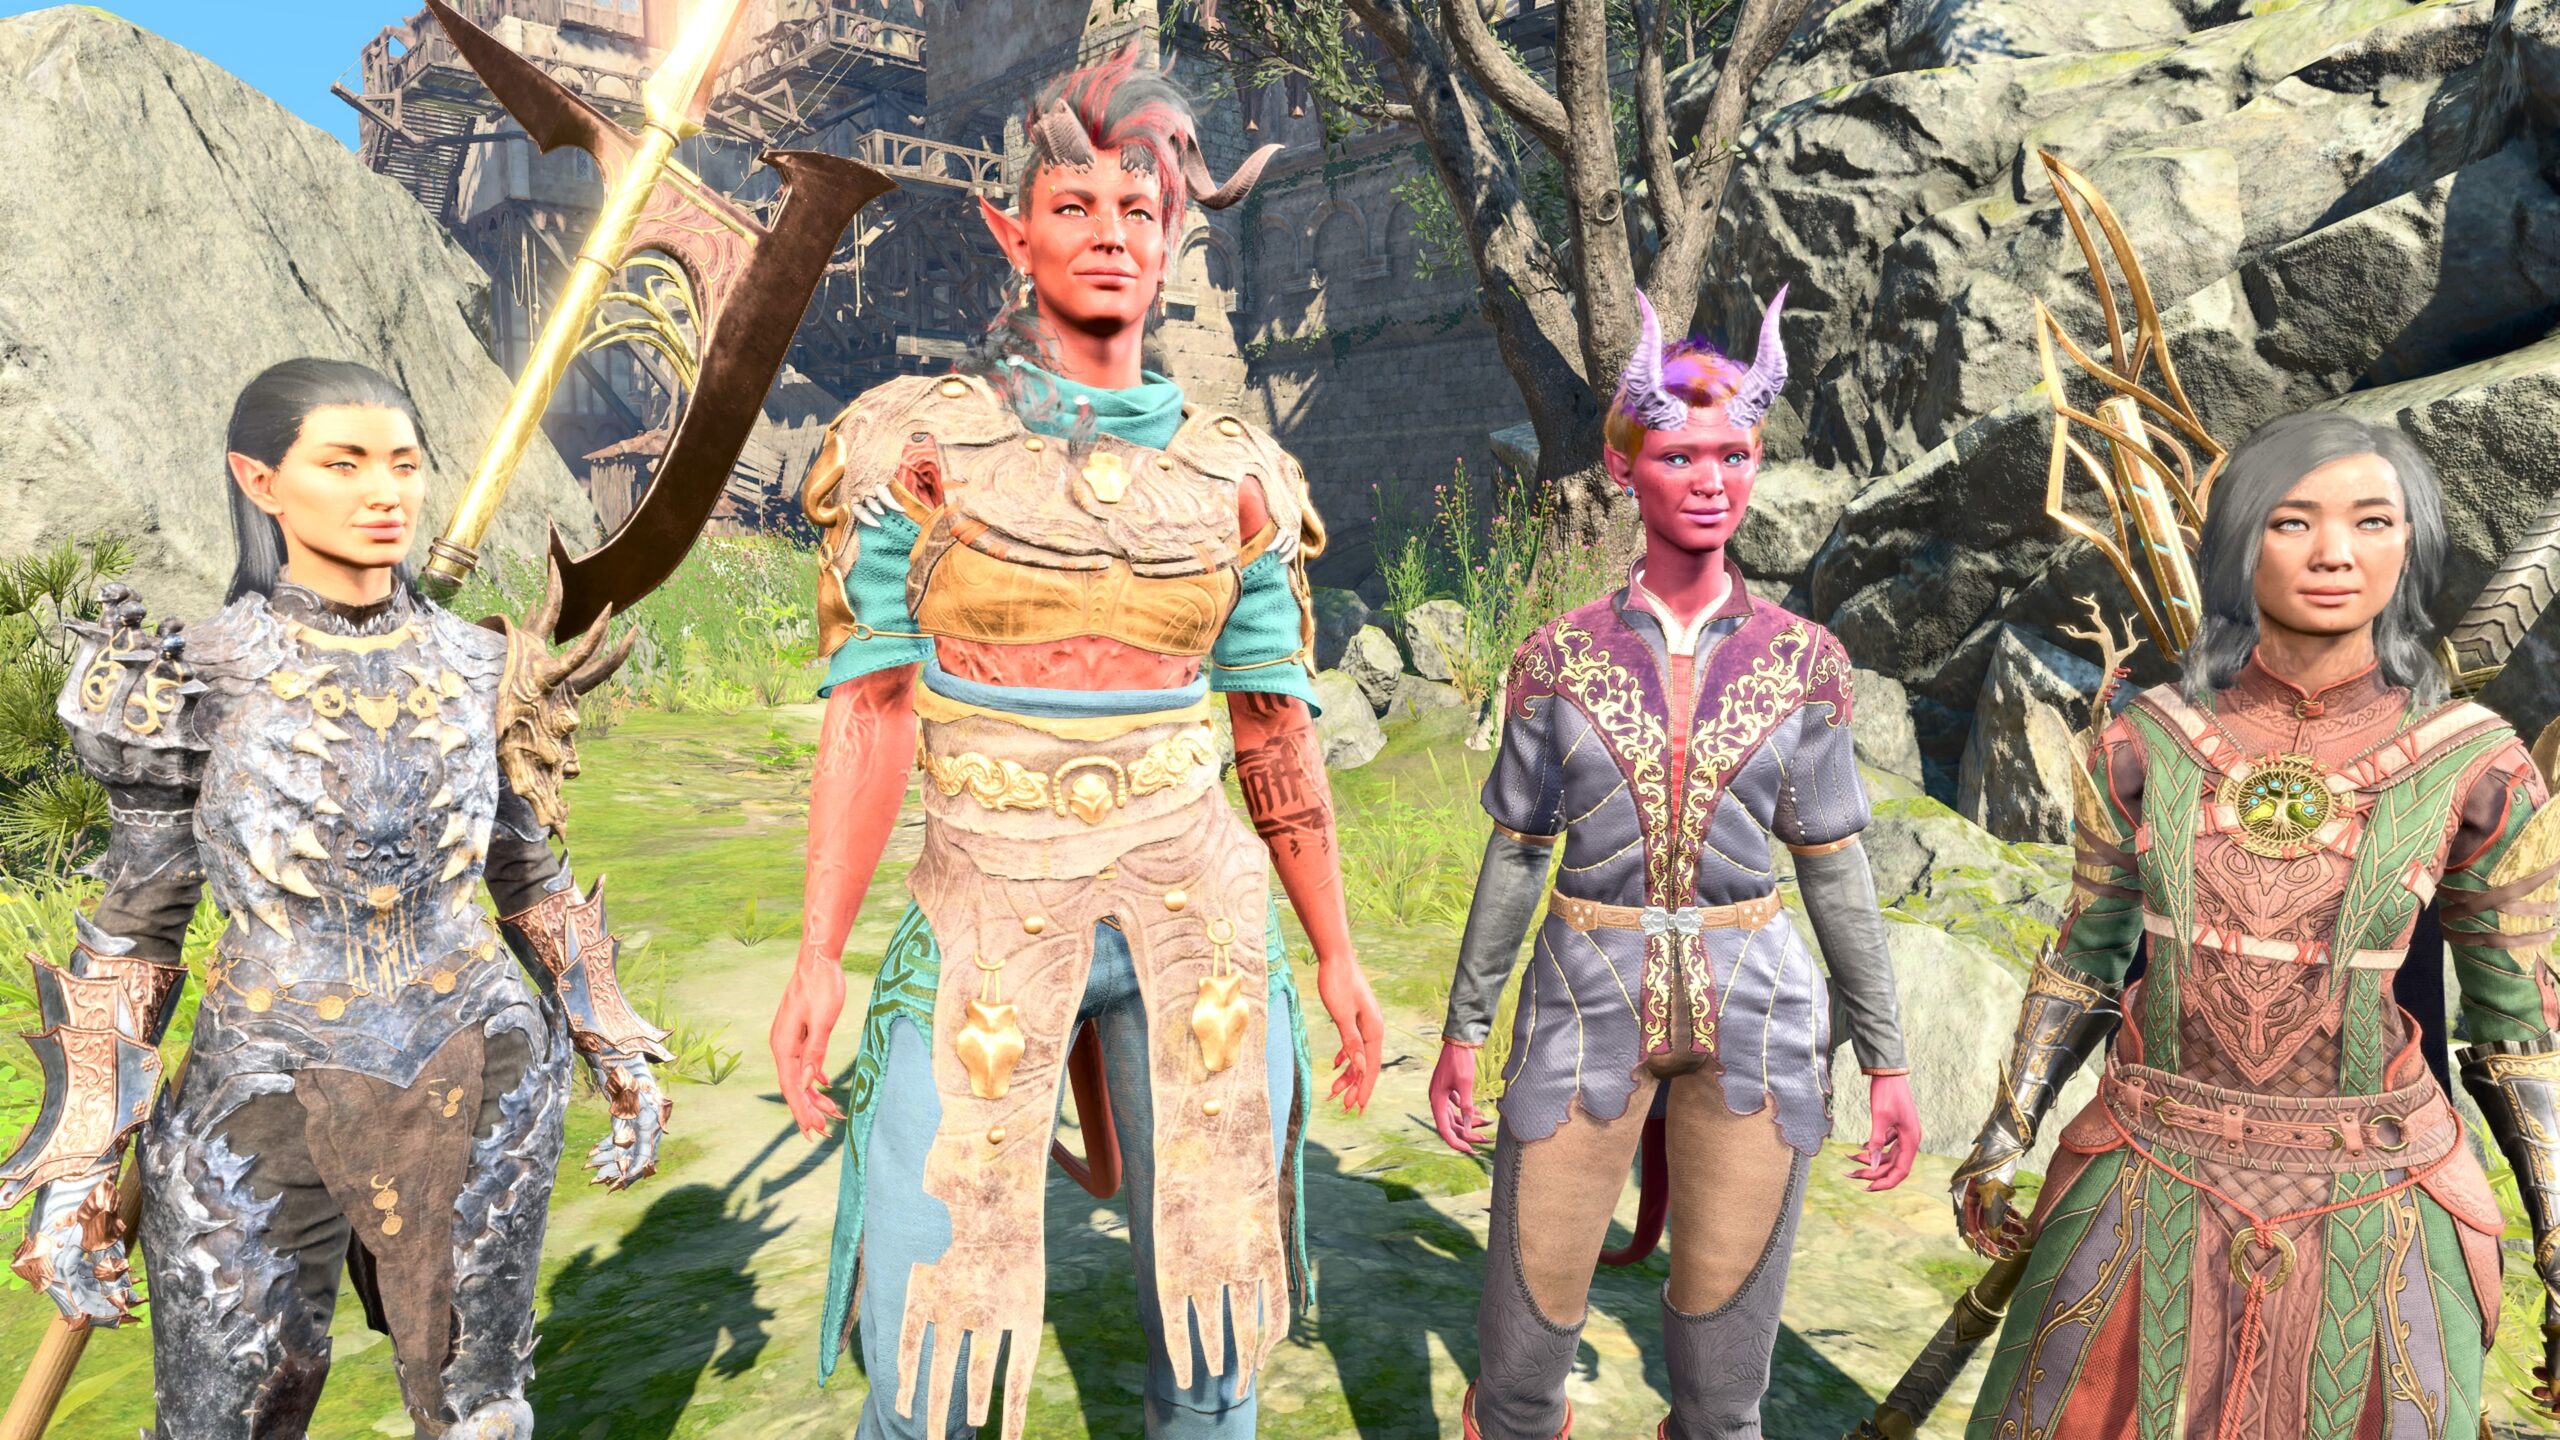

My fanfic consists mostly of close-in views of talking heads. I don’t do many large-scale battle shots. I always want a relatively narrow Field of View.
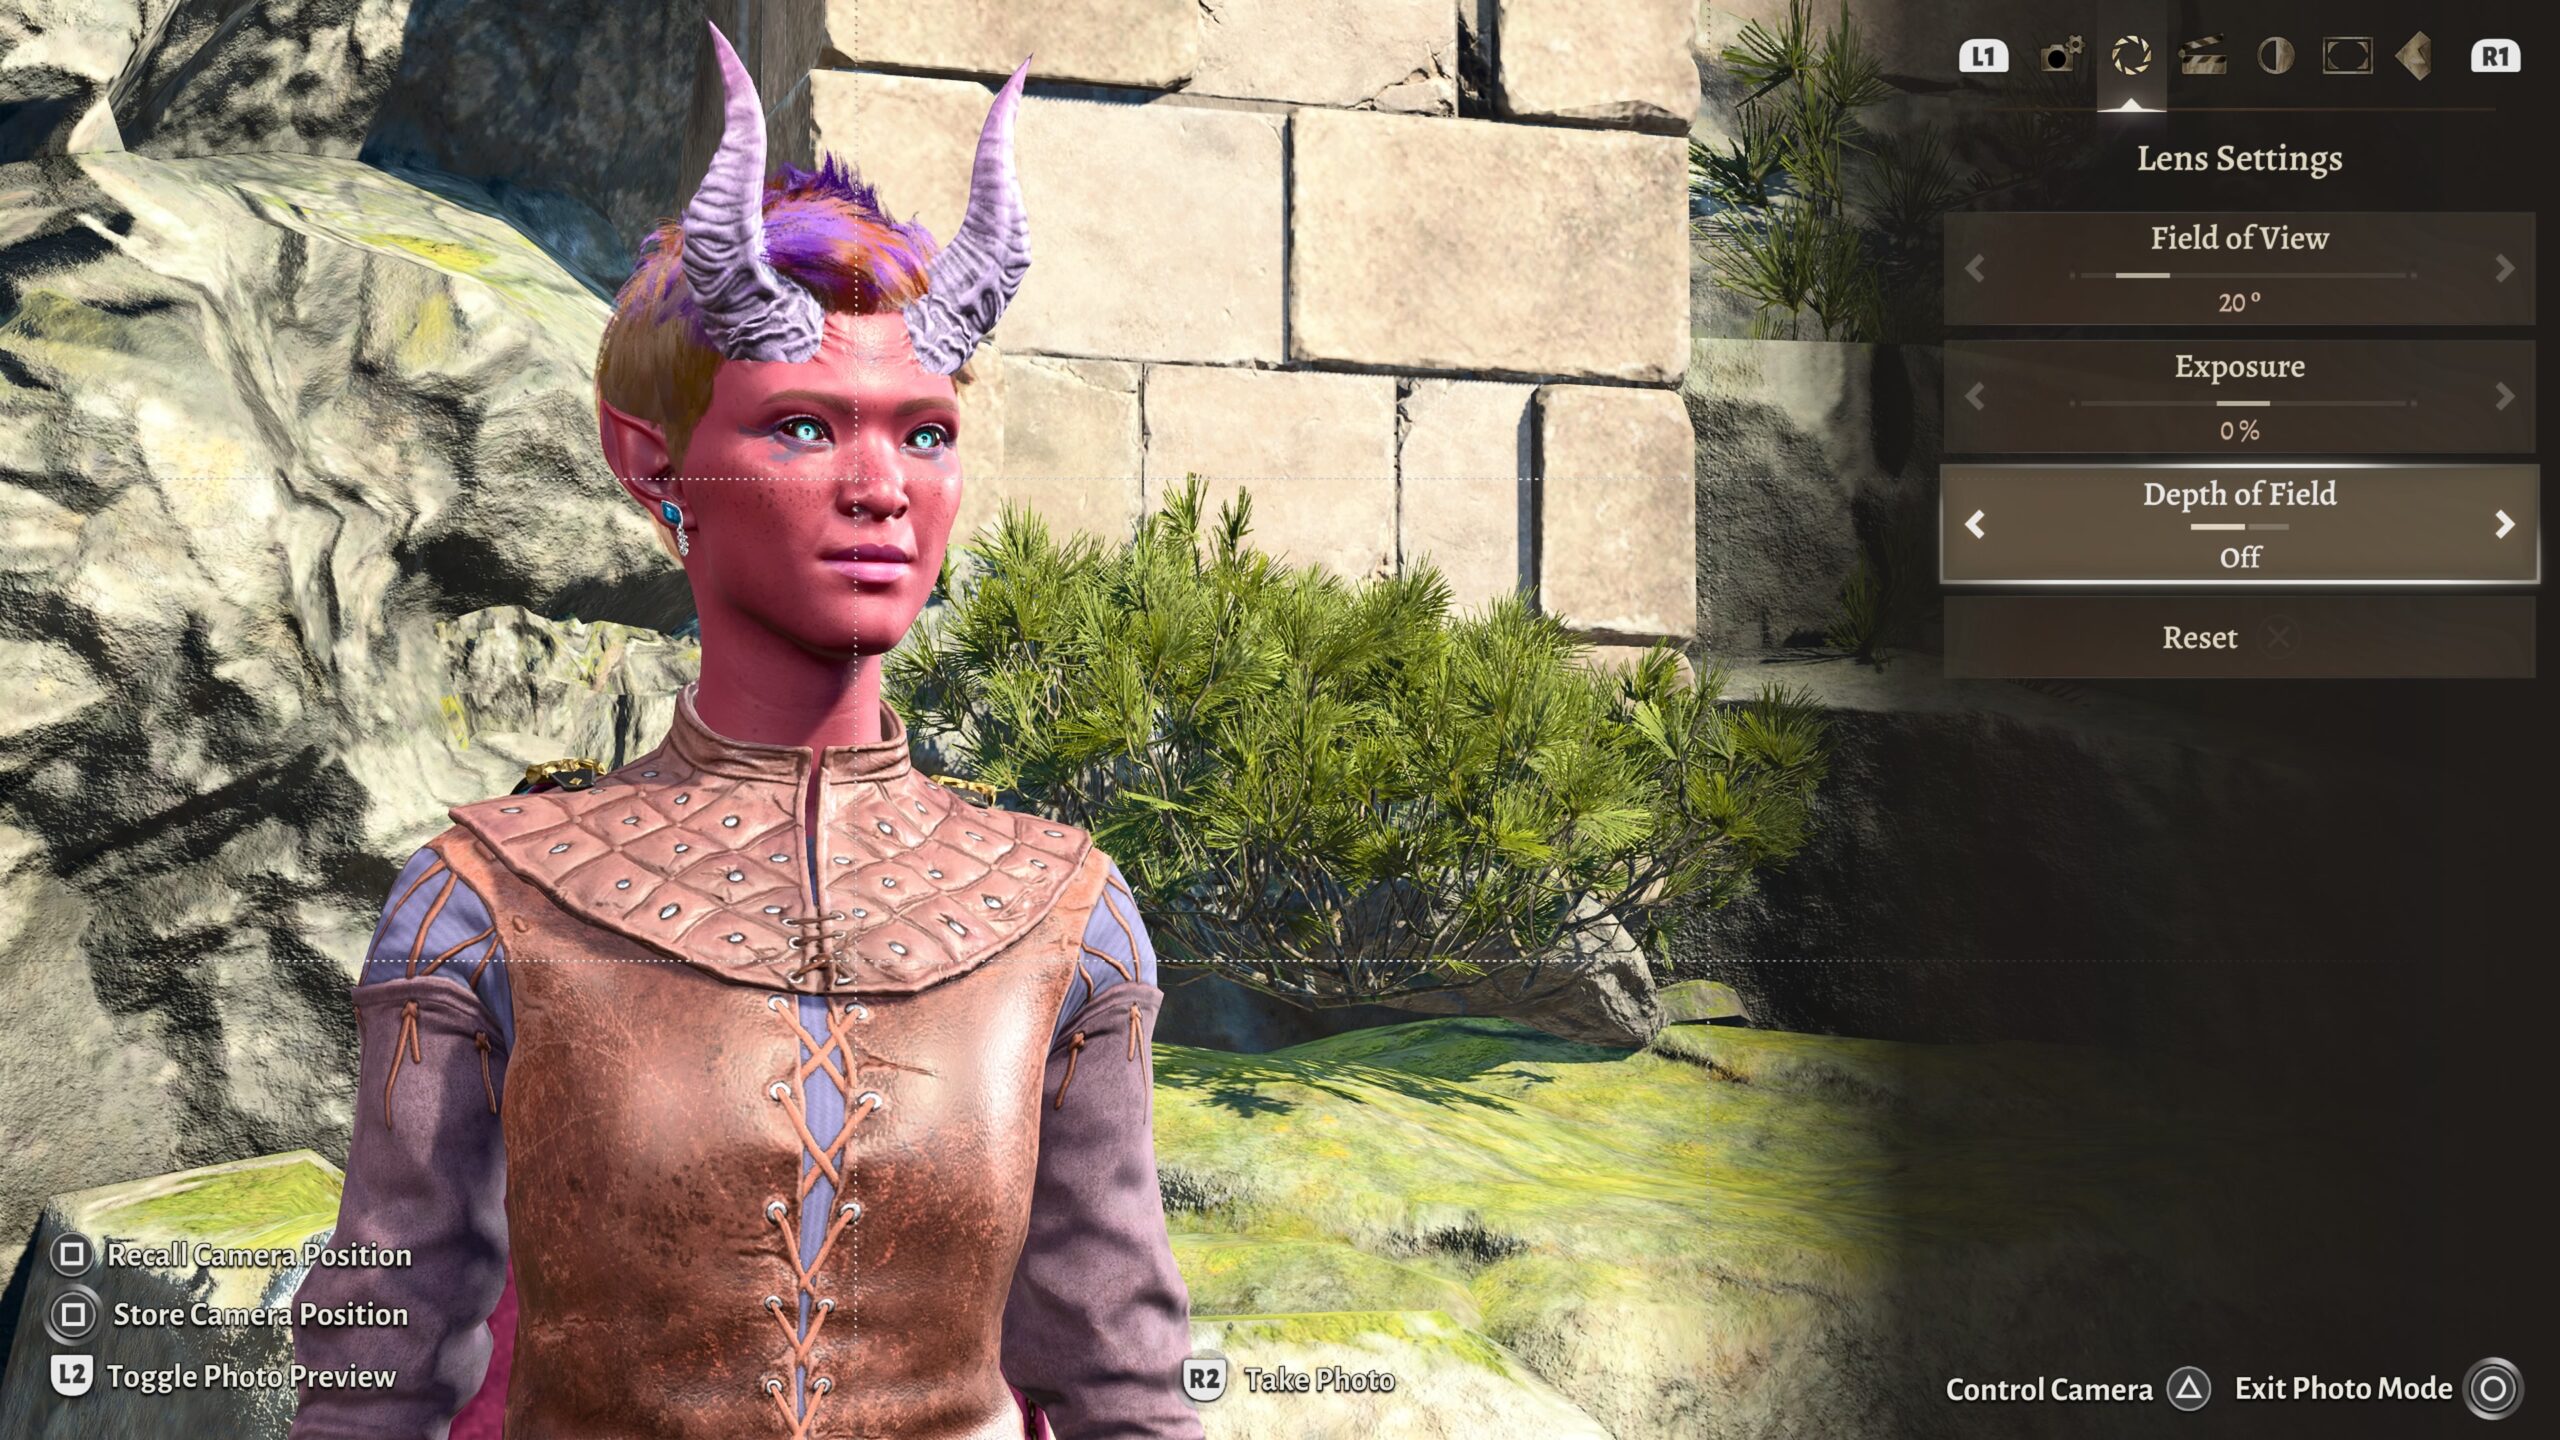
If 20° is good, wouldn’t 10° be better? Not for me. When the Field of View gets too low, I have problems positioning the camera. 20° is a good balance, at least for my fanfic shots.
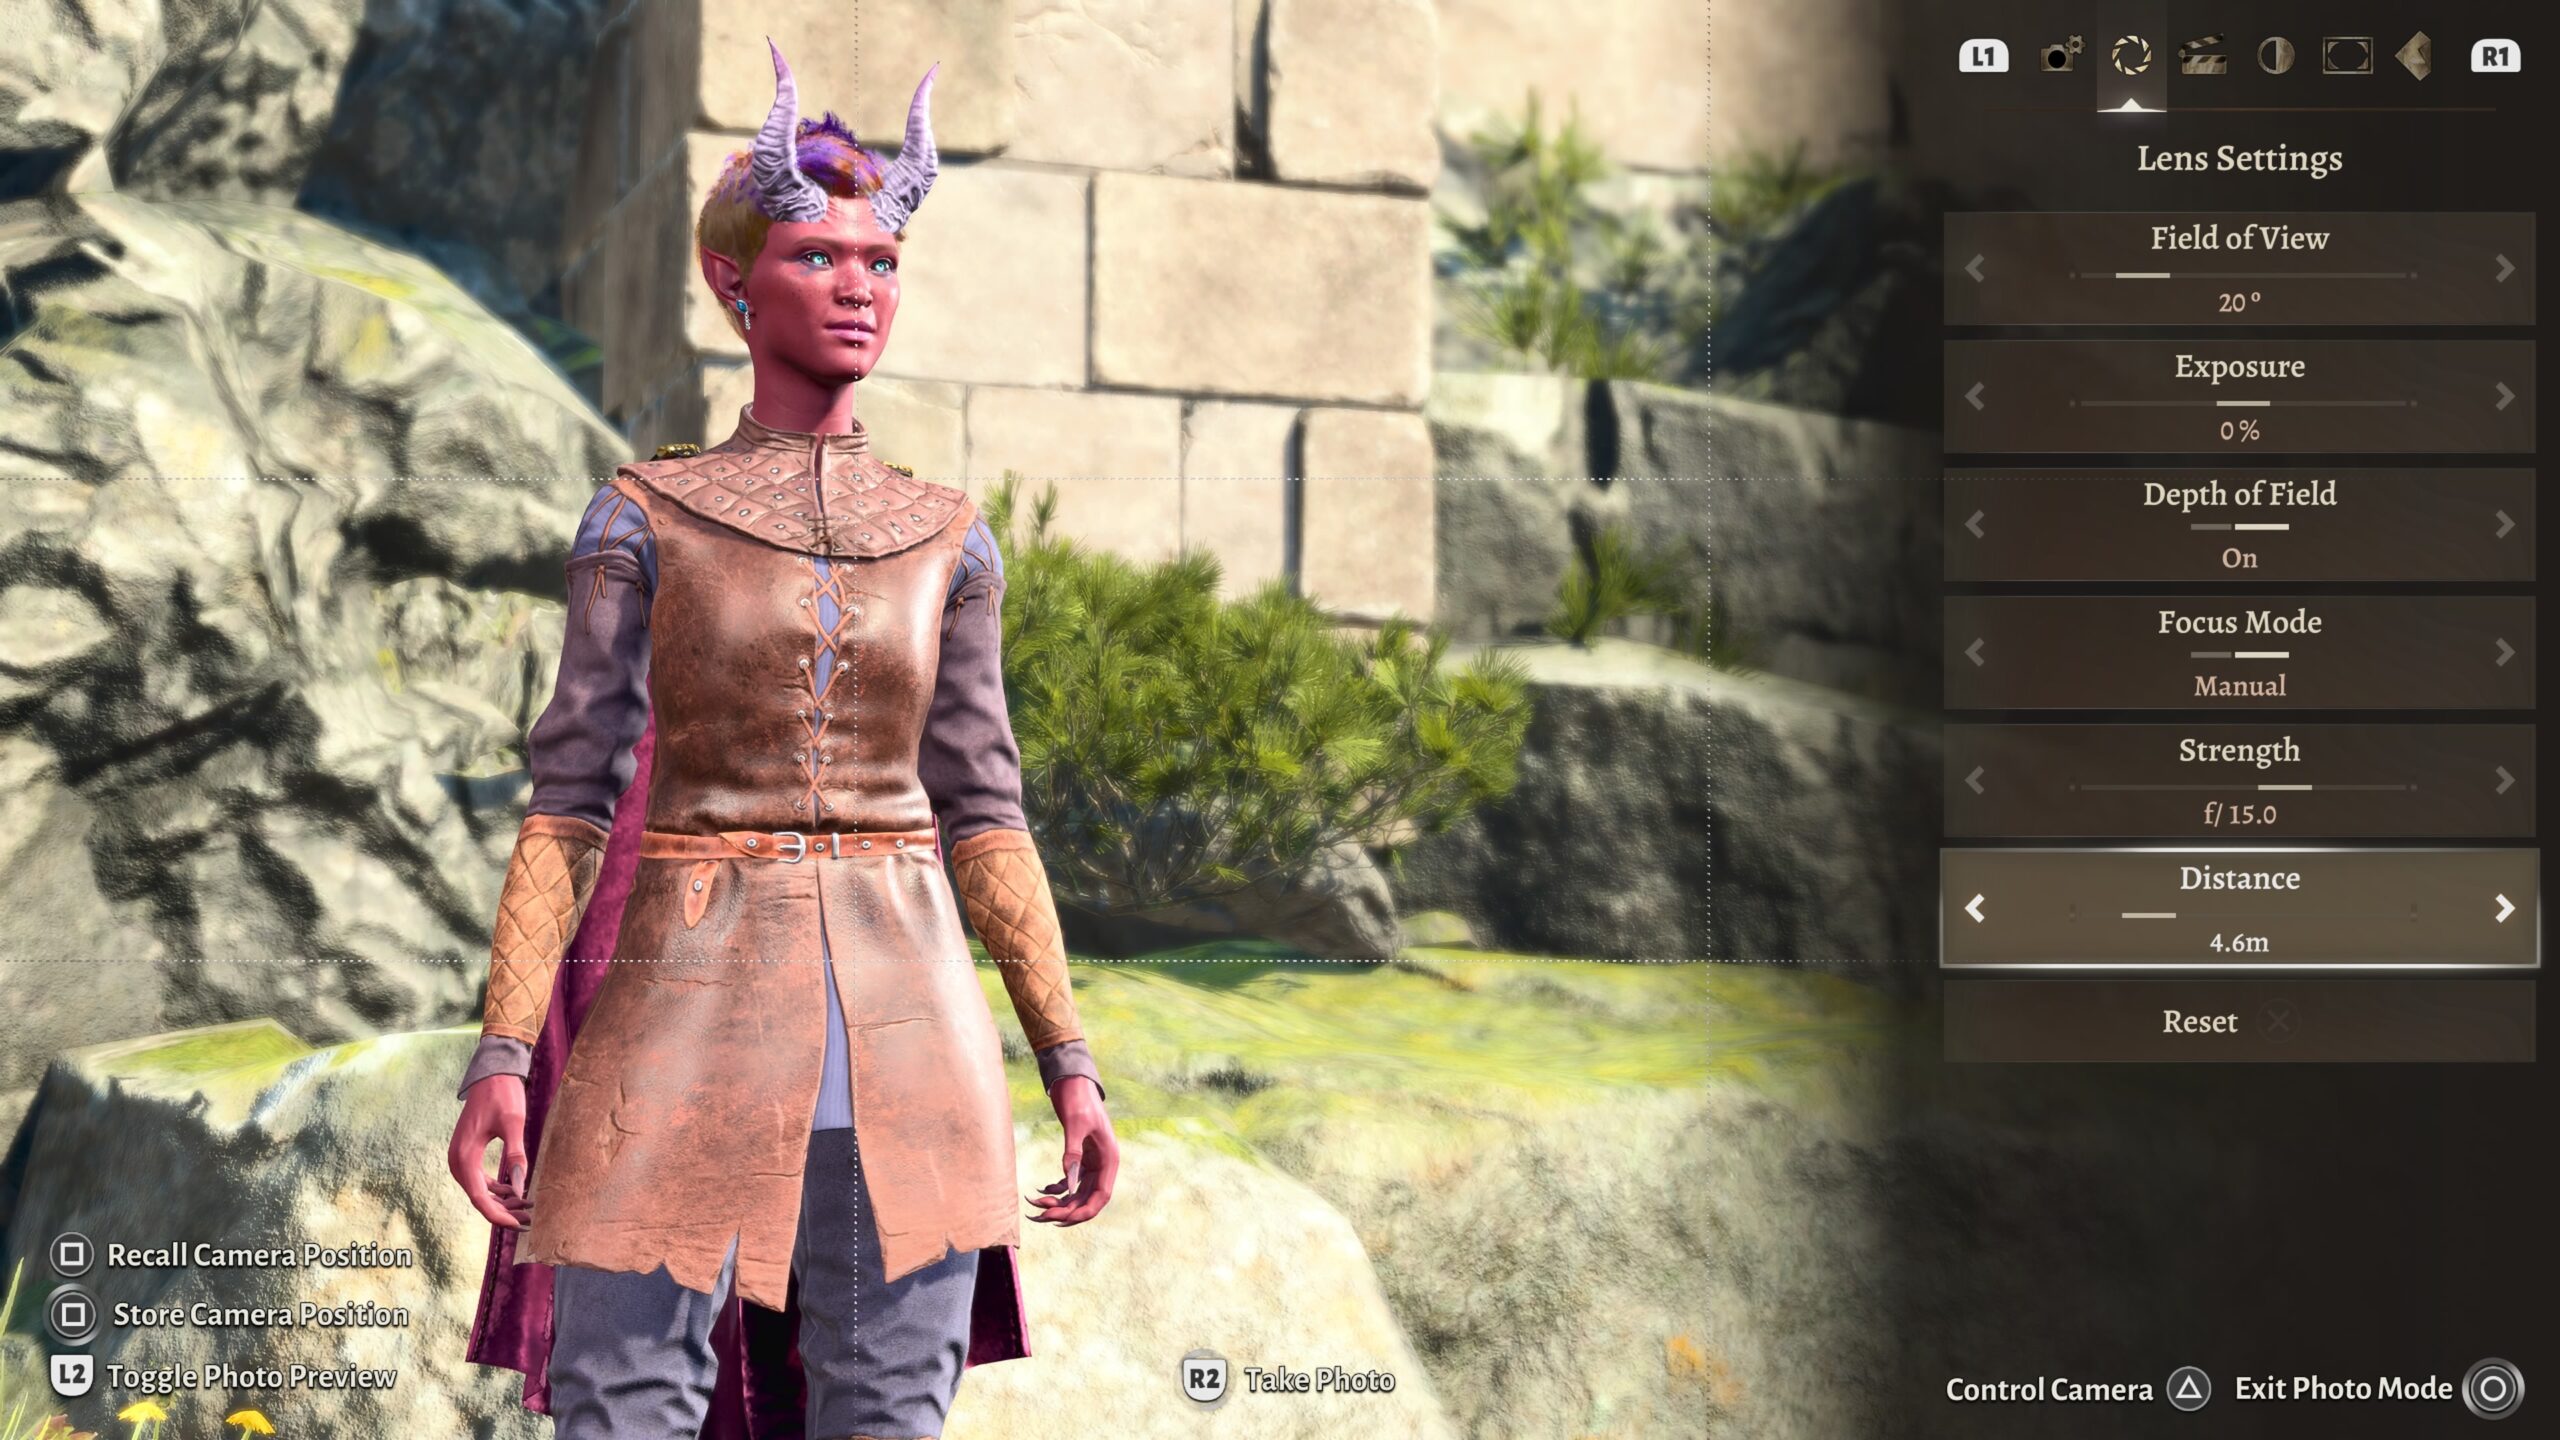
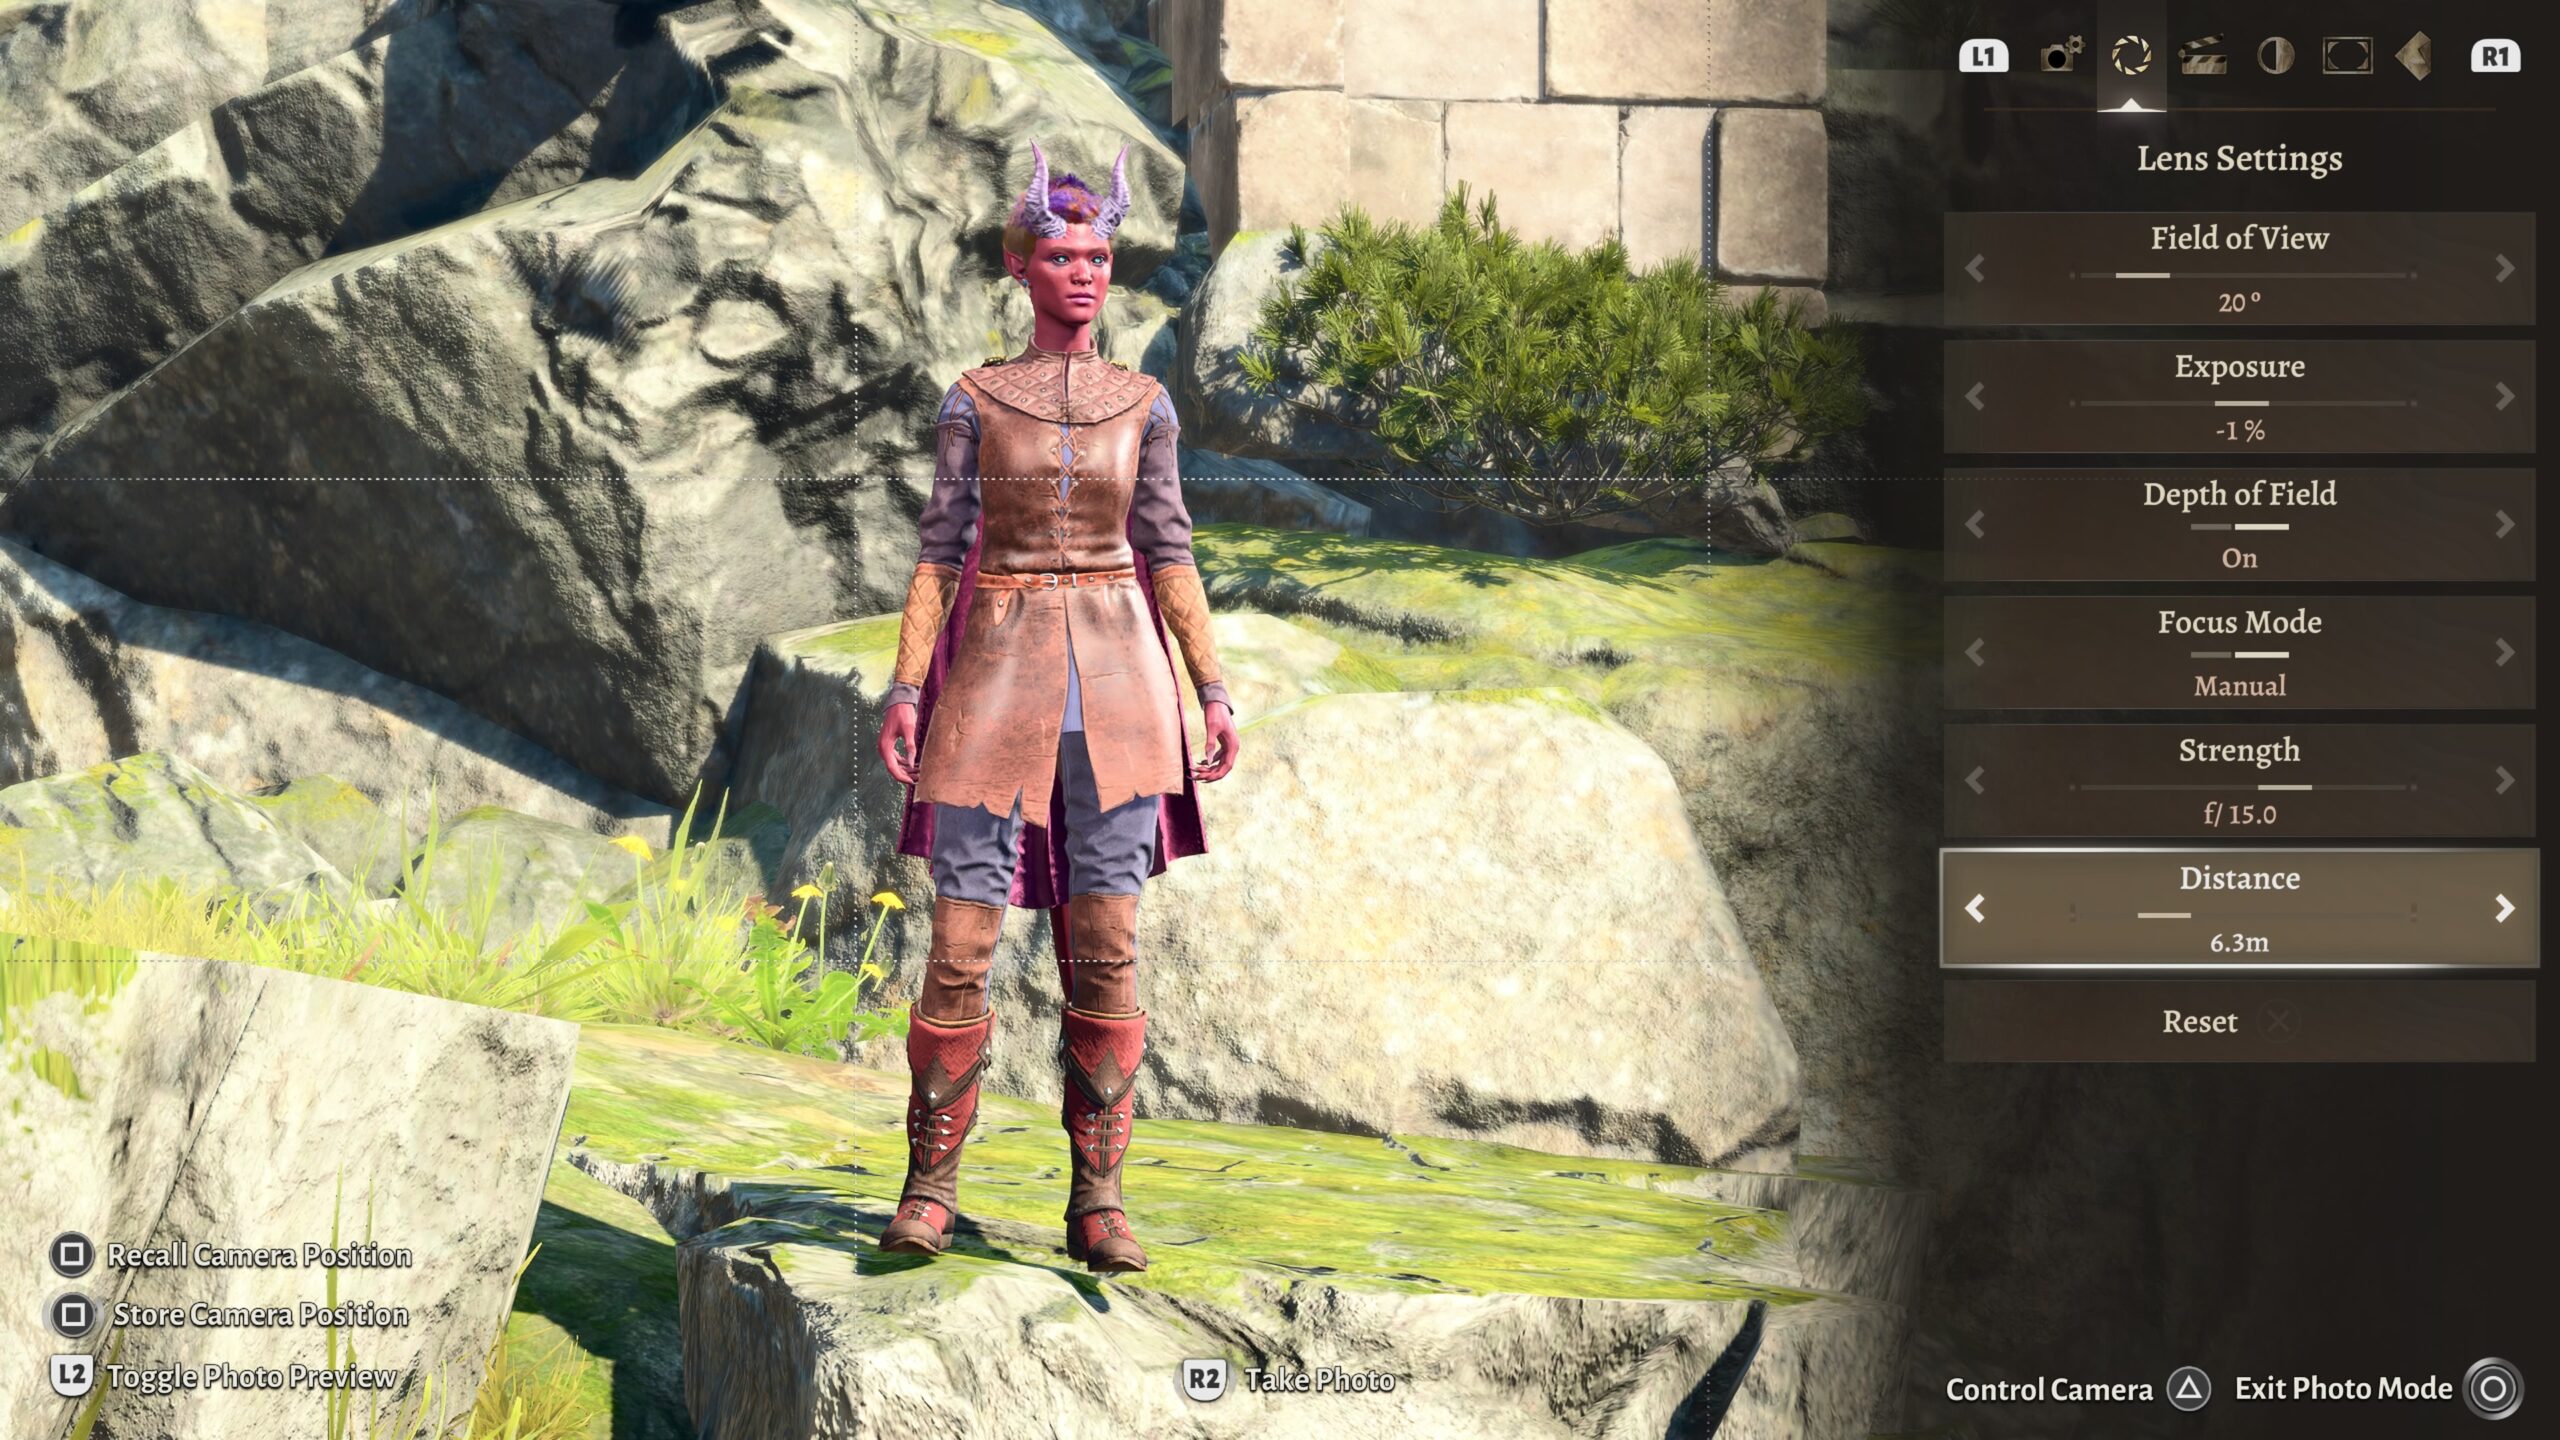
Depth of Field
When I understood how Field of View affected my images, I couldn’t unsee it. I had to adjust for it in every “photo shoot.”
Fortunately, I don’t usually take a single photo in isolation. I roughly position the models, go into Photo Mode, then take a variety of images, adjusting the camera and models as I go. I only have to set the Field of View when I first enter Photo Mode.
Depth of Field is a different story. Once I understood what it was, I couldn’t let it go either. It’s something I may potentially have to adjust for each individual image.
It slows me down. A part of me wishes I hadn’t learned it. It’s why I’ve been reluctant, as I explained earlier, to get even minor additional training in crafting the fanfic.
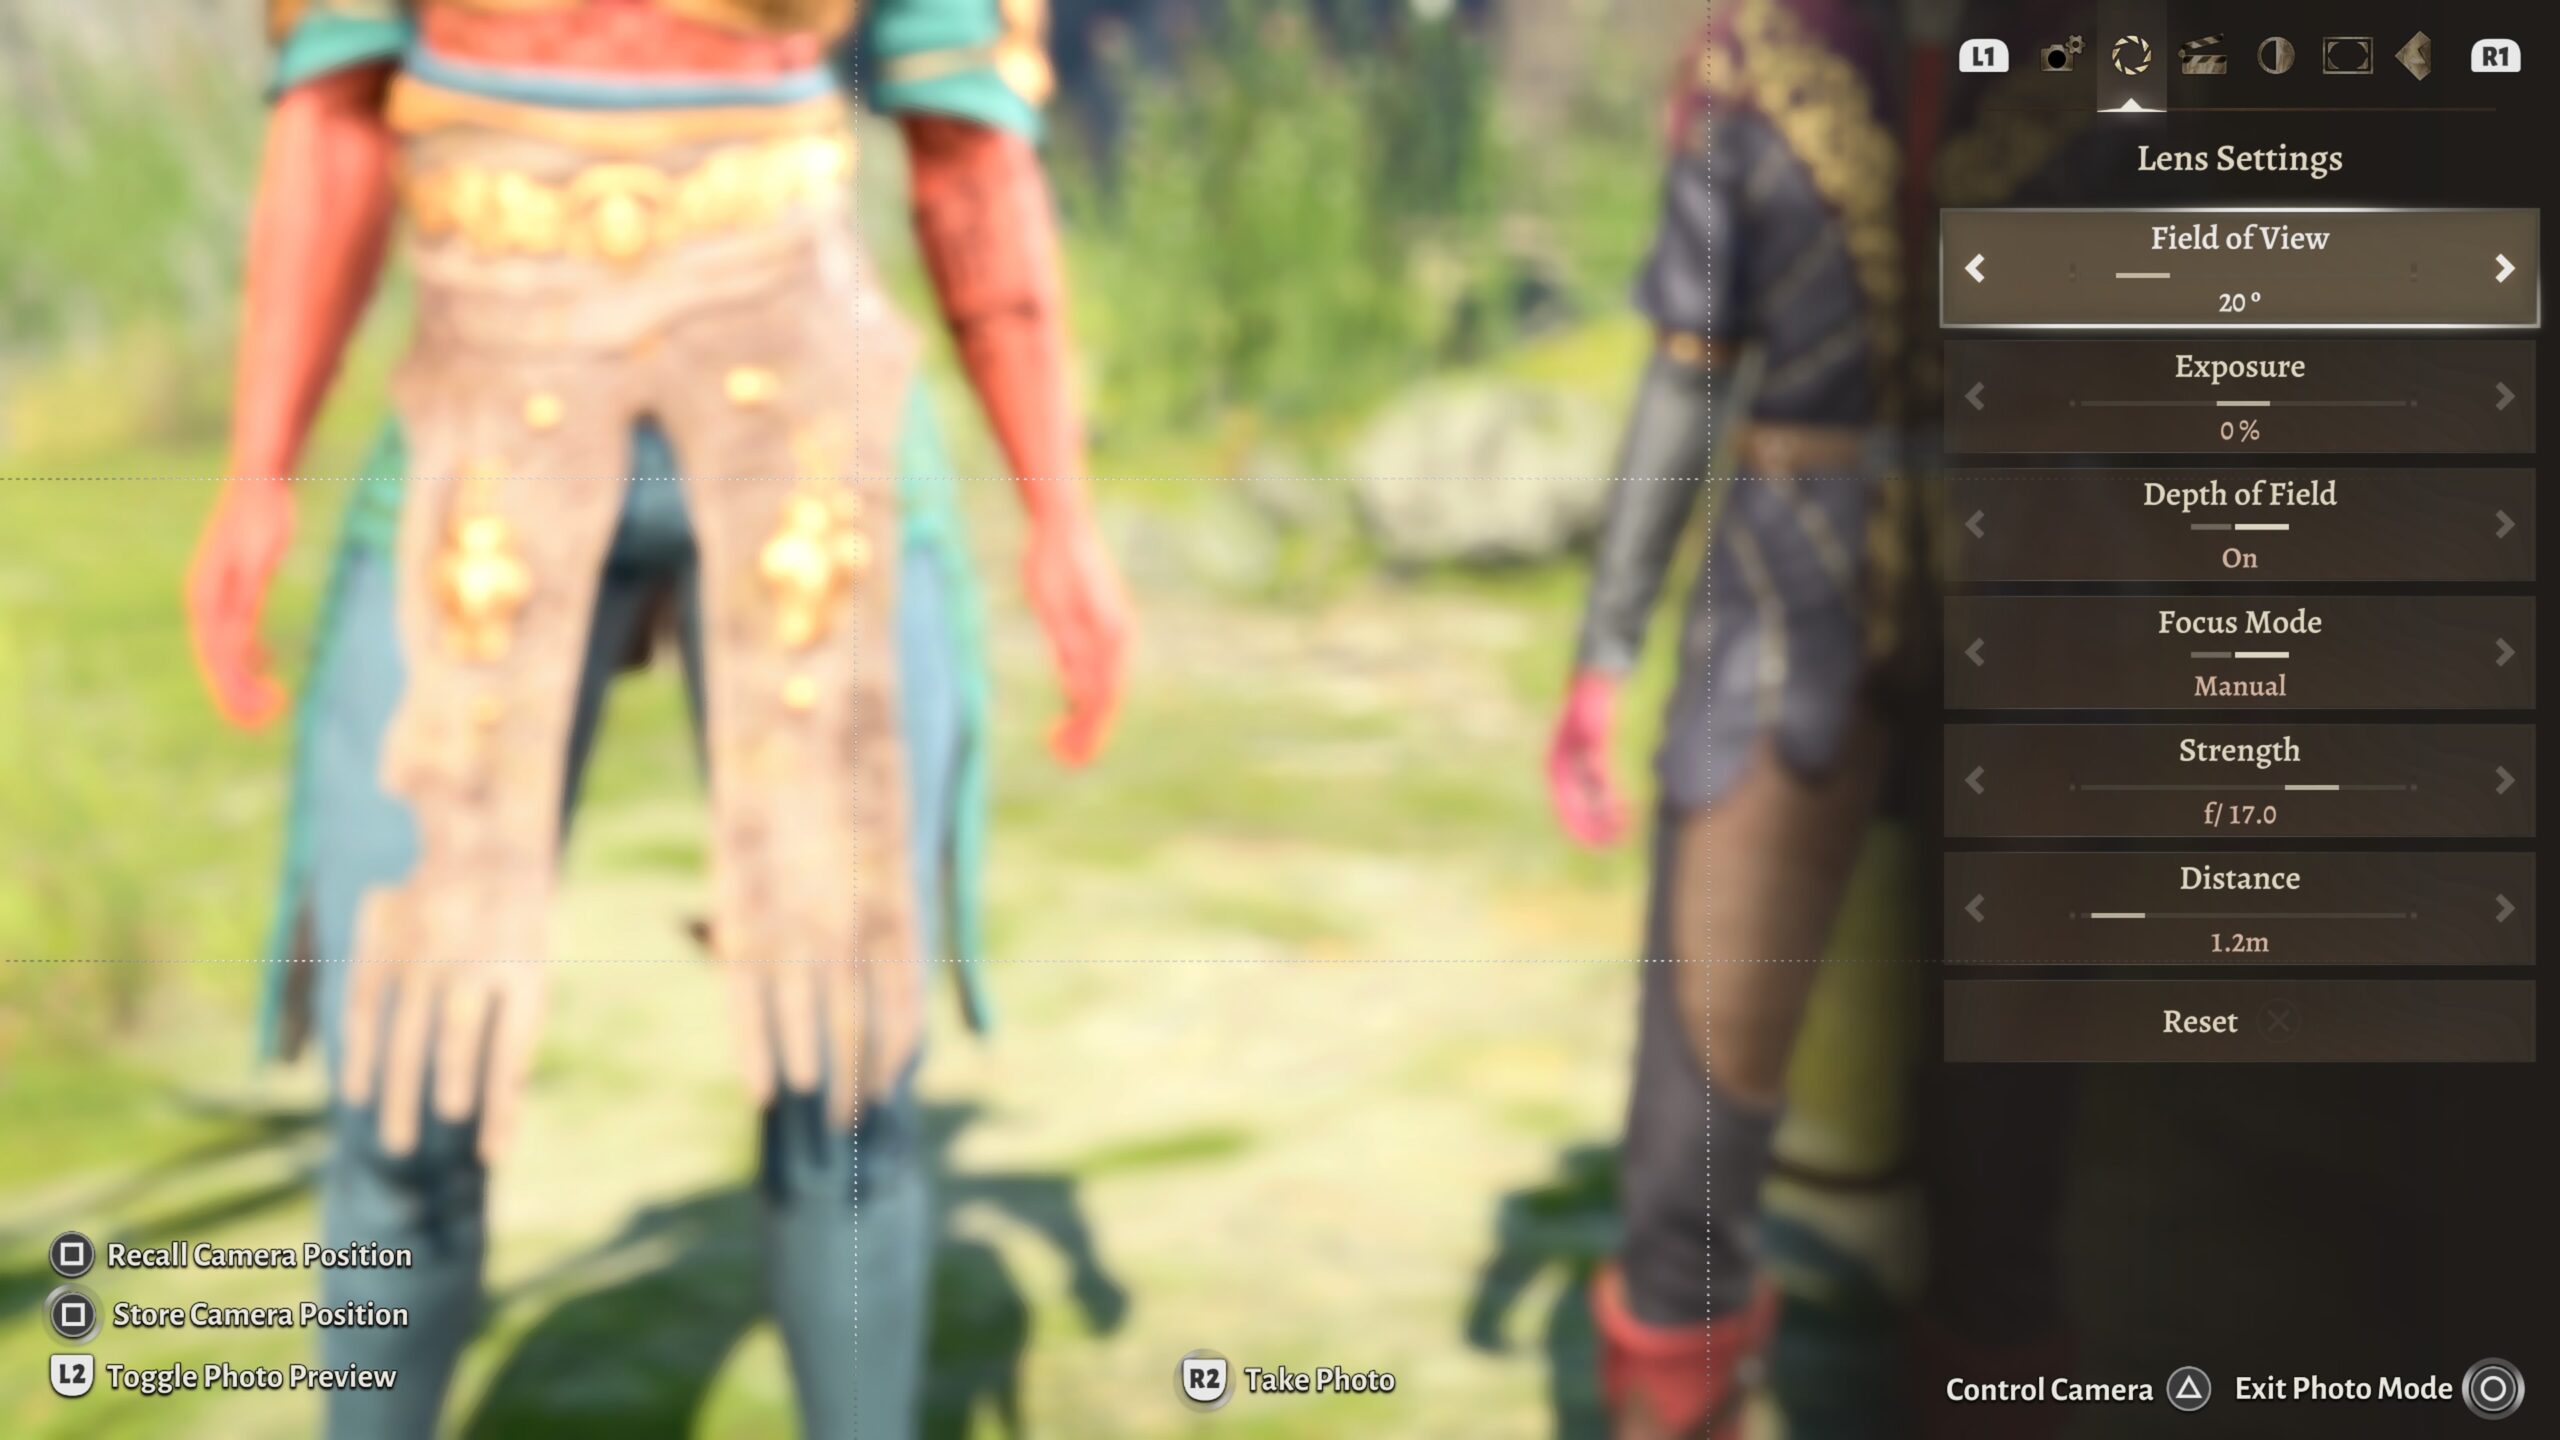
“Depth of Field” is the distance from the camera at which the image is in focus. Let’s look at an example.
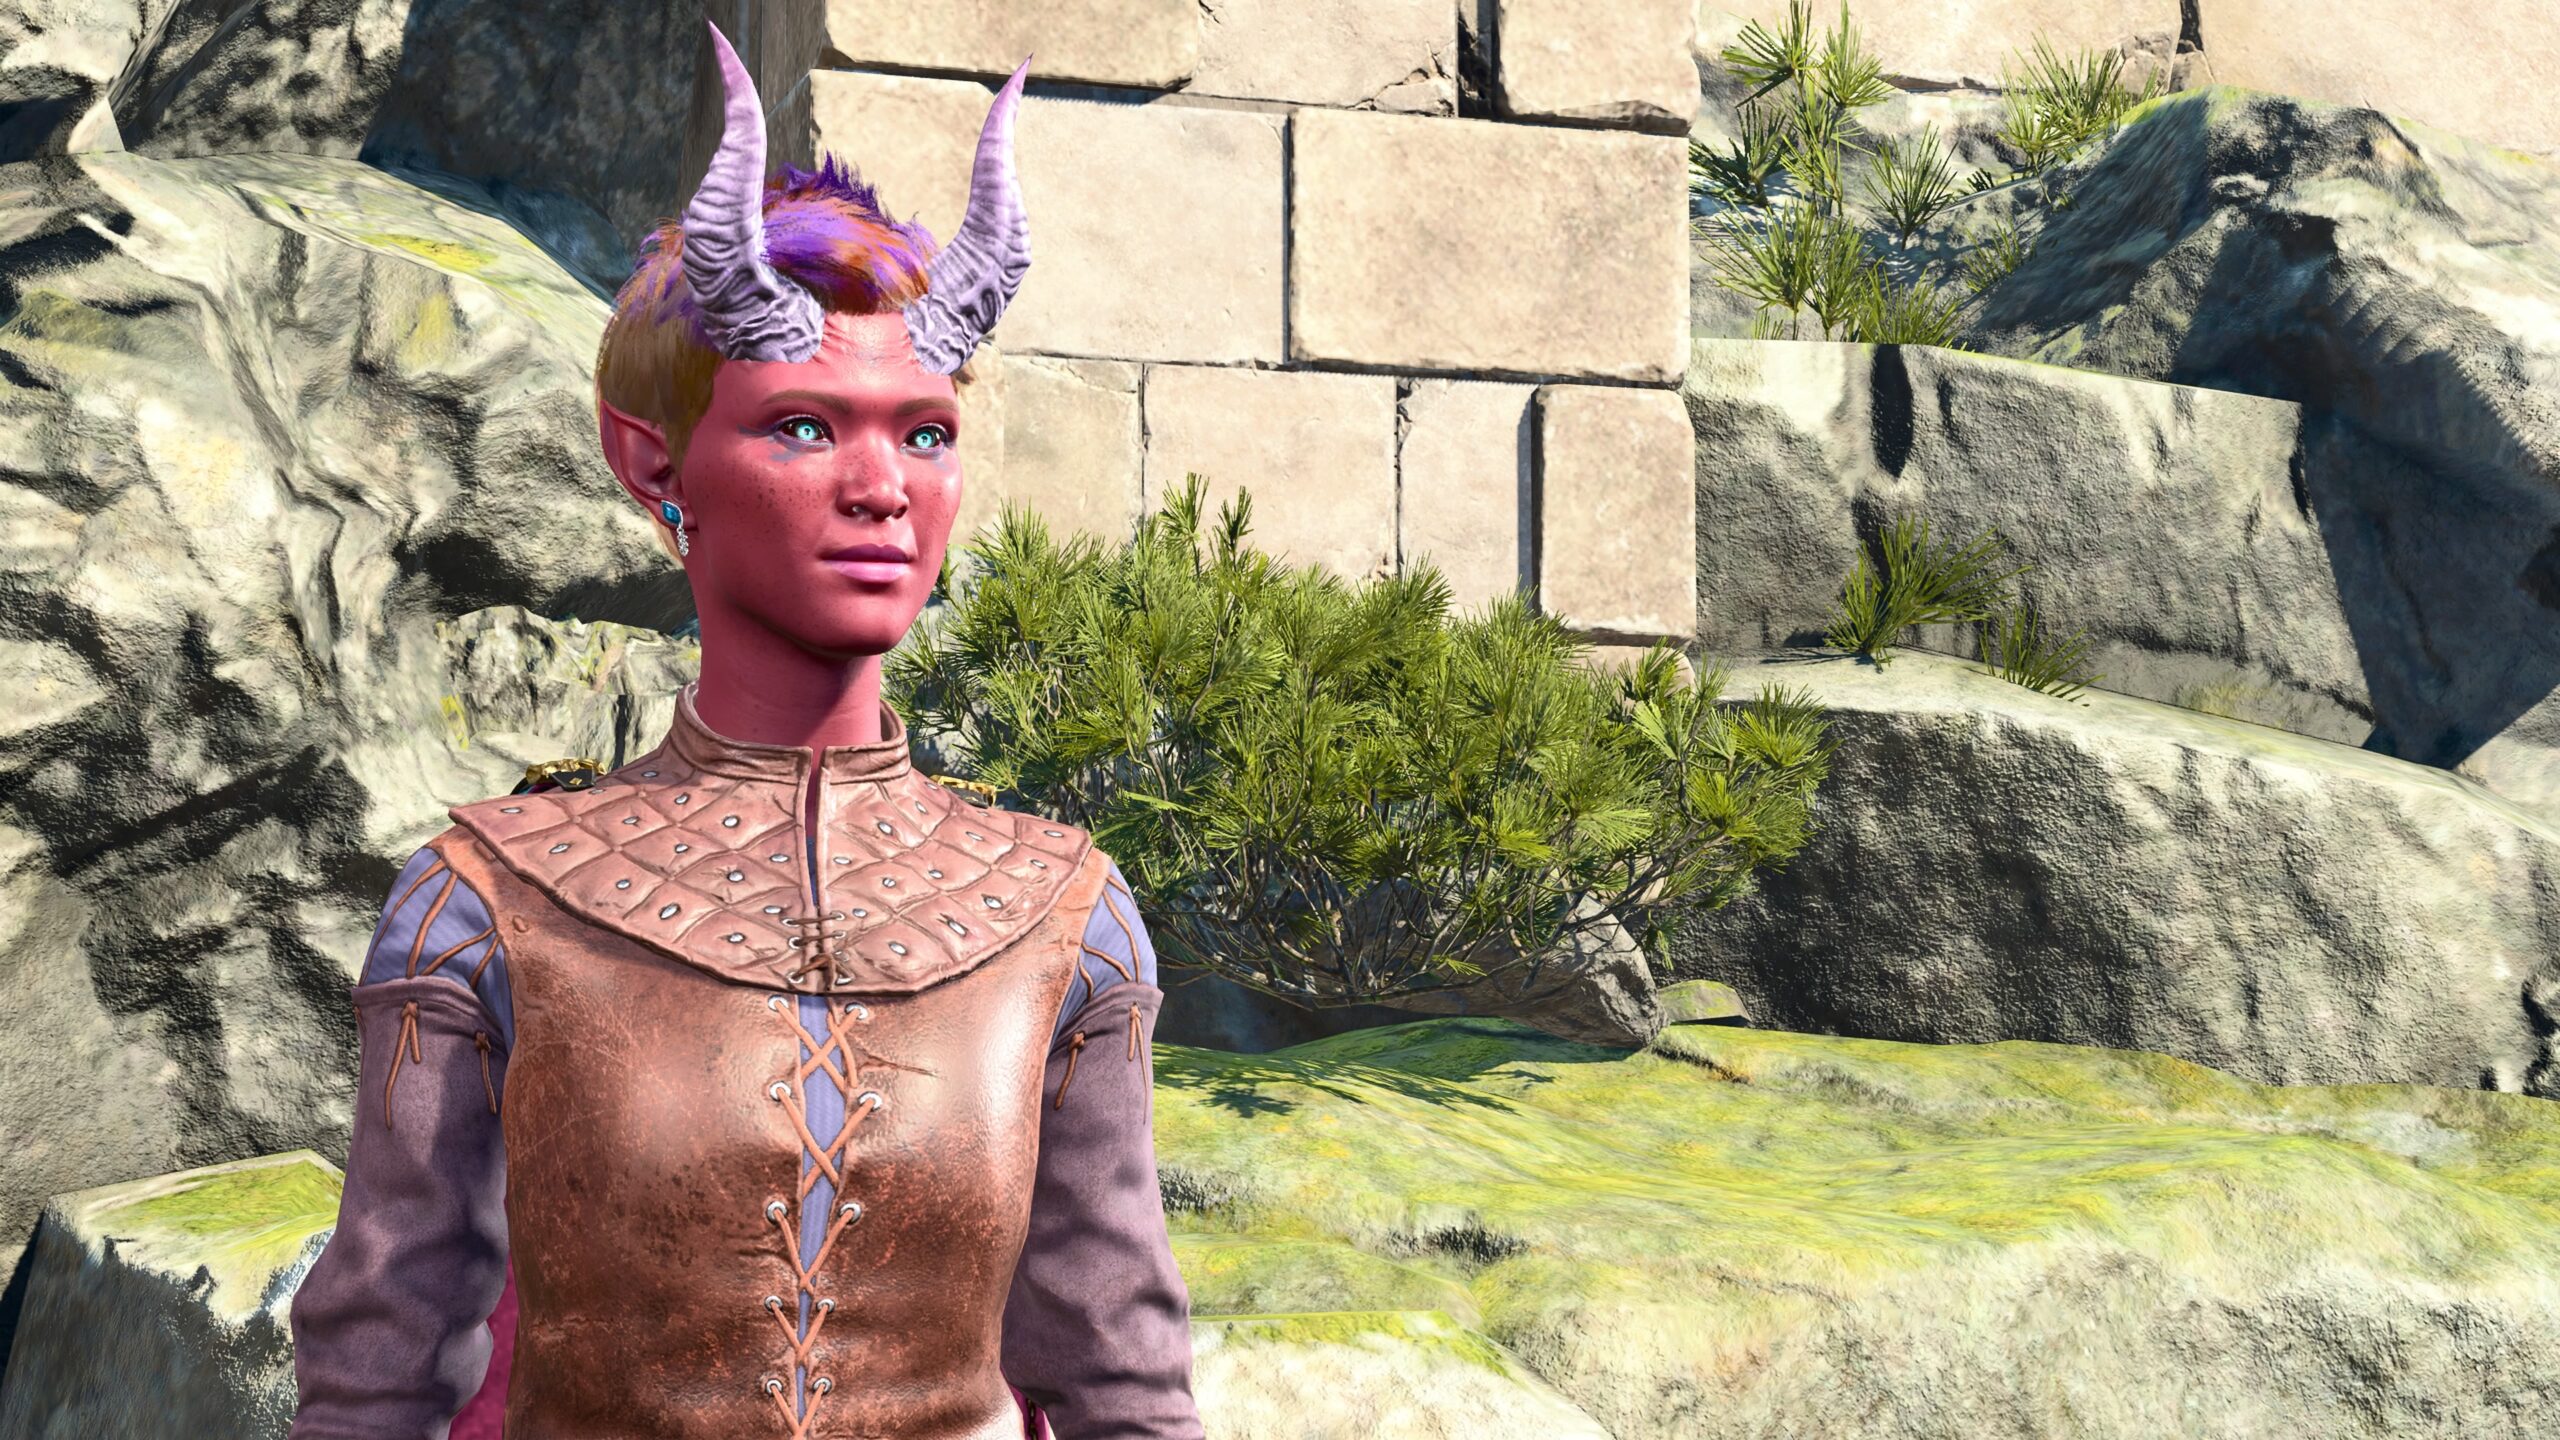
I know that the f-ratio relates to Exposure in some way in real cameras. But in the artificial universe of the camera in Photo Mode, the only difference I see when adjusting Exposure is in the image’s brightness. I usually adjust that (if needed) using a different image-control panel.
The simplified version, at least the one I understand, is that turning on Depth of Field means that part of the image will be out-of-focus. The part that will be in-focus depends on the Distance you set in the camera controls. The Strength parameter controls:
- how blurry other objects (like background trees) will become as a function of separation from that Distance value;
- the range on either side of that distance that objects will still remain in-focus.
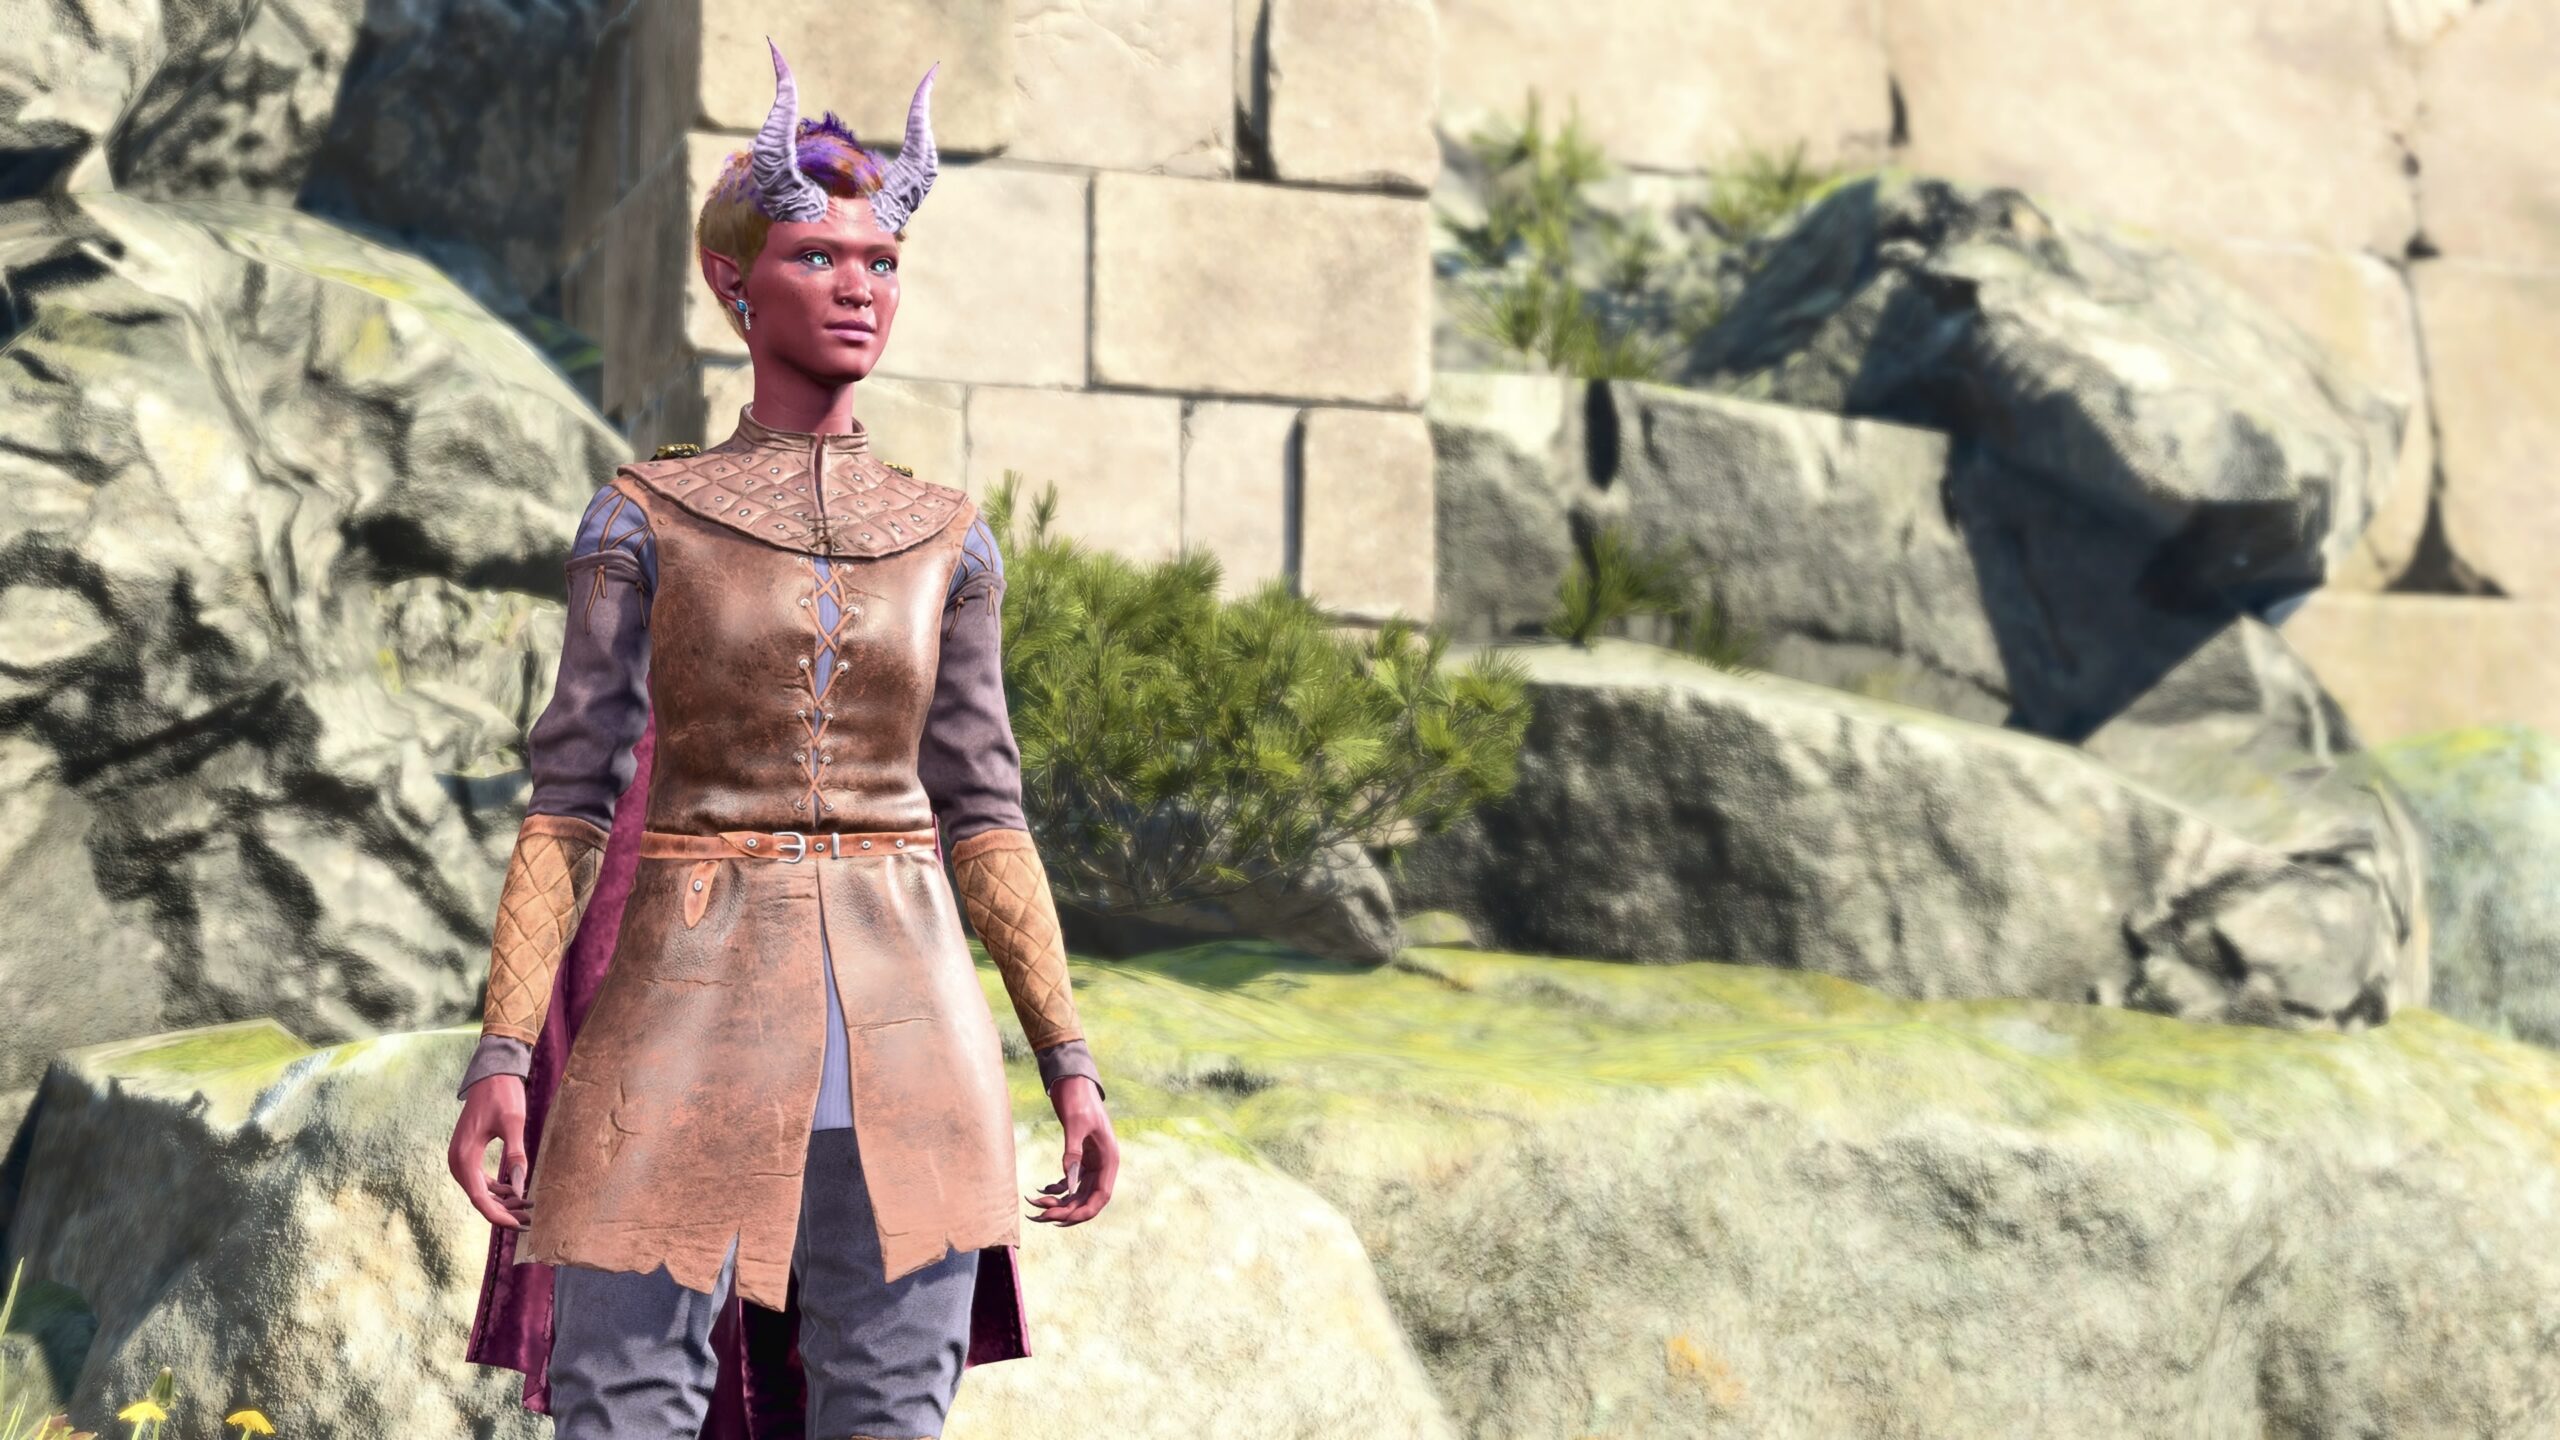
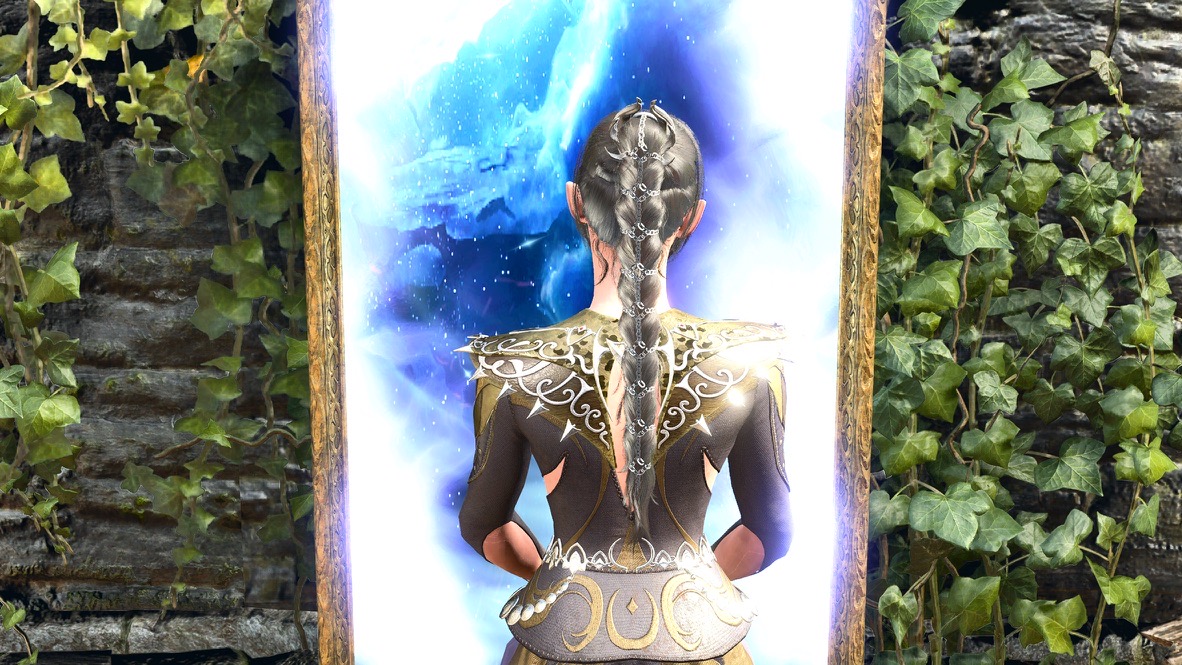
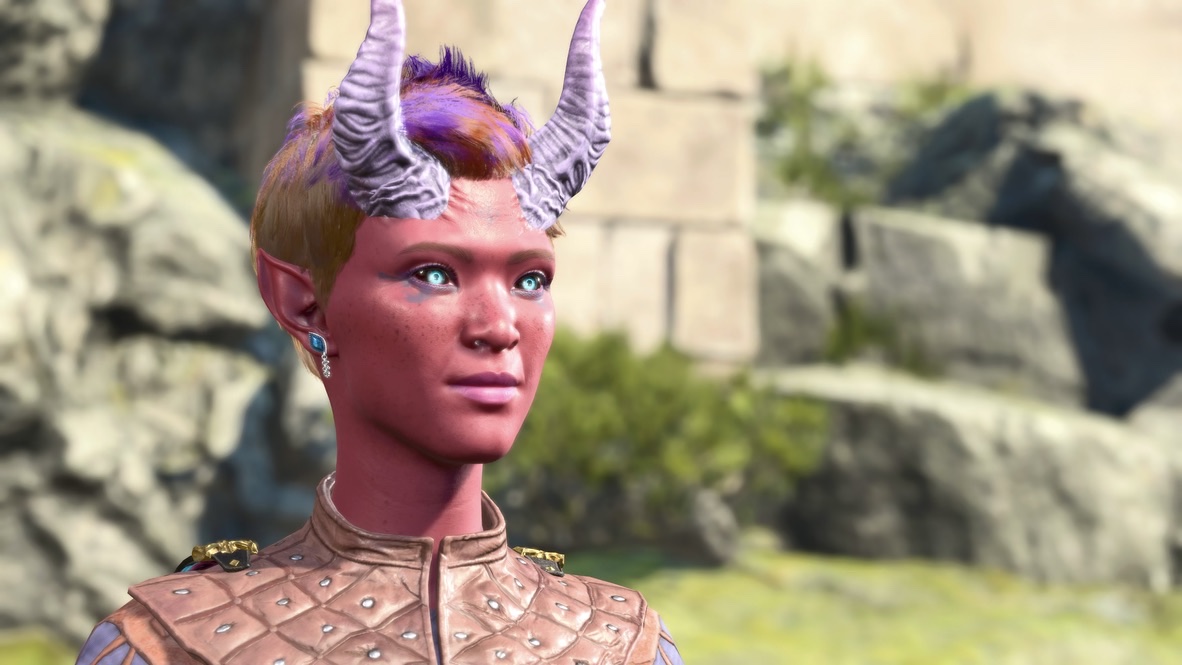
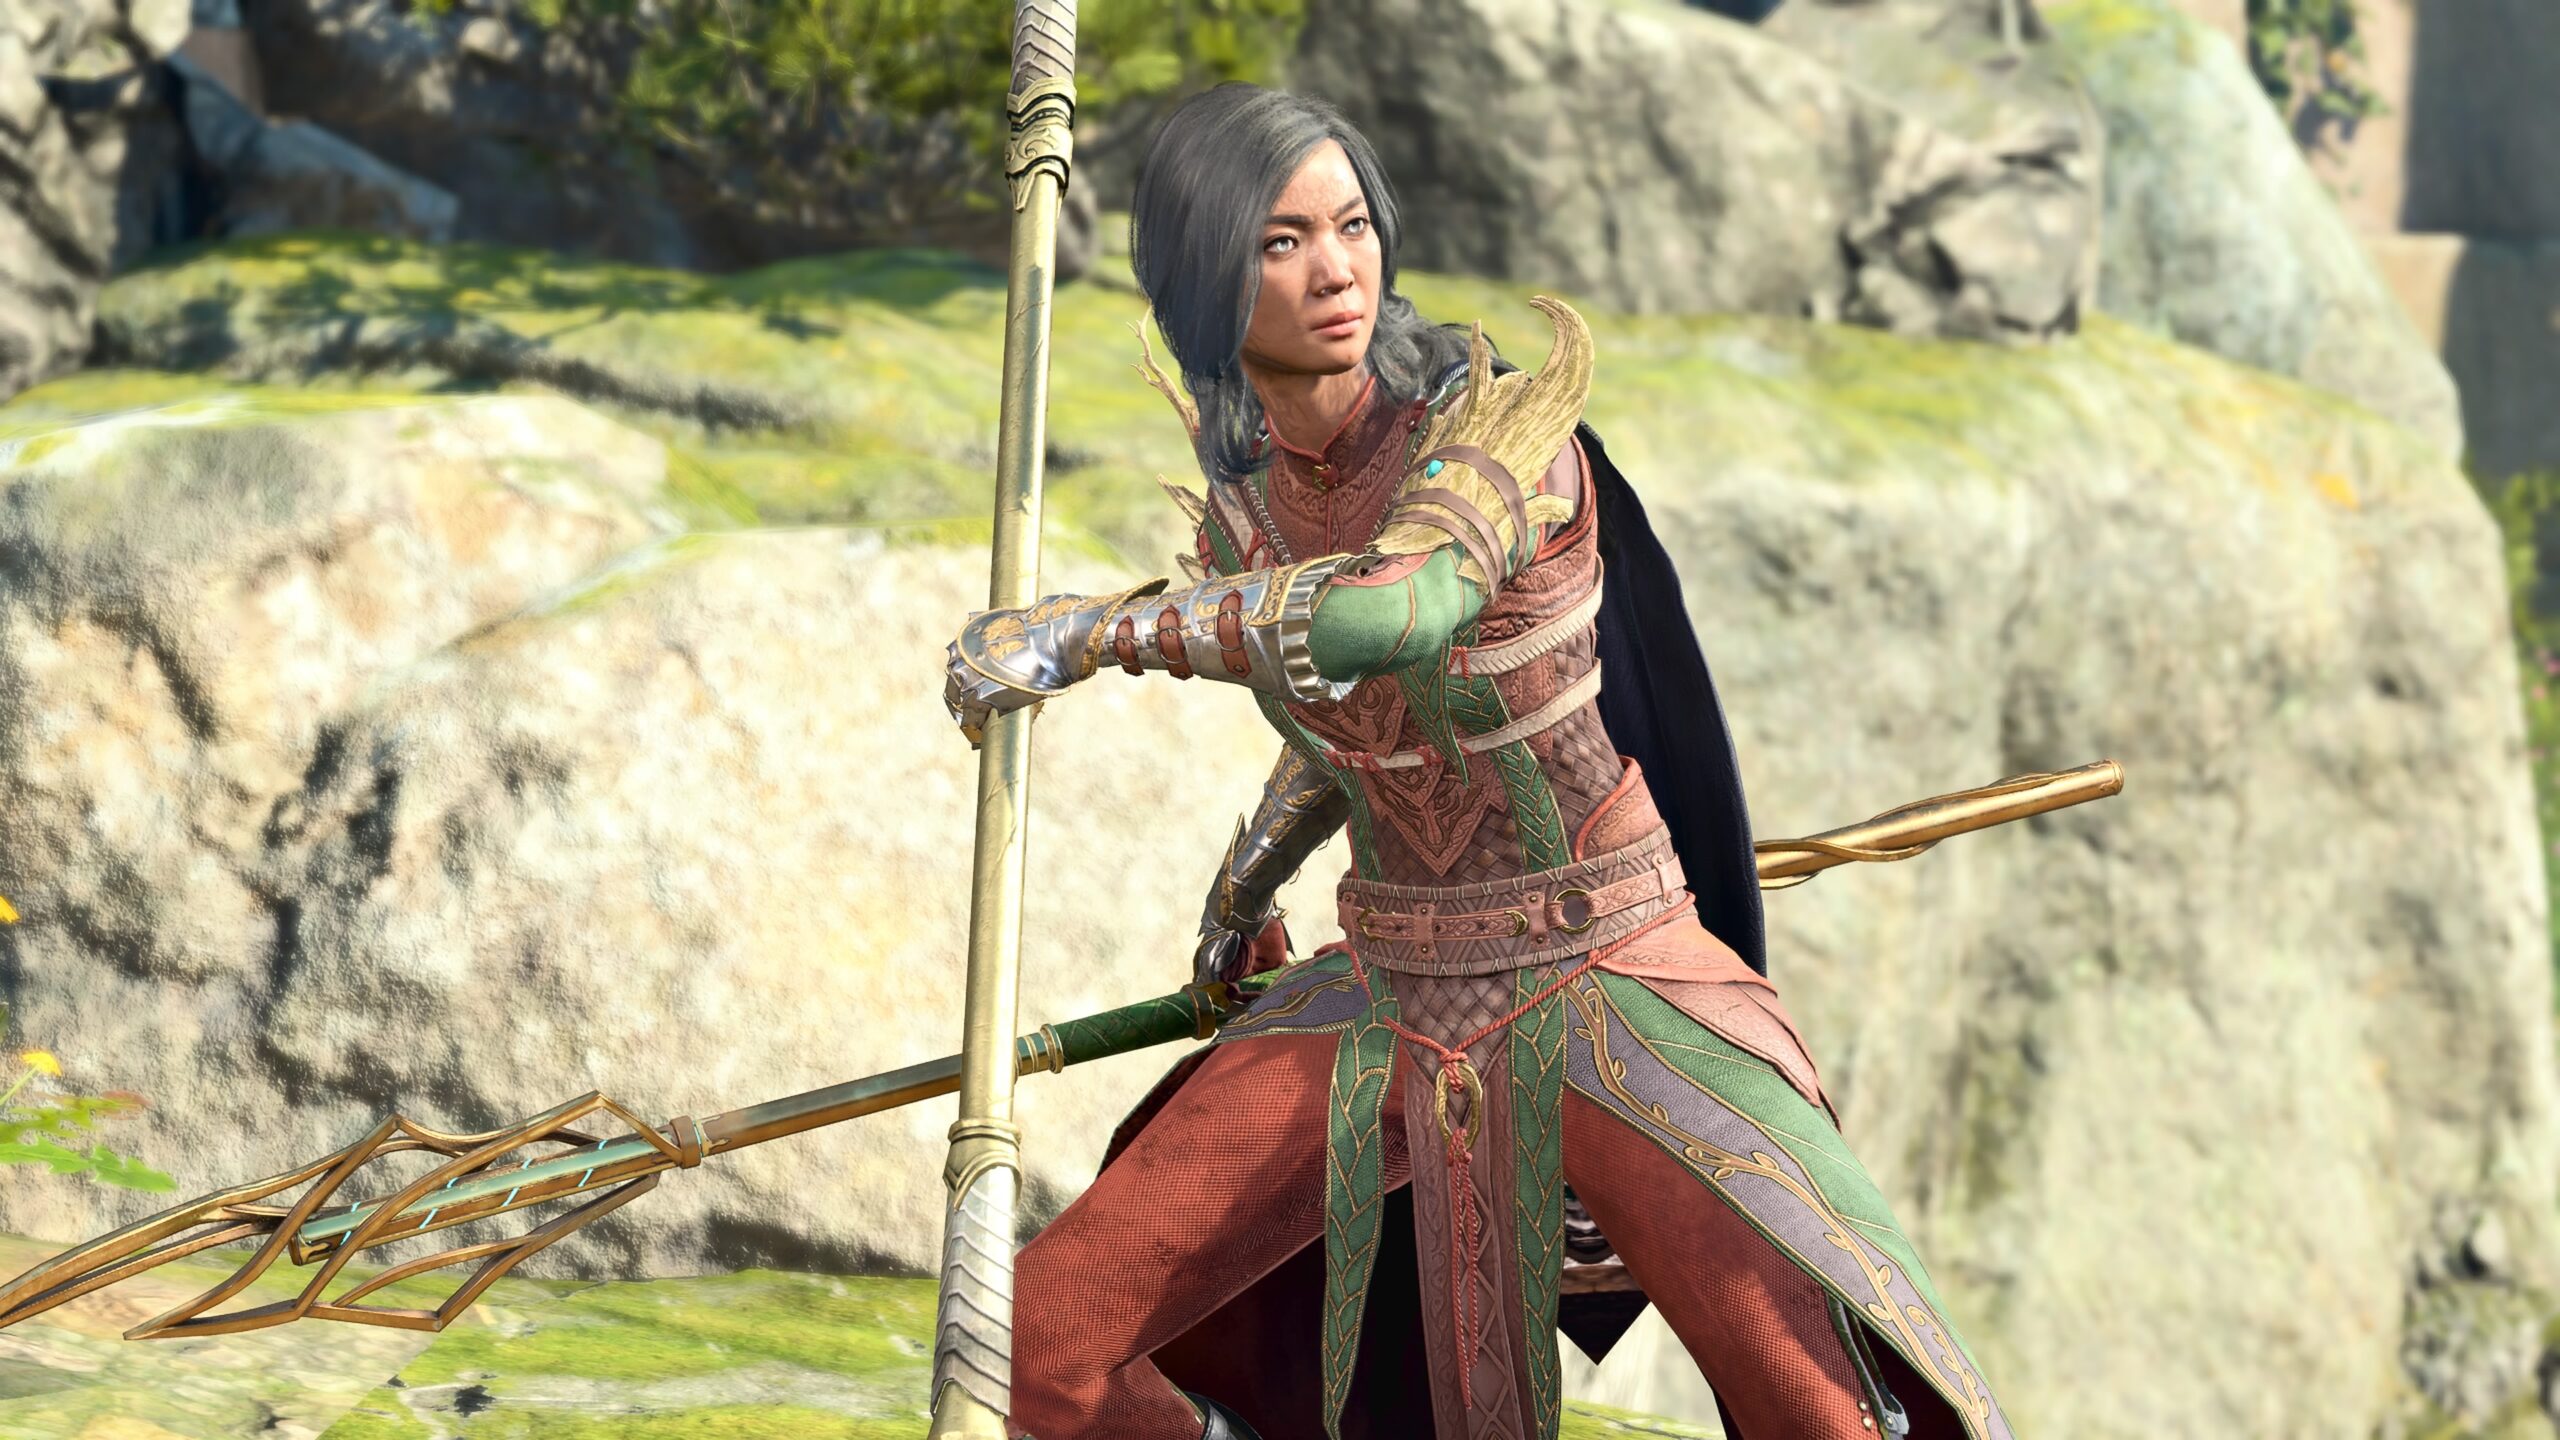
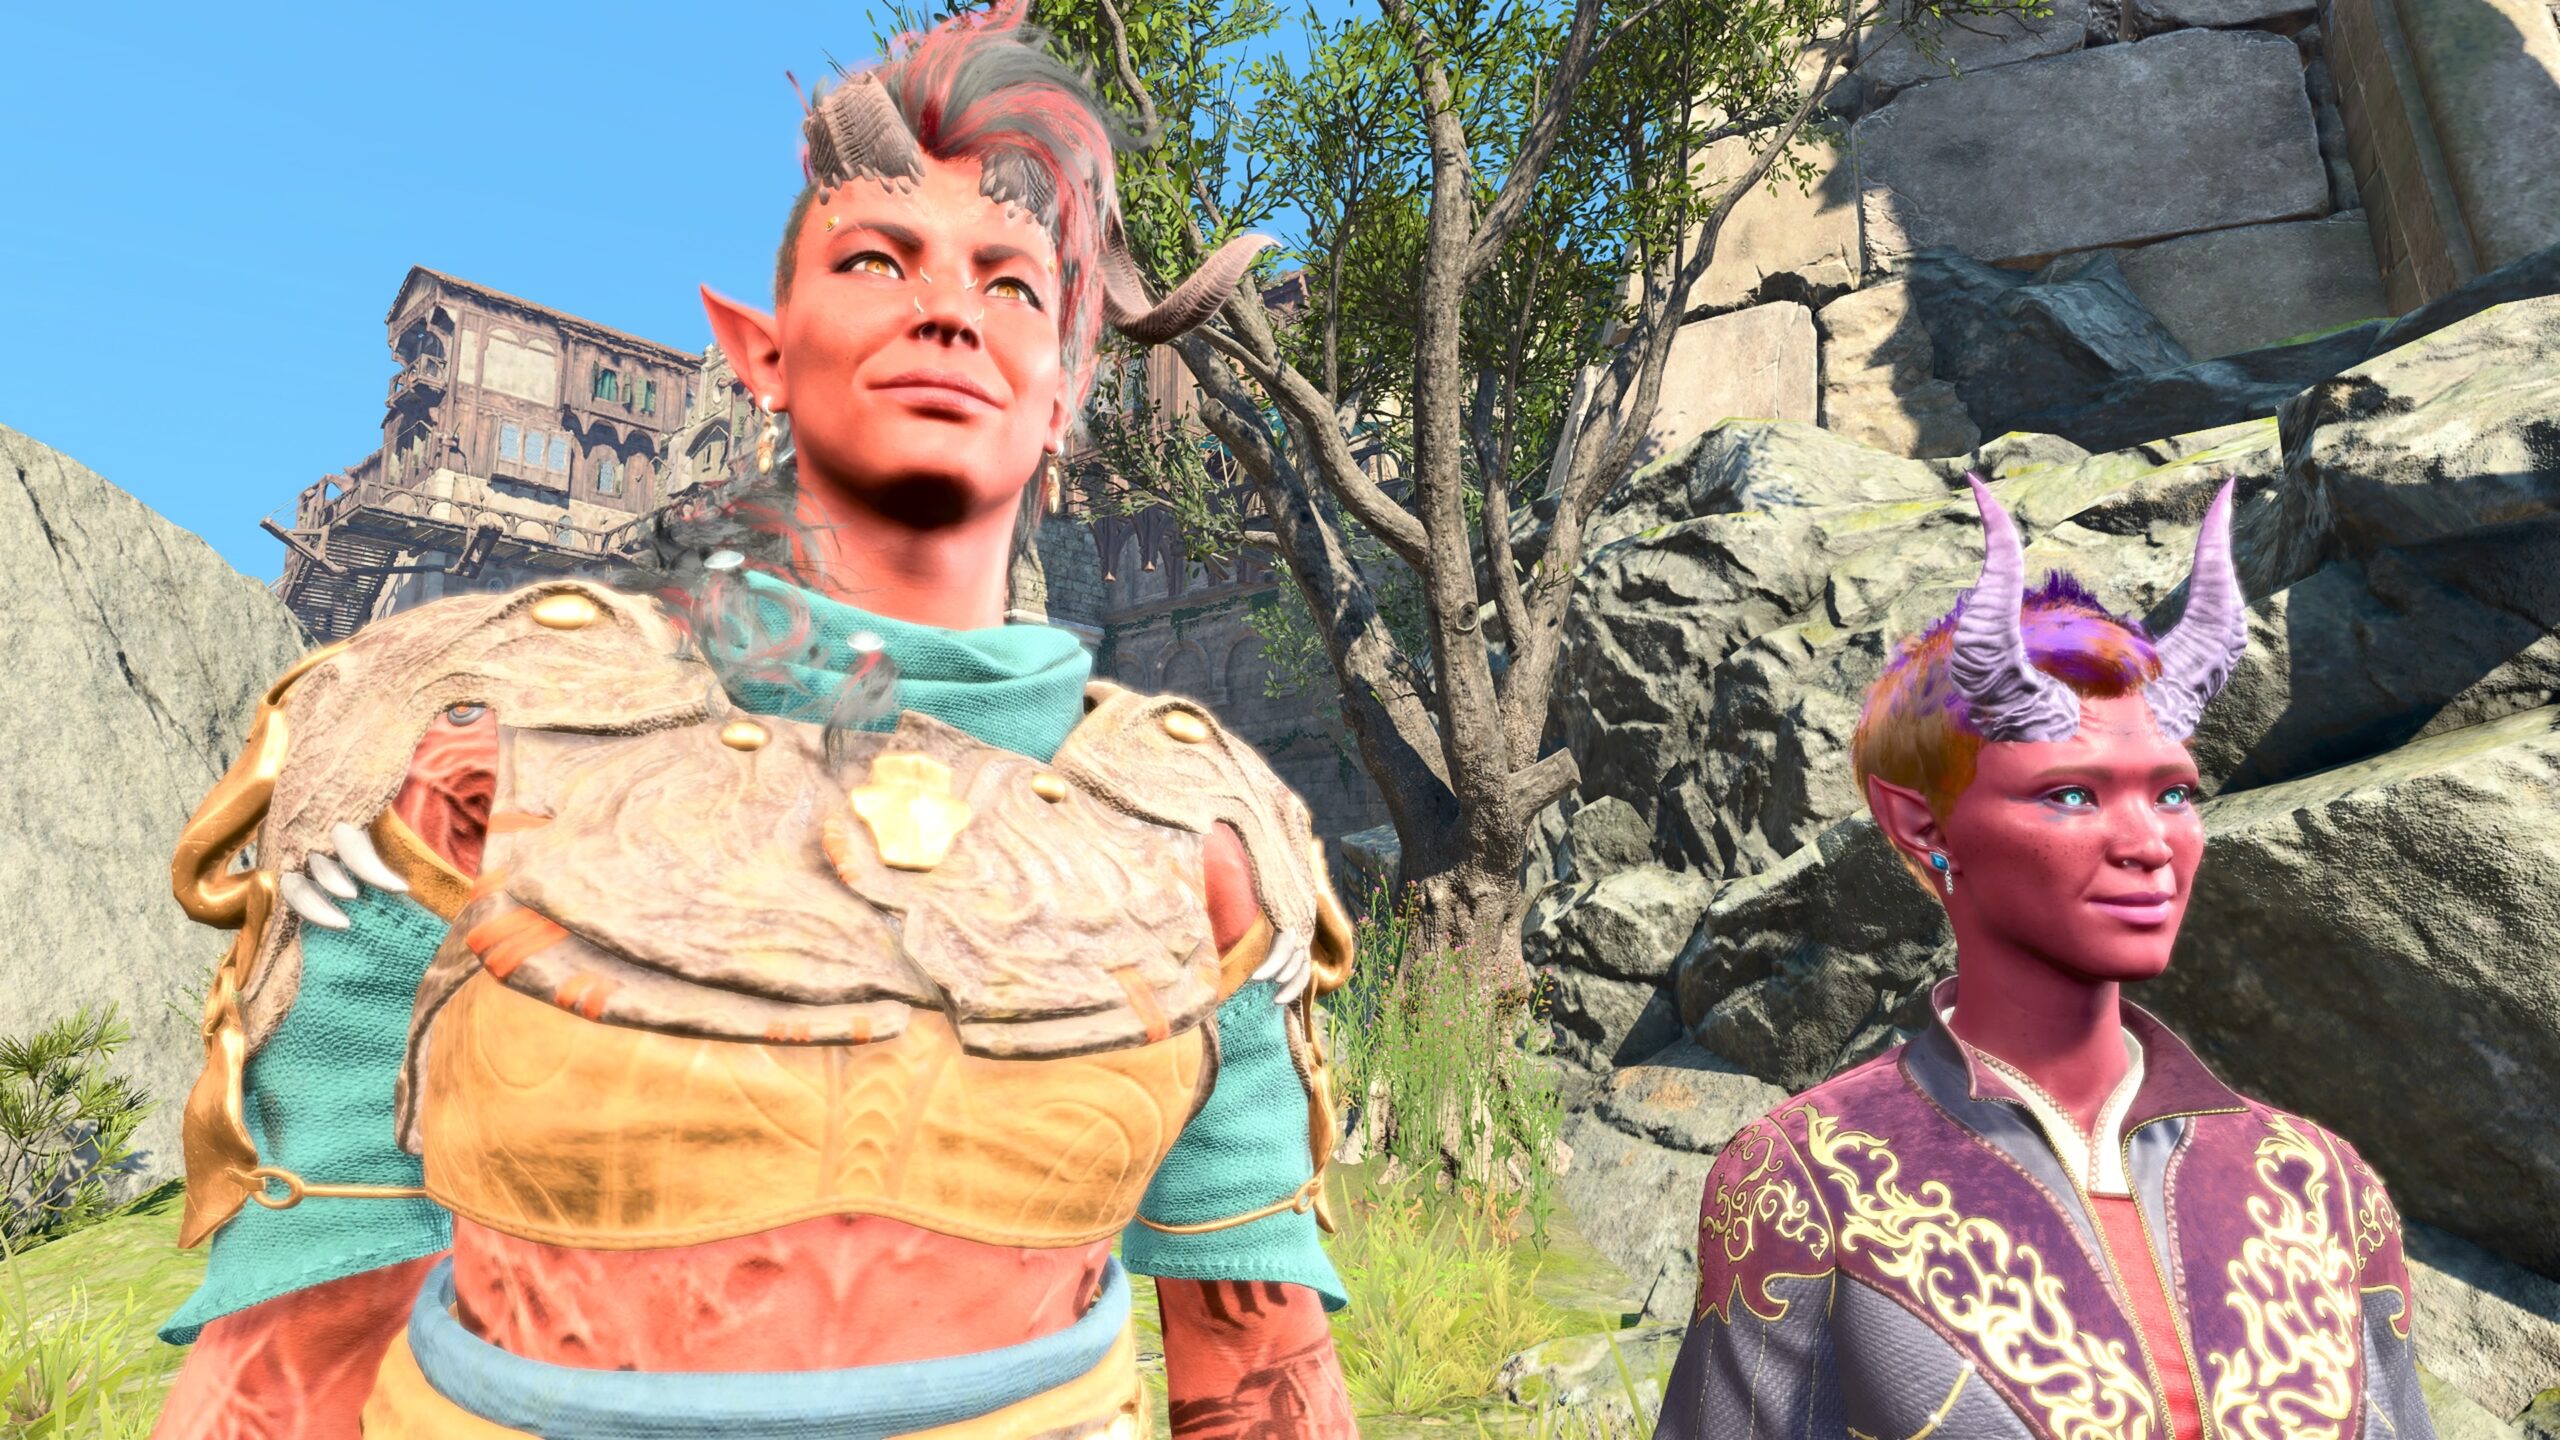
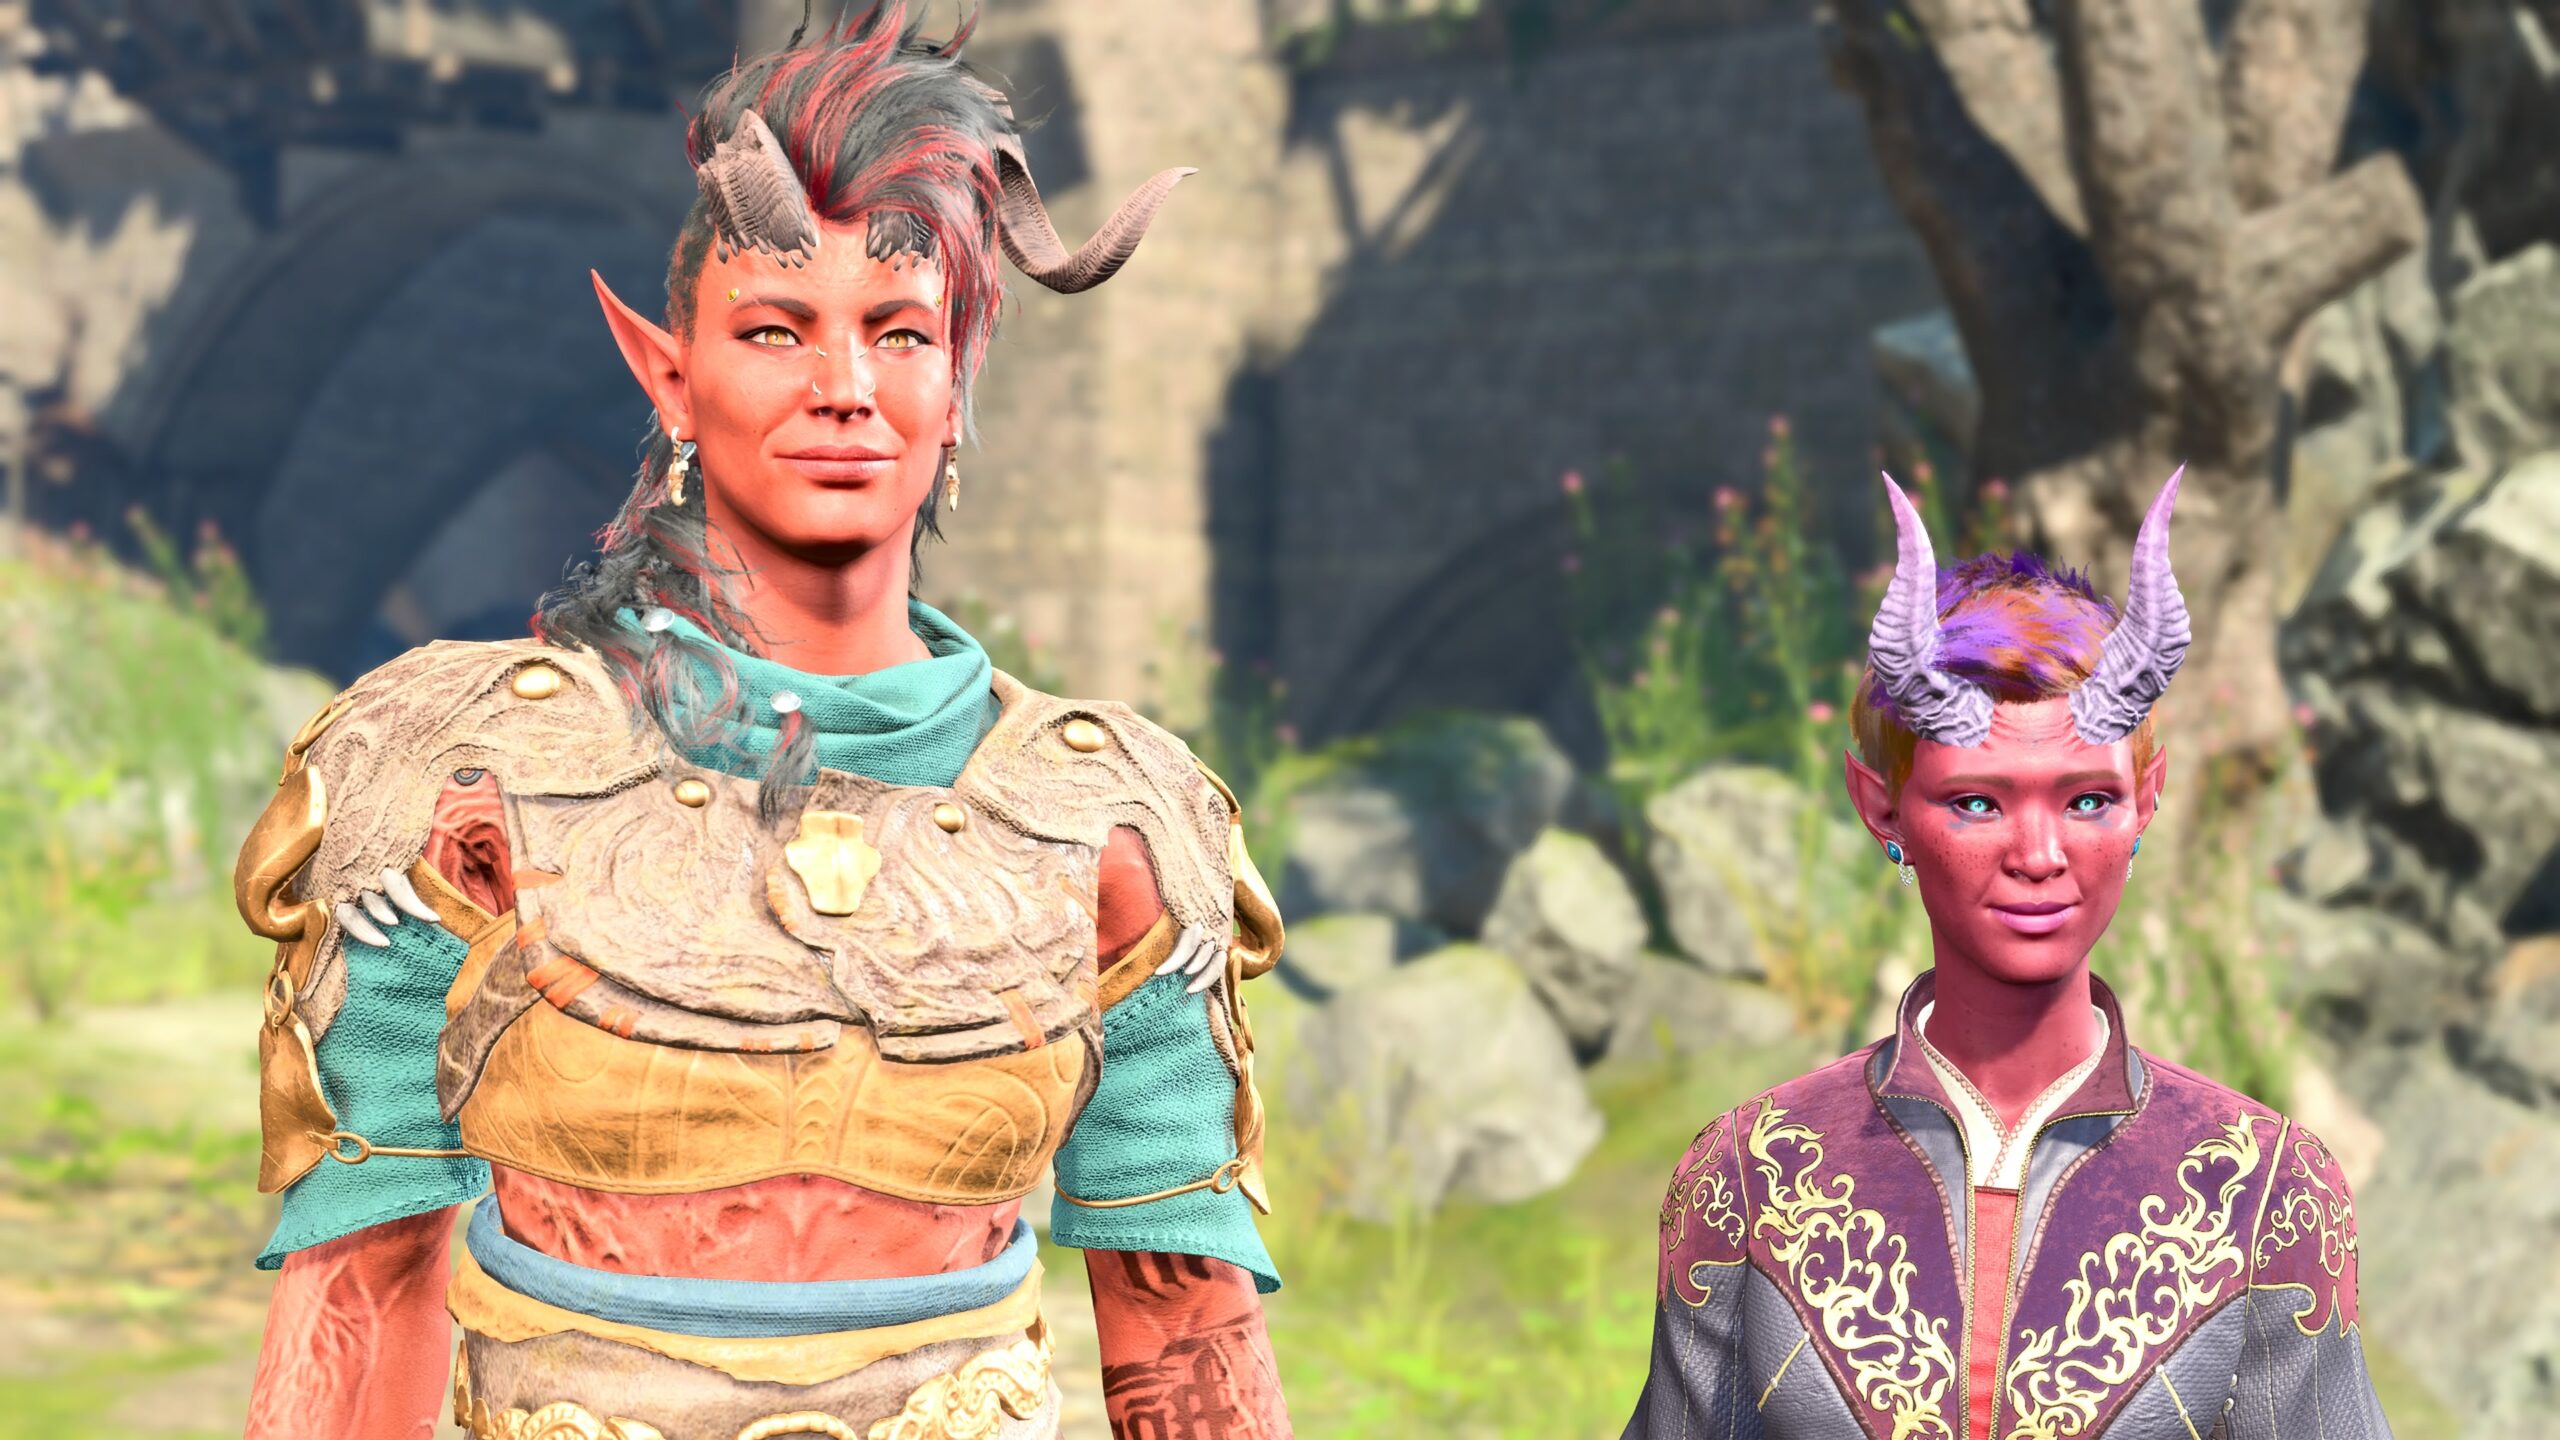
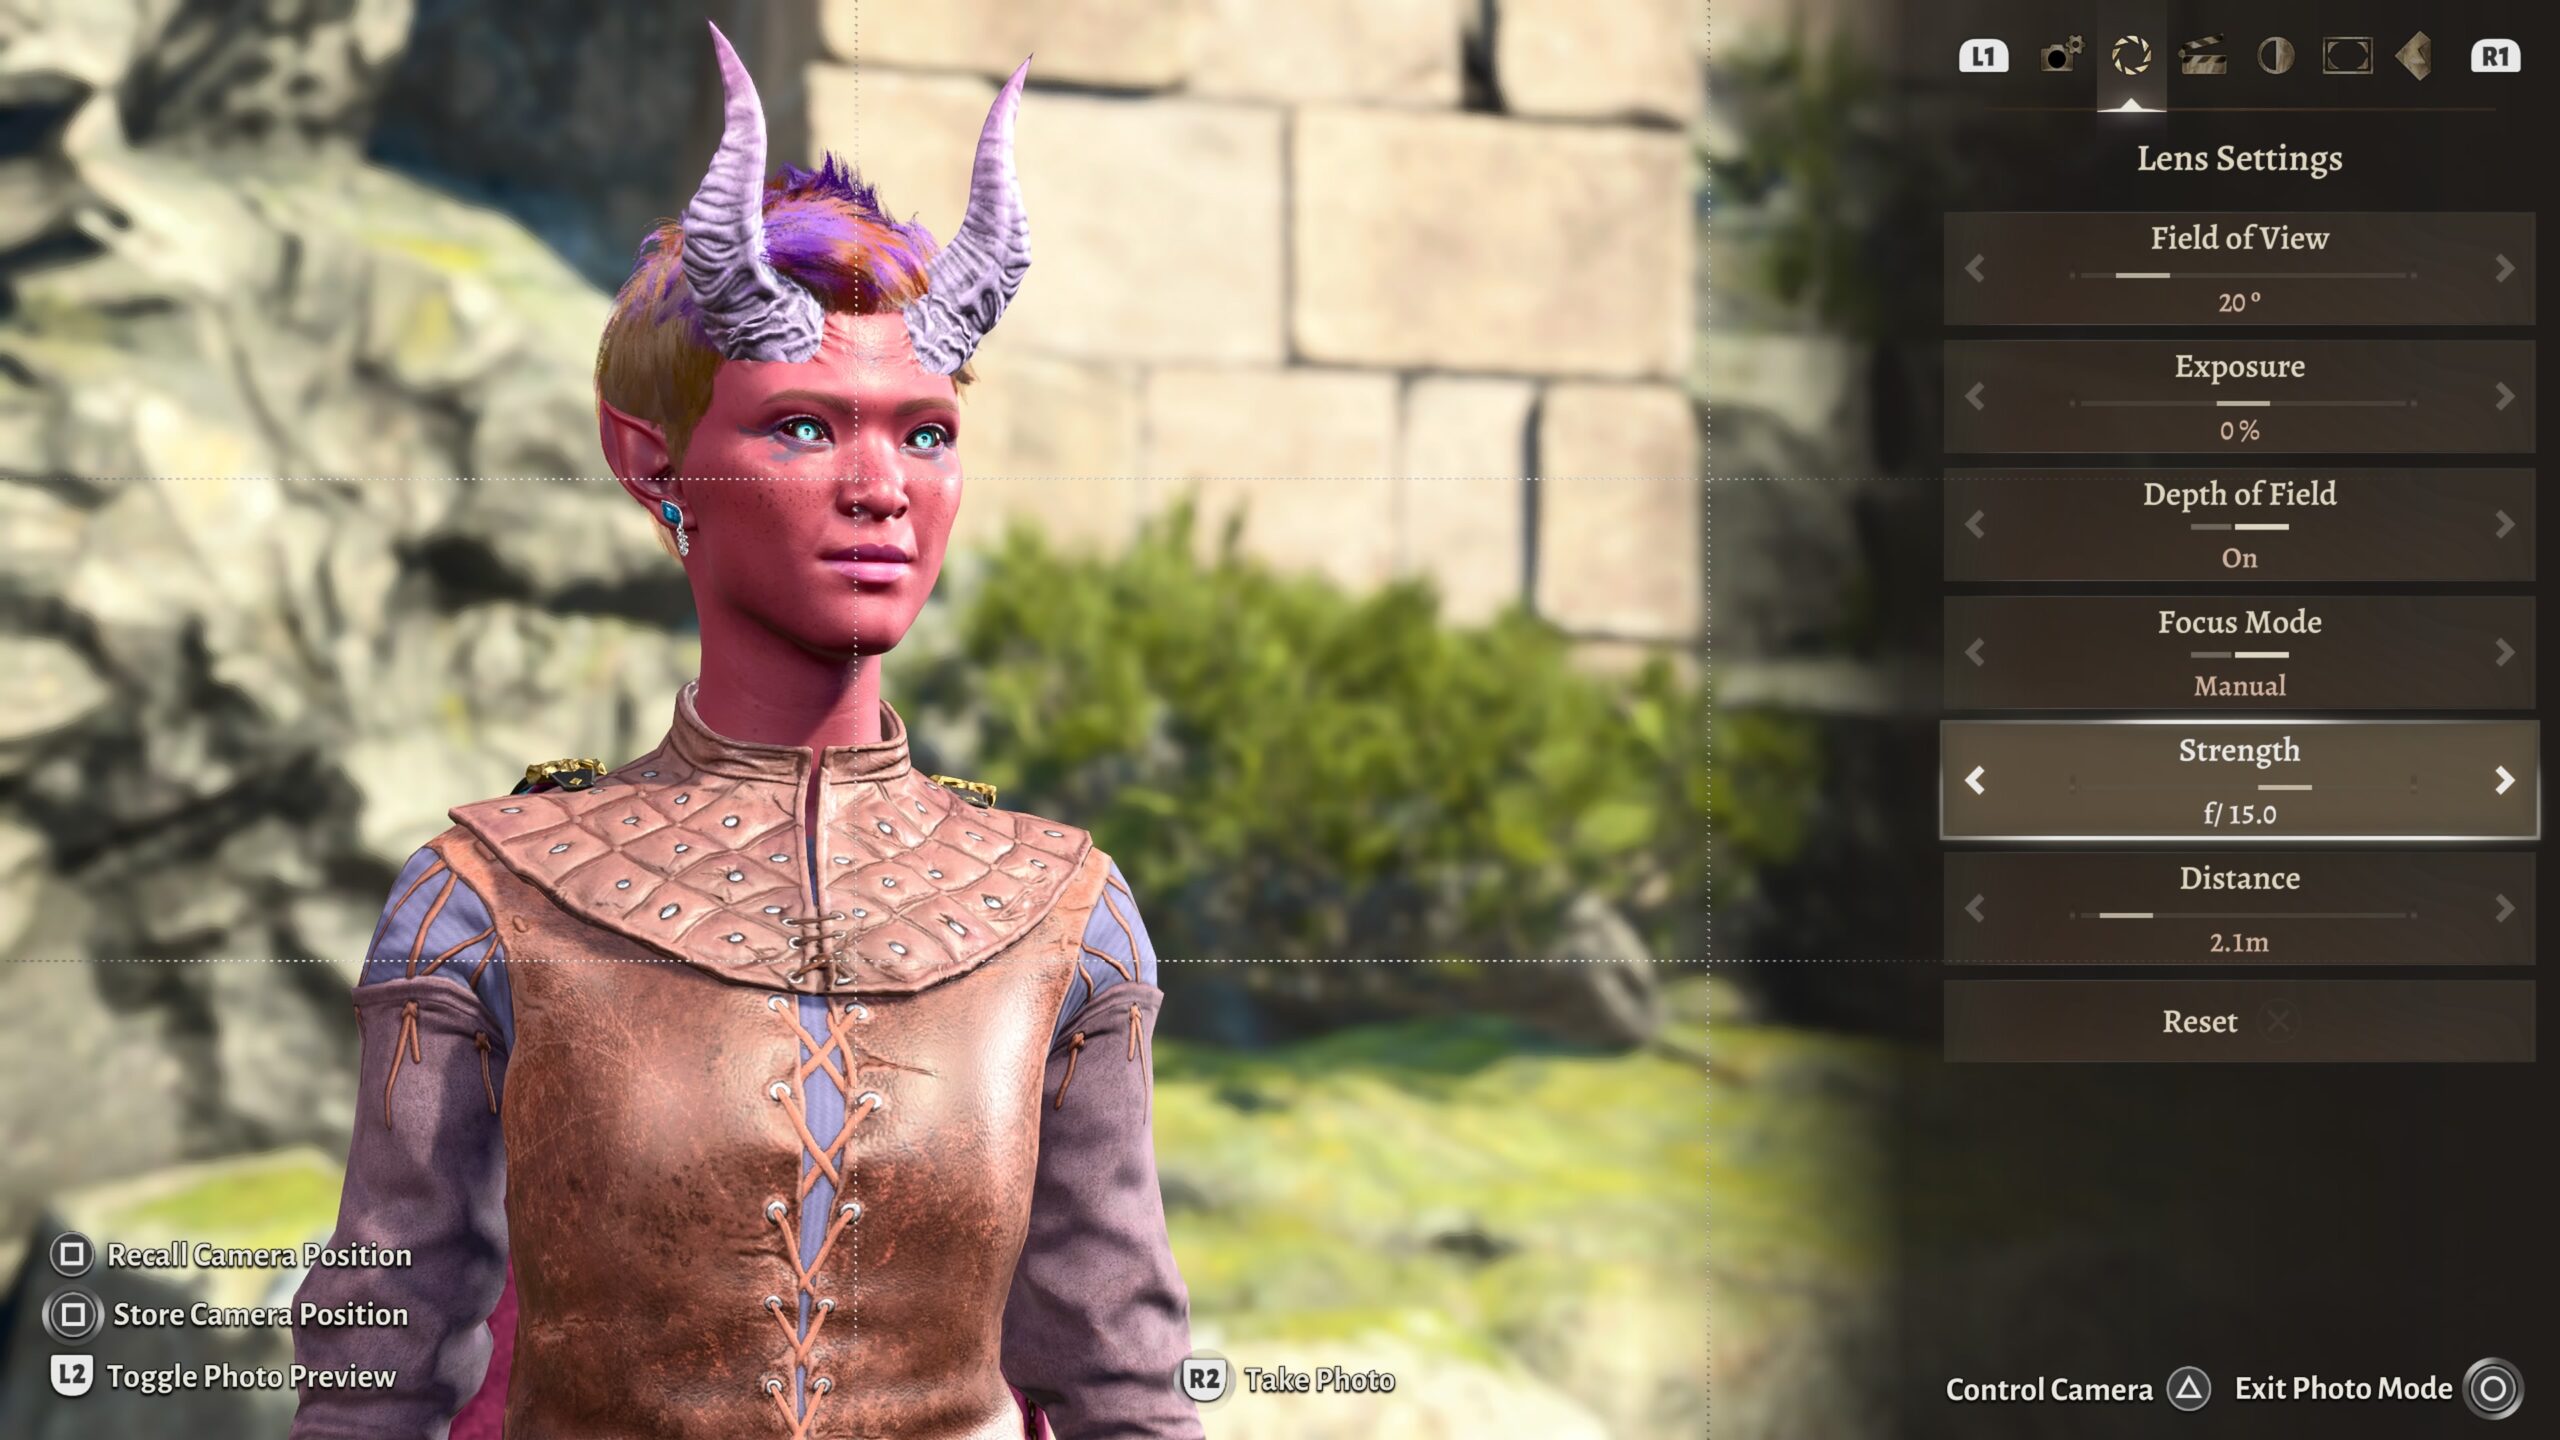
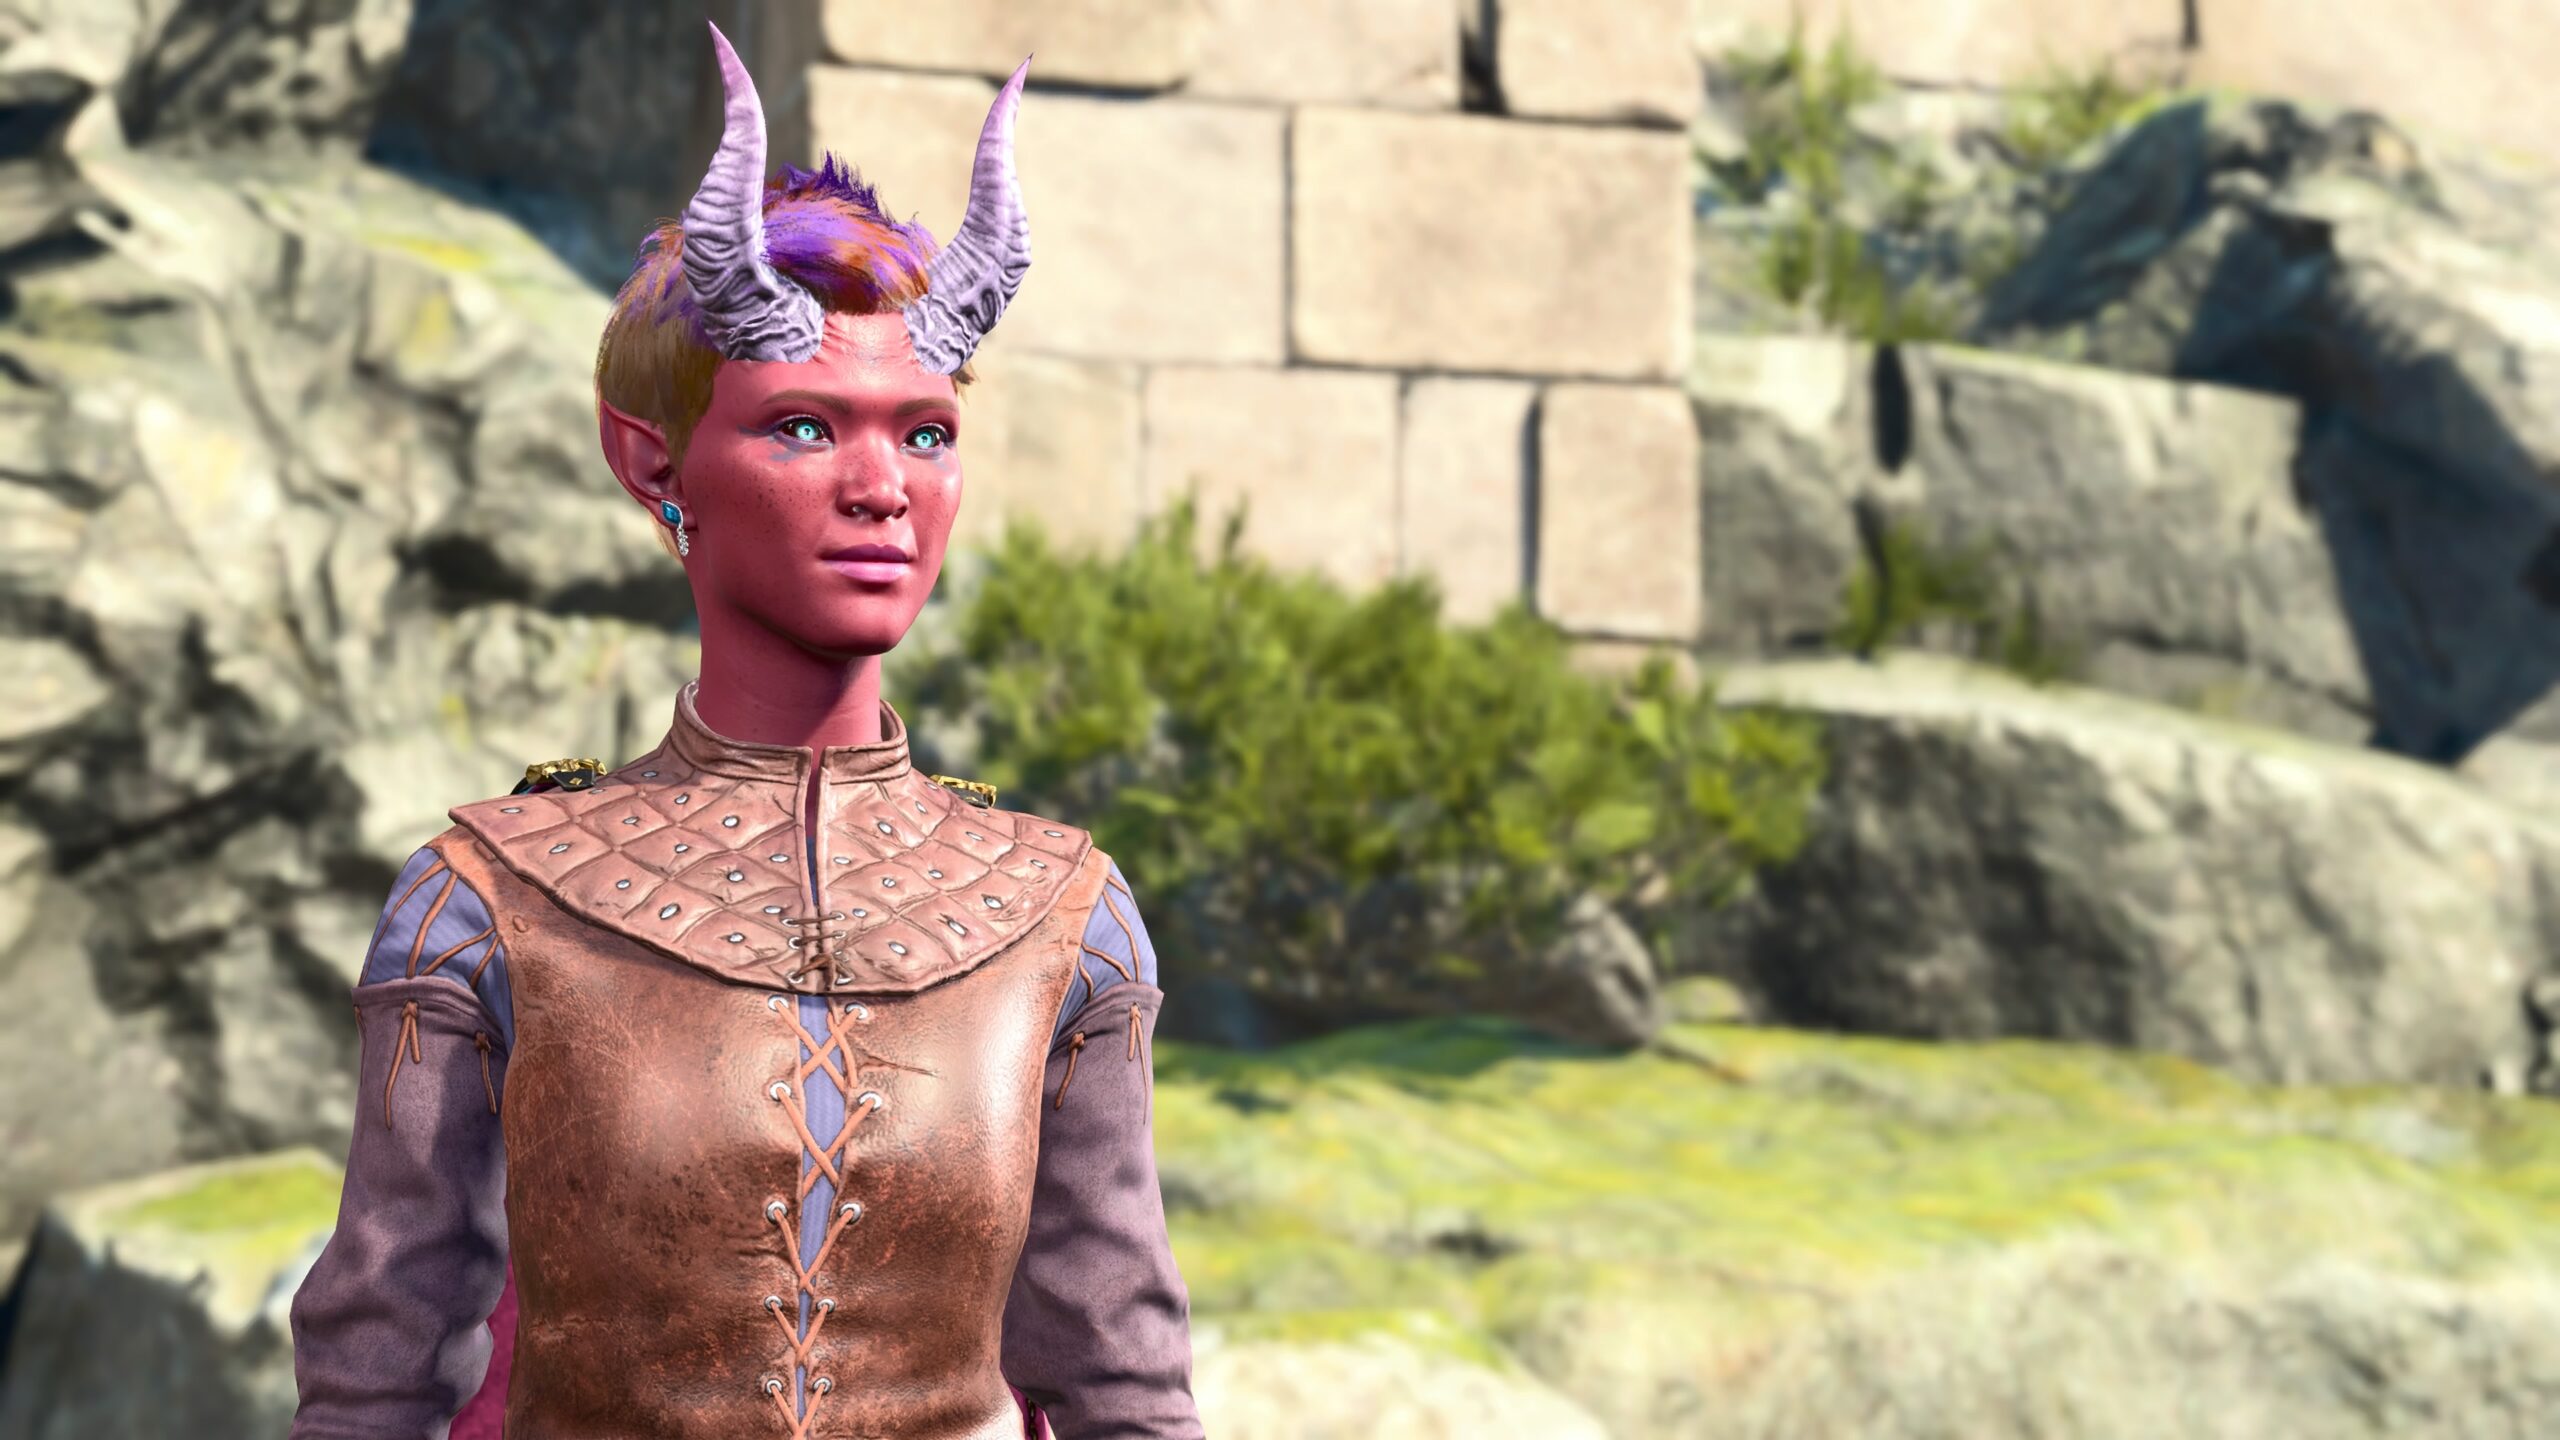
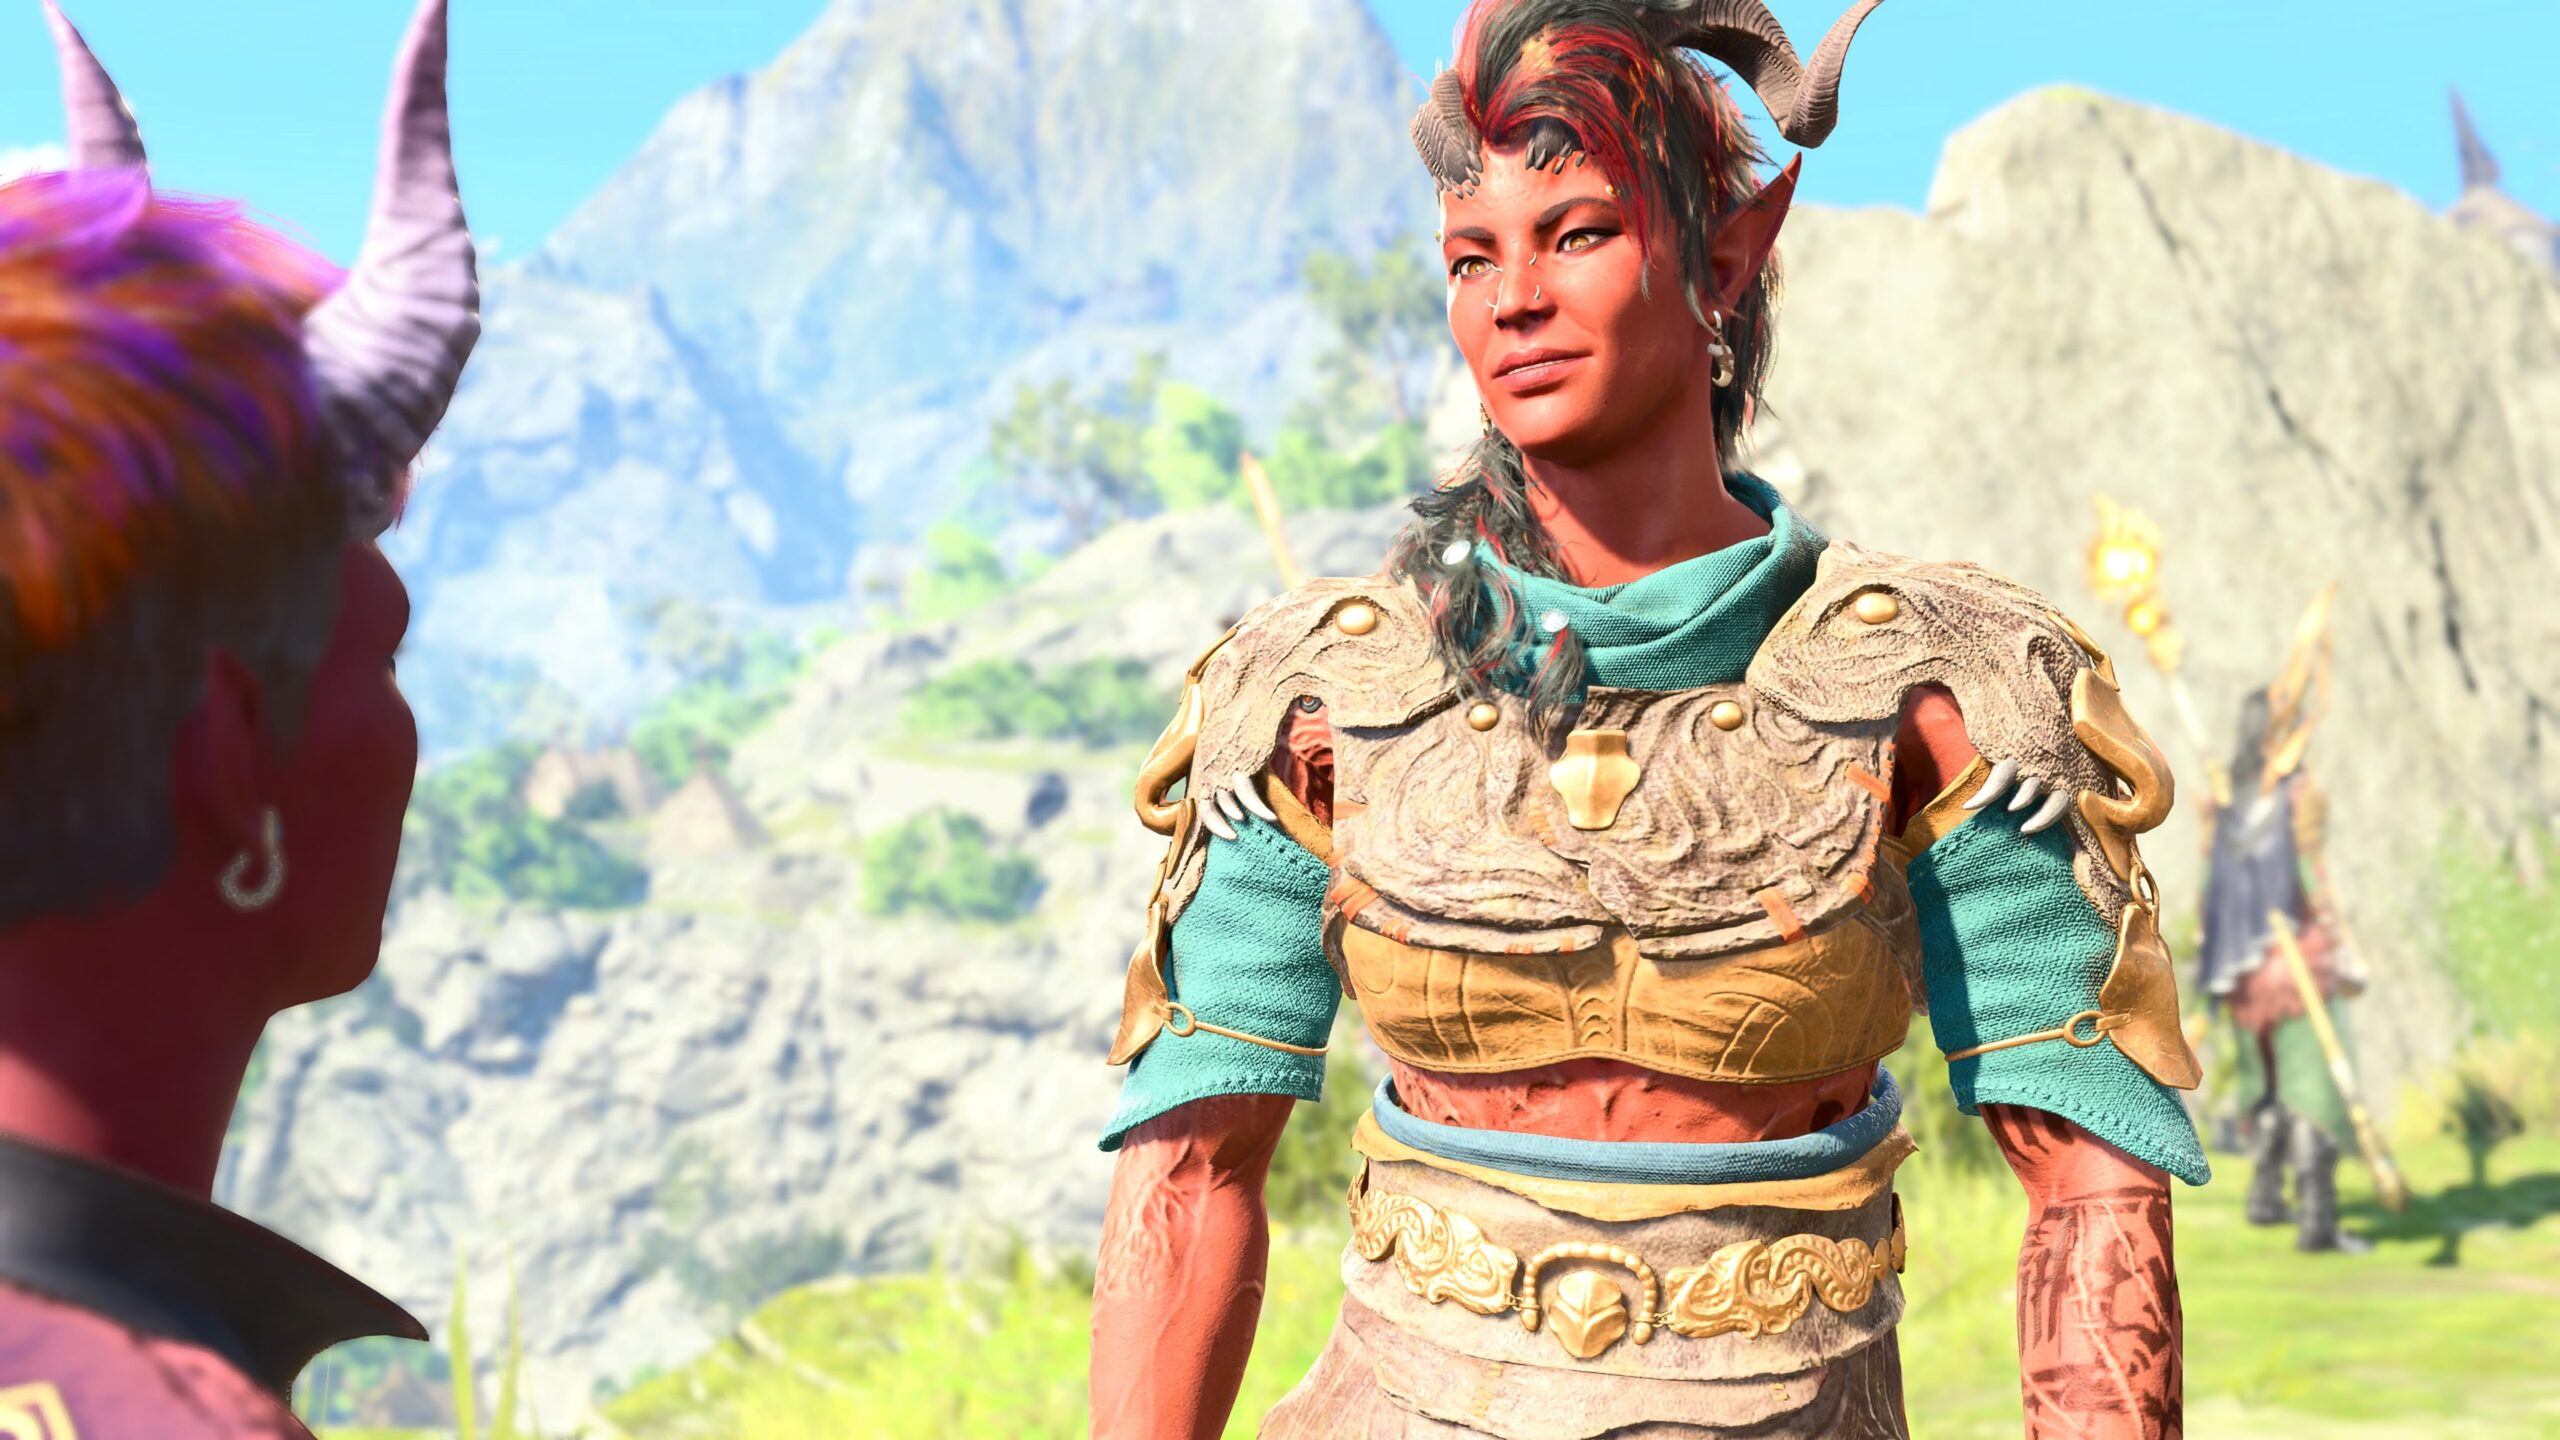
Here’s a brief example that illustrates my second point about the Strength parameter, that it represents the distance over which an object can appear in-focus:
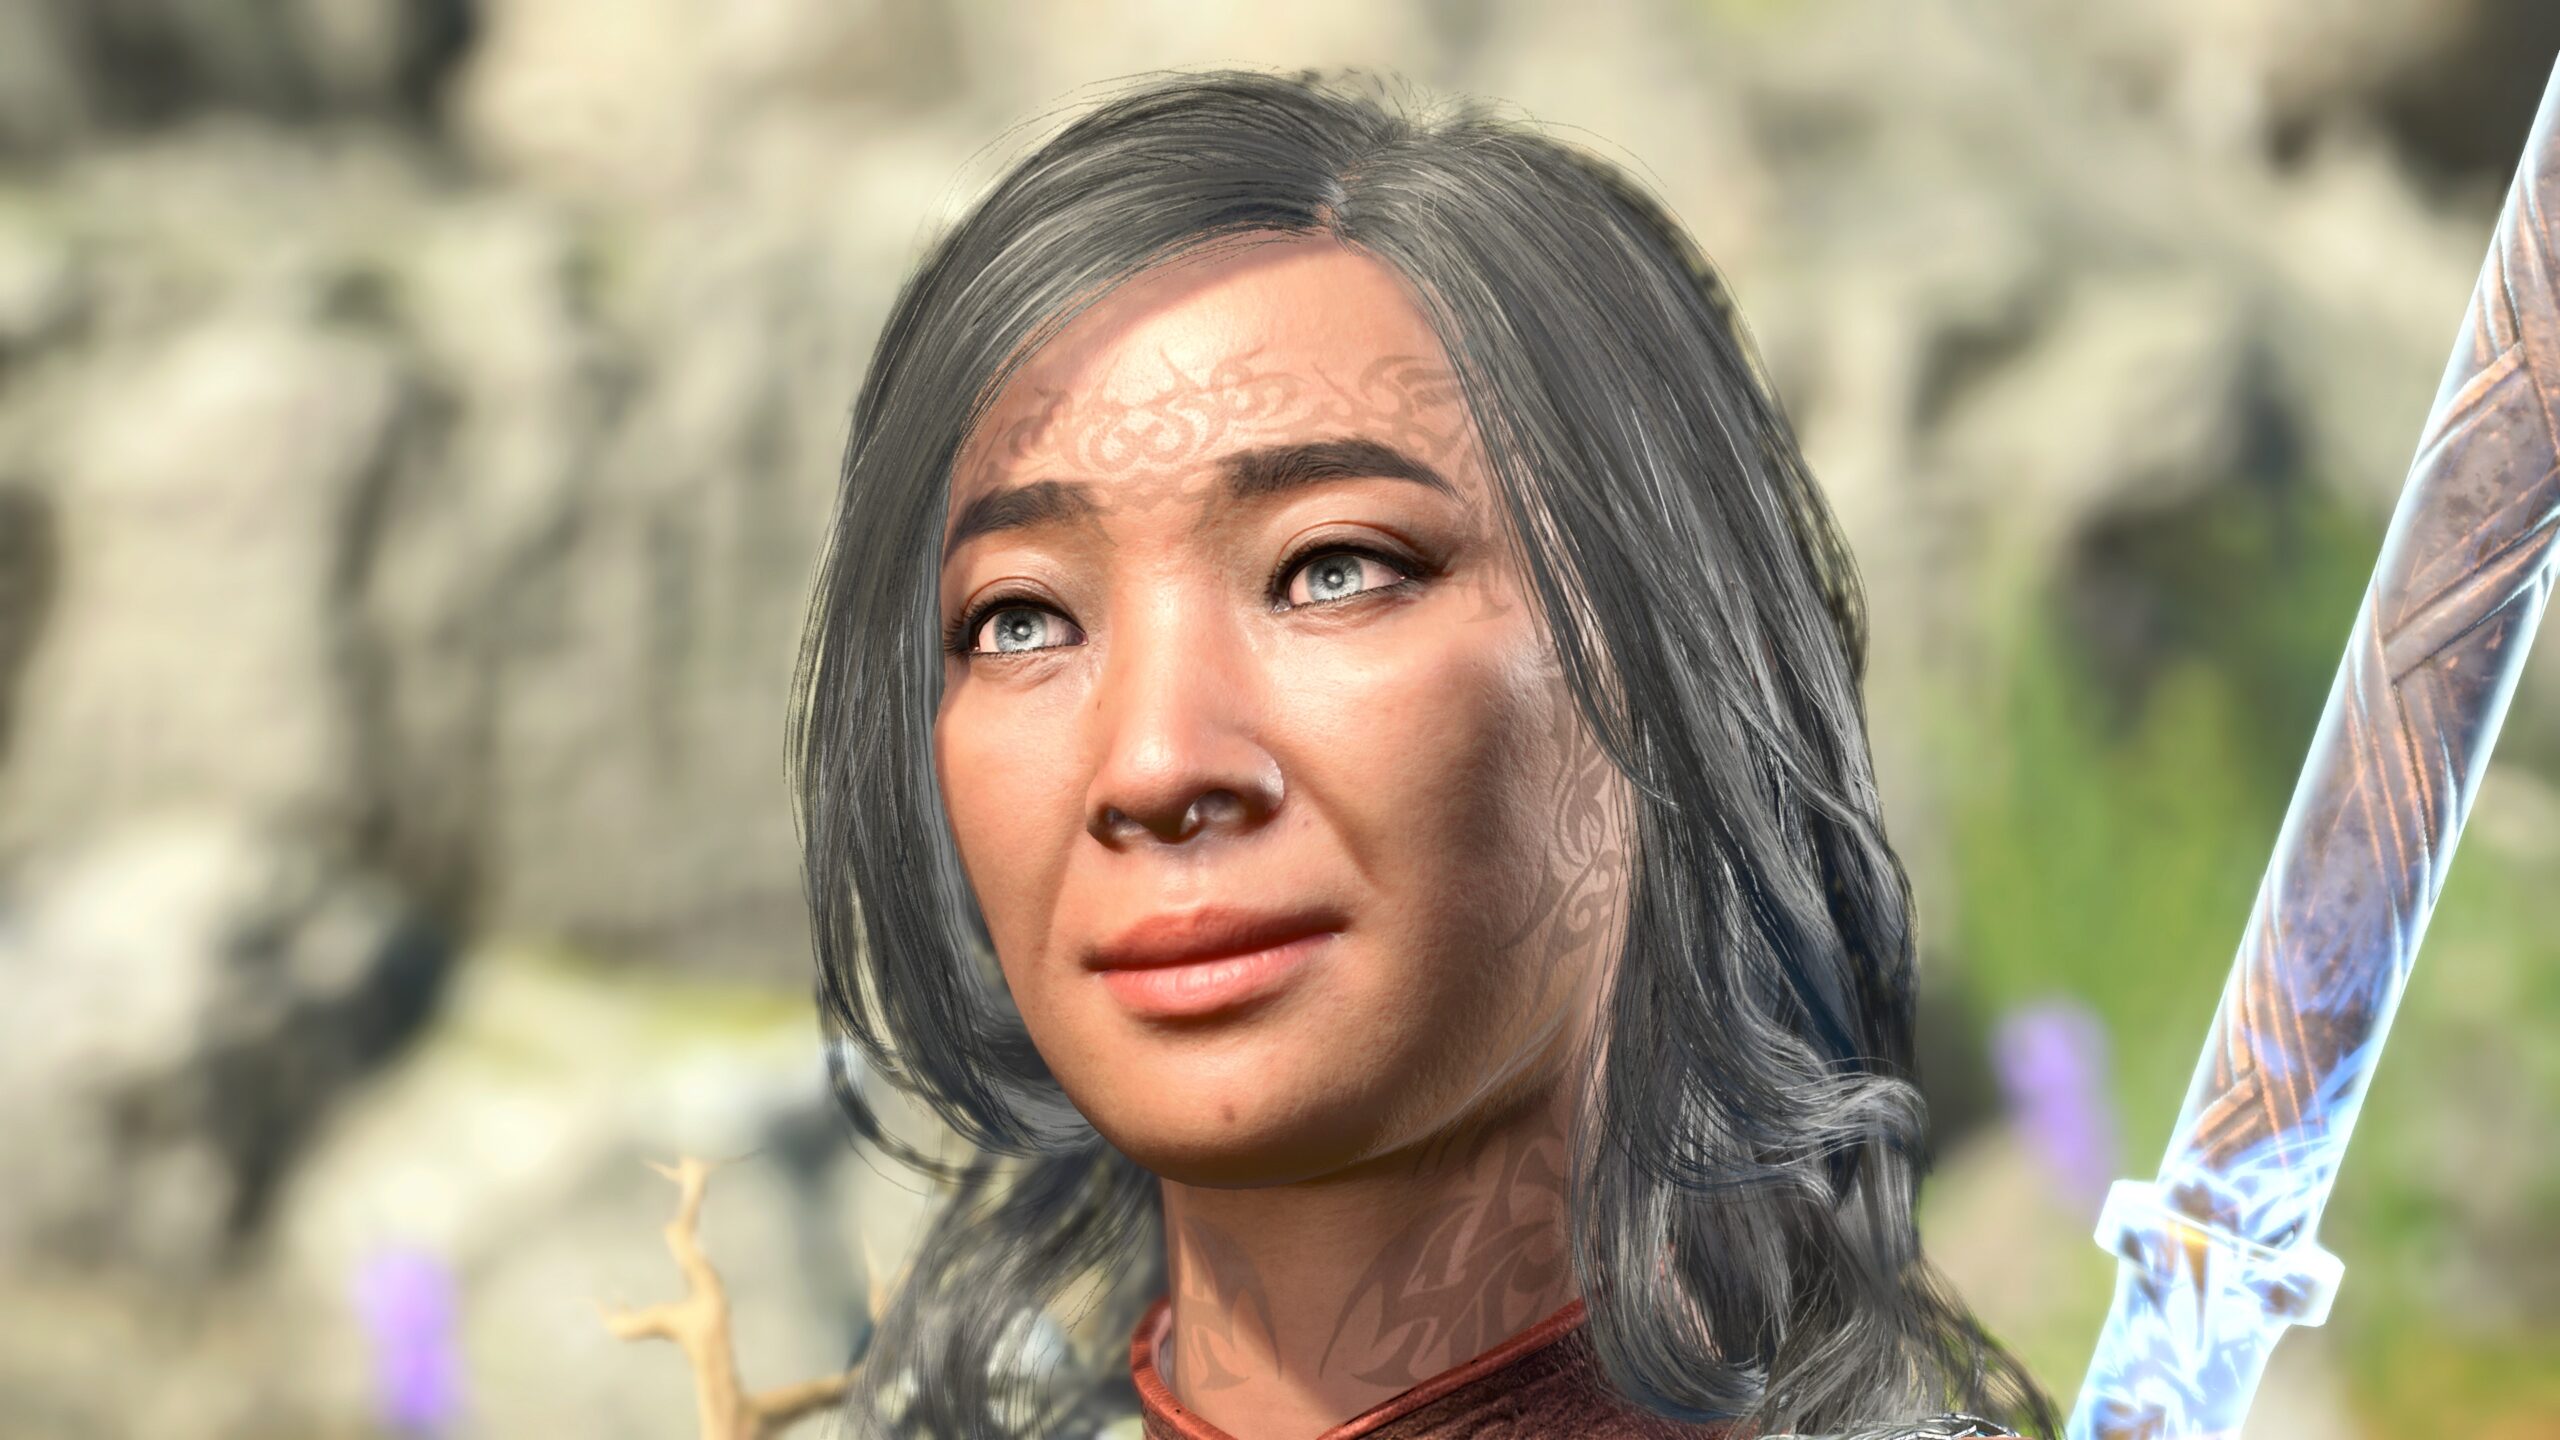
If I get very close to a model’s face, it’s possible that I can’t make both the front and back of her head to be in-focus at the same time. If you look closely at the model’s hair at the bottom left of her face, you’ll see that the strands of her hair are slightly out-of-focus. The branches growing out of her shoulders pads are also out-of-focus.
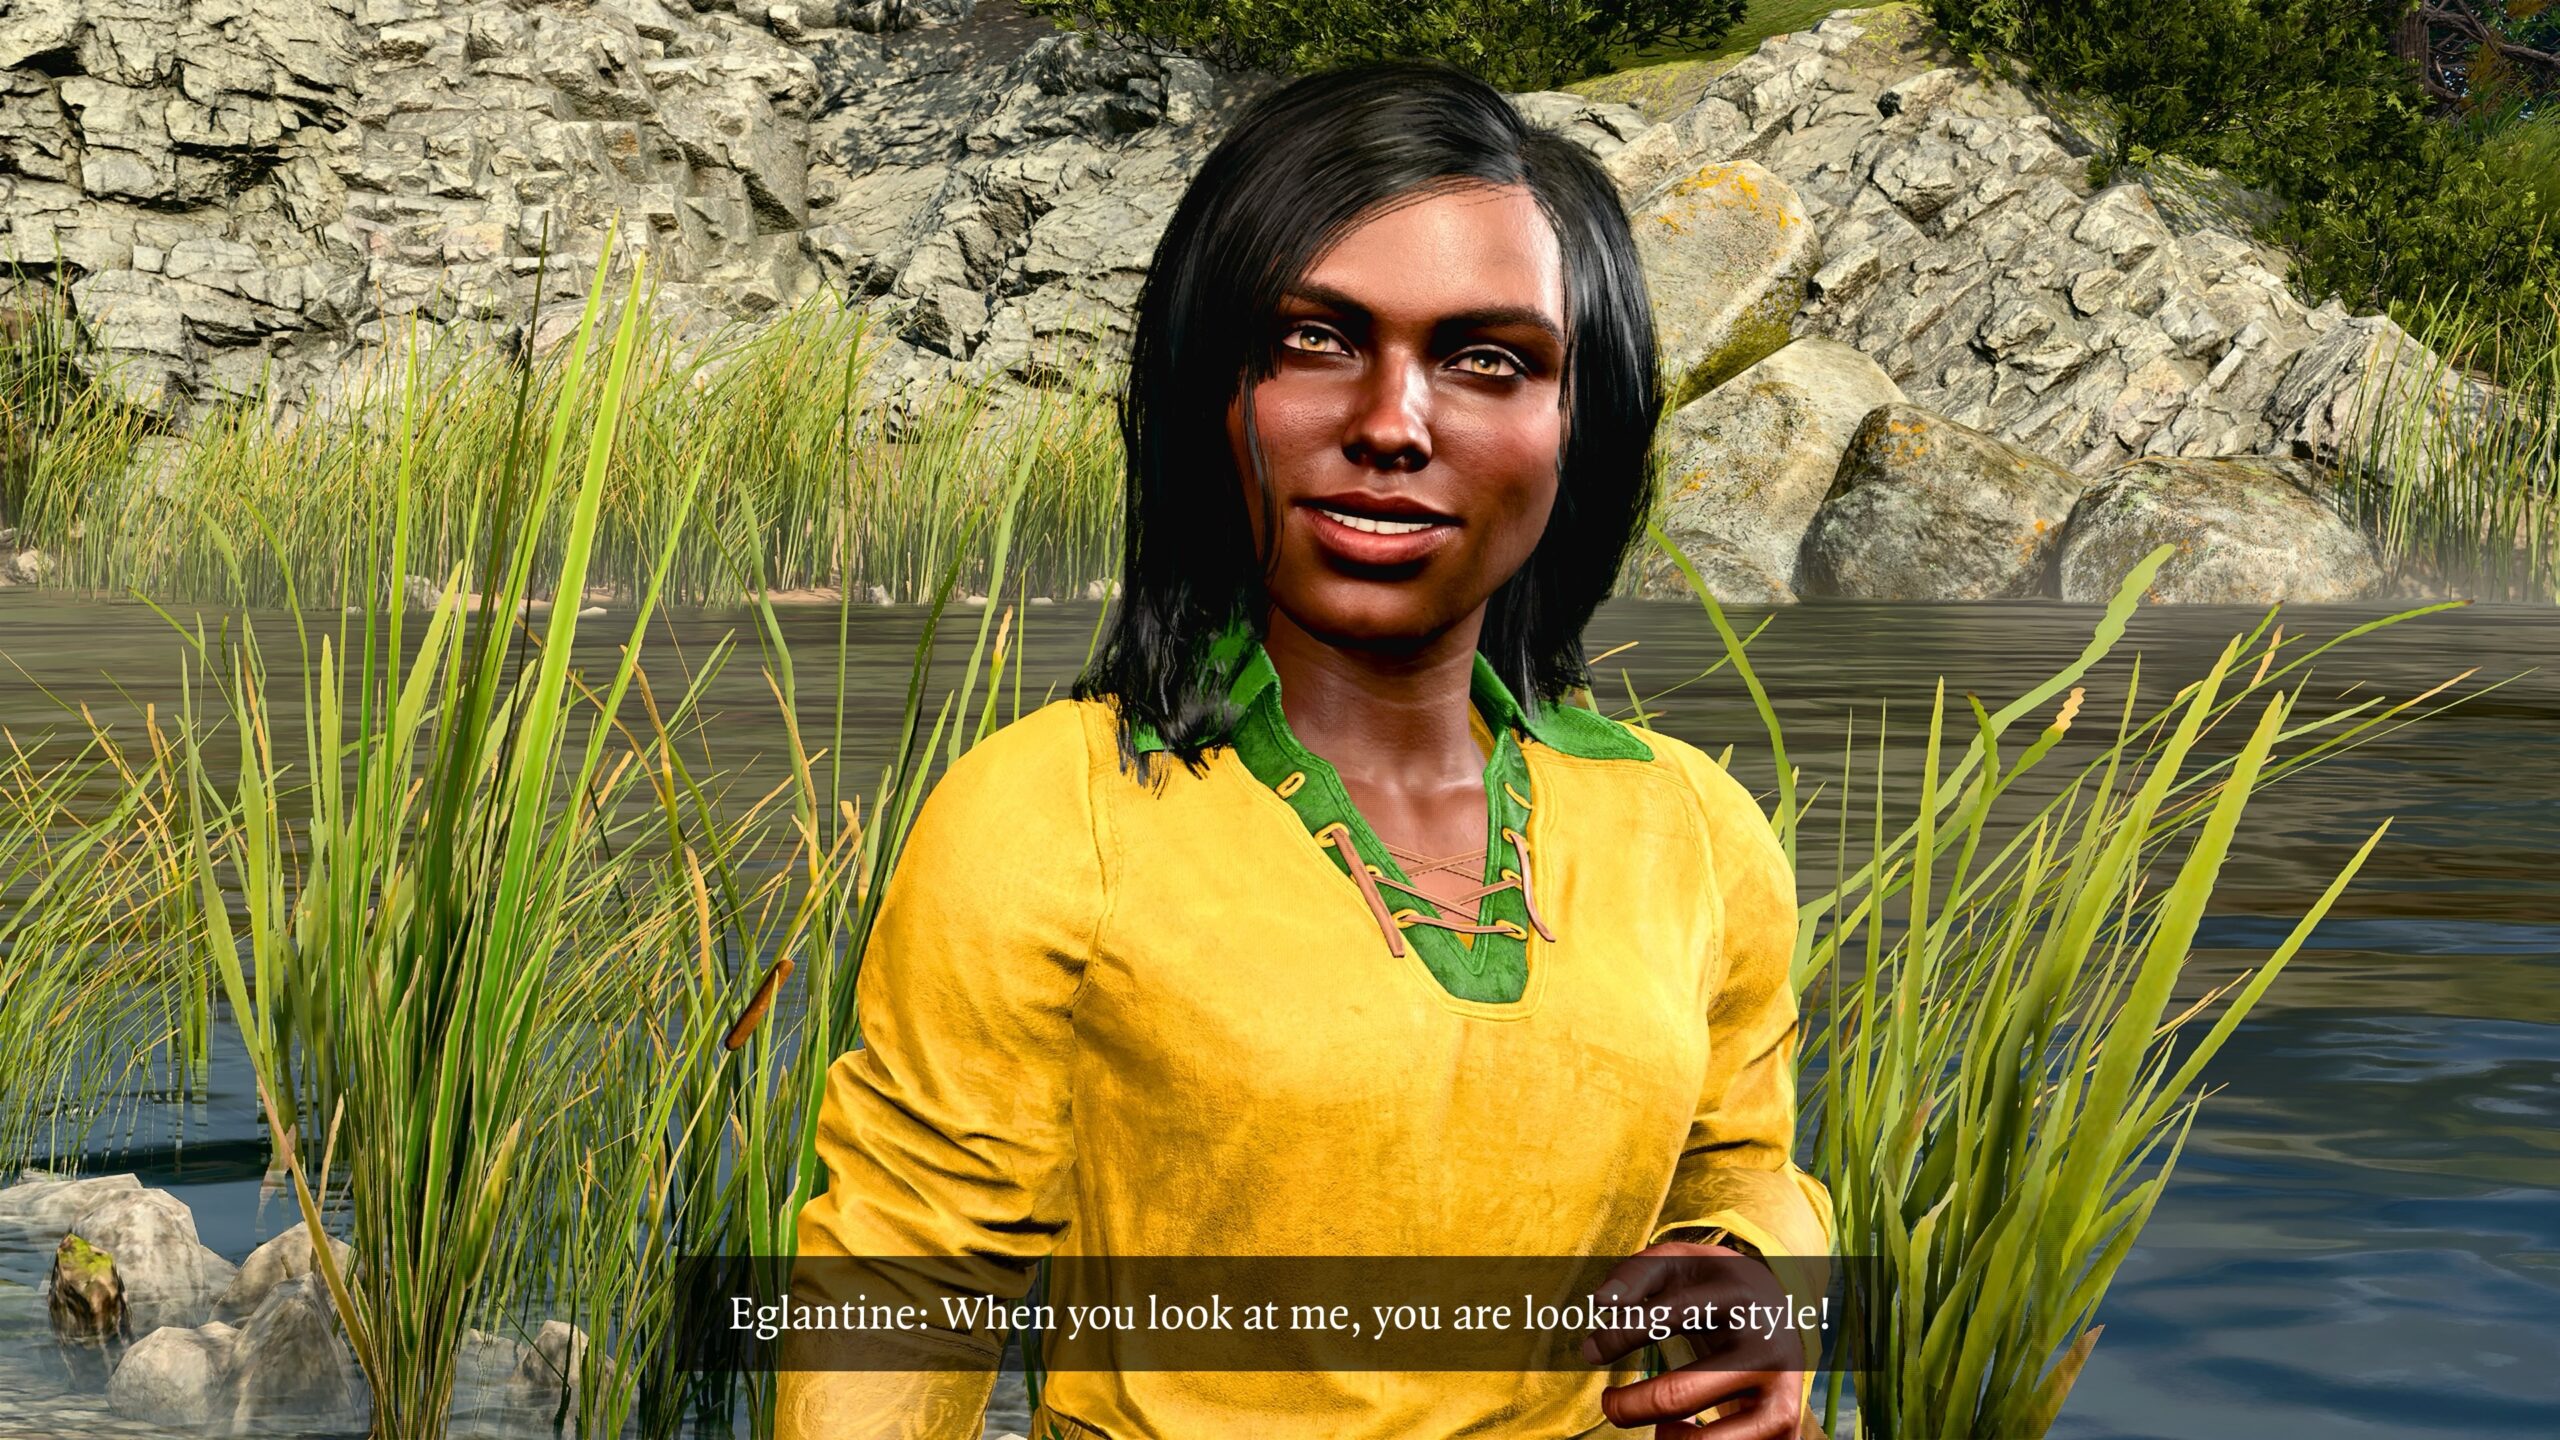
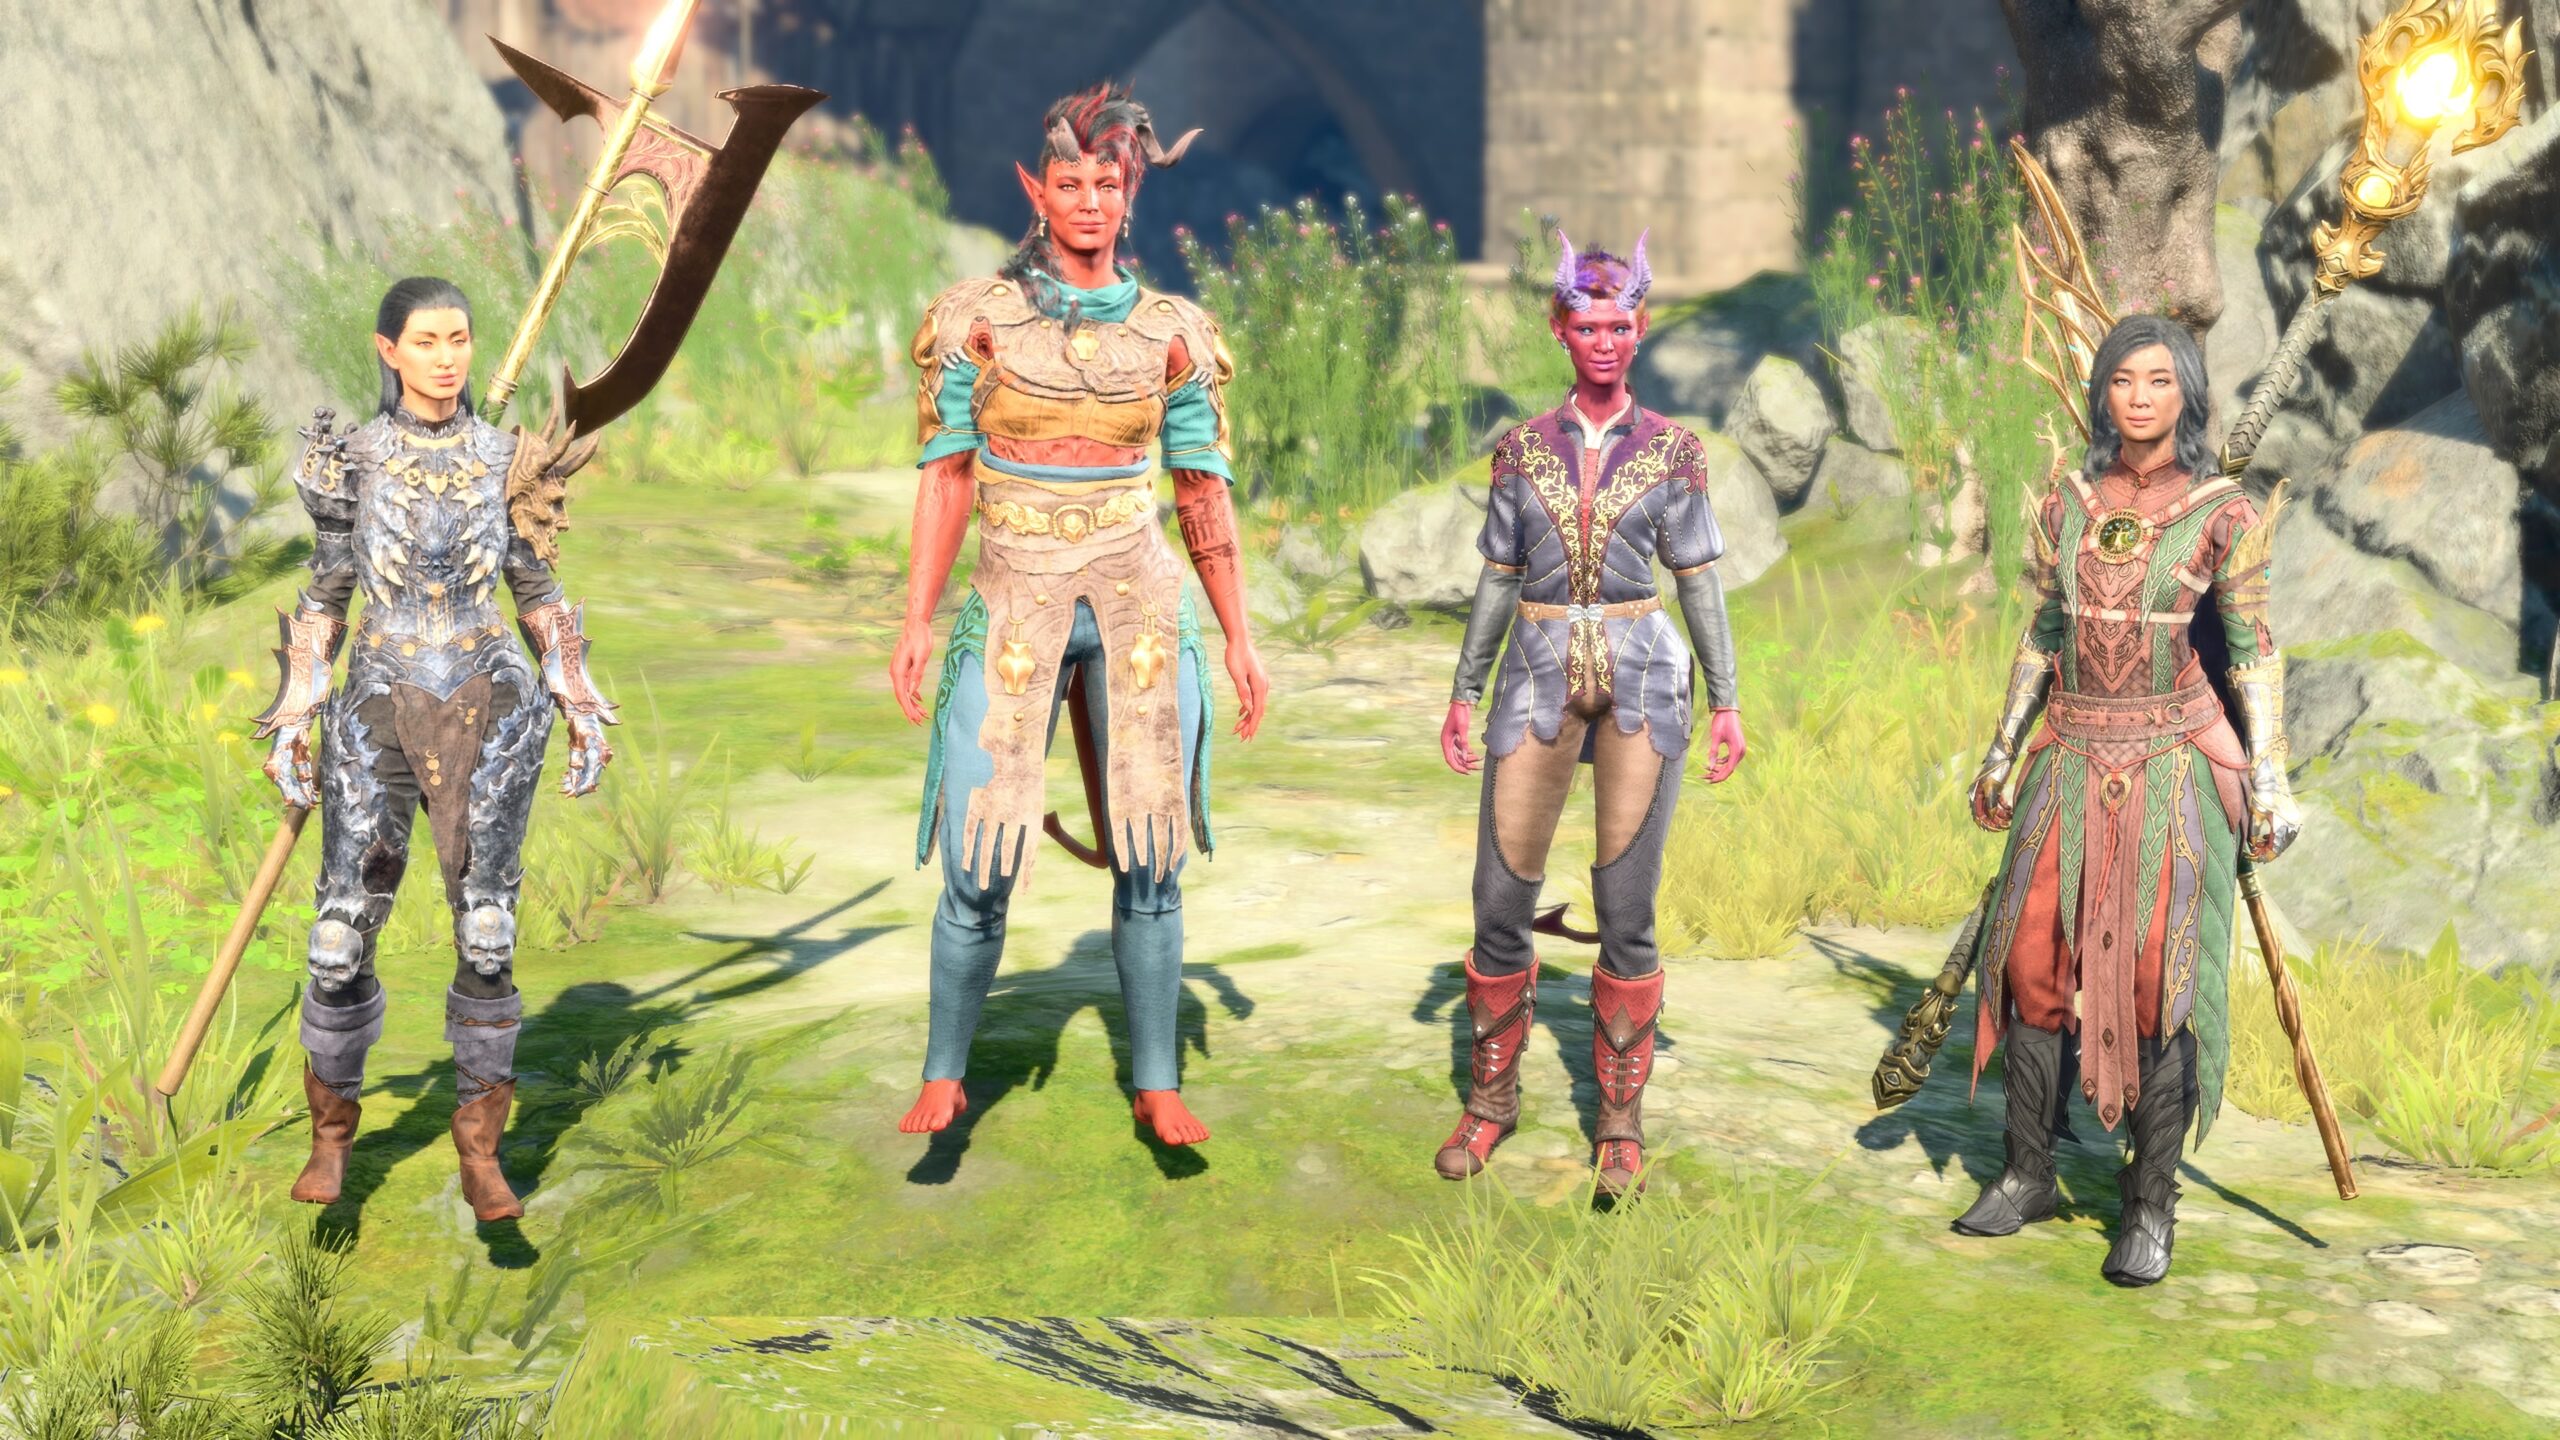
Another way to keep a model from blending into the background is to think harder about the model’s appearance.
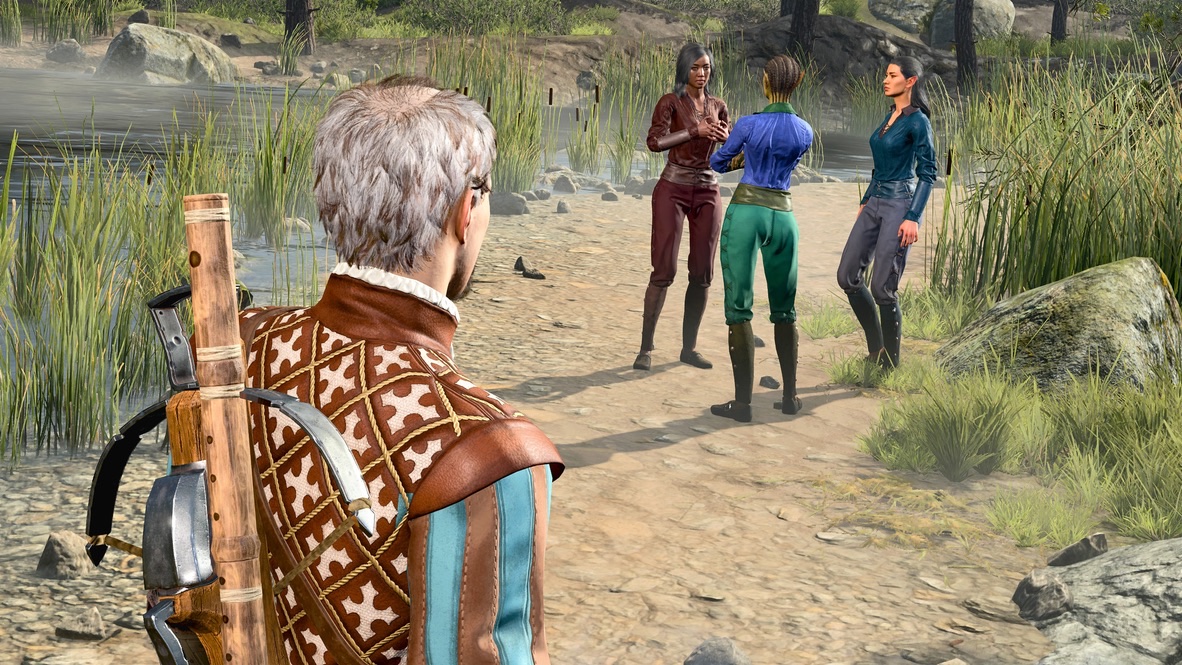
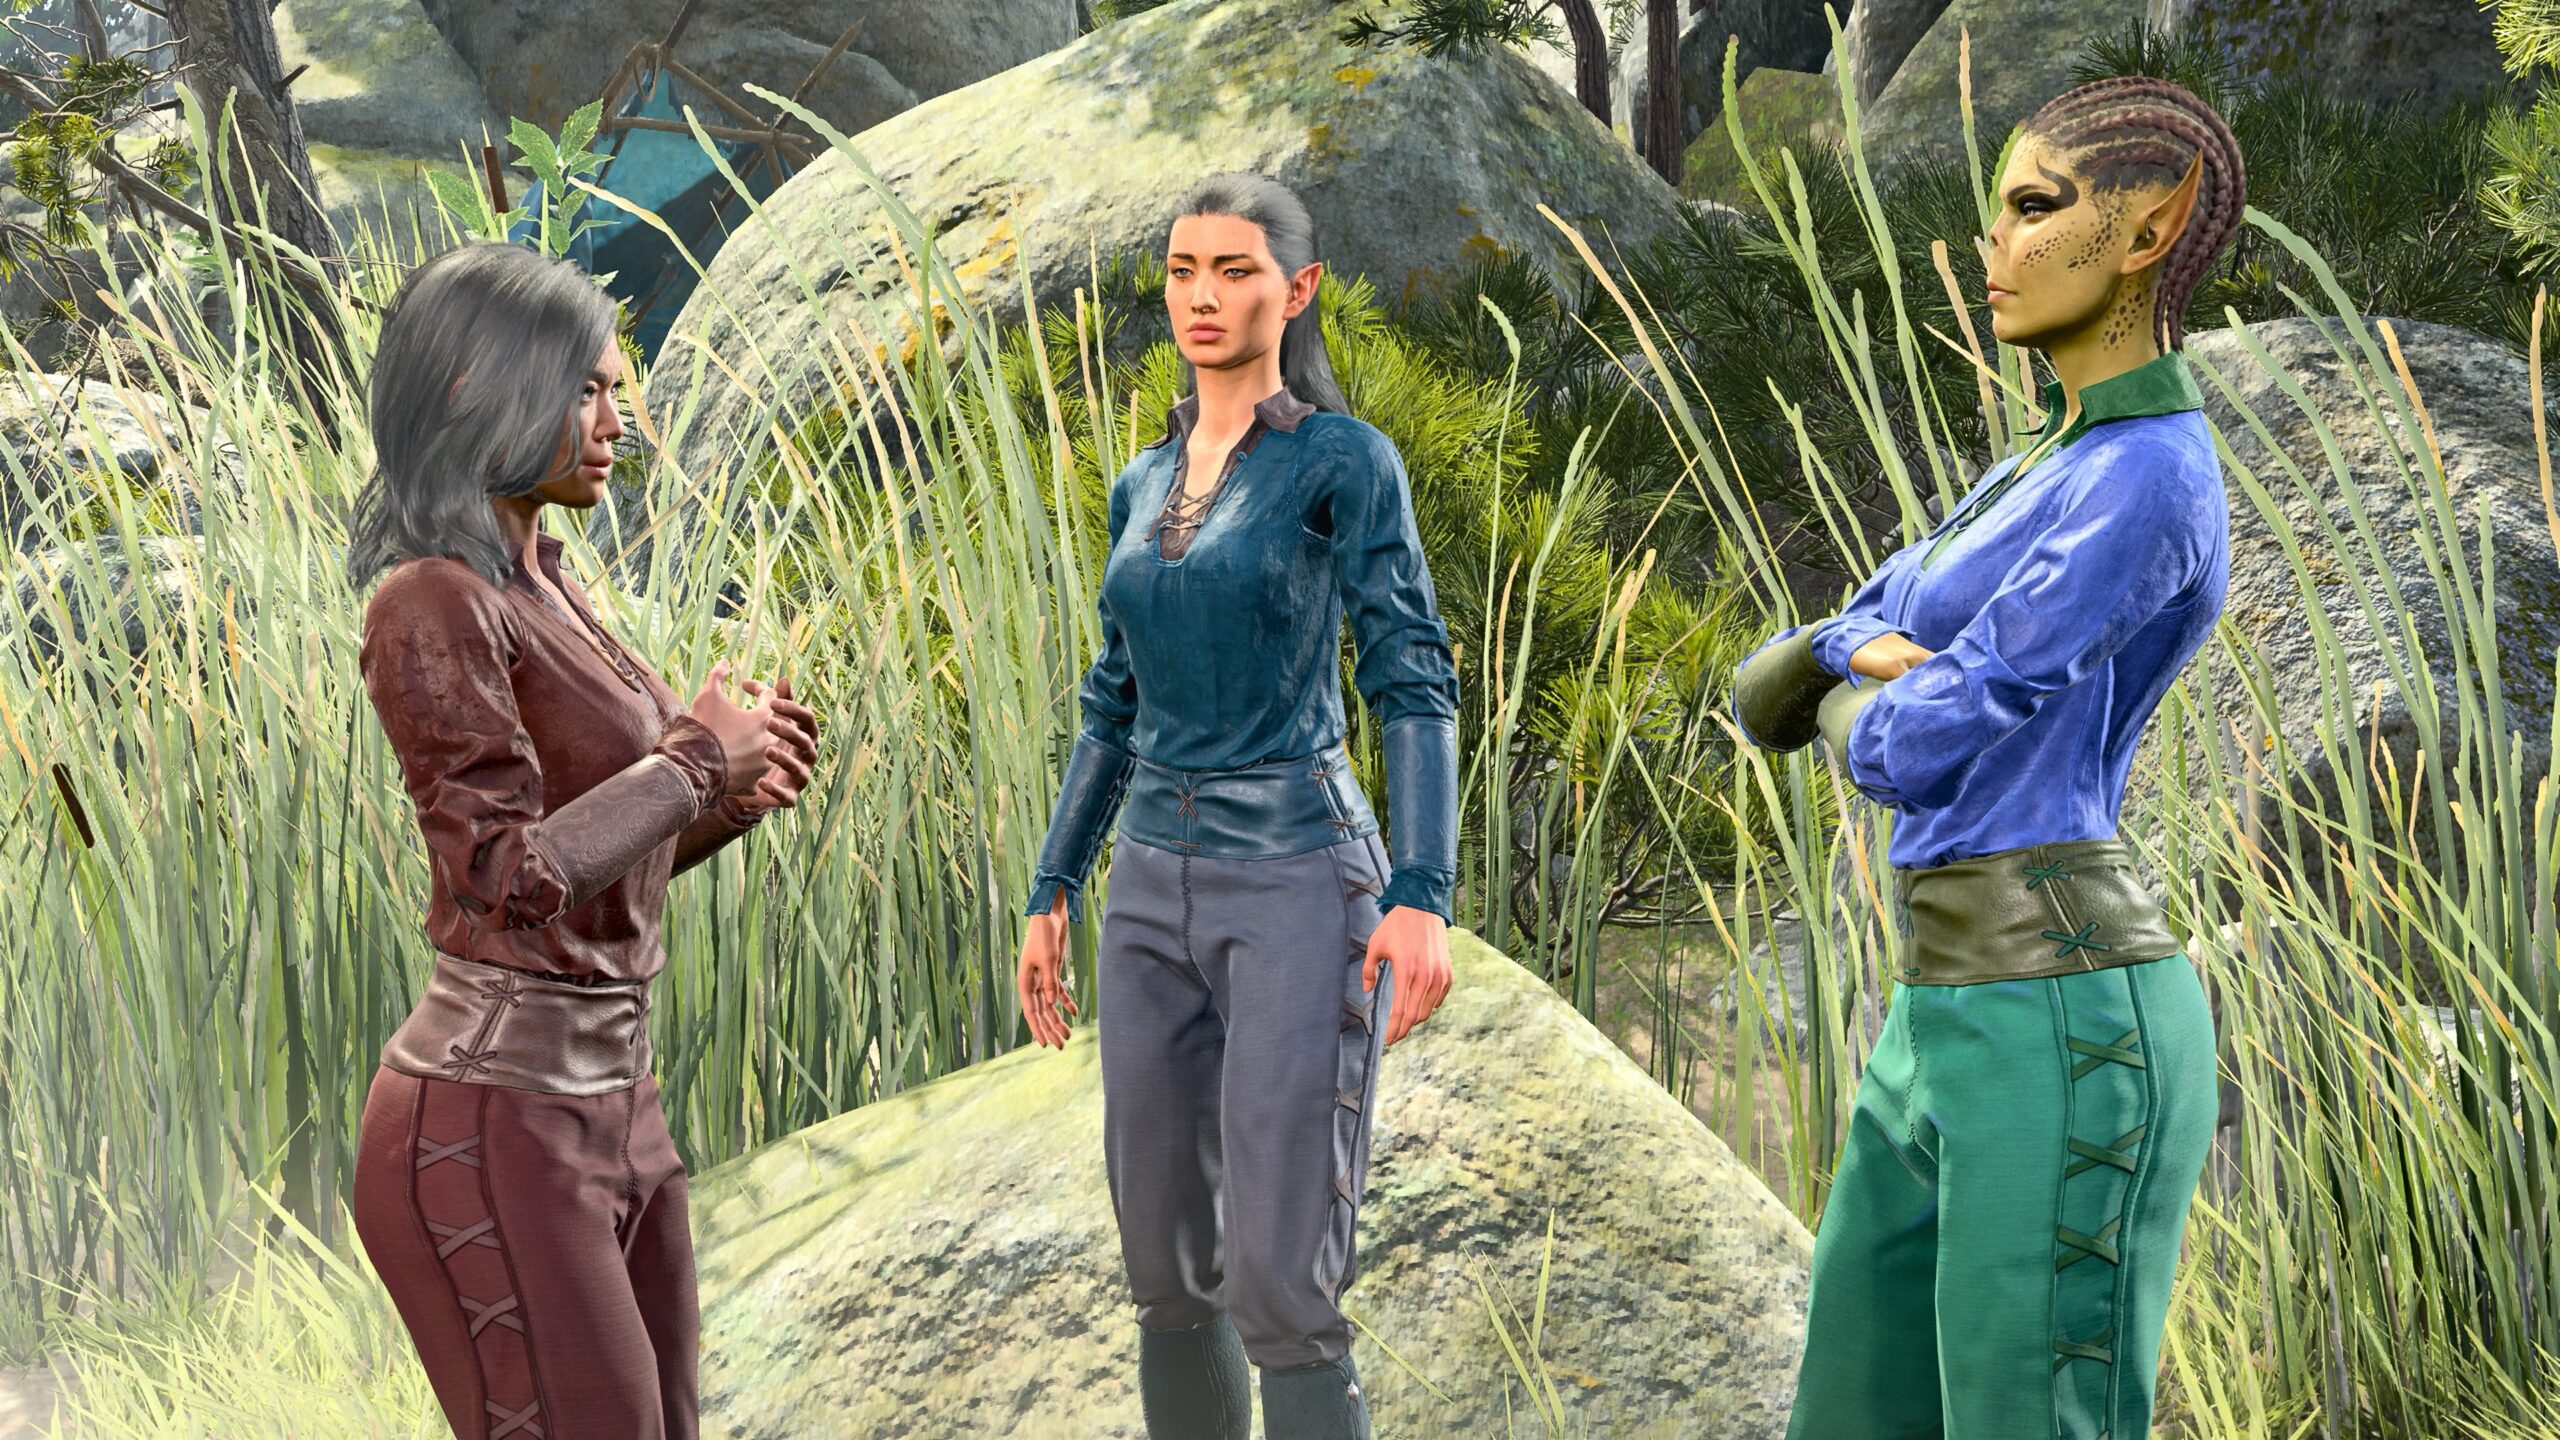
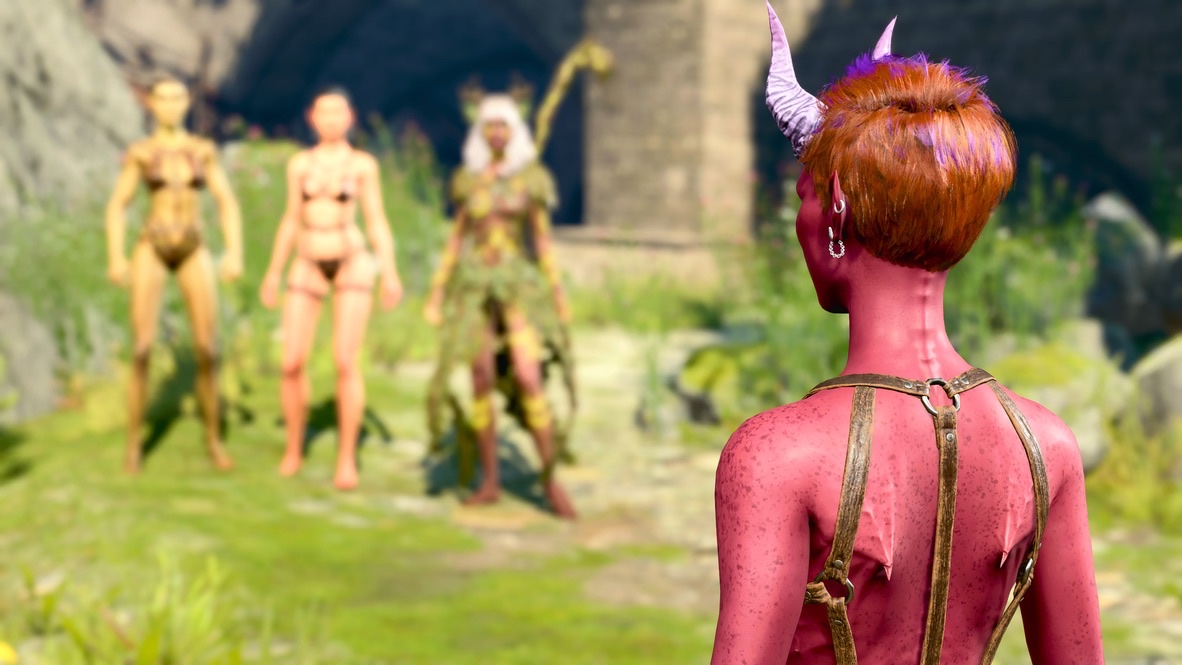
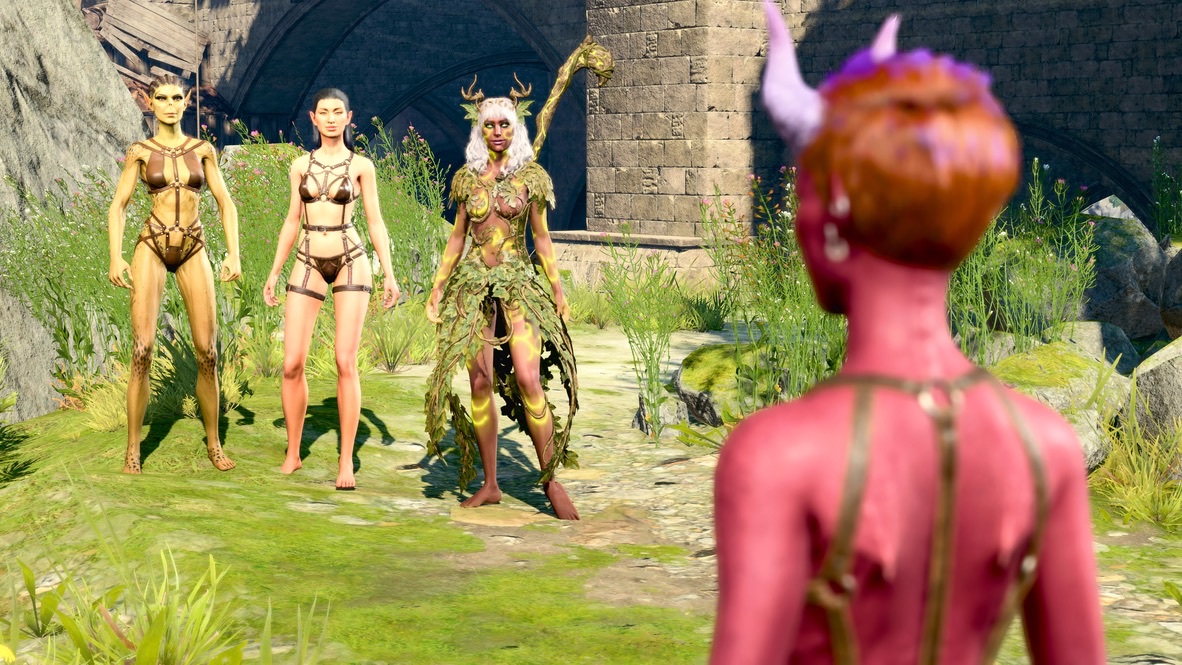
This image is one I took for The Jump. Thanks to a little foresight, I knew that I wanted shots of the guy in the foreground to observe the conversation between the other characters from a distance. I left Depth of Field off; there was no combination of parameters that would have kept all these models in focus and made the background out-of-focus in this environment. Instead, I dyed the outfits of the models so they’d be distinct from the background and from each other.
Tangent: Contrast
I’m not speaking of “constrast” as in “contrast vs. brightness” in image processing, which I don’t plan to discuss in this essay. I’m speaking of making image elements stand out.
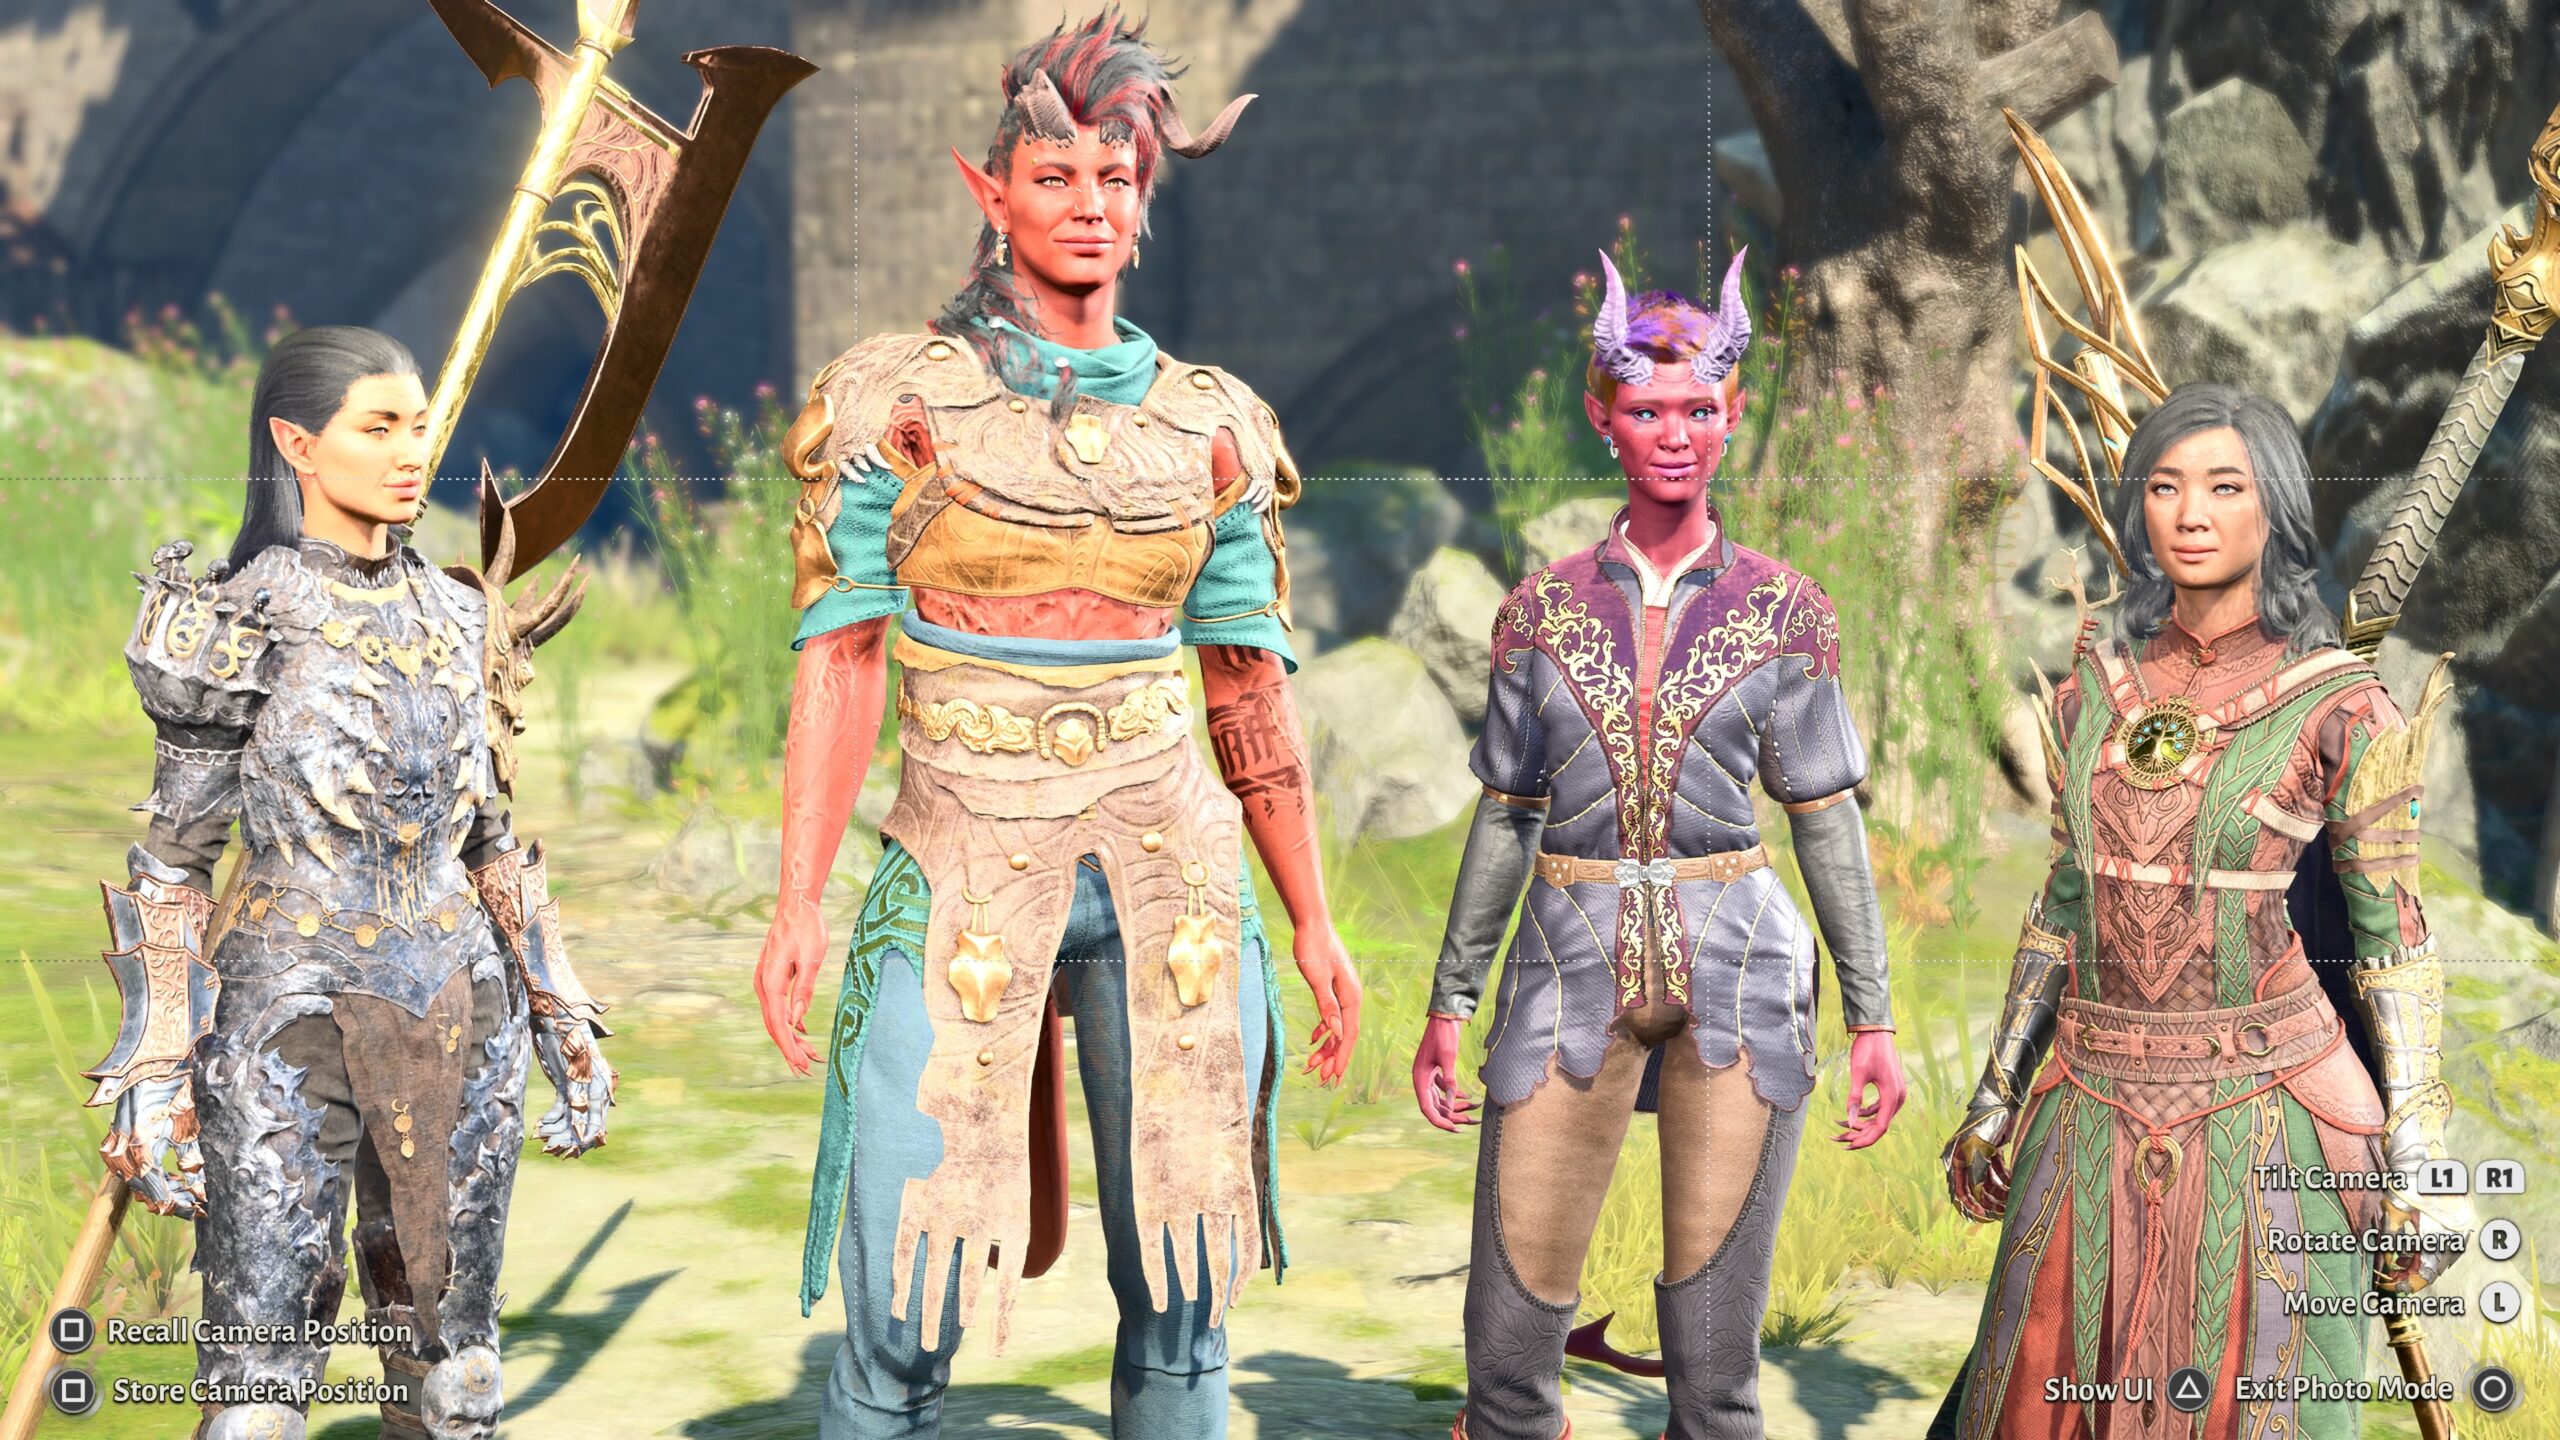
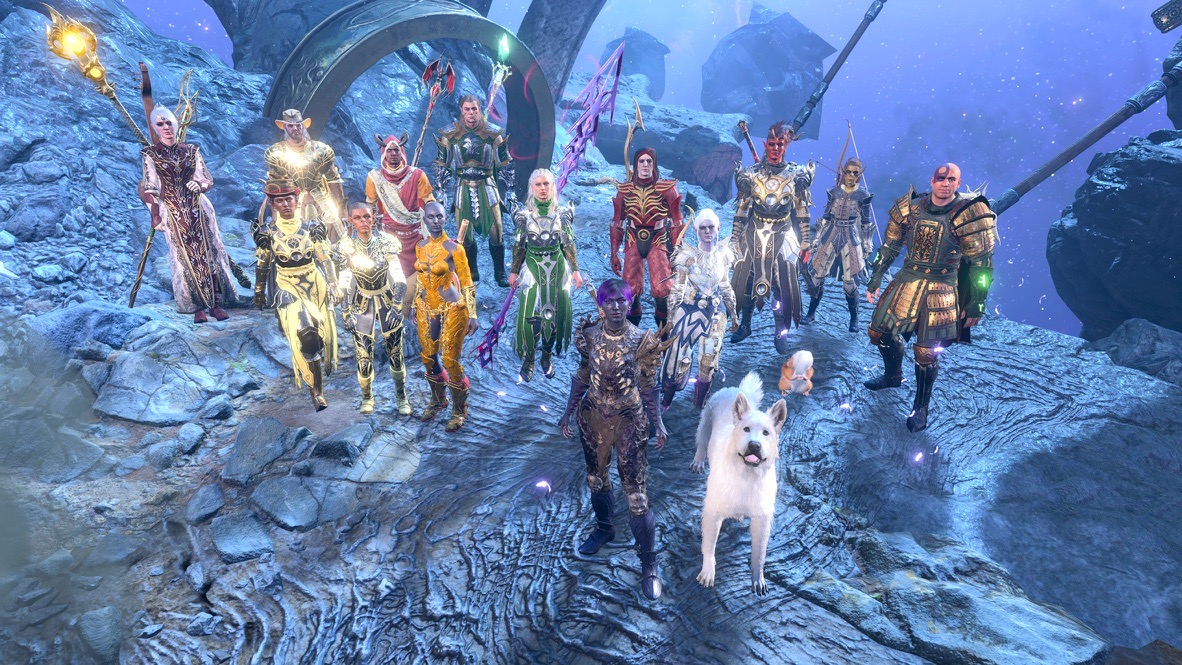
As an example of a mistake, consider this:
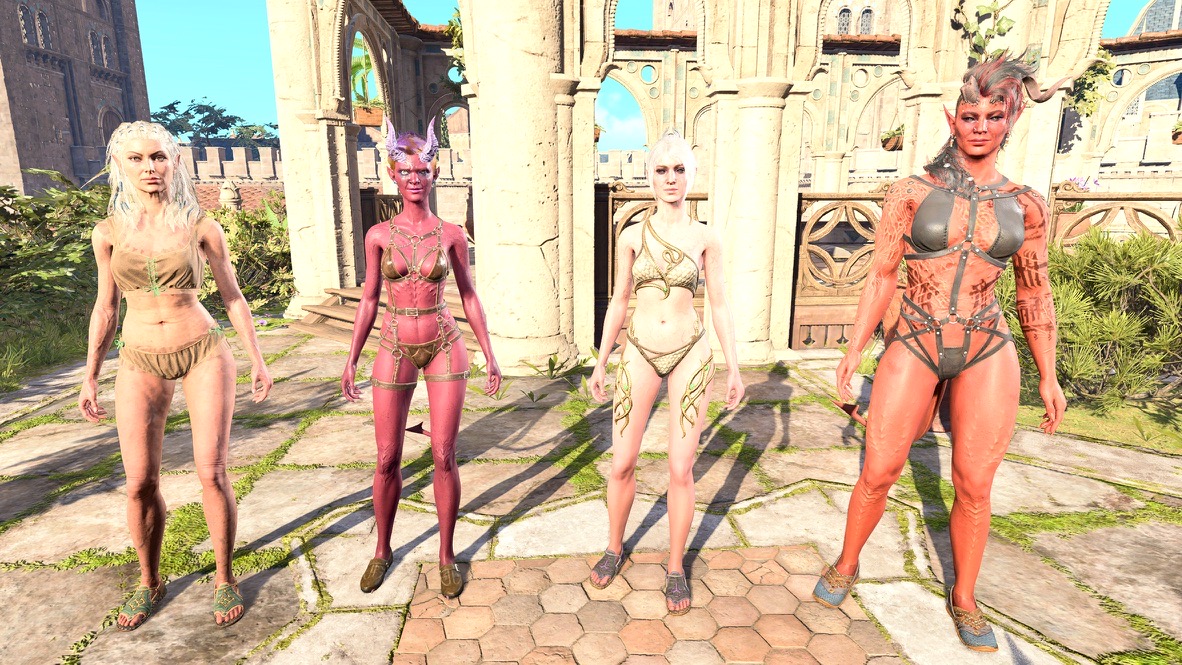
When I took this picture, I didn’t consider that the second model from the right blended into the background. If I paid attention, I would have posed the models in front of a different background, changed their position so a pale character wasn’t standing in front of a pale surface, or dressed them in outfits that would stand out more. (Of course, the clear purpose of this picture was to create a pin-up photo, so giving them different clothes wasn’t really an option.) Now I’d also consider using Depth of Field for making foreground images sharper than the background.
For me, the long-term true value of this picture is that I now try to make sure that image elements that are part of the story are visible in the fanfic photos.
End of tangent; on to a different mistake
Another use of Depth of Field is put additional emphasis on a given picture element.
Superficially, that may sound fine. In this particular case, after I’d published it, I looked it over a few days later and saw the sequence was a failure. Real Angela thought the entire fanfic repeated the obvious, and had too much pointless nudity. While I may not have gotten my plot points across through my use of pictures, in my judgement it’s my fumbling with Depth of Field that ruined the piece. If you look at the sequence, it’s clear that I set the Depth of Field much too high.
I also switched focus between the foreground and background models in an inconsistent way. The reason: As I mentioned before, no matter how many photos I take, I always seem to have omitted something when I get to writing the blog post. In this case, I didn’t have enough shots of foreground vs. background focus to suit the story points I wanted to make. I made do, but unlike the “Druid Angela and Wings smiling” photo earlier in this essay, the choice didn’t work.
Now that I’ve explained Depth of Field, I can now define what “Focus Character” means.
If the computer can figure out the focus for us, why did I make a fuss about adjusting the Distance earlier in this essay?

Answer: Because automatic focus doesn’t work if you get too close to the Focus Character. Then I have no choice but to adjust the Distance manually. Because so many of my images are “talking heads,” I’d have to adjust the Distance manually all the time anyway.
Also, it’s easy for me to lose track of who I set as the Focus Character. If I have more than one model in a shot, at different distances from the virtual camera, with Automatic Focus Mode I might wonder my characters were perpetually out-of-focus.
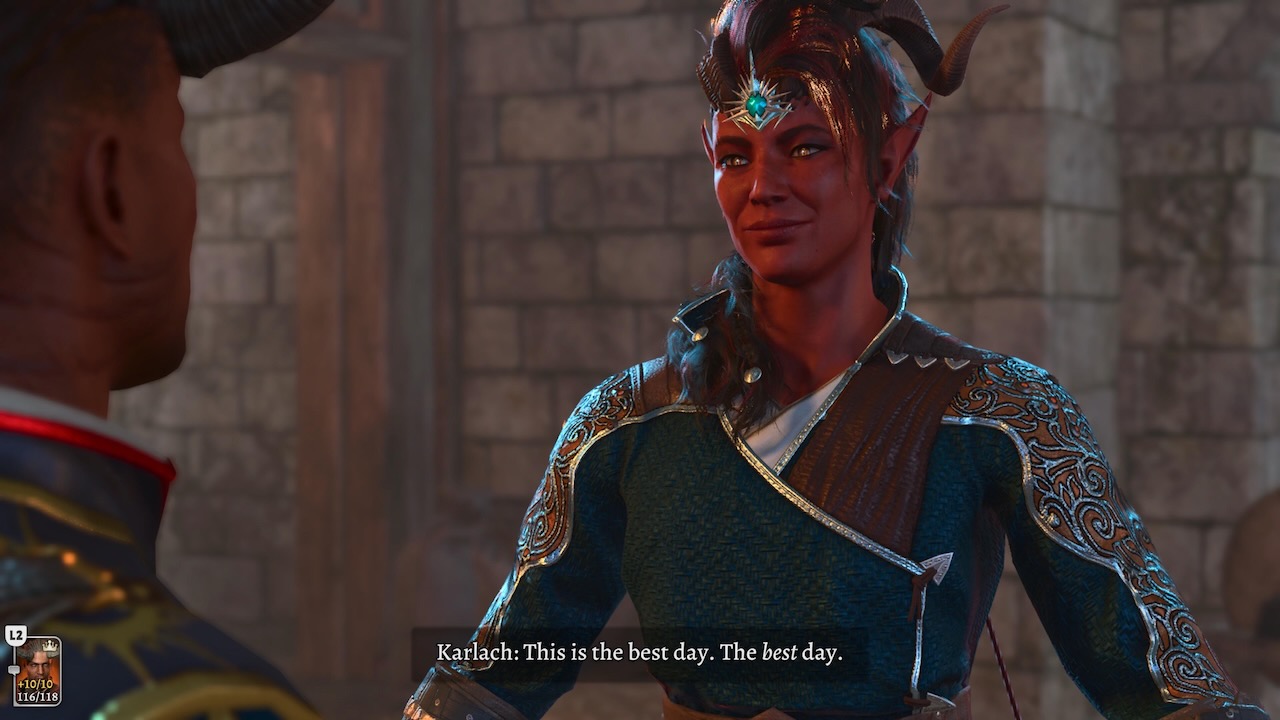
In this picture (which is actually a screenshot from a cutscene), the game has kept Karlach in focus, Tav in the foreground is a bit blurry, and Druid Angela (lower right) in the distance is way out-of-focus. Imagine what the image would look like if I accidentally left Druid Angela as the Focus Character.
So I just leave Focus Mode set at Manual, which means that Focus Character doesn’t matter.
In part two we’ll learn about positions, angles, composition, staging, the Rule of Thirds, captions, and a detail about Withers you may have never noticed.
Pingback: BG3 – Virtual Photography – 2 of 4 – The Argothald Journal
Pingback: BG3 – Virtual Photography – 3 of 4 – The Argothald Journal
Pingback: BG3 – Virtual Photography – 4 of 4 – The Argothald Journal
Pingback: A Windows hater buys a Windows machine – The Argothald Journal