In my big Baldur’s Gate 3 post, I said that I might update the diary at the end of the post as I continued my playthroughs.
Instead, I’ve decided to write a fresh post for each playthrough, as long I’m interested in documenting my experiences with the game.
Caveats
- I’m not a particularly skilled gamer. If you’re reading my playthroughs hoping to get some major insight, you probably won’t find anything here. In particular, if you’re looking for something that will help you solo Honor mode, it’s only vaguely possible that you’ll learn from my mistakes.
- I will generally avoid spoilers. But there’ll typically be one major spoiler in each of these playthrough posts. It’s the same one I warned about in my first BG3 post. If you read all of that, then there’ll be no major spoilers for you here. However, if you’ve never played BG3 before, I can’t promise that my posts won’t interfere with a pure “virgin” experience of the game. Certainly the links to the Baldur’s Gate 3 Wiki, which I use for spells and items, will contain spoilers.
- I recently learned how to transfer screenshots from the game to my Mac’s Photo library. These posts are long, but that’s mostly because I’m also using them as photo albums for my playthroughs.
Goals
As I said before, my goals for Playthrough 7 were:
- Play with Gale as the main character.
- Play Gale as a Retaliation Wizard.
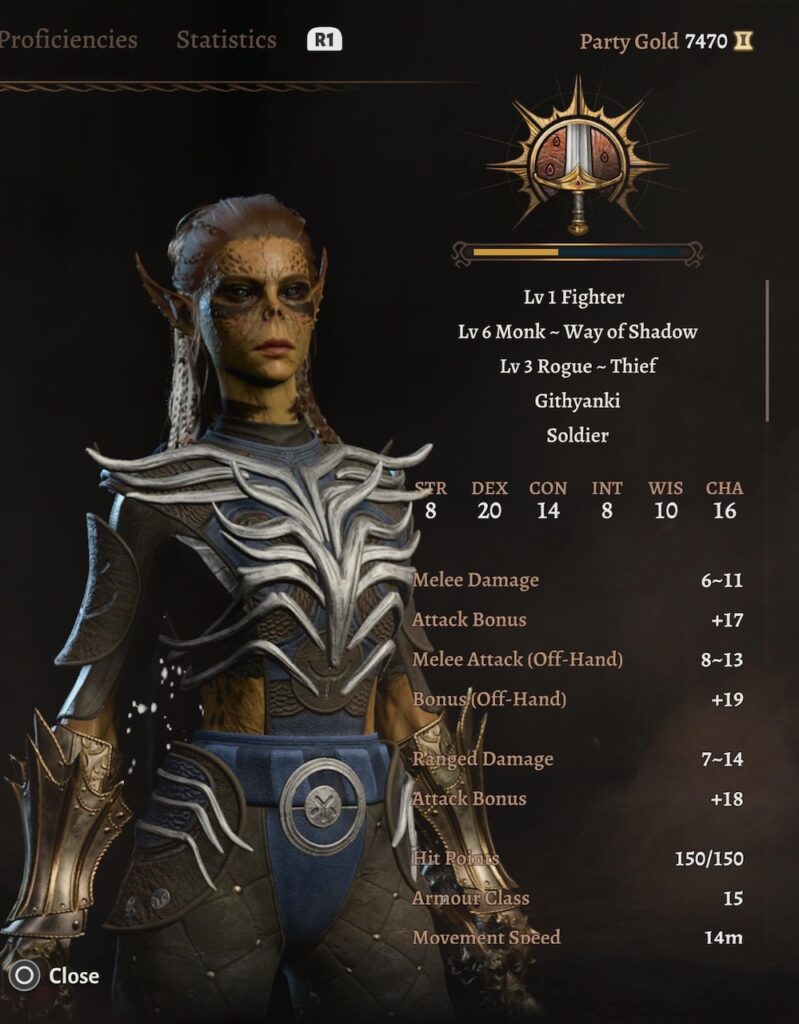
- Play Lae’zel as a Shadow Assassin.
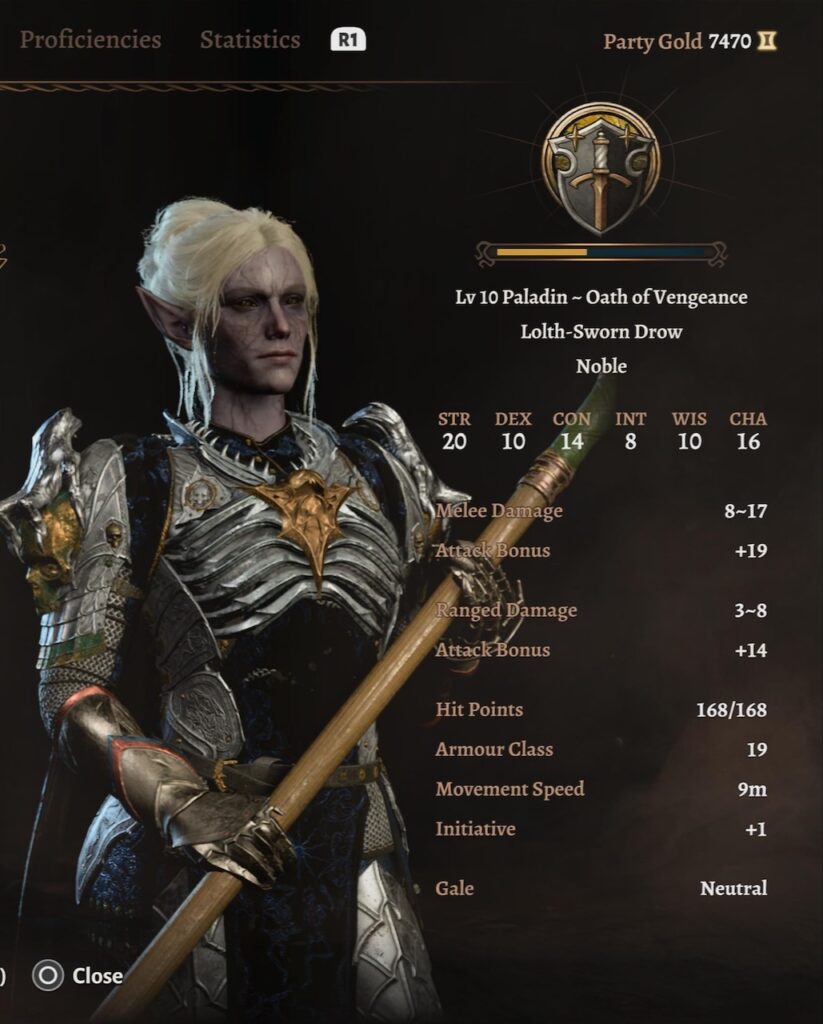
- Play Minthara as a full-fledged Lolth-sworn Paladin, which is how she’s initially presented in the game.
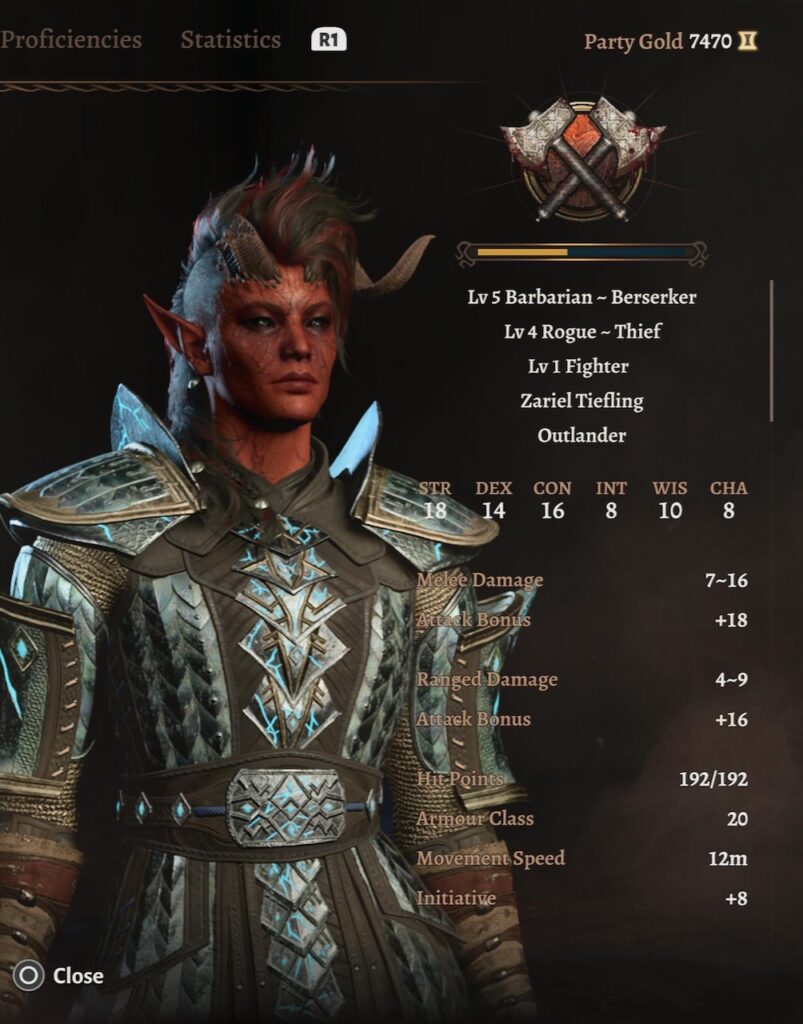
- Karlach would be a build I’ve used before: a Barbarian Thrower.
- Try again to take a couple of the Druid NPCs “out for a walk” and see if I could finally make the class work for me.
- Break my chain of being in a relationship with Minthara in my four prior playthroughs. This time I would stick to a relationship with Lae’zel.
Results
I’m going to review the results in a different order than I listed them above, mainly to interleave interesting screenshots with discussions of game mechanics.
Gale as main character
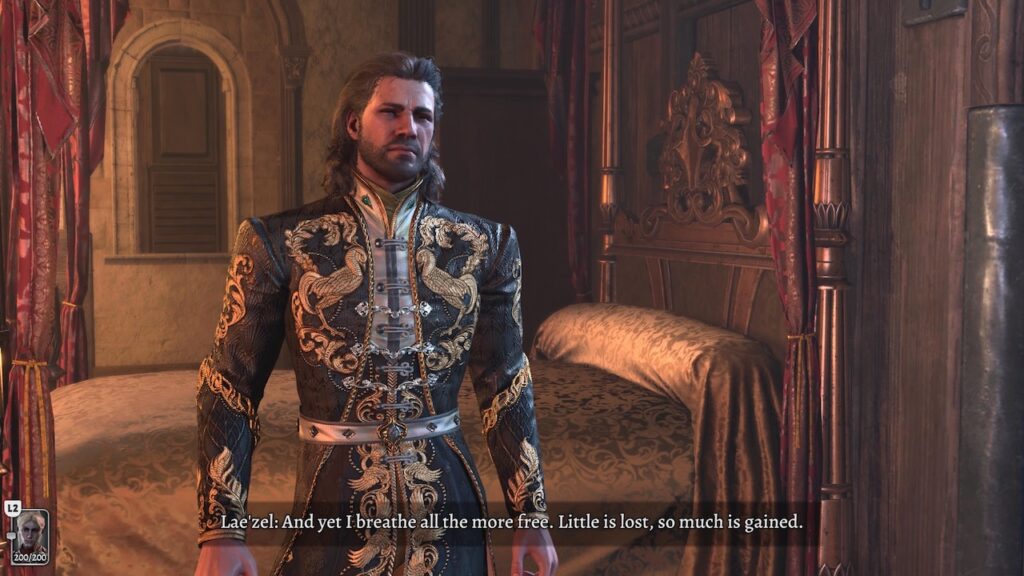
Accomplished. I went from this:
To this:
To end as this:
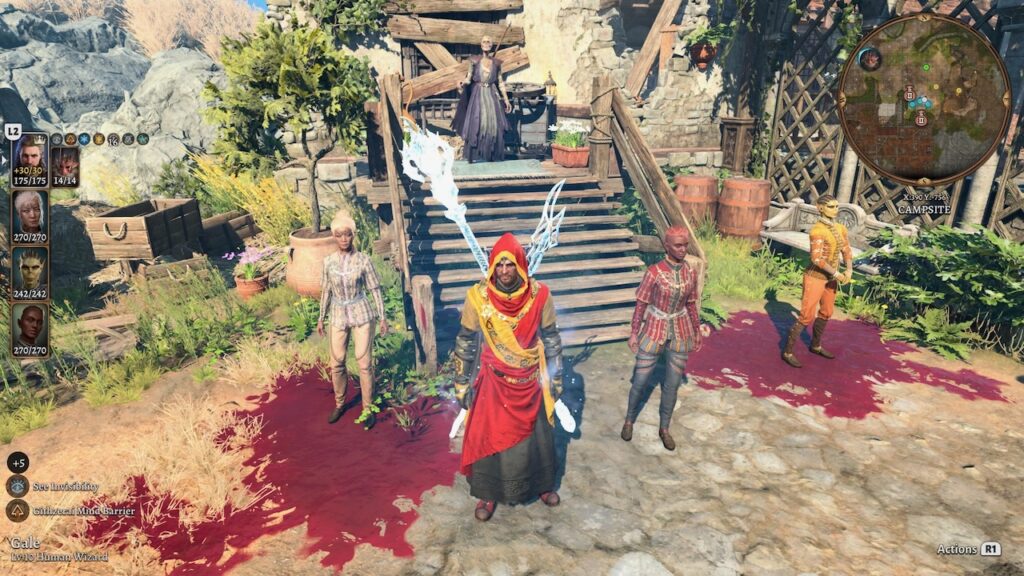
Some points about that last photo:
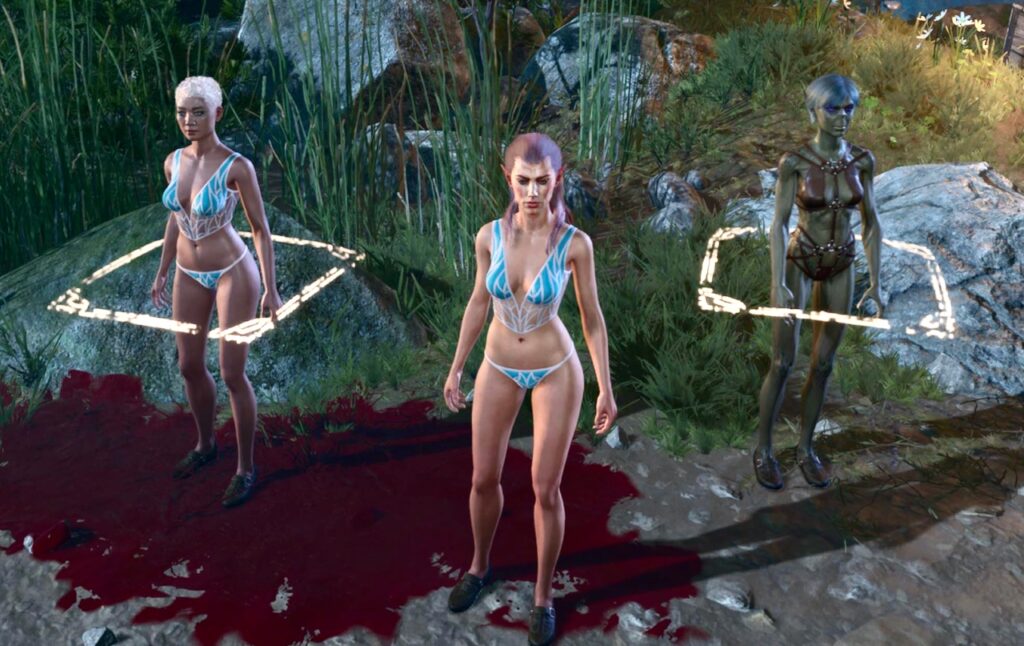
- Gale’s staffs are glowing. That’s because he’s used the spell Kereshka’s Favour, which can only be gained from one of the best spellcaster staffs in the game: Markoheshkir, a name that’s easier to copy-and-paste than it is to say.
- When a spellcaster casts Warding Bond, the caster takes half the damage that the spell’s target takes. That’s the reason why two of the Angels have blood stains underneath them; they bleed when their Bonds bleed. The middle Angel happens to not have taken damage while standing on that spot.
- The use of hirelings in this way was something I figured out during Playthrough 6, in which I played at a harder difficulty level (Balanced) as opposed to this seventh playthrough in which I played at the easiest level, Explorer. Honestly, they’re probably not needed for this easy level, but it’s hard to give up a neat trick to preserve the party and save on spell slots.
- You get the hirelings from Withers, the mummy-like figure you see in the background (who played the role of Charlie in the 70s TV series (yes, John Forsythe is dead; that’s the point)). You can re-name and respec hirelings as you choose. For the record, these Angels are (from right to left):
- Ward Bond (a distant relative of James Bond, of course). She was originally introduced to cast Warding Bond on Astarion in Playthrough 6, and the name stuck. She is a Cleric, for casting Warding Bond and other defensive spells.
- The Blade, so-called because I hired her to cast Flame Blade and Shadow Blade in Playthrough 6. She has one level of Wizard (for casting Mage Armour), with her remaining levels in Druid for Freedom of Movement and other utility spells.
- Ai’Kandii, also a Cleric, for an additional cast of Warding Bond and other high-level single-cast spells such as Heroes Feast.
- Please note that I don’t always strip the female characters down to their underwear. Not always.
Right-to-left: Ward Bond, The Blade, Ai’Kandii. I’m short on money in the early levels of this playthrough, and sold their armor to make ends meet. The squares are an effect of the Ward Bond spell. - Ward Bond has another function: the Wardrobe Manager. As I go through the game and come across or purchase interesting non-combat clothing, I send it to her. This saves on inventory space, and is a useful organizational tool; there’s a camp supply chest, but that tends to fill up with saved gear and becomes tedious to scroll through. Periodically, when I feel like redressing a character, I’ll go through Ward Bond’s inventory and try on outfits until I see one that suits my mood.
One of the many costumes that Ward Bond managed for me. She also handles all the outfits, including various styles of underwear, for the main characters and all the Angels as seen in other photos.
More kudos to Larian: Even in the seventh playthrough, I saw things I hadn’t seen before.
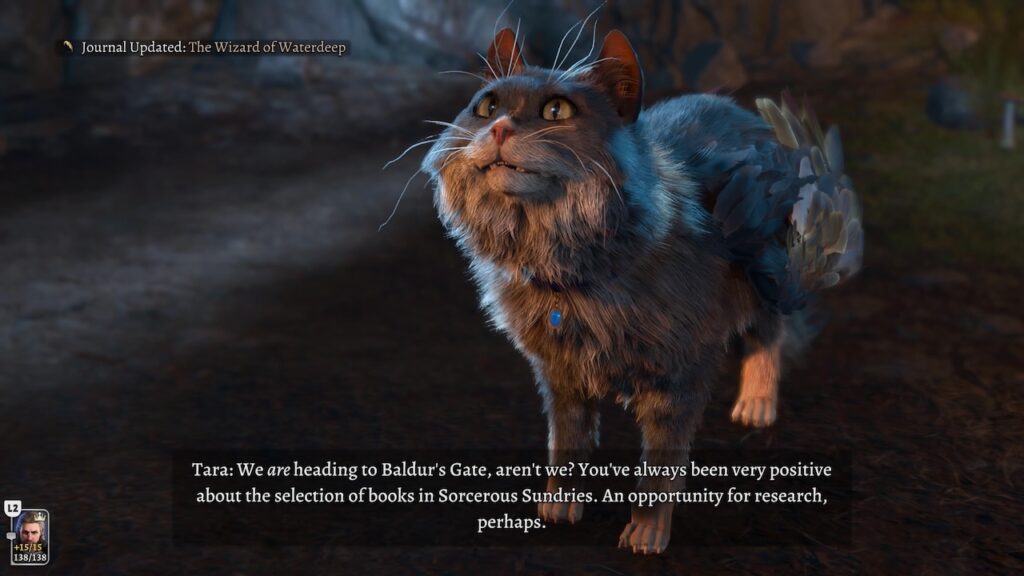
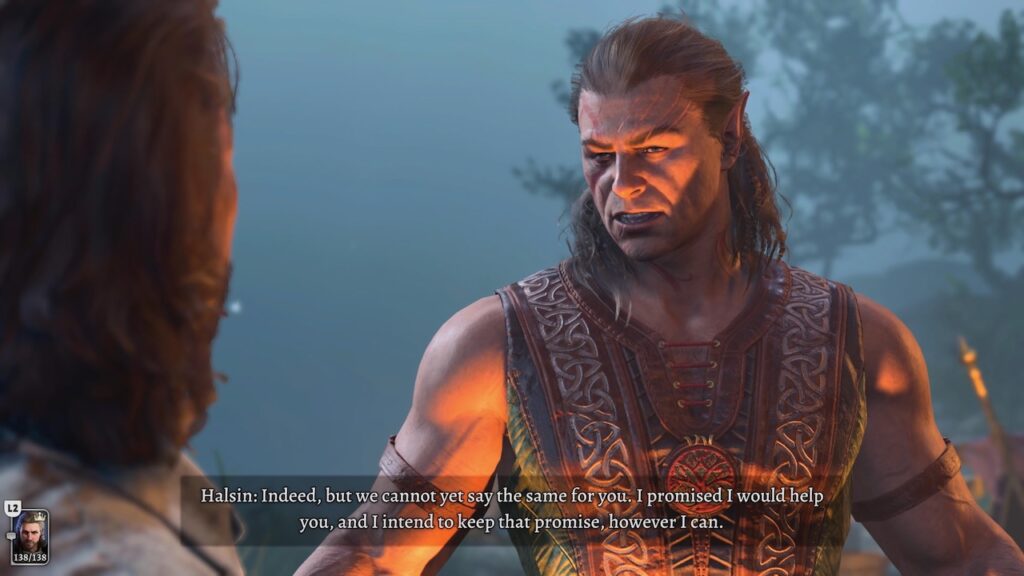
As with other Origin characters, Gale has special content that you see if you take a Long Rest immediately after waking up on a beach. One of the features is the opportunity to speak with this delightful individual:
I posted a link in my first BG3 post to a video in which Devora Wilde, the voice actor for Lae’zel, made a crucial story decision. I decided to have Gale make the same decision.
Once again, this choice illuminated new story possibilities. In particular, there was one location whose presence seemed superfluous in earlier playthroughs. Now I know why that location exists and how it fits in to a different part of the story. It also suggests future alternative decisions, though I would save them for the next time I play a morally dubious character.
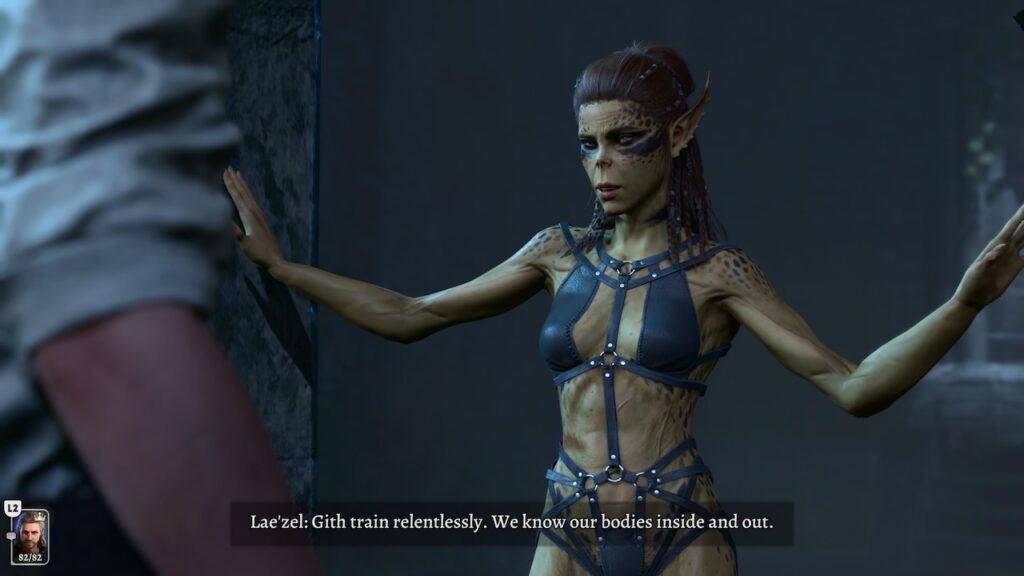
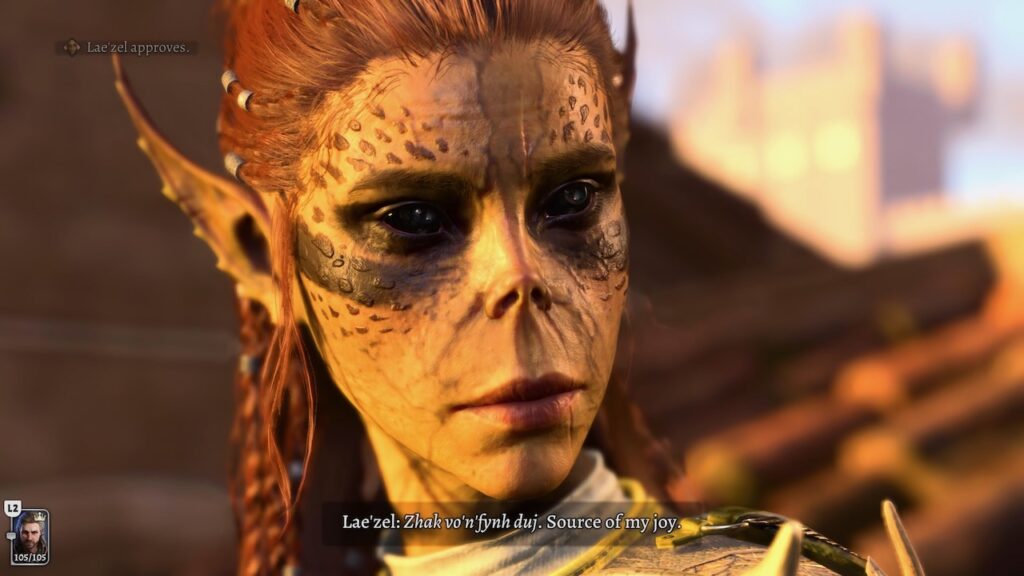
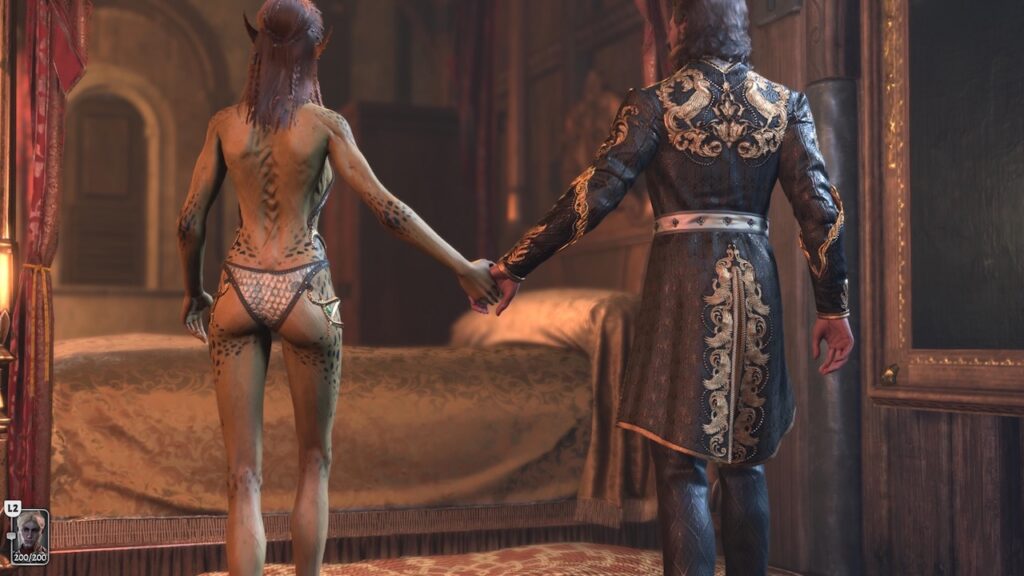
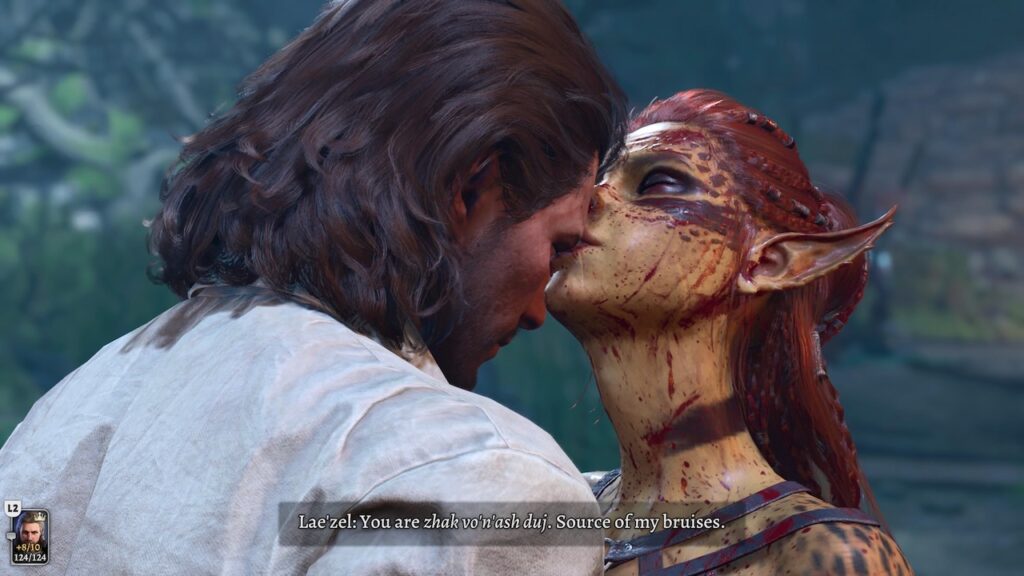
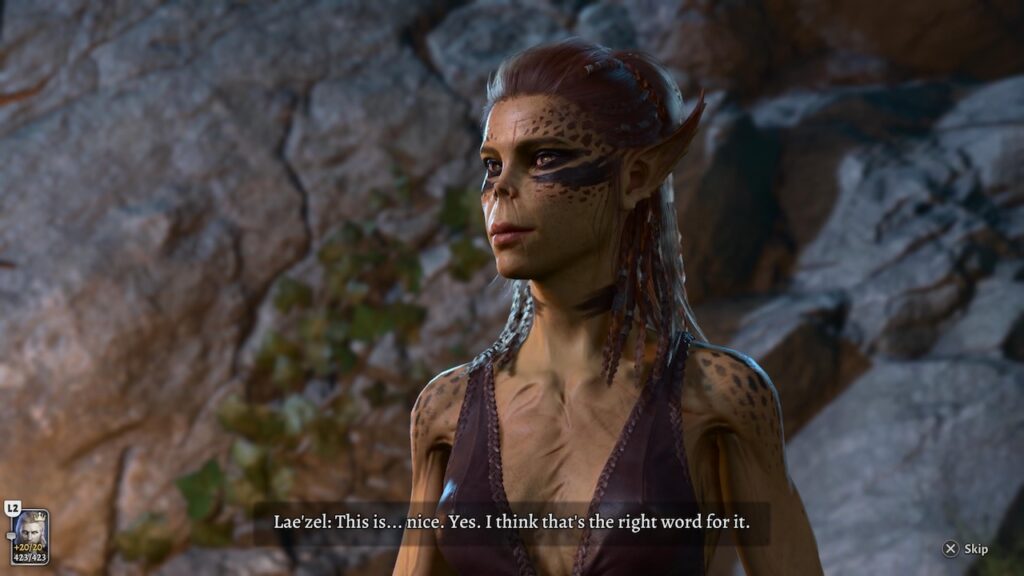
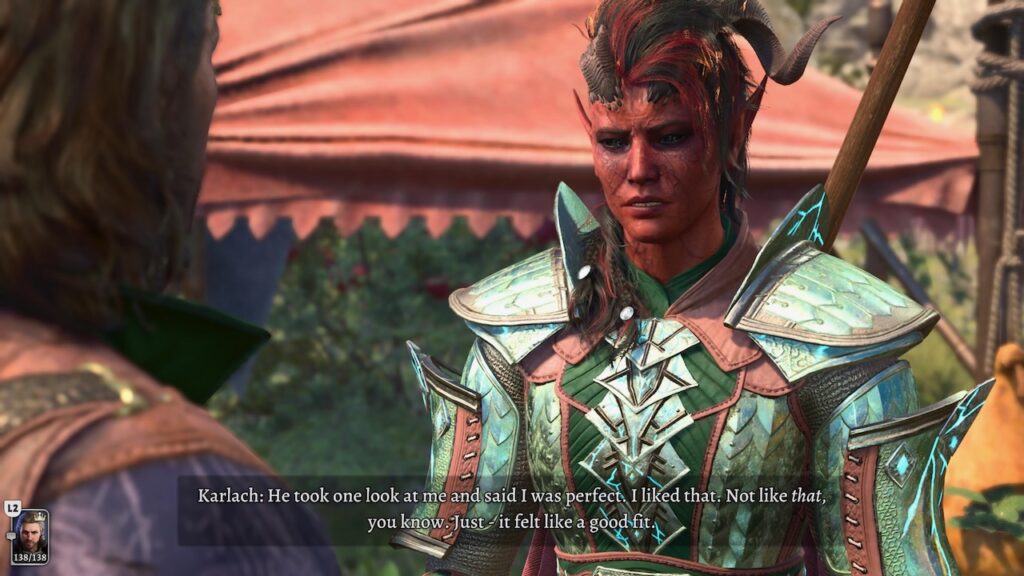
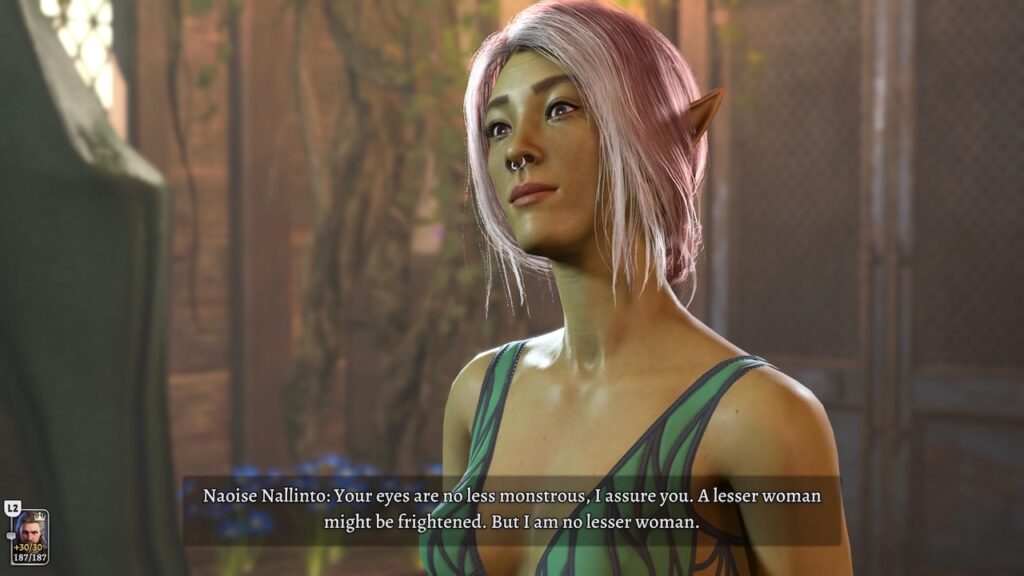
Relationship with Lae’zel
How could I have skipped over her for so long?
Both Lae’zel and Minthara are fierce, and their initial sex scenes have the same aura of aggressiveness about them.
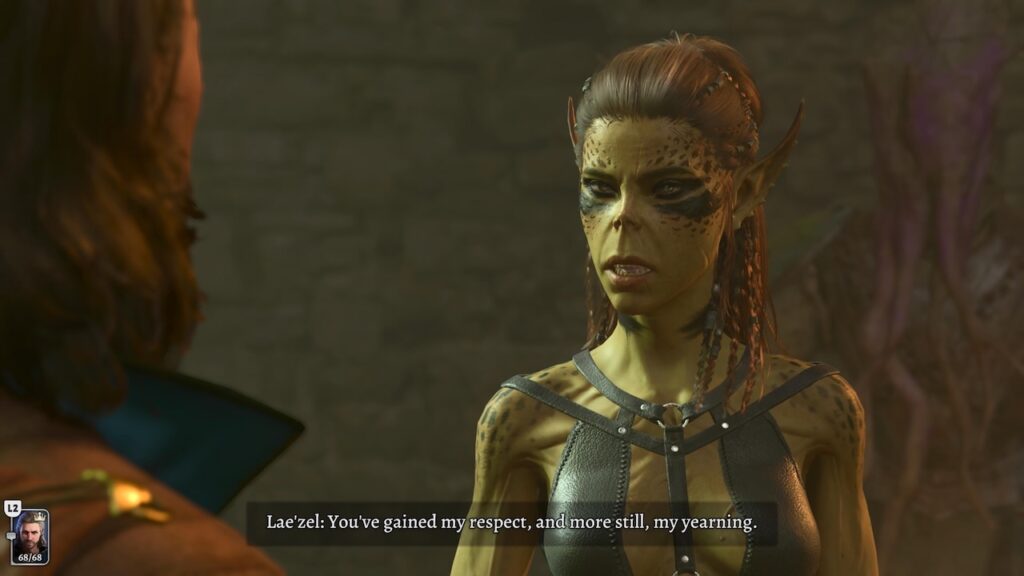
However, Lae’zel has a full-fledged relationship arc; Karlach has one too (which I hope to explore again in Playthrough 8), but none of the other characters have ones that are so strong. (As I’ve noted before, this may be a consequence of Larian not having the resources to script everything in such a big, complex game. There are plenty of examples in the game of what appear to be unfinished story elements.)
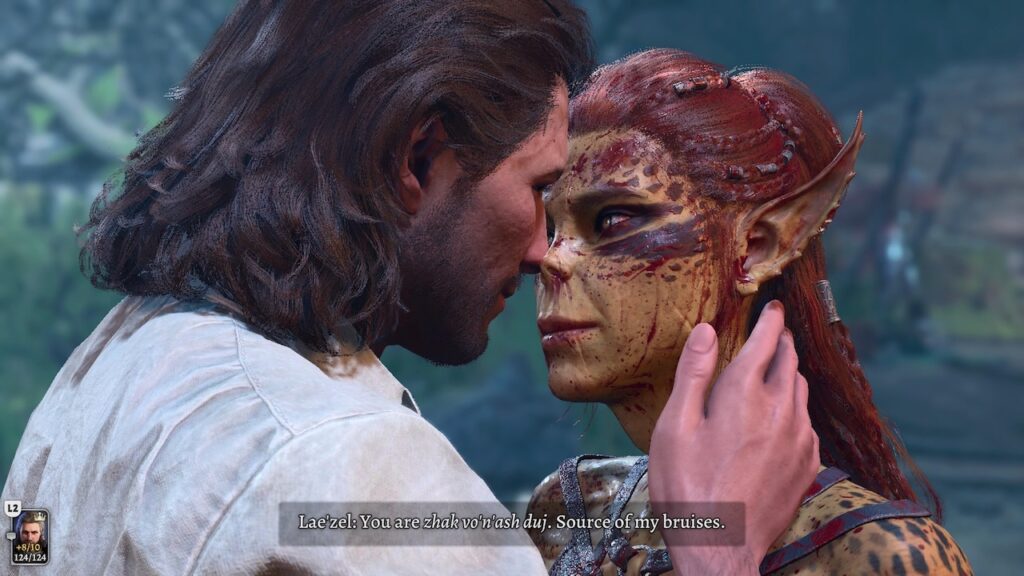
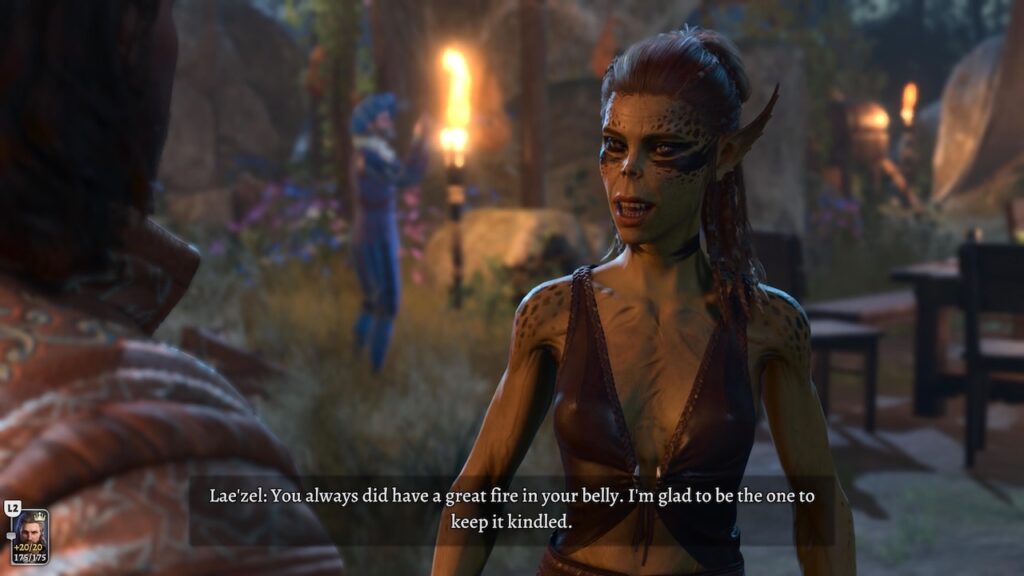
Finally, if you’ve maintained her approval, she comes to understand that there’s more to a relationship than just fighting.
This story is interleaved with her other story arc, which concerns her connection with her people, the Githyanki. It’s possible to lose your relationship status with her if you make certain choices. But it’s worth it in the end.
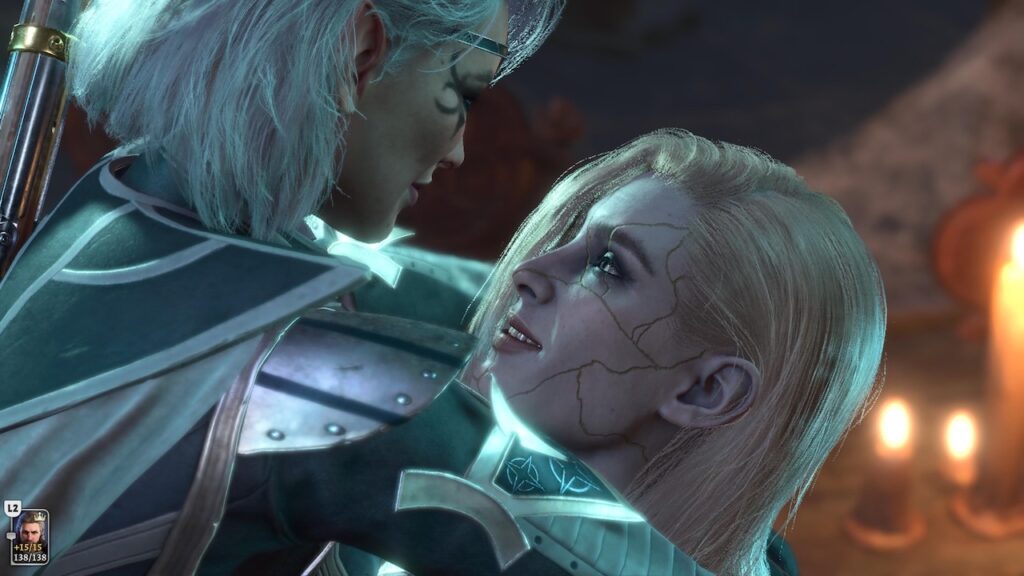
Because I’d repeated relationships with Minthara in previous playthroughs, I never noticed before how much the characters kiss differently, and how those kisses reflect the characters’ personalities.
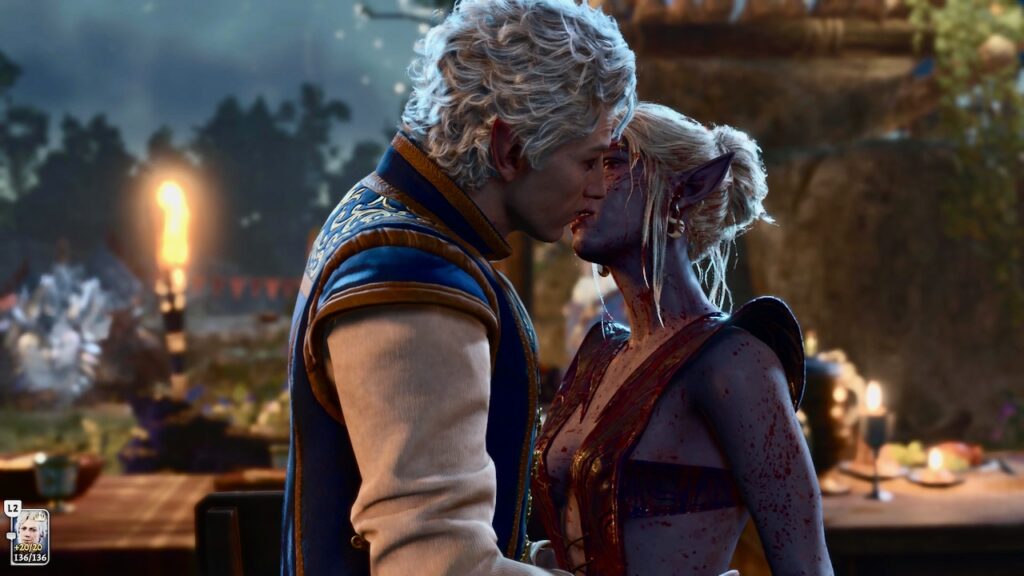
Now that I’ve spotted the differences in kissing animations between characters, I look forward to future relationships with other characters to compare.
(I’ll add special kudos for the motion-capture actors who performed for the kissing scenes. I know they look all romantic and fun. I also know that the process of motion capture is not a sexy one, with the performers in special mocap suits, location dots all over their faces, surrounded by technical crew, and faking interest in the other performer whom they may not know. Plus there’s an intimacy coordinator choreographing everything. The fact that I enjoy these scenes is a tribute to a lot of hard work by professionals. To paraphrase Samantha Béart, it takes a village to make a kiss.)
There was an interesting parallel with playthrough 6: The game had a relationship glitch.
Near the end of the story, Gale has a choice to make. I made the one that seemed to best fit Gale’s personality. Afterwards, Gale and Lae’zel had a scene that indicated the relationship between the two of them was fine.
There was a subsequent conversation between them in a different setting. In it, Lae’zel indicates that she thoroughly disapproved of Gale’s choice. There was no mention of their prior relationship.
Perhaps the game’s designers never considered my sequence of choices (relationship with Lae’zel, Gale’s particular choice, conversations afterwards), or the game has a bug.
Either way, I didn’t like how that ended. I restored the game from a save, had Gale made a different choice, and saw a consistent set of conversations.
(Am I so enamored of BG3 relationships because there are real-world relationships that I wish I could restore from a save?)
I’m getting all gushy about Lae’zel’s emotional life. Let’s not forget she had a job.
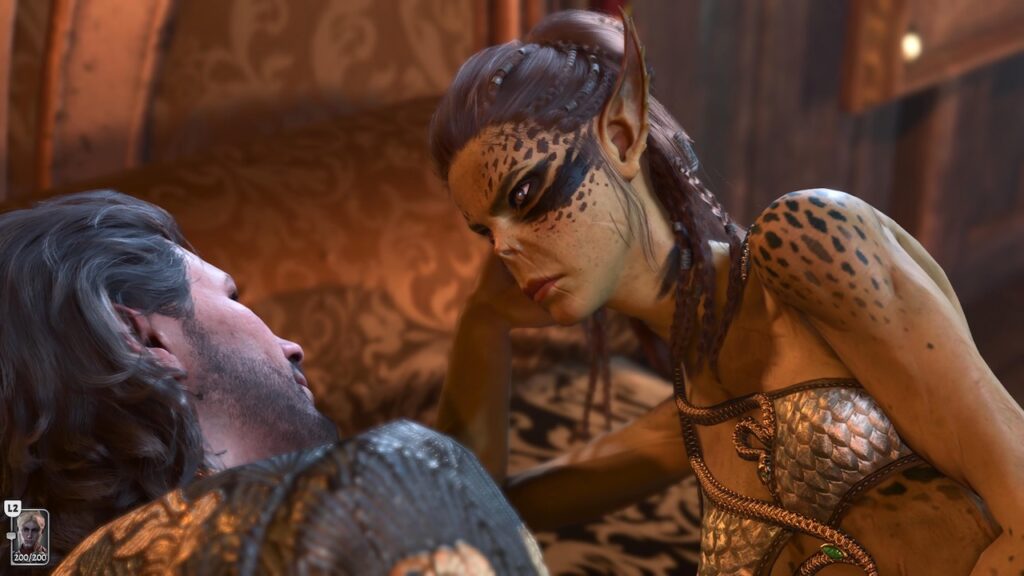
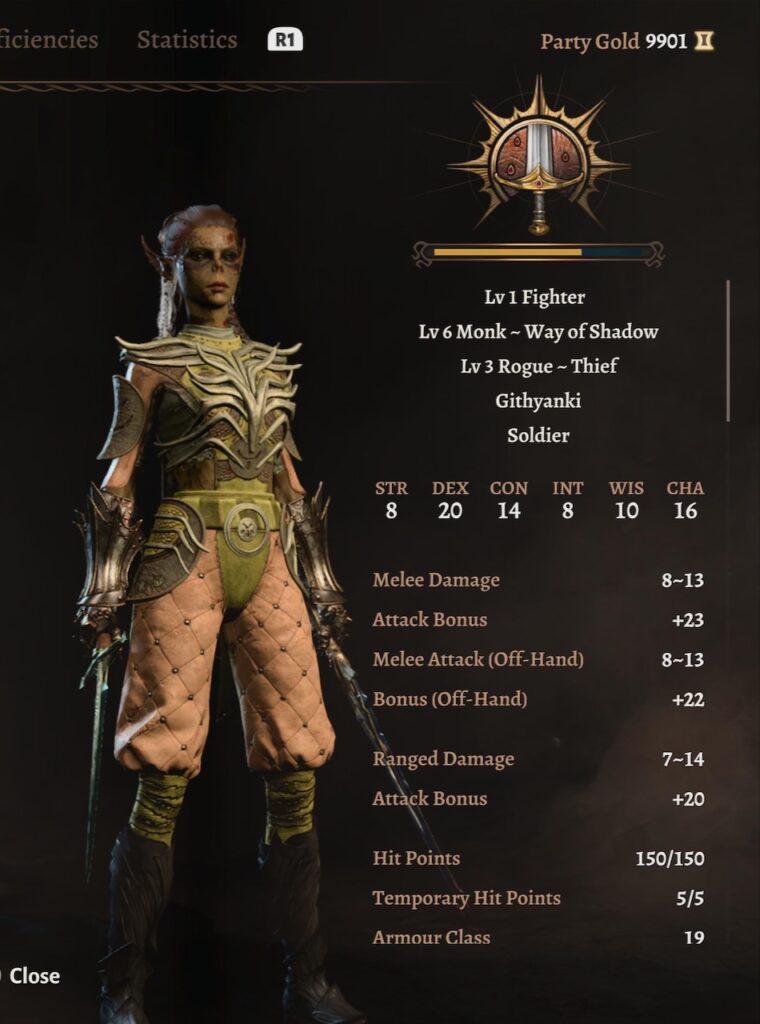
Lae’zel as Shadow Assassin
This worked well, though not as well as I’d hoped.
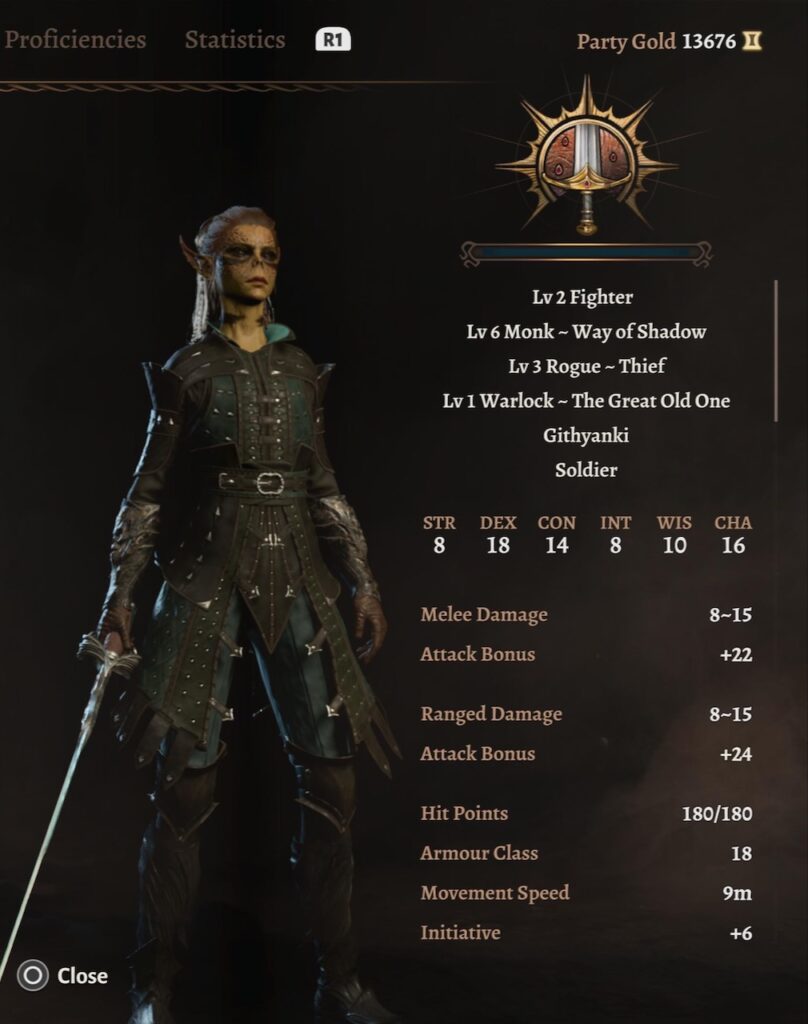
Near the end of the game, she took out an entire room of high-level enemies all by herself. OK, it was because she filled the room with explosives while invisible then detonated them with a fire arrow, but it was still damned impressive.
She was pretty kick-butt as a Shadow Assassin. However…
For a particular adventure, I took Astarion “out for a walk.” Since I hadn’t used him much prior to this, and wasn’t planning to use him again, I didn’t fiddle with special multi-class specs. All the playable characters in the game (including hirelings) level up when your character does. I simply went to camp and made him a Level 12 Thief with no special Feats. He only had “second tier” gear; that is, items that Lae’zel had used and discarded as she got better ones.
As an “uninspired Rogue” Astarion did as well, if not better, than Lae’zel did as a full-fledged multi-classed fully-geared Shadow Assassin.
To be clear: There’s nothing special about Astarion as a character that makes him better as a Rogue than Lae’zel, especially since I’d respecced her for her role but did little for Astarion.
What does this mean?
- It might mean all my fuss about finding exotic builds for these characters is a waste of time. At Explorer difficulty, any of them will work as well. It may be pointless to get excited when the YouTube algorithm throws a video like this at me:
- This might mean that a Shadow Assassin in particular doesn’t offer anything special unless they’re being played solo. One of the tactics explained in the video is that Shadow Assassins have more ways to “disappear” than other character builds. If they’re played solo, they can vanish, hide, and wait. The enemy will eventually exit combat mode. This means a Shadow Assassin can pick off enemies one-by-one. That strategy is great, but it’s hard to do if there are three other party members bumbling around.
- Finally, it might mean that I’m not skilled enough to take advantage of a Shadow Assassin’s key benefit: teleporting invisibly from shadow to shadow. A typical tactic is to shoot an Arrow of Darkness at an enemy (which does some damage), teleport into that Darkness next to the enemy, shank them, then hide there and plan for the next attack. I never did that. Part of the reason may be that I didn’t pay attention to the opportunities. Part of it may be that the “action economy” for a Shadow Assassin doesn’t favor that tactic.
Tangent: Action Economy in BG3 (and D&D5e)
If you already know about D&D’s action economy, just scroll down until you see more photos.
D&D has a turn-based combat system. Within a turn, there are five basic resources your character has:
- Action – “the green icons”
- Bonus Action – “the orange icons”
- Reaction
- Movement
- Concentration
You can do them in any order, or not do them at all.
Let’s take a look at each of these. As I go down the list, you may want to keep in mind that the action economy is one of the reasons why I loathe D&D.
Action
The idea behind an Action is that you’re doing something significant that turn. BG3 offers you a display of all your available actions; for some classes (spellcasters especially), that list can be quite long and hard to examine.
Examples of Actions: Attacking with a weapon; shooting with a bow; casting a spell.
Having a lot of choices doesn’t mean that every choice makes sense. For example, every character has a Hide Action available to them. But for most characters to Hide successfully, no one can be looking at you. If you’re in the middle of combat, trying to Hide will simply be a wasted Action.
The game offers you Actions, but doesn’t tell you which are useful at any given moment. That’s up to you.
At the start of the game, you can do only one Action every turn. There are skills, spells, and potions that offer additional Actions per turn, but they usually have some penalty; Haste spells and Speed potions cause you to miss a turn after their effects wear off, for example.
If someone offers tips on multi-classing, and they say “Take two levels of Fighter,” it’s because that at second level Fighter you get Action Surge, which lets you take an additional Action for one turn. You have to rest to do it again, so you can only do this once per fight.
Bonus Action
A Bonus Action is supposed to represent a minor form of Action, one that’s less powerful or takes less time than an Action.
That’s a mis-label. There are plenty of Bonus Actions, such as Jump or Shove, which can have effects that are more important to a situation than an action.
At Level 1 you can do only one Bonus Action per turn. As you advance in the game, there are many skill/item combination that grant additional Bonus Actions in a turn. For example, if a build tells you take three levels in Rogue, it’s because Rogue 3 lets you pick the Thief subclass, which gives you an extra Bonus Action every turn.
What’s perplexing and annoying about Bonus Actions is that you can’t do a Bonus Action as an Action. For example, both Jump and Shove are Bonus Actions. If you want to Jump to an enemy’s location and then Shove them off a cliff, you can’t in a single turn.
At this point, you may have understand why I never got Shadow Assassin Lae’zel to shoot an Arrow of Darkness, teleport into the Darkness, attack, then Hide: A Monk’s Shadow Step lets you teleport from shadow to shadow as a Bonus Action, but shooting a bow and attacking are both Actions, and Hide is yet another Bonus Action. Without a Speed potion or some other means of doing multiple attacks in a turn (such as Extra Attack), this is hard to set up.
Of course, you could be relying on a enemy to step out of the Darkness, giving you a chance to do an Opportunity Attack as a “Reaction”:
Reaction
A Reaction is something your character can do in response to what an enemy does. In most cases, you can’t do a Reaction during your turn; you do a Reaction during the enemy’s turn.
One of the most common Reactions is the Opportunity Attack: If A and B are fighting, and A tries to move outside of B’s reach, B can spend a Reaction to get an extra melee attack on them.
With few exceptions, you only get one Reaction per overall combat round. That means that if Strong Enemy moves away from you first during their turn, you might do an Opportunity Attack against them, doing a relatively small amount of damage to their health. If Weak Enemy moves away from you after that, you’ve spent your Reaction and there’s nothing you can do. In this case it might have better to wait until Small Enemy moves away so that you can get them off the battlefield. (Just because it’s a Small Enemy doesn’t mean it can’t do lots of damage; enemy spellcasters are the mischief.)
But you can’t always predict what enemies will do. What if Small Enemy doesn’t choose to move away from you? Then you’ve lost a chance at an Opportunity Attack.
There’s a wide range of Reactions that become available during the course of the game. My favorite is Counterspell, which can cancel a spell that an enemy is trying to cast. This costs you a spell, which means you’ll have fewer spells available for the rest of the combat.
What if you want to move away from an enemy during combat and you don’t want to take the damage from their Opportunity Attack? There’s an Action called Disengage that won’t provoke an enemy’s Opportunity Attack. Of course, Disengage is an Action, so you may not be able to do anything else that turn, except Movement:
Movement
All characters in the game have a Movement Speed, and there are a variety of effects that can affect that speed.
Movement in combat is extremely important. If you’re too far from an enemy, you can’t hit them with a melee weapon; if you want to attack an enemy with a bow or a spell and you’re outside the spell’s range, you can’t do it. Enemies can often see you before you’re in range of either, which means that one side or the other must waste a turn of movement before they can do anything else.
Of course, if you can turn invisible (see Shadow Assassin, for example), you can sneak up on an enemy before they know you’re there.
You can break up your movement into pieces with respect to any of the other items on the “action economy” list. For example, you can move to within the range of your spell, shoot it at an enemy, then move out of range of the enemy’s spells or duck behind cover.
There’s Dash, which lets you double your movement speed. Of course, Dash in an Action, so you may not be able to do anything else that turn.
If you look through those build videos or web sites that I link to, you’ll see the same movement-based items listed over and over again: Haste Helm, Boots of Speed, Disintegrating Night Walkers, Boots of Genial Striding, Crusher’s Ring, and so on. The function of these items is help you move faster, or to prevent certain terrain (like mud) from slowing you down.
There’s a spell, Misty Step, that lets you teleport across the battlefield. It’s even a Bonus Action. Of course, to cast it you have to spend a spell slot.
Concentration
The concept is simple: Some spells, even those of finite duration, require the caster to Concentrate on keeping the spell active. You can only Concentrate on one thing at a time; there’s nothing in the game that allows an exception.
Suppose you’re a Wizard who knows both the spell Cloud of Daggers and the spell Protection from Evil and Good (the spell with the most awkward name in the game). You want to cast Cloud of Daggers to block an enemy from getting to you, and Protection on your melee fighter to protect them against attacks from the Undead enemy.
Both those spells require Concentration, so you can’t cast both and have them active at the same time. (You can’t cast them both in the same turn anyway, since casting a spell is an Action.) Once you cast the second one of those spells, you lose Concentration on the other.
You can also lose Concentration if you’re damaged. That’s why many builds talk about getting Constitution Proficiency or Advantage on Constitution Saving Throws: to minimize the odds that your Concentration will be interrupted by even a tiny amount of damage.
You will also lose Concentration if you fall Prone, which can happen any number of ways; slipping on ice for example.
Putting it all together
It’s a mess of rules to remember, and to get it right.
Now you know why I didn’t try to play a Dark Urge until my third playthrough, why my sixth playthrough on Balanced difficulty was problematic, why Shadow Assassin Lae’zel was not used to her full ability.
There’s a video streamer, Luality, who did a hardcore Honor Mode playthrough under extremely harsh restrictions: no character death, no Rests, no stealing, no purchasing items from vendors. I watched some of her livestream. It took her days spread out over several multi-hour sessions; here’s a summary. She might easily spend an hour contemplating her options for a single combat round, weighing the action economy against her resources.
If I were to spend more time analyzing my tactics, I’d probably be a better BG3 player. Maybe I’m just too impatient when I play. To quote Karlach, “Let’s go already!”

I wanted to lay the groundwork for future discussion of the game, but you’re right, Lae’zel. Let’s get back to playthrough goals.
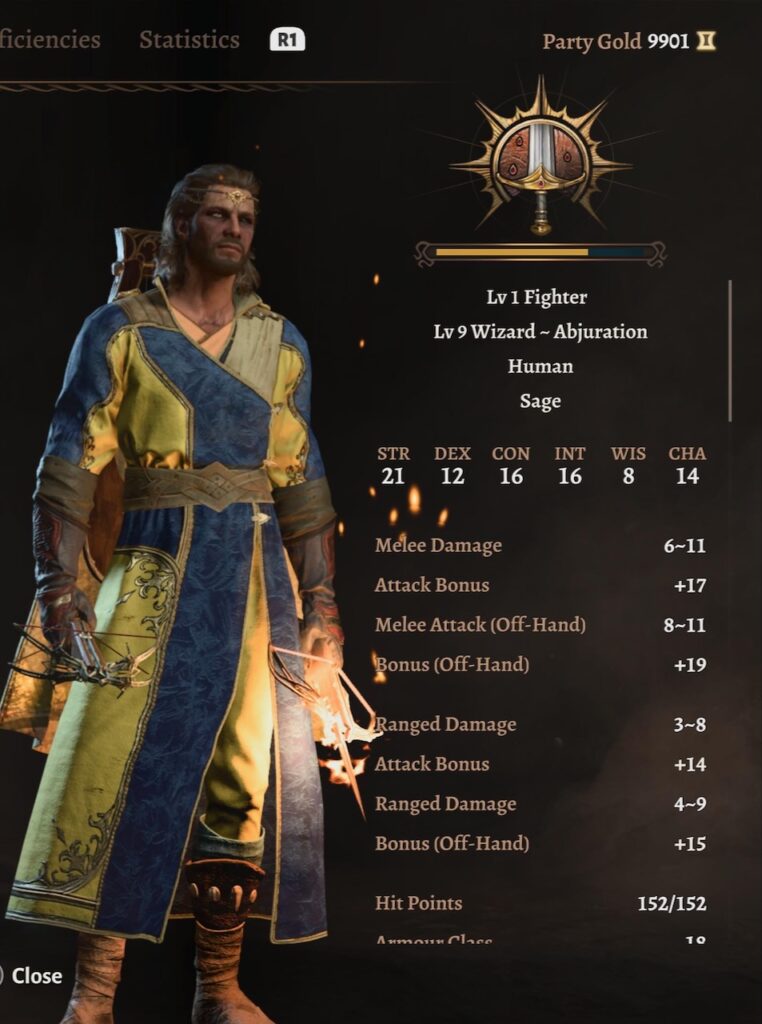
Gale as a Retaliation Wizard
The point of a “retaliation” build is that enemies automatically take damage when they try to hit you. I tried this Retaliation Barbarian/Warlock build for Wyll in one of my earlier playthroughs, but I could never quite get it to work; I either made him function as a Barbarian or as a Warlock, but I couldn’t get the retaliation part to come together.
The Retaliation Wizard build was more successful. However, I think that had more do with being an Abjuration Wizard.
Part of what makes some builds work, especially Barbarian-related builds or ones that make use of the Tavern Brawler Feat, is gaining a plentiful supply of Elixirs of Hill Giant Strength. Those are easy to come by in the early game.
In my previous playthrough, I discovered that a Sorcerer becomes overwhelmingly powerful if one has access to Potions of Angelic Reprieve. These become easy to acquire around the middle of the game.
For this playthrough, I made a similar discovery for Wizards: the same potions work well for them. The rarer Potion of Angelic Slumber is beautiful for Wizards, but you can’t “farm” them the way you can those other potions.
All Wizards can cast powerful spells at high levels; the Evocation Wizard is best for this. But if you want a Wizard who can block attacks against both themselves and their allies, the Abjuration Wizard is best.
The idea behind a Retaliation Wizard is that you use the spell Armour of Agathys to protect yourself; that spell causes an enemy who hits you to take Cold damage up to some limit. However, your Arcane Ward blocks that attack; it doesn’t hurt you. But the enemy still takes damage from Armor of Agathys anyway.
In other words, an enemy attacks and you say, “Why are you hitting yourself?”
There are other tricks you can do so the enemy takes even more damage than they inflict!
It was fun to see enemies rush up to attack Gale, only to watch them sizzle from the cold and kill themselves.
But…
This only happened in one combat, perhaps two. The rest of the time the enemies wouldn’t hit Gale.
In retrospect, this was probably due to:
- Party composition. I had two strong melee fighters in the group, Minthara (as I’ll describe below) and Lae’zel. They would rush into the enemies and start hitting.
- The game’s AI that controls the enemies can be tricky to understand, but for the most part the enemies like to go after the character with the lowest Armor Class. For a variety of reasons, Gale didn’t have the lowest AC, Lae’zel did; the enemies preferred to attack Lae’zel. Paradoxically, Gale might have been more effective in combat if he didn’t have Mage Armour cast on him.
- This is something I didn’t realize until it was too late in the game to matter: If I wanted enemies to hit Gale, the best thing to do was run past them. They would try to hit him with Opportunity Attacks. By the time I figured this out, I’d improved his Armor Class by so much that the enemies kept missing him!
If I ever play a Retaliation build again (and I might, now that I understand what’s going on), I’ll have to remember: Keep AC low, movement high, and be in the front line.
In the case of Gale, part of the problem was making sure that I had access to the Armour of Agathys spell. The problem is that Wizards normally don’t get it. The build guide in the video recommended taking one level of Sorcerer for the White Draconic Ancestry to get the spell.
I didn’t want to do that in the earlier part of the game, so I picked up the Icebite Robe. You can see it in this picture:
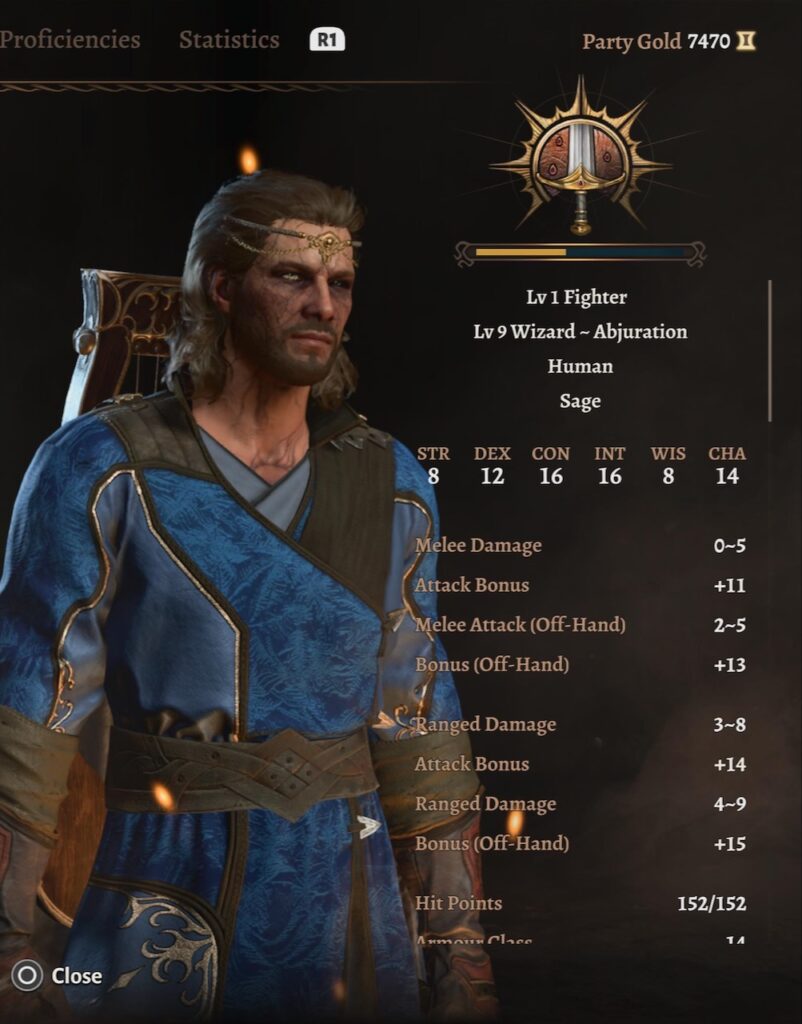
The reason why I didn’t want to take a level in Sorceror (at least, not yet) was because I wanted to take a level in Fighter instead.
It takes an Action to cast a spell. What can a spellcaster do with their bonus action? In the case of Wizards, the answer is: not much.
I wanted Gale (and every spellcaster I play, for that matter) to dual-wield staffs, to get the magical benefits of both of them. (Typical Wizards have a shield in their off-hand, but as I noted above, having more armor protection was not one of Gale’s problems.) I also wanted Gale to dual-wield Hand Crossbows, at least in the earlier part of the game.
The benefit of having two small crossbows, one in either hand, was that it gave Gale something to do with his Bonus Action. Attacking with any kind of weapon in the main hand is an Action; Gale had far more effective combat spells than any weapon he was likely to carry. But attacking with any kind of weapon in one’s off hand is a Bonus Action. If there was nothing else for him to do, why not allow him to attack with an off-hand staff or crossbow?
By itself, a Wizard might not expect to do much damage with a measly small crossbow. However, I gave Gale the Spineshudder Amulet (apply the condition Reverberation with a ranged spell attack), and the Diadem of Arcane Synergy (give Gale Arcane Synergy when he inflicts a condition like Reverberation); Arcane Synergy in turn adds to Gale’s damage with a weapon attack.
However, to use any weapon in D&D, you have to have Proficiency in that weapons. Wizards don’t get Proficiency in hand crossbows. To get that, I needed to get a level in some other class that included Proficiency in Martial Weapons. For the early levels, of the classes that included it, I picked Fighter (as you can see in the above photo). That’s because a Fighter can use the Fighting Style Two Weapon Fighting, which adds damage to an off-hand attack.
It also helps that Fighter gives you Proficiency for Constitution Saving Throws. As I noted above, if you cast a spell that requires Concentration, you don’t want some lucky enemy to break it.
It’s not done. In order to hold two staffs at once, I needed the Feat Dual Wielder. You normally get a Feat every four levels in a given class, which meant I couldn’t dual-wield staffs until Gale was fifth level (one for Fighter, four for Wizard).
Net effect: Cast a spell on an enemy to soften them up; hit them a off-hand crossbow attack that did so much damage that it often exceeded the damage done by the spell! It was a nice combo.
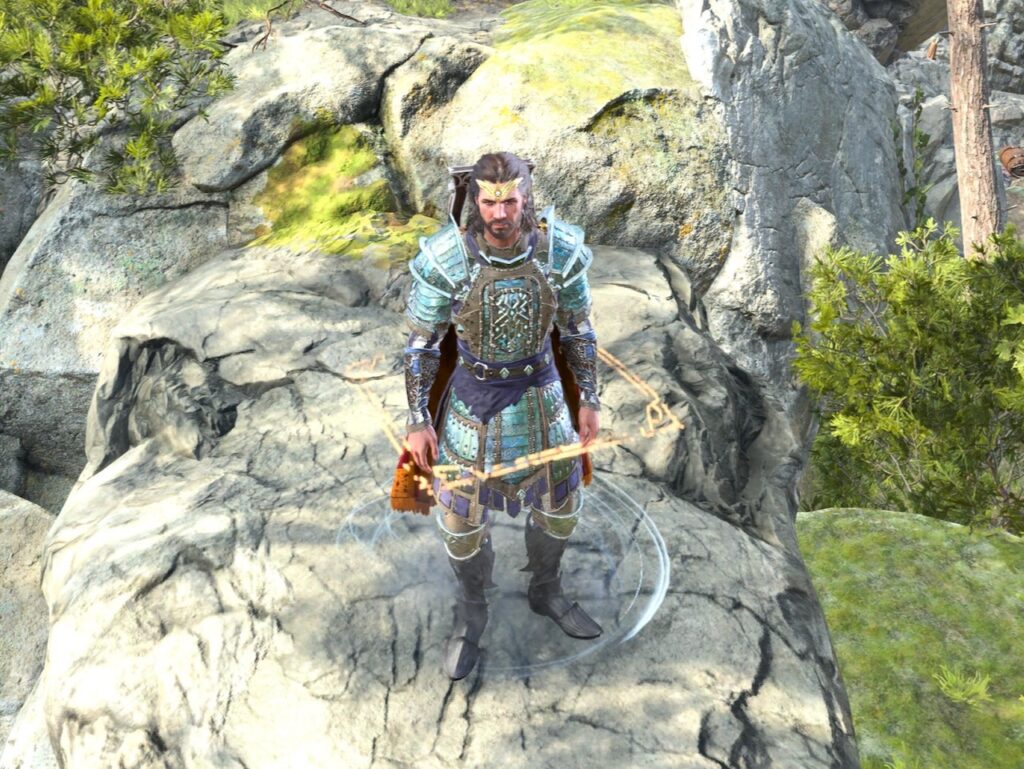
Eventually I picked up the ultimate combination set for a Wizard, and indeed for most spellcasters: Robe of the Weave, Hood of the Weave, and Cloak of the Weave. Combined with the two staffs Markoheshkir and Staff of Spellpower, and I had what’s probably the best gear for a Wizard.
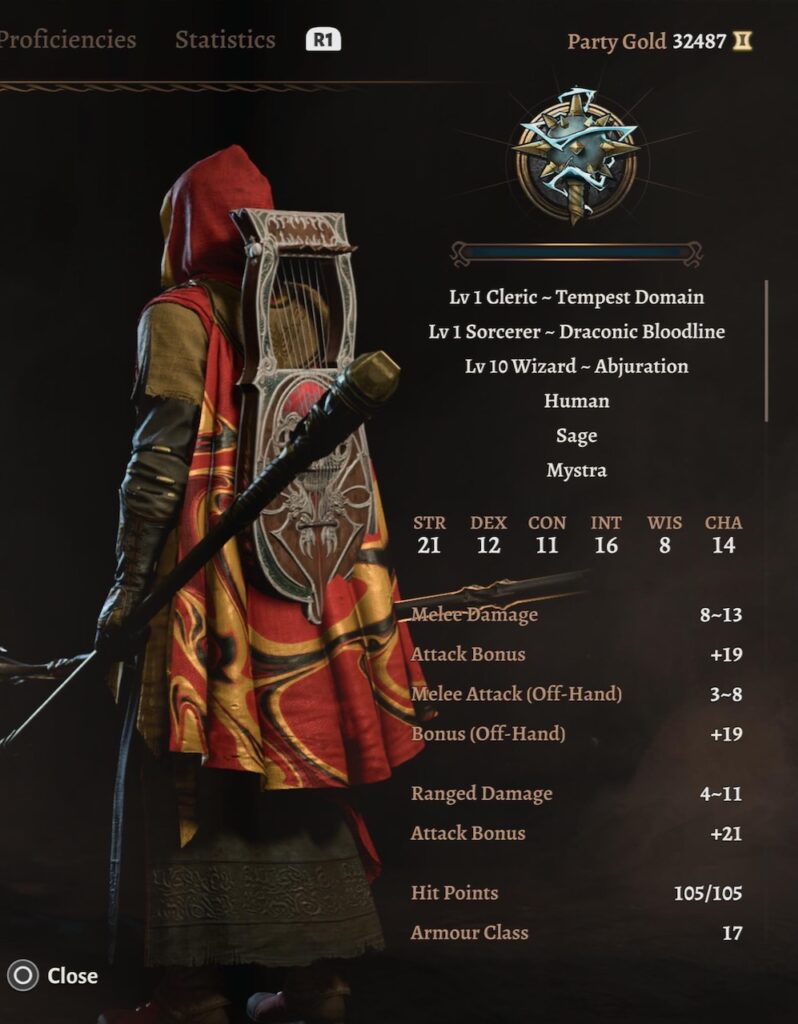
![]()
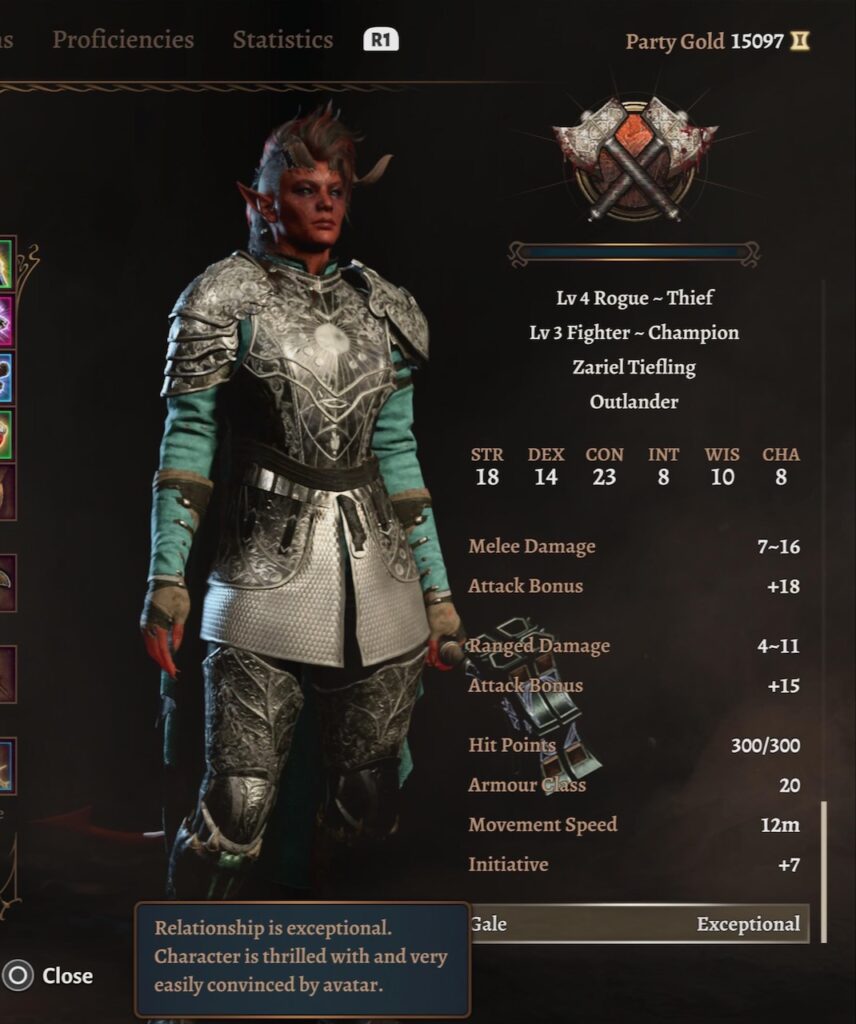
As you can see in the picture, by the time Gale hit level 12, I’d exchanged the level of Fighter for Tempest Domain Cleric, to get the Reaction Wrath of the Storm as a extra piece of retaliation. I also added that level of White Draconic Sorceror for Armour of Agathys. This left me with “only” 10 levels of Abjuration Wizard, but all this really meant is that Gale couldn’t cast sixth-level spells. This didn’t matter much, since any such spells could be cast from scrolls.
Final verdict: Not much Retaliation, but a whole lotta Wizard. Five stars, would play again.
If all of this leaves your head spinning (assuming you were brave enough to read this far into the post), you now have an even better understanding of why I don’t like D&D.
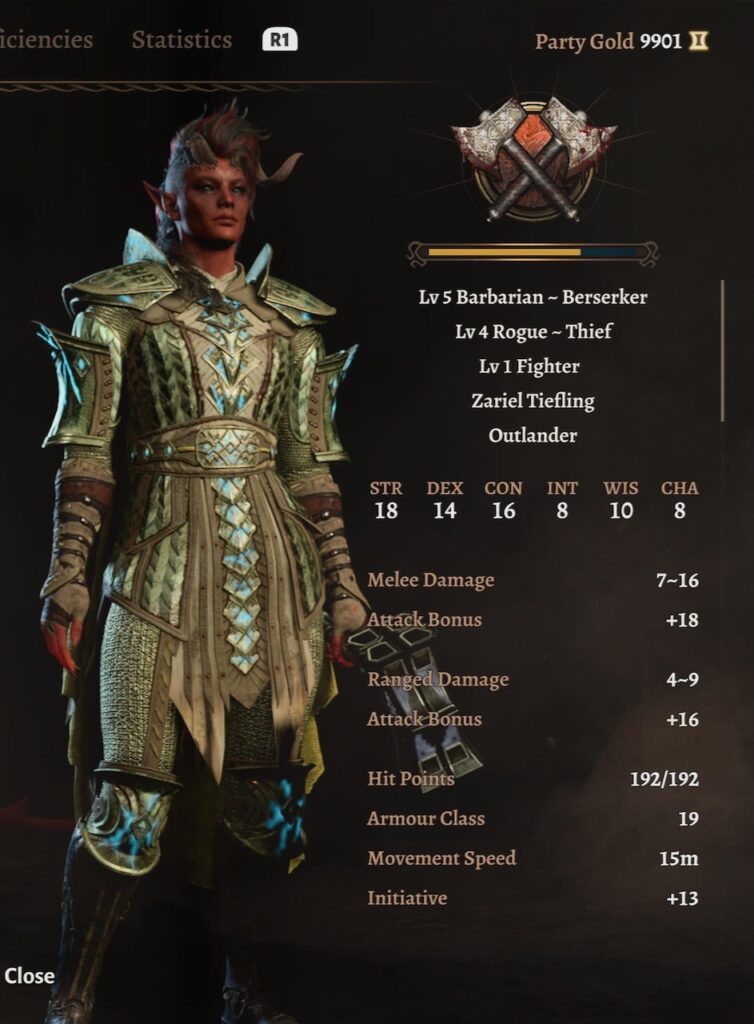
Karlach as a Barbarian Thrower
It was a successful build before, and it was a successful build again.
A couple of comments on the above photo.
- The composition isn’t great. One of the things that Larian has planned for a future update to BG3 is a “photo mode,” allowing players to move the camera around in such a way to better compose images. No one knows exactly when this feature will be available. It certainly won’t be before Sep 2024, when the next big update (Patch 7) is scheduled to be released.
- The very best single-target throwing weapon in the game is the Dwarven Thrower. It’s extremely effective, provided its wielder is a Dwarf. The extra features still work if the user assumes the form of a Dwarf using a Disguise Kit.
One memorable moment from this playthrough is a one-two combo from Lae’zel and Karlach as they fought a Dragon. Lae’zel softened it up with several Arrows of Dragon Slaying, and Karlach (in Dwarf form) provided the finishing blow. The Dragon never got to take a turn. The rest of the party just watched in awe as the Dragon fell.
In this playthrough, I learned that if you examine a character’s stats while they’re Raging (a Barbarian class feature), their image is different.

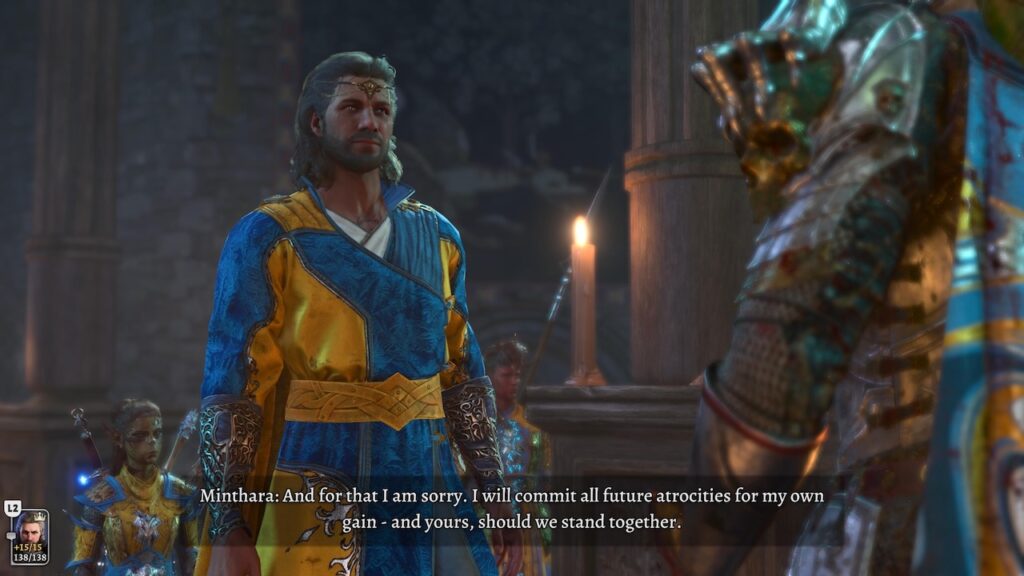
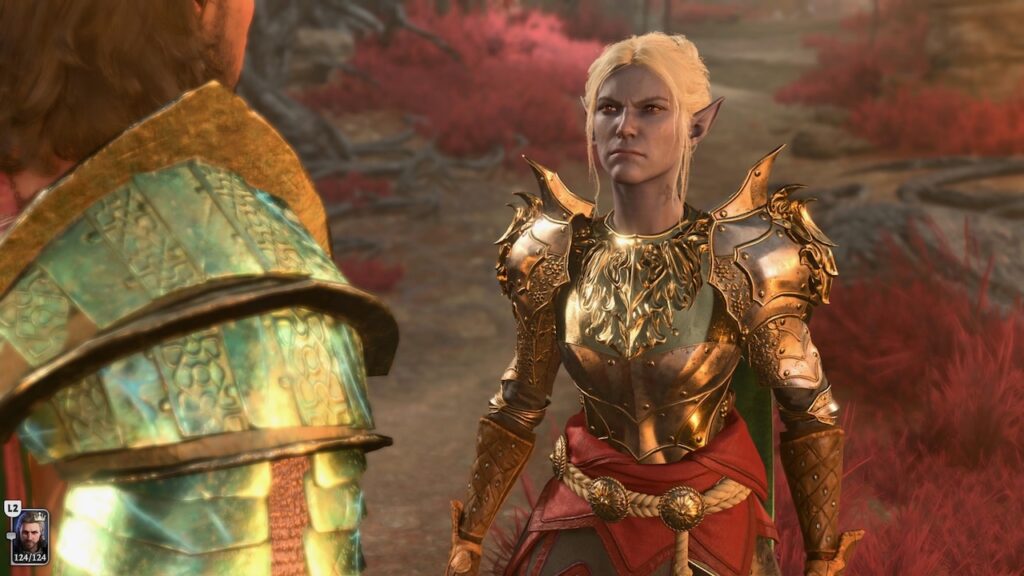
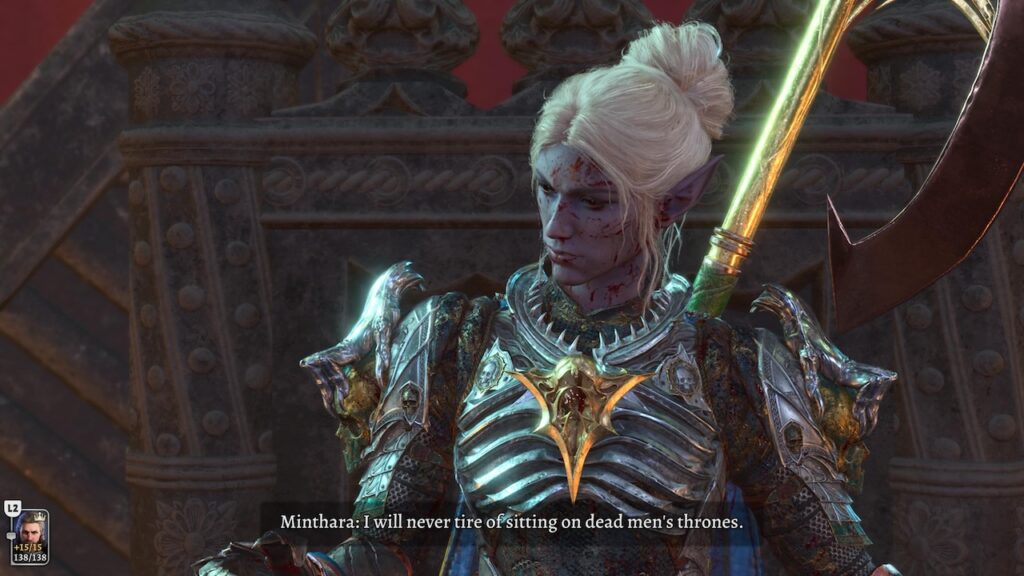
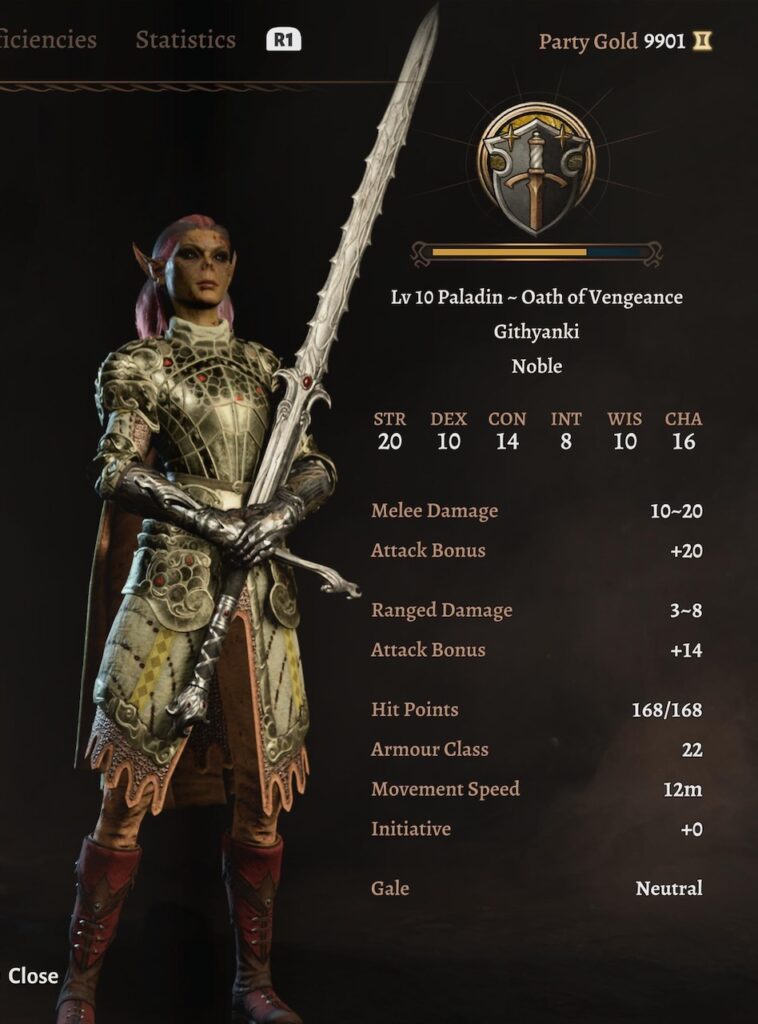
Minthara as a Lolth-sworn Paladin
This was a complete surprise. After my previous experience with Minthara and Shadowheart as Paladins, I thought this would fail and I’d have to respec Minthara into some other class.
But she was utterly kick-butt as a Paladin through all 12 levels.
I think there were a couple of reasons why Minthara was so successful in this playthrough. (If you suggest that that she was successful because she wasn’t in a relationship with me, the only thing I can do is agree, and ask “How did the game know?”)
I first “rescued” Minthara in Playthrough 2. When I tried to play her as a multi-classed Paladin recommended by some build or other, I ran into a game bug: When I switched the game’s difficulty level from Explorer to Balanced, then switched it back again, Minthara remained in Balanced mode. That meant she had half the hit points of any other party member, and possibly some other disadvantages as well.
Her character was unplayable, given my level of player skill at the time.
The bug wasn’t fixed in time for Playthrough 3. So it wasn’t until Playthrough 4 that that I could play her without the bug. I tried again, but again my lack of understanding about how Paladins worked got in the way.
In Playthrough 5, I tried to make Shadowheart a Paladin. I was doing OK, until I broke some Paladin Oath or something. That made things complicated. I think I gave up on the whole Paladin idea for a while.
When I included Minthara in the party this time around, I was amazed at how powerful she was unchanged. I respecced her attributes (the game has awful initial specs for all their playable characters) but didn’t change anything else.
I recognized that, given her attitude towards power, that she was likely to become an Oathbreaker as Shadowheart had. I didn’t mind; in fact, I anticipated it. Oathbreaker Paladins gain abilities that I felt fit right in with Minthara’s backstory.
But there was no Oathbreaking, no matter what Minthara did. When I considered her past, I understood from the game standpoint, she’d already broken her Oath before she joined the party. No matter how many villagers she slew (by accident, of course… completely by accident) she did not get any special Oathbreaker cutscenes or acquire Oathbreaker abilities.
That was fine. She might not be first to a fight, but she was usually the one to end it. The combination of Karlach, Lae’zel, and Minthara often meant that poor Gale didn’t have anyone to attack him to experience Retaliation.
Make the Druids work
A double dose of failure.
Halsin
As with Astarion, I simply leveled up Halsin to level 12 using his game-supplied class of Moon Druid. This let him transform into a variety of beasts. I even gave him some extra gear that, in theory, should have boosted his skills.
When I “took him out for a walk,” it was nothing special. He killed a creature or two, but the other characters greatly exceeded his damage output, even when he was in his favorite shape, Cave Bear. He didn’t have the mobility of the other characters either, though I didn’t test out his faster animal shapes such as Panther.
Maybe I’m trying him out too late in the game, without giving myself a chance to learn his abilities. Perhaps next time.
Jaheira
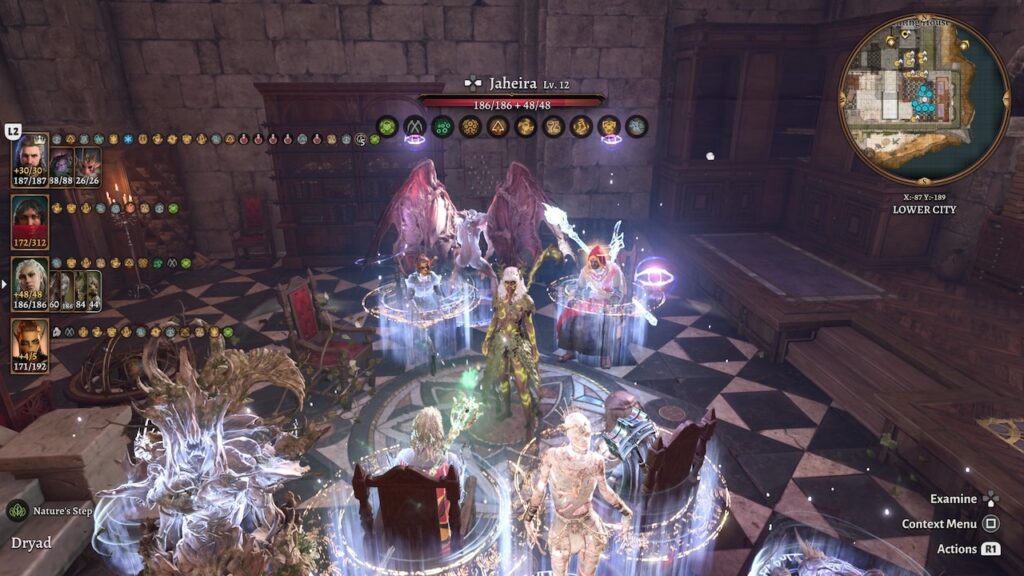
And again, I simply leveled up Jaheira to a level 12 Spore Druid, since Land Druid had not worked last time. As you can see from the photo, the Spore Druid’s strength is in summoning lots of companions.
It turns out that having lots of friends doesn’t matter much if they can’t get anywhere. Like Halsin, Jaheira and her crew have movement-speed problems. Her damage output, even with the classic Symbiotic Entity + Halo of Spores combo, was pathetic compared to the other characters.
I may try again. Perhaps I should start playing these Druid characters as soon as they become available, instead of waiting until near the end of the game to experiment with them.
A few side photos
It’s not just the adventure. It’s the friends you meet on the way.

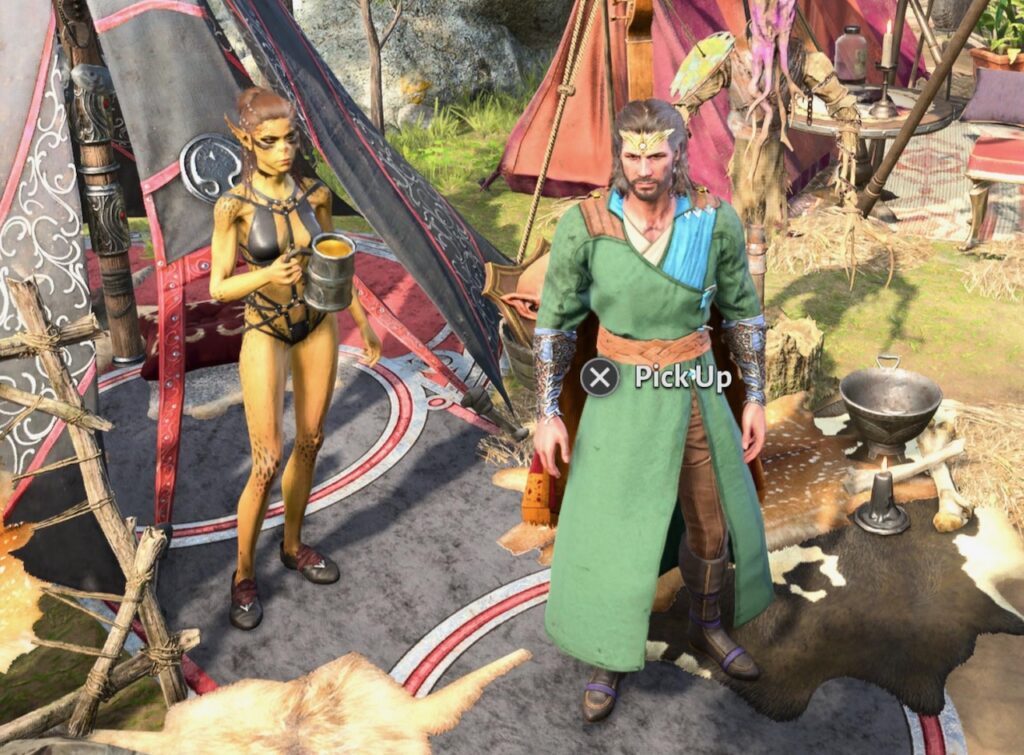
Dress-up
As I mentioned before, not only can you die, but you can dye.
I took the opportunity to see how some of the more expensive dyes interacted with the characters’ gear.
Black and Azure
All of these pictures were taken after their chest armor was dyed with Black and Azure Dye.
Lime, Lemon, and Lichen Dye
I also tried Lime, Lemon, and Lichen Dye.
Baby Blue and Gold
At one point I had everyone using Baby Blue and Gold Dye, but I guess I only captured Gale.
The Ultimate Dye: Drake General
When you first take a Long Rest, you find some starting items in your camp chest. One is a set of five vials of Drake General Dye. This dye is available nowhere else in the game.
When you start applying dyes, the two most visible items you might want to color are your chest armor and your cloak. For everything to fit into the color scheme, you’d also want to dye your headgear, your boots, and your gloves.
If you’re sentimental about this sort of thing (as I am), you’ll want to save this rare dye until you’ve settled on your final items for the rest of the game.
What purpose does all this dyeing serve? None whatsoever. But it’s better to dye than to die, that’s certain.
What’s next?
My plans for Playthrough 8:
Wyll: Try for 12 levels of Fiend Warlock, the class he’s assigned at the start of the game. Be willing to respec with 1 level of Fighter and/or 1 level of Paladin for the same kind of weapon benefits as I had with Gale.
Shadowheart: Try as a Trickery Cleric, the class she’s assigned at the start of the game. This class has a bad reputation, but this might not matter in Explorer difficulty. I intend for her to function in a Rogue-like role (stealth activities, lockpicking, disarming traps).
Karlach: This video claims that Karlach makes the best Open Hand Monk. I don’t doubt that’s true, but let’s find out.
Lae’zel or Minthara: Sorcadin = part Paladin, part Sorcerer.
If the other characters seem powerful enough, consider swapping out the Sorcadin for Jaheira or Halsin when they become available. As I noted above, perhaps more experience will help me appreciate Druids more.
Relationship goal: Karlach. It’s been a while, and I’d like to see her again. Also, Wyll and Karlach have intersecting stories near the start of the game. I’d like to see how that evolves later on if they’re in a romantic relationship.
I’ve already did a bit of the Wyll playthrough. Again, the first Long Rest at camp brought me some new scenes I hadn’t experienced before. We’ll see if there are more!
And maybe my next playthrough post won’t be quite as long. We can always dream, can’t we?
Pingback: Baldur’s Gate 3 – Playthrough 8 – Wyll – The Argothald Journal
Pingback: Baldur’s Gate 3 – Playthrough 9 – Laurelin – The Argothald Journal
Pingback: BG3 on the Mac – The Argothald Journal
Pingback: Baldur’s Gate 3 – Playthrough 11 – Romancing a Wizard – The Argothald Journal
Pingback: Baldur’s Gate 3 – Playthrough 11 – A Hireling’s Destiny – The Argothald Journal
Pingback: Baldur’s Gate 3 – Playthrough 11 – Wrapping it up – The Argothald Journal
Pingback: Divinity Original Sin II – The Argothald Journal
Pingback: Baldur’s Gate 3 – Playthrough 12 – More Relationships – The Argothald Journal
Pingback: Baldur’s Gate 3 – Playthrough 12 – Hugs and Kisses – The Argothald Journal
Pingback: Baldur’s Gate 3 – Playthrough 12 – Bits and Pieces and Nudity – The Argothald Journal
Pingback: BG3 – Pickpocketing – The Argothald Journal
Pingback: BG3 – Photo mode – The Argothald Journal
Pingback: Baldur’s Gate 3 – Playthrough 2/14.5 – Raelia and Tavelle – The Argothald Journal
Pingback: BG3 – Summoned creatures, throwing potions, and consoles – The Argothald Journal
Pingback: BG3 – Alternatives to Fly – The Argothald Journal
Pingback: BG3 – You can be Arctic Druid Angela too Five – The Argothald Journal
“And maybe my next playthrough post won’t be quite as long. We can always dream, can’t we?”
Life laughs at such bold predictions! That playthrough was to mark the birth of Arctic Druid Angela. The essays surrounding her have more text in them than all my other BG3 posts combined.
Pingback: My BG3 and D&D rules explanations – The Argothald Journal
Pingback: BG3 – Virtual Photography – 1 of 4 – The Argothald Journal