This is part two of a four-part article that begins here.
Position
Remember when you learned about co-ordinate systems back in high school? BG3‘s Photo Mode lets you put that knowledge to good use. There are two coordinate systems to keep track of.
Warning for the math-adverse: If your head starts spinning, just scroll to the Composition section. It will explain why you don’t often see kissing in my staged pictures.
Camera position
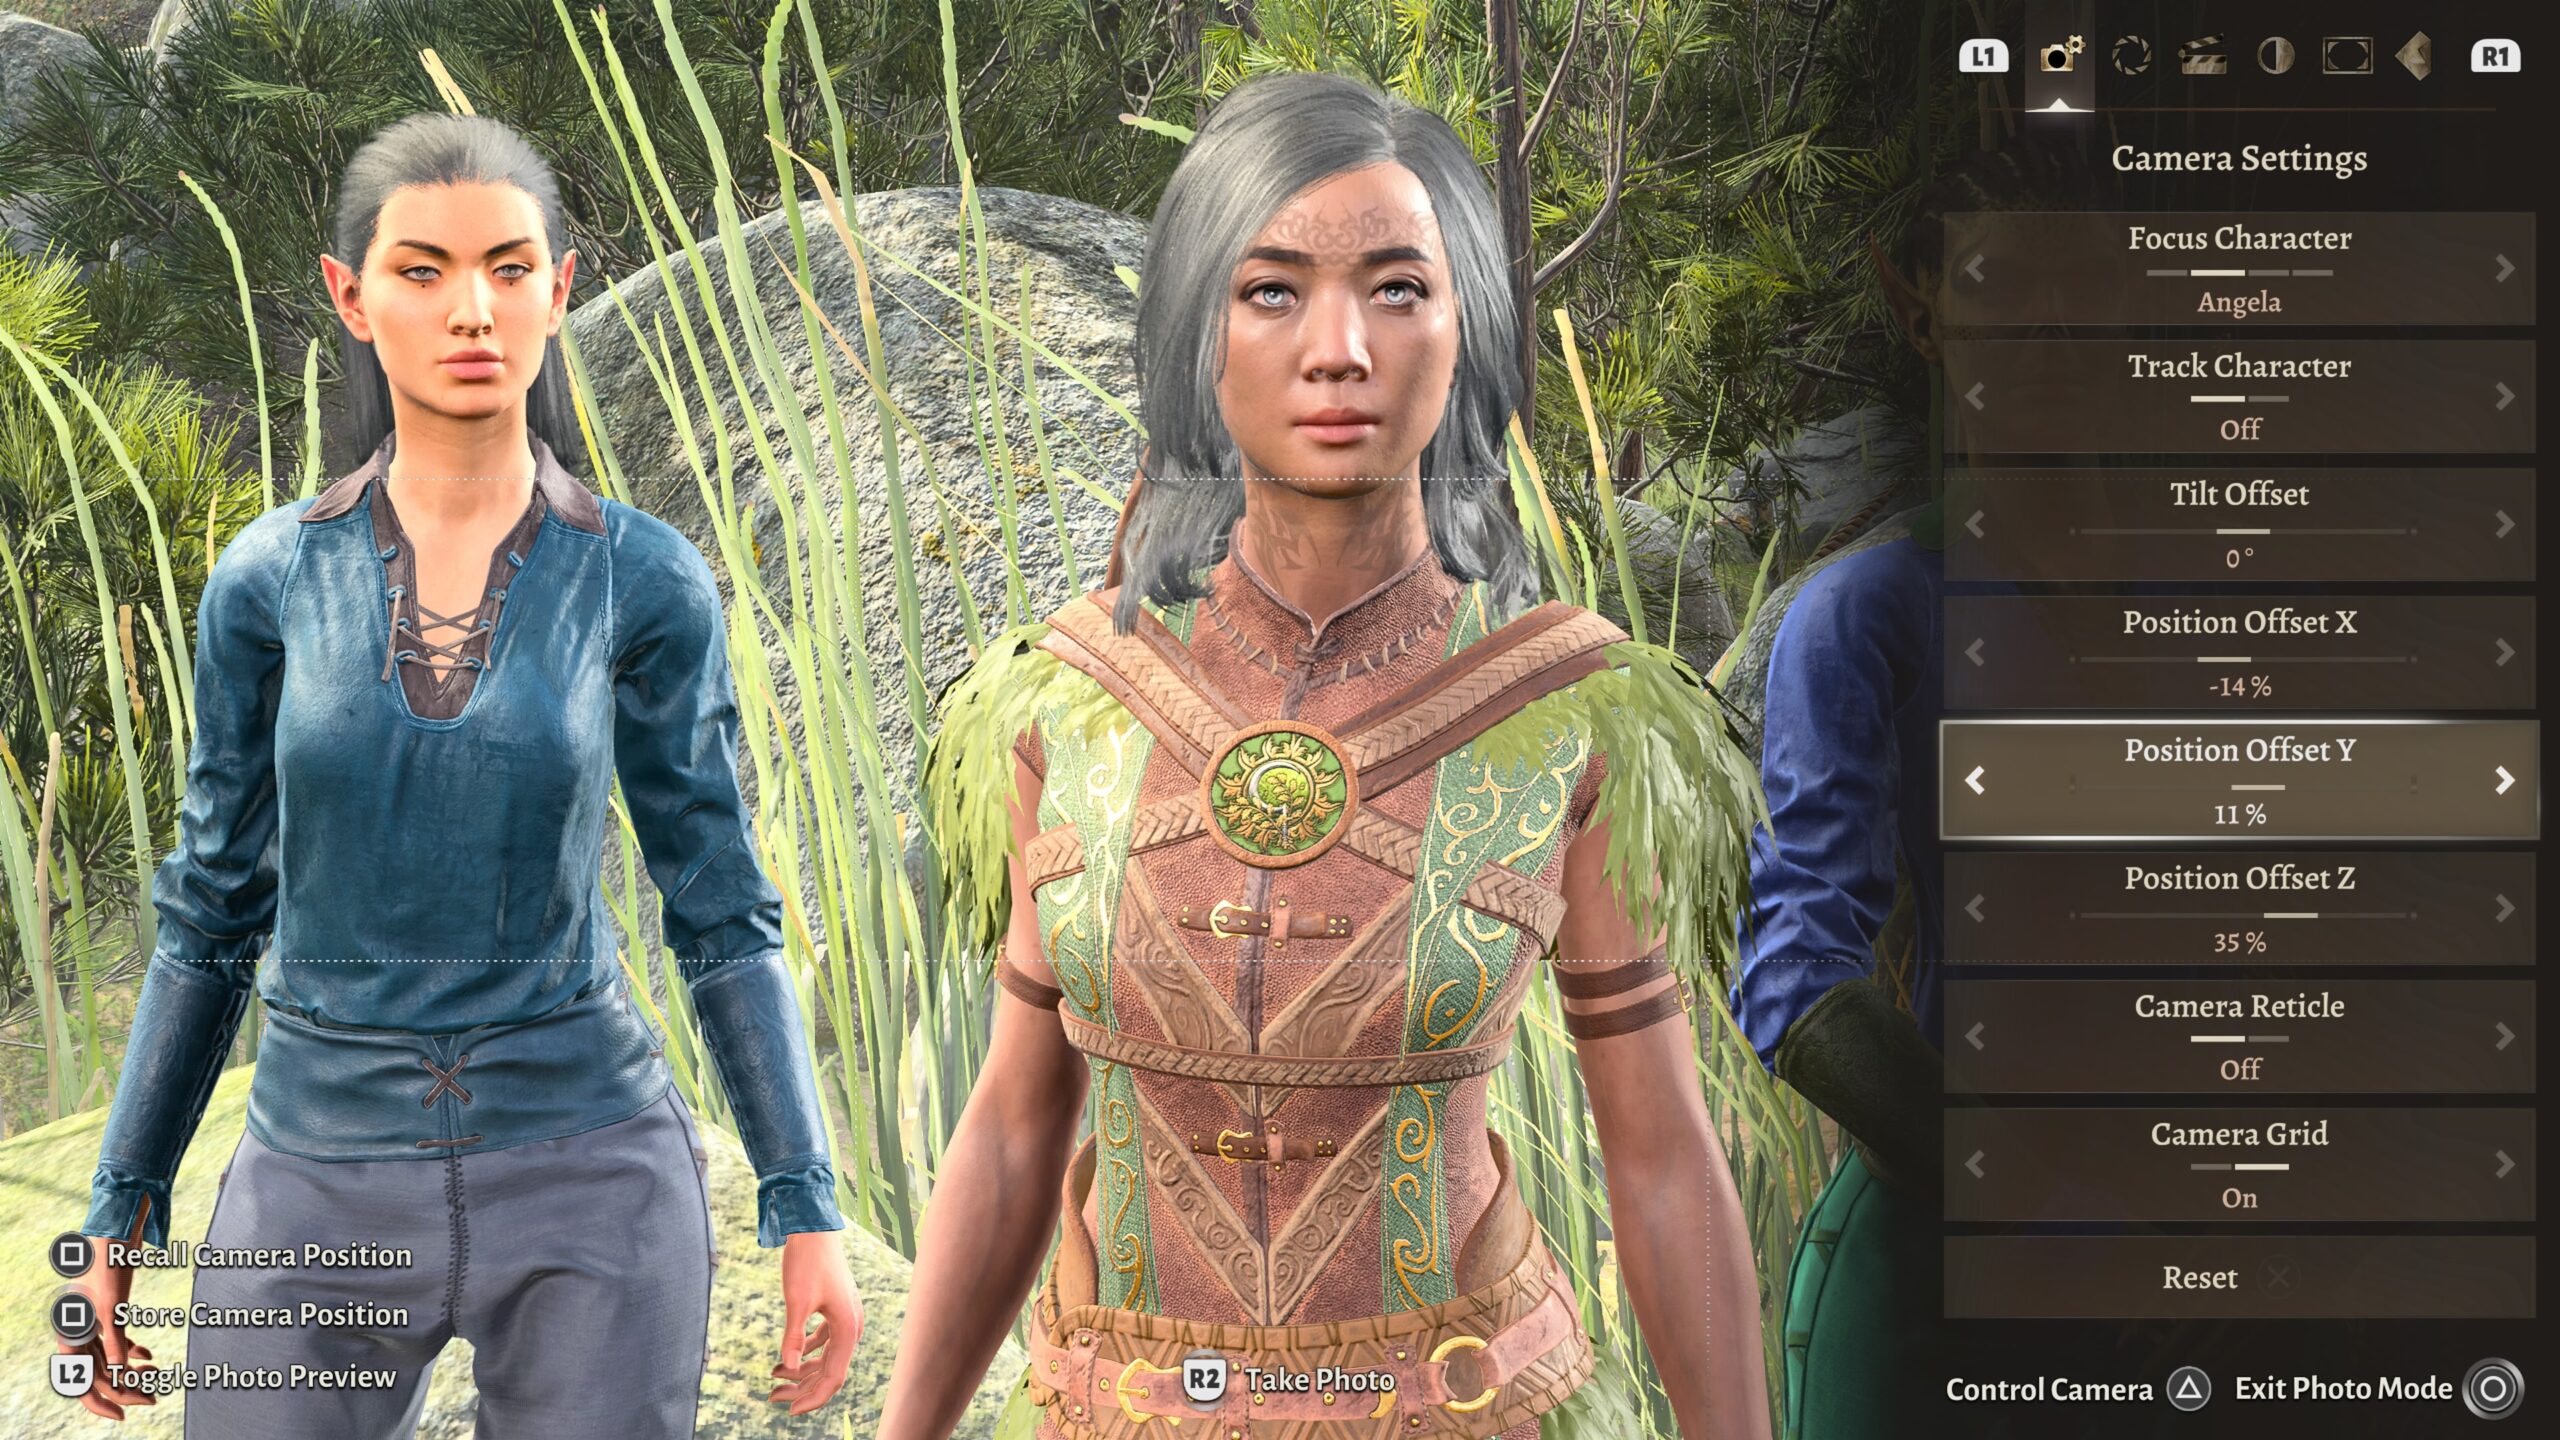
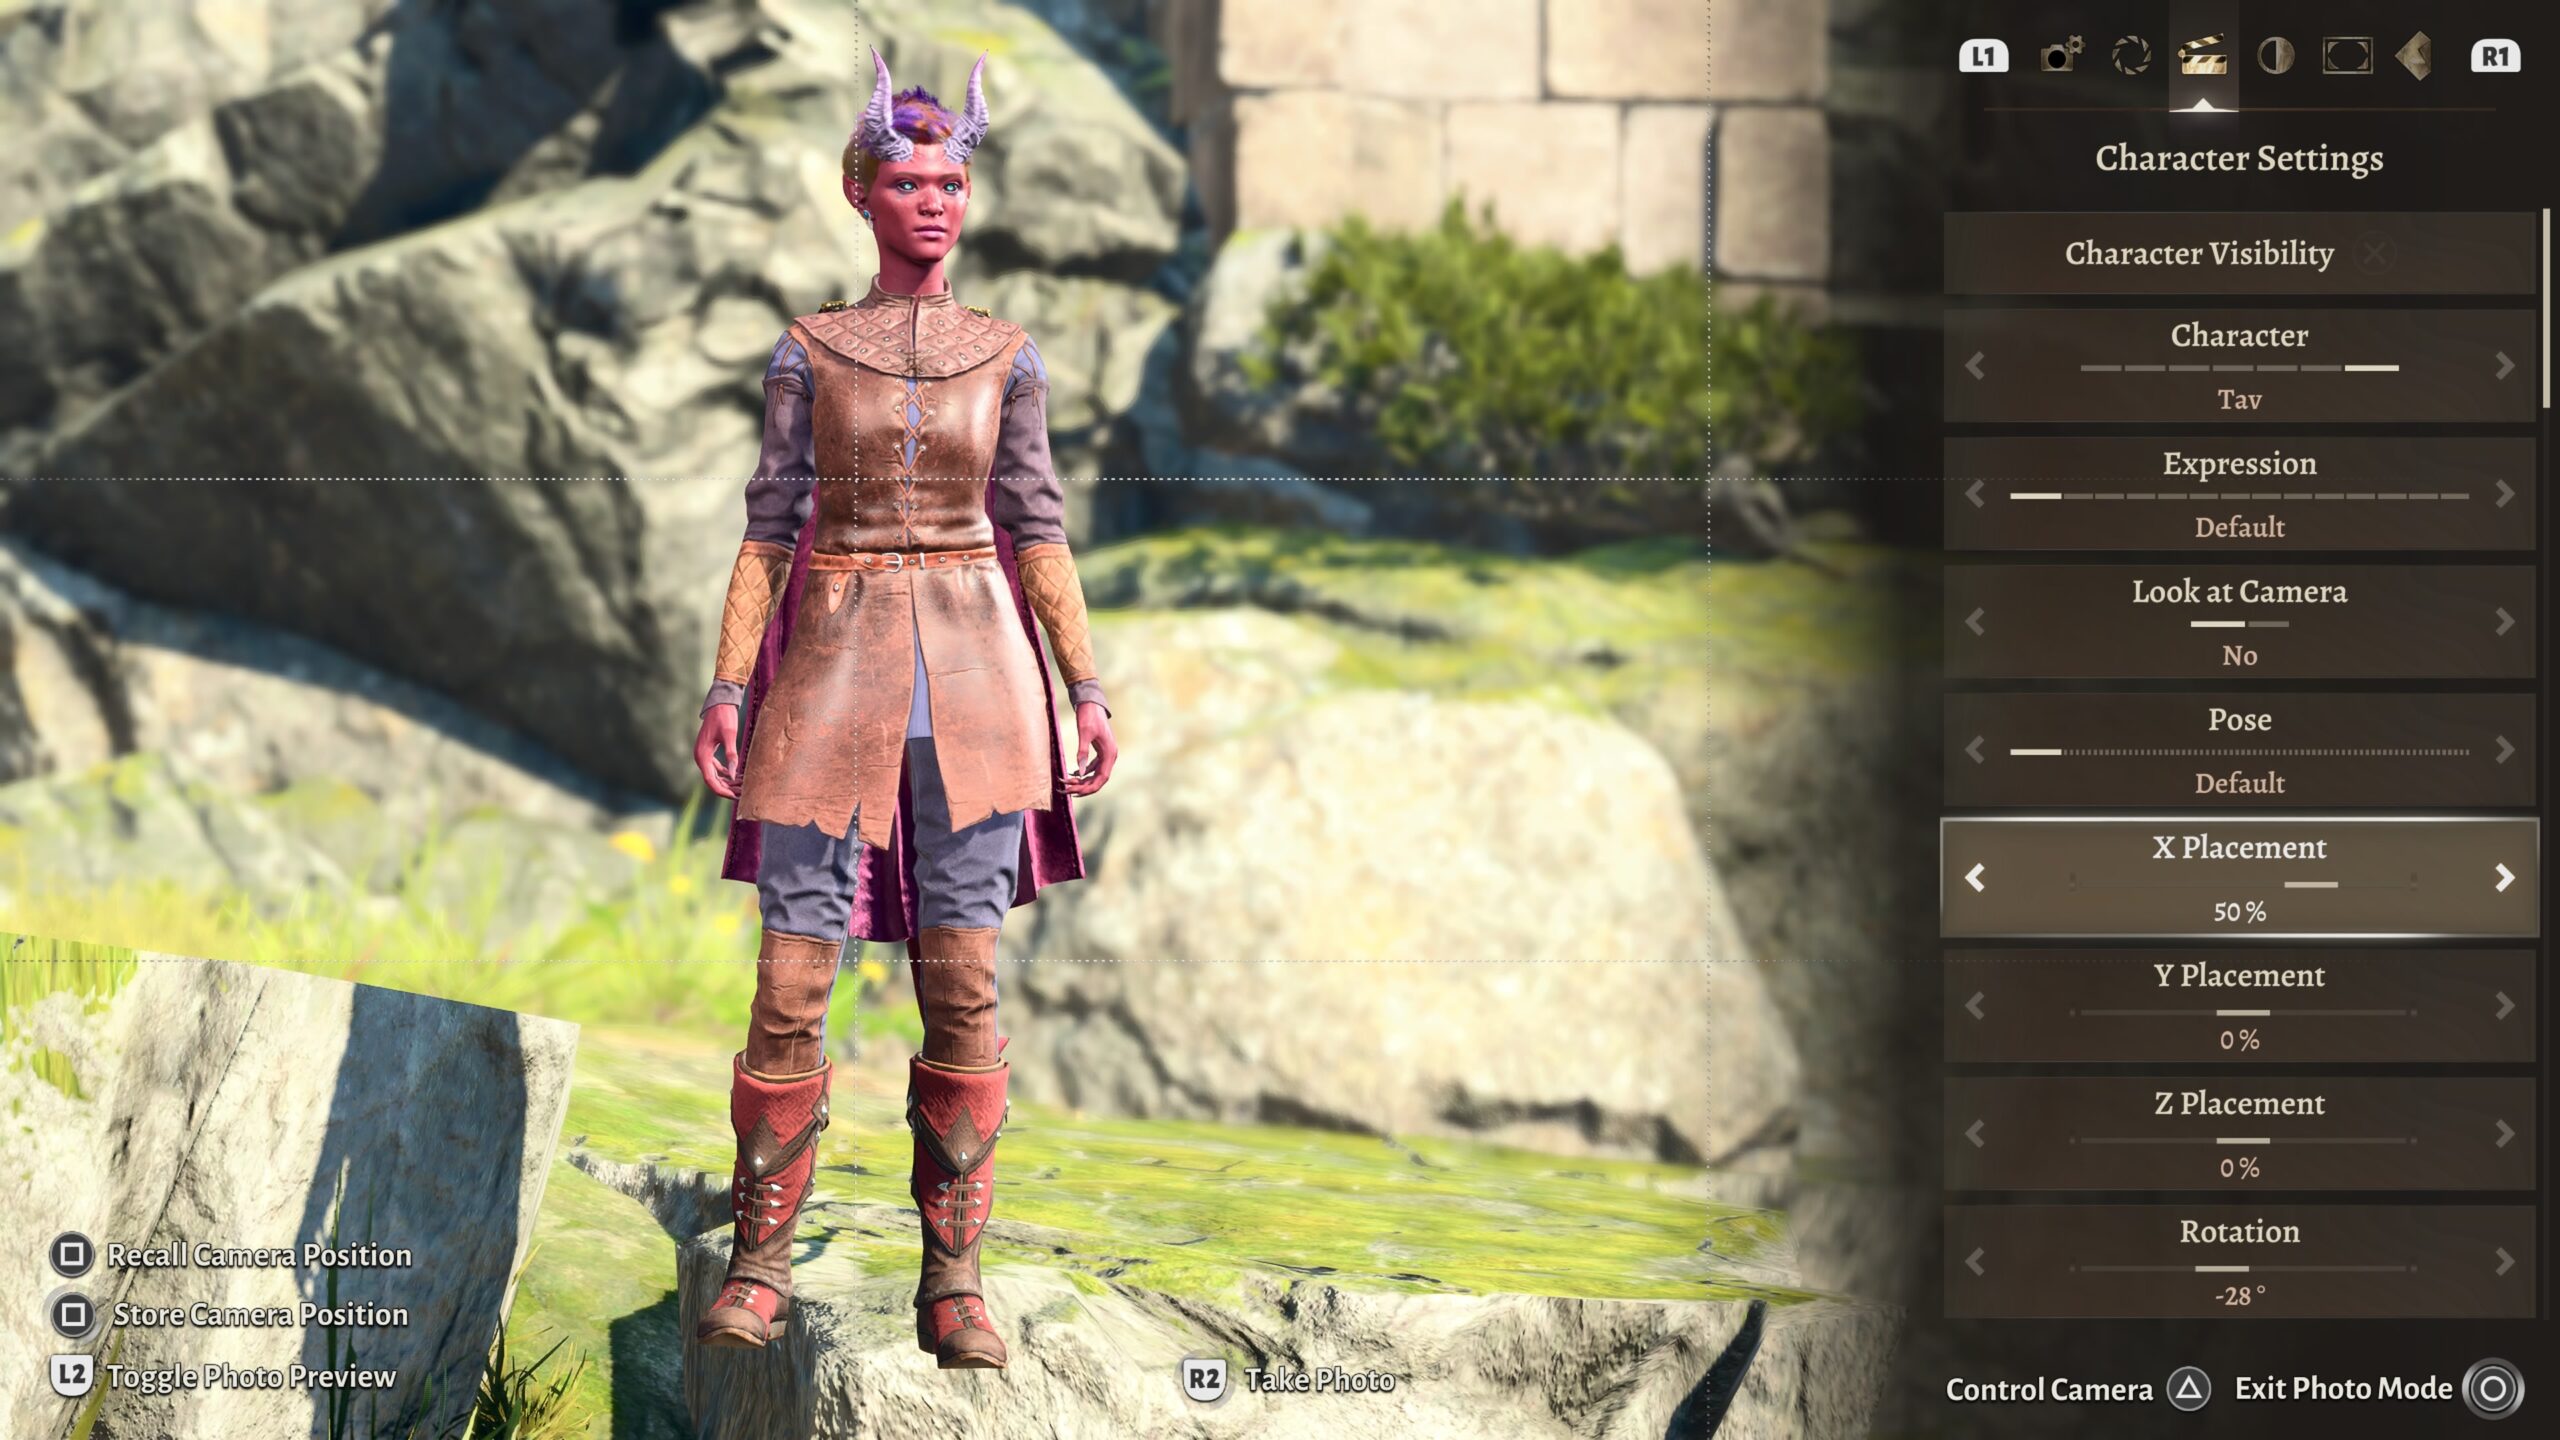
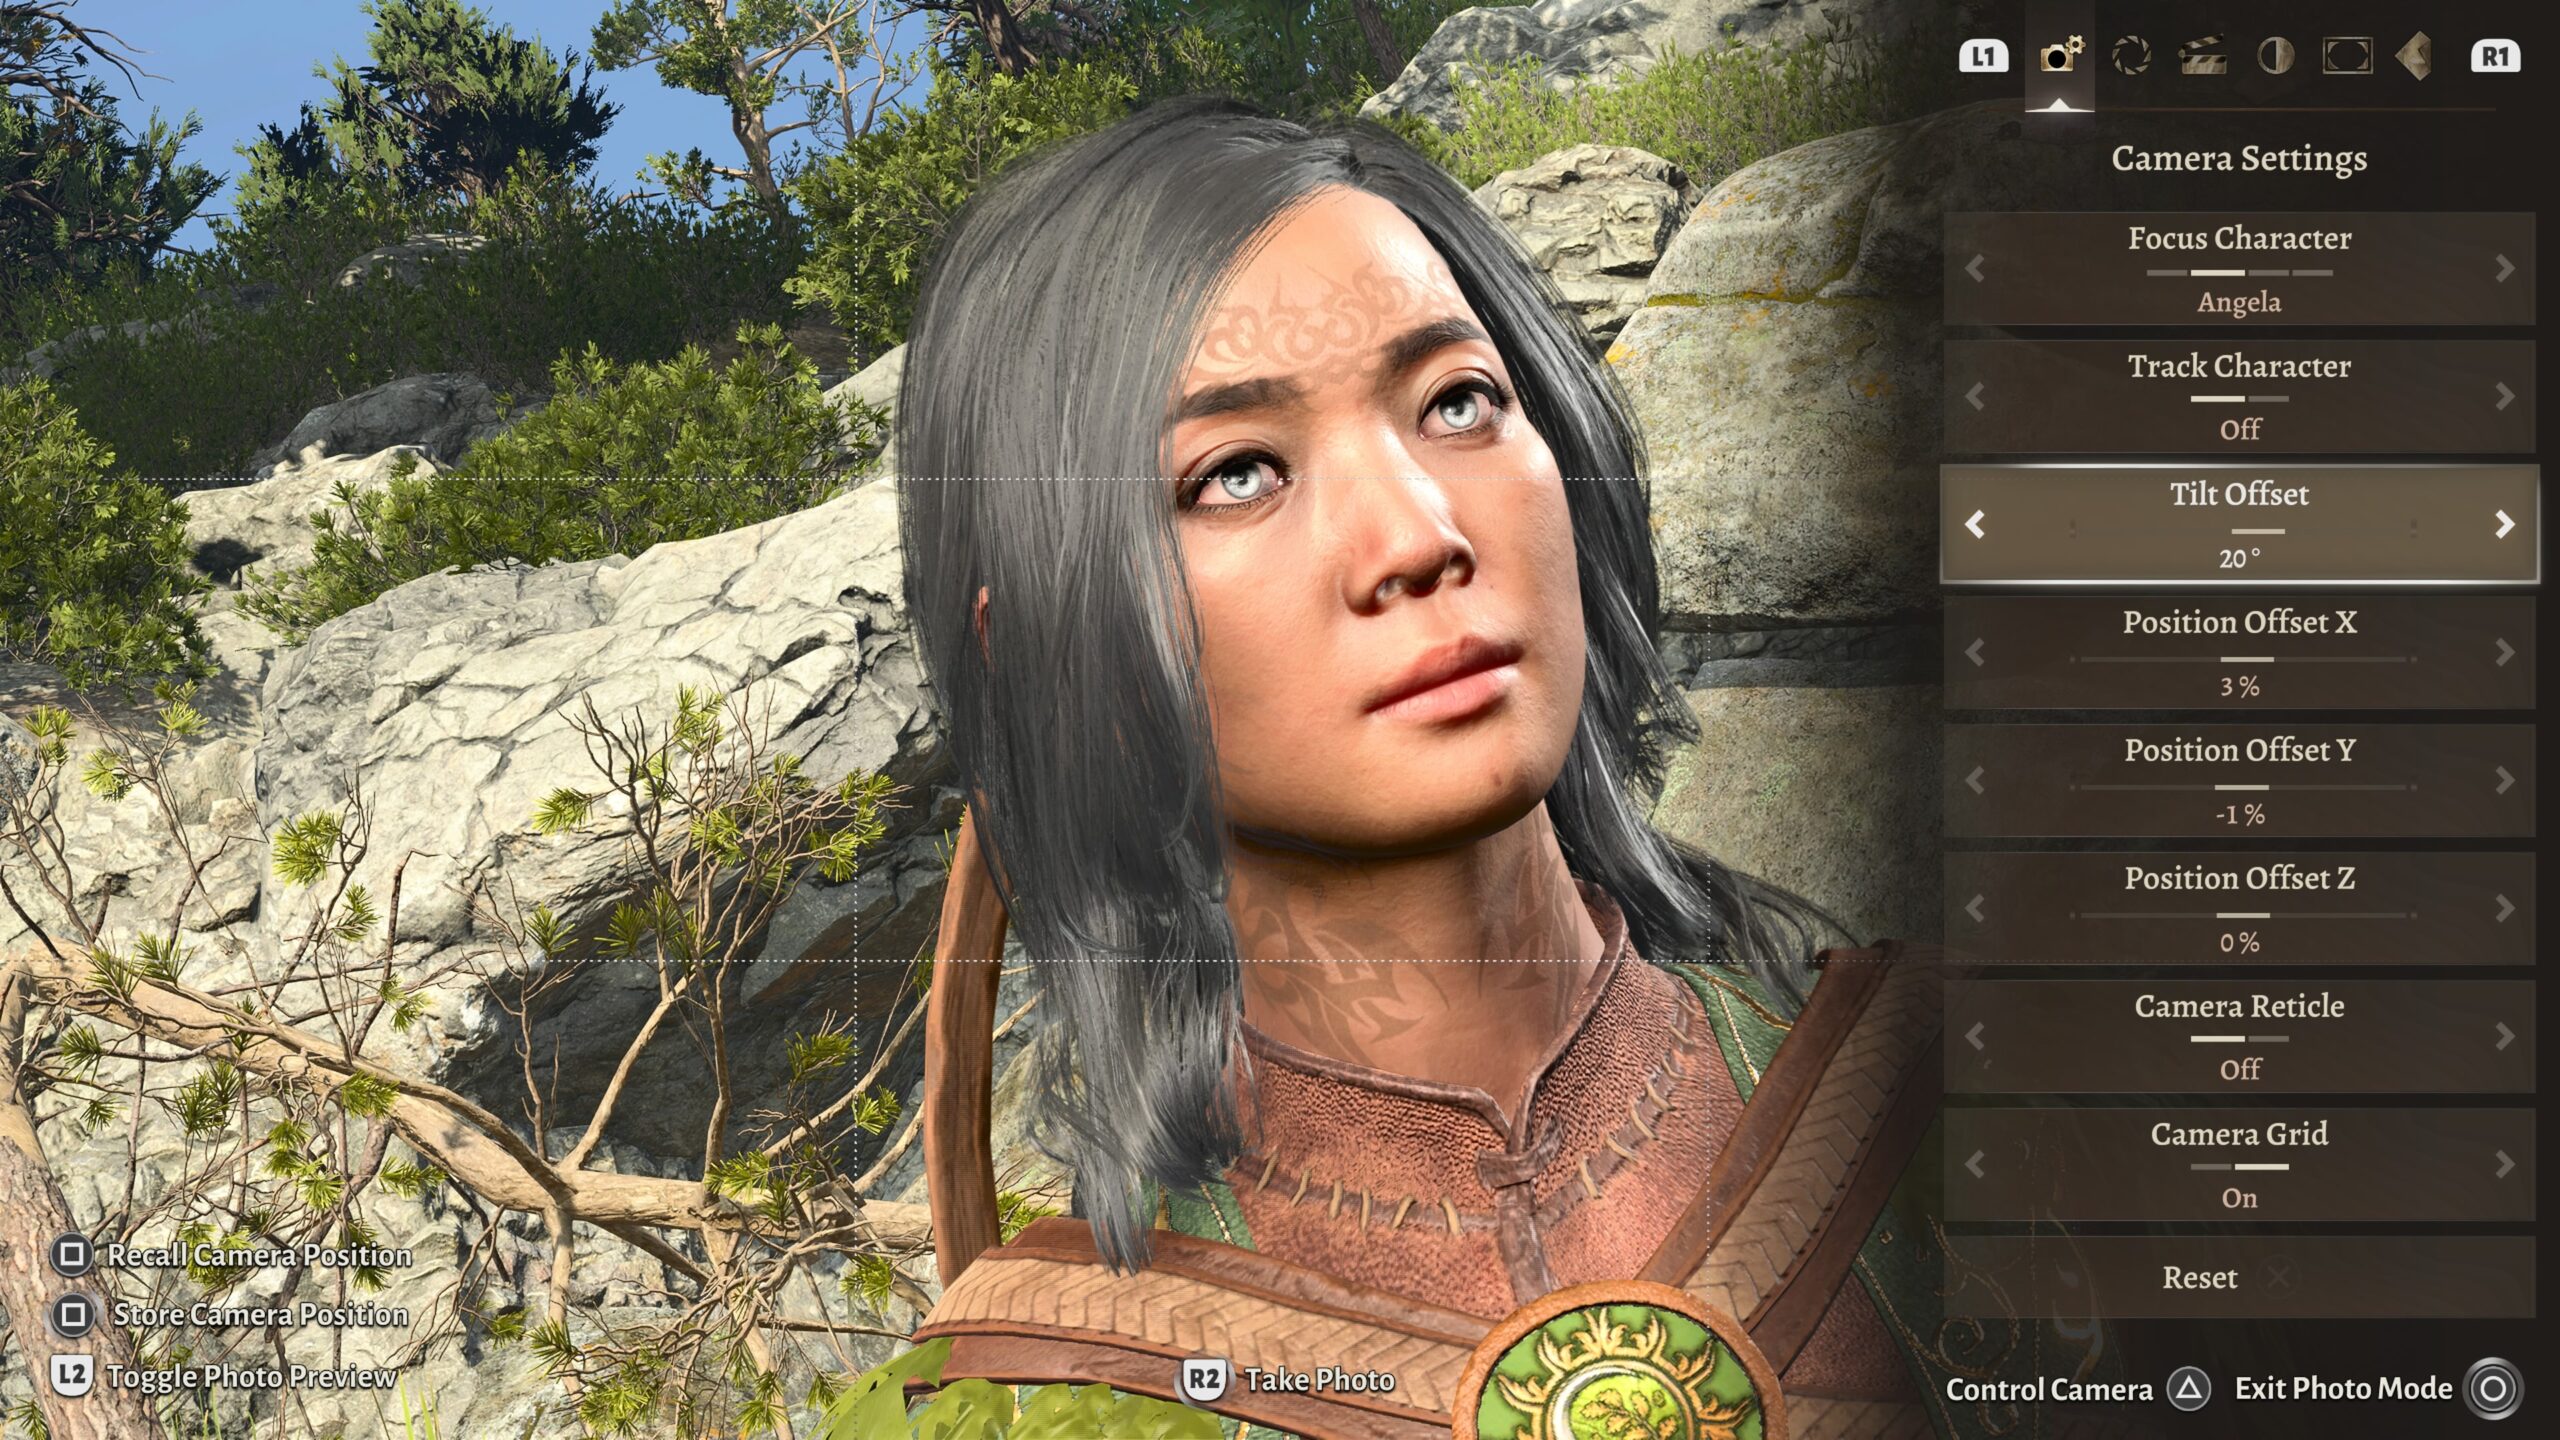
For the kinds of photos I take, I think of the environment I want for the background. Then I move the camera within that environment. Let’s take yet another look a screenshot from earlier in this essay:
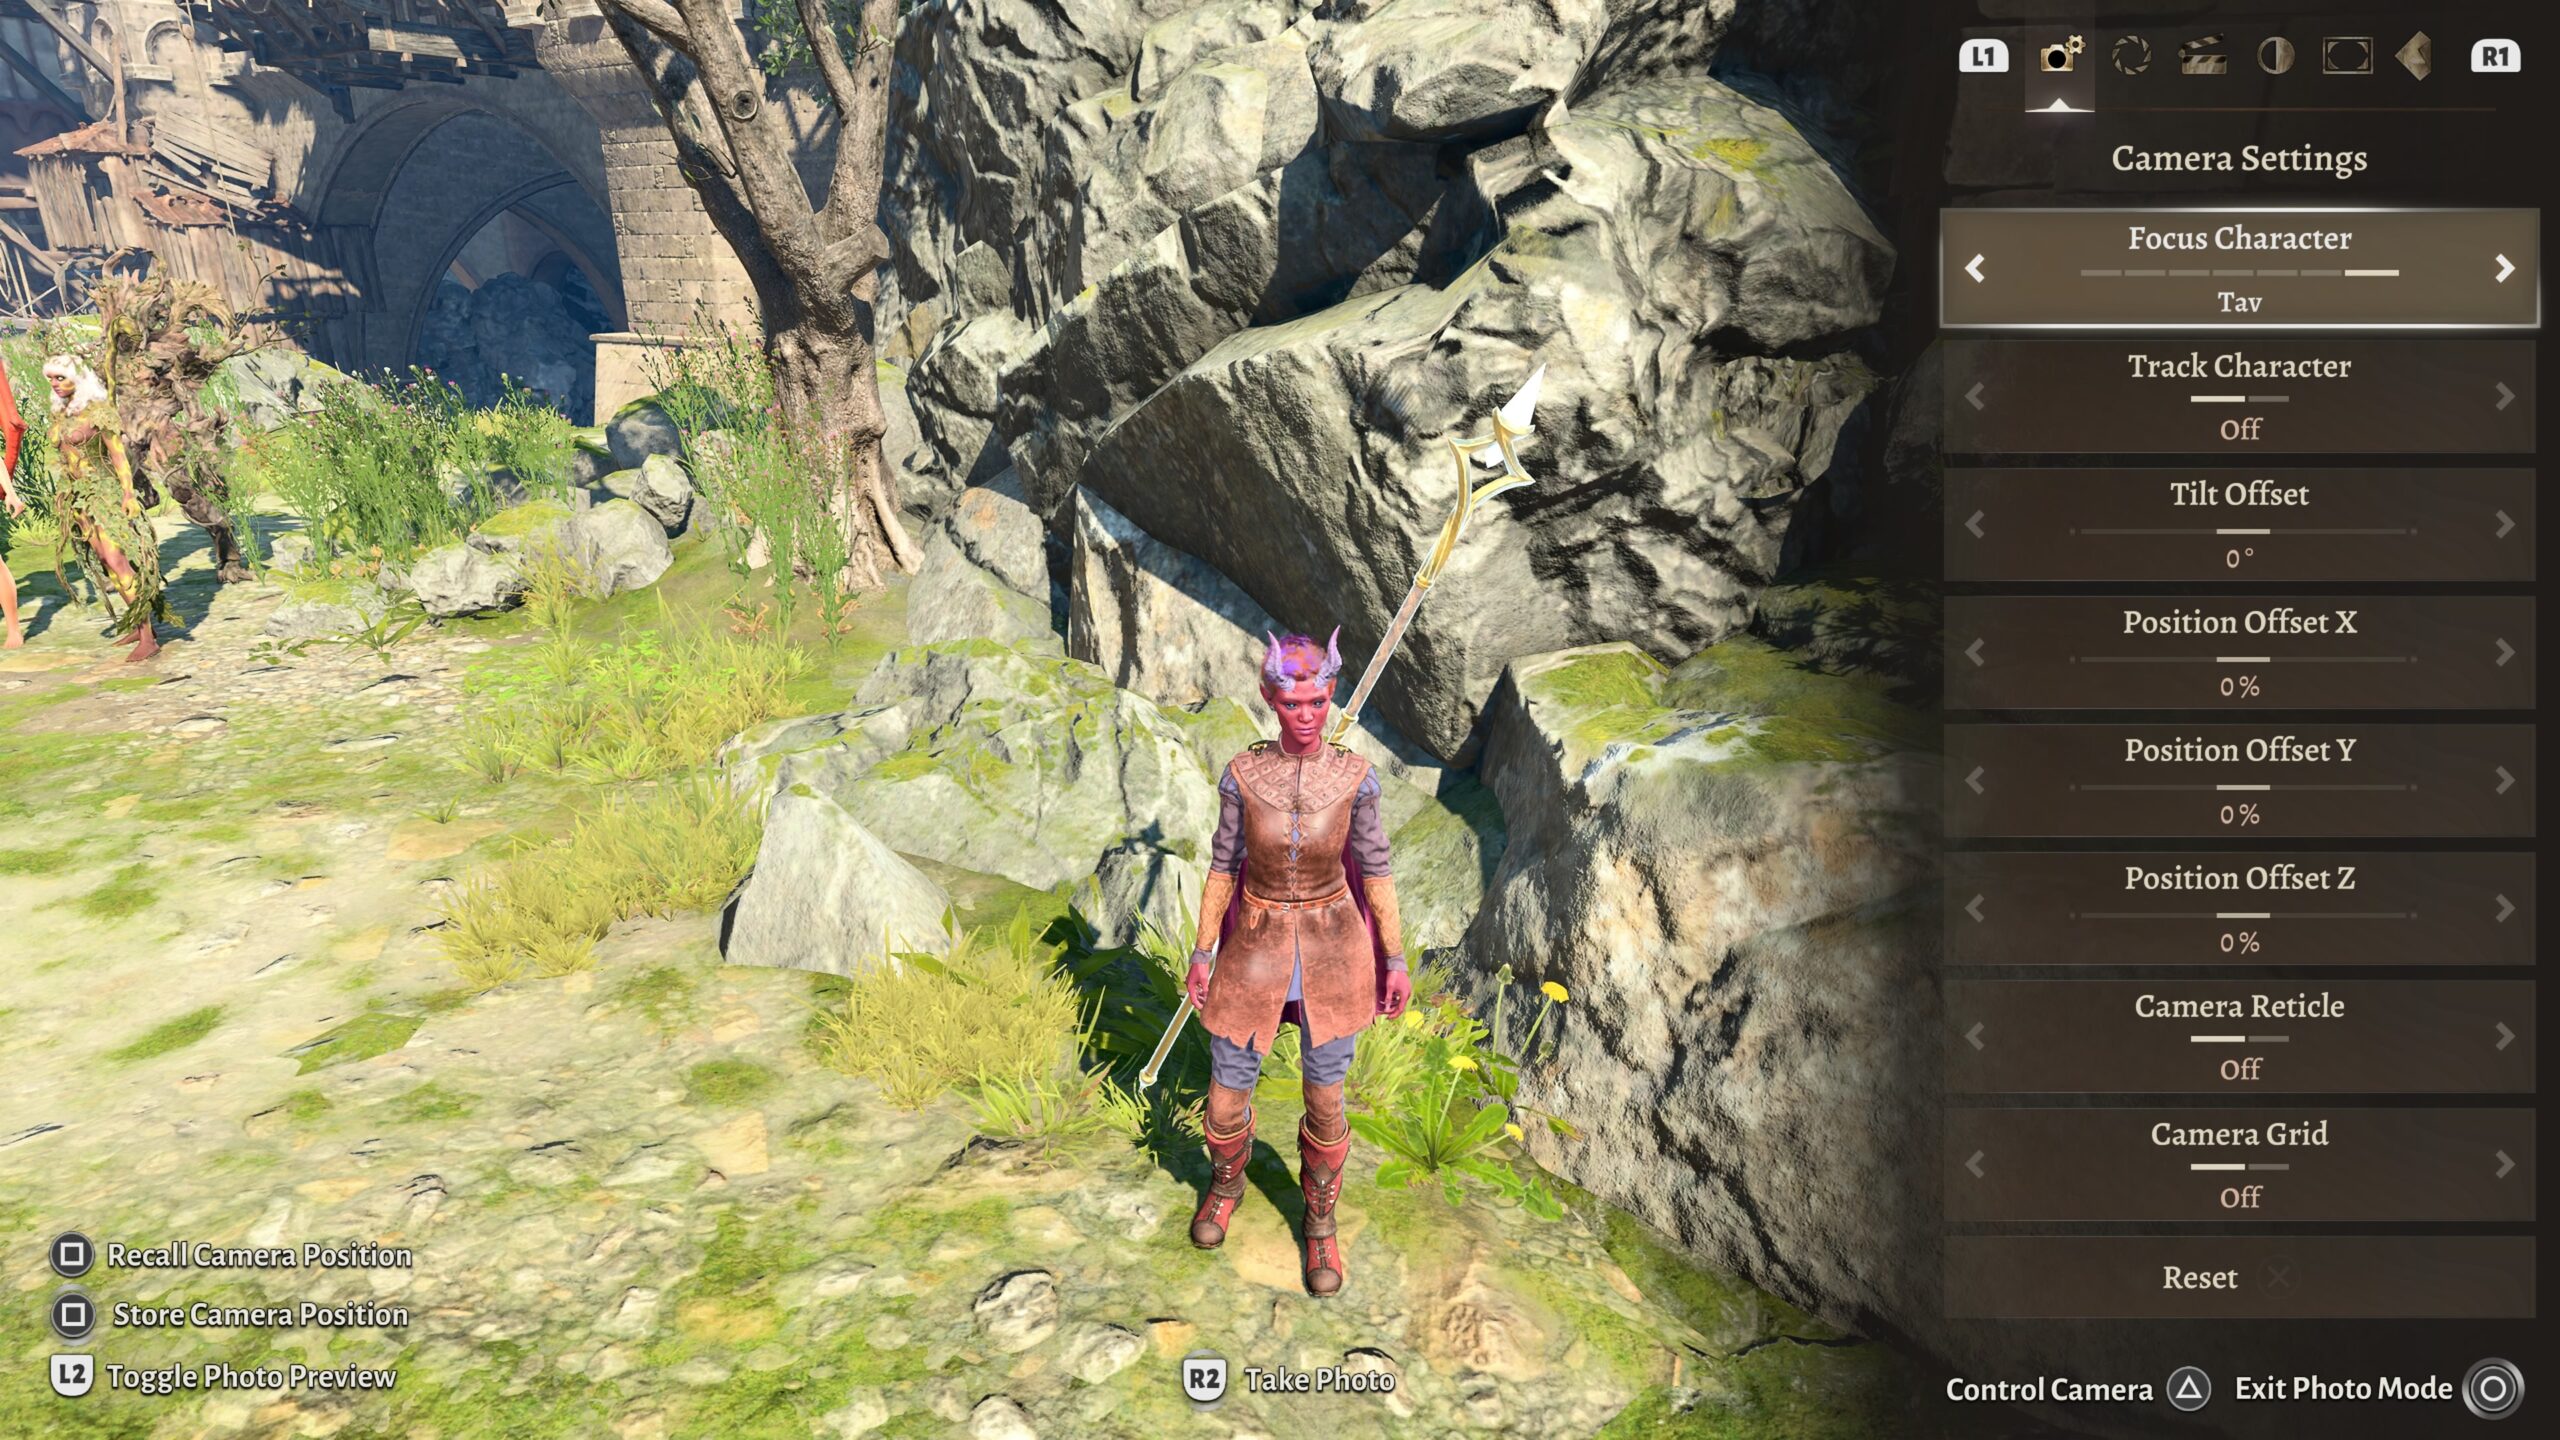
In the bottom right of the above picture, there’s button icon to Control Camera. That will hide the display of the panel on the right, and let me move the camera around with the same controls I’m used to when playing the game, using the joysticks to view my virtual scene.
That’s good enough to coarsely position the camera. But anyone who’s ever played a game like this can tell you: Sometimes it’s not easy to get the camera pointed exactly where you want it. Those Position Offset controls let me fine-tune the camera’s position.
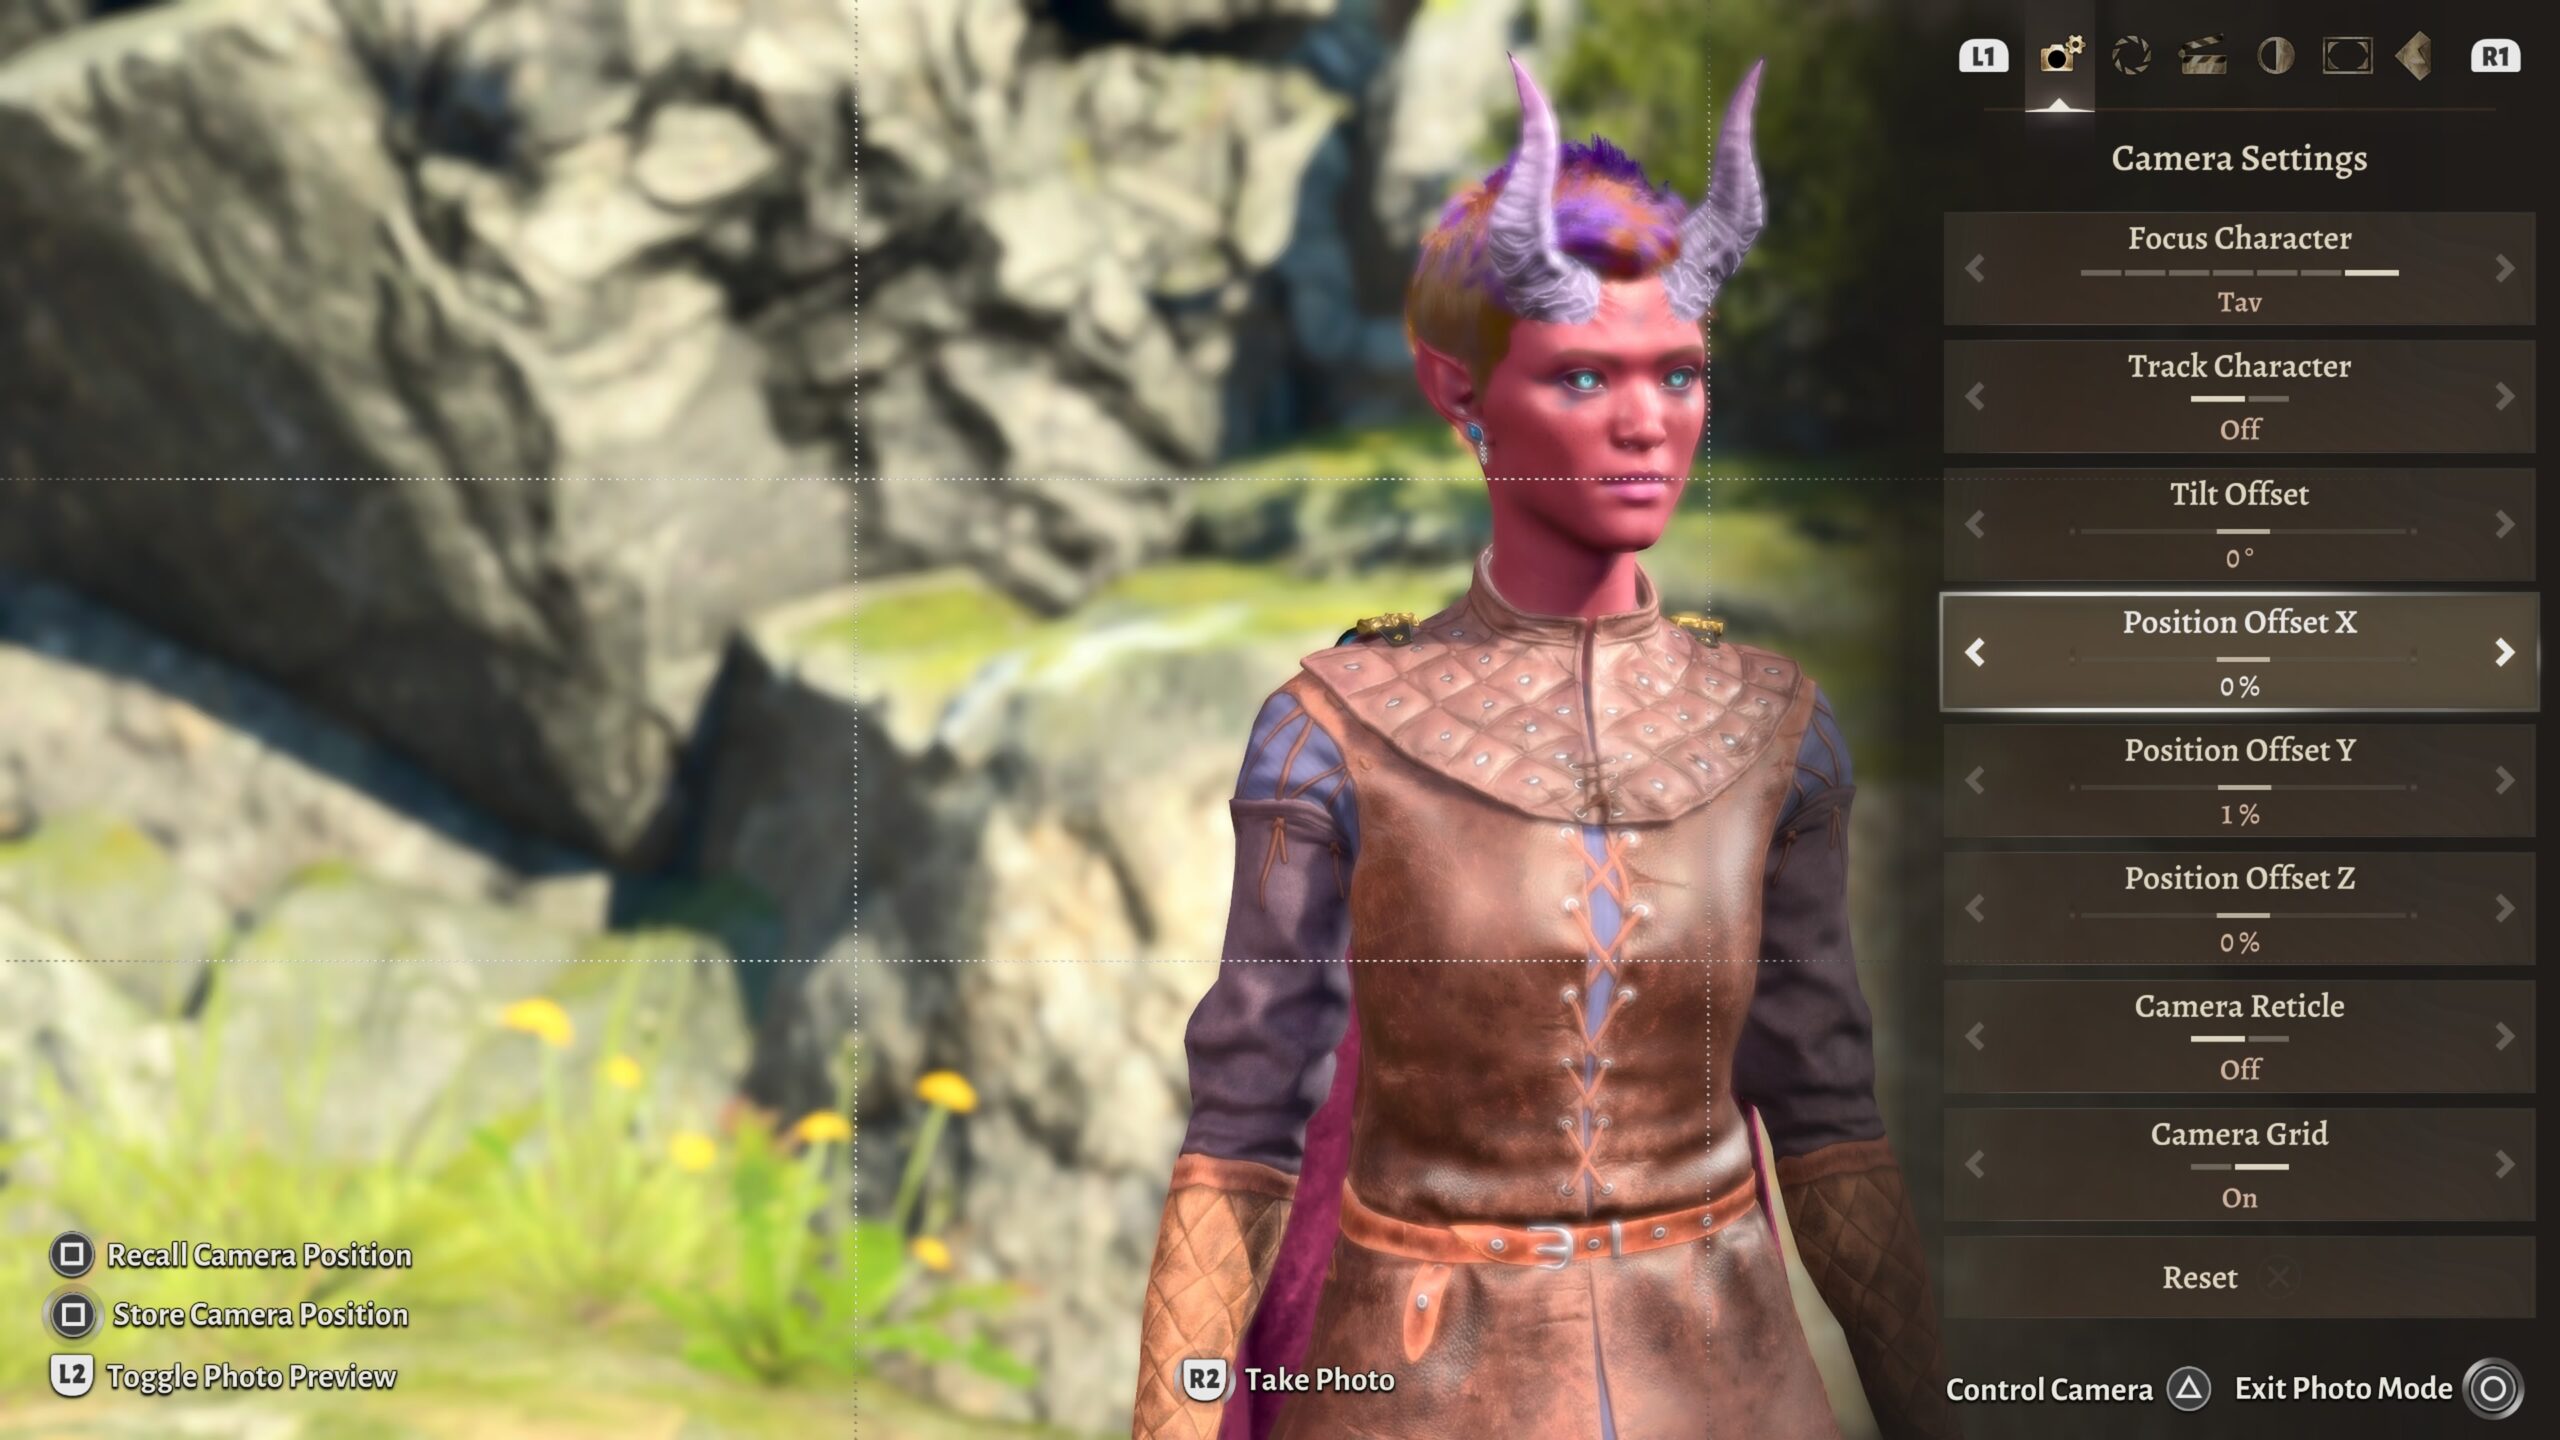

Those Position Offset fields refer to adjustments to the camera’s position relative to the camera itself. If you’re not into co-ordinate systems (enjoy your innocence for a couple more paragraphs), what this means in practice is:
- Position Offset X will cause the camera to move to the right or left within the scene. If you compare the two images above, you can see that moving the camera to the right (increasing X) caused the image to appear to move to the left. Also note that the model moved with respect to the background; moving in X, Y, or Z doesn’t turn off perspective.
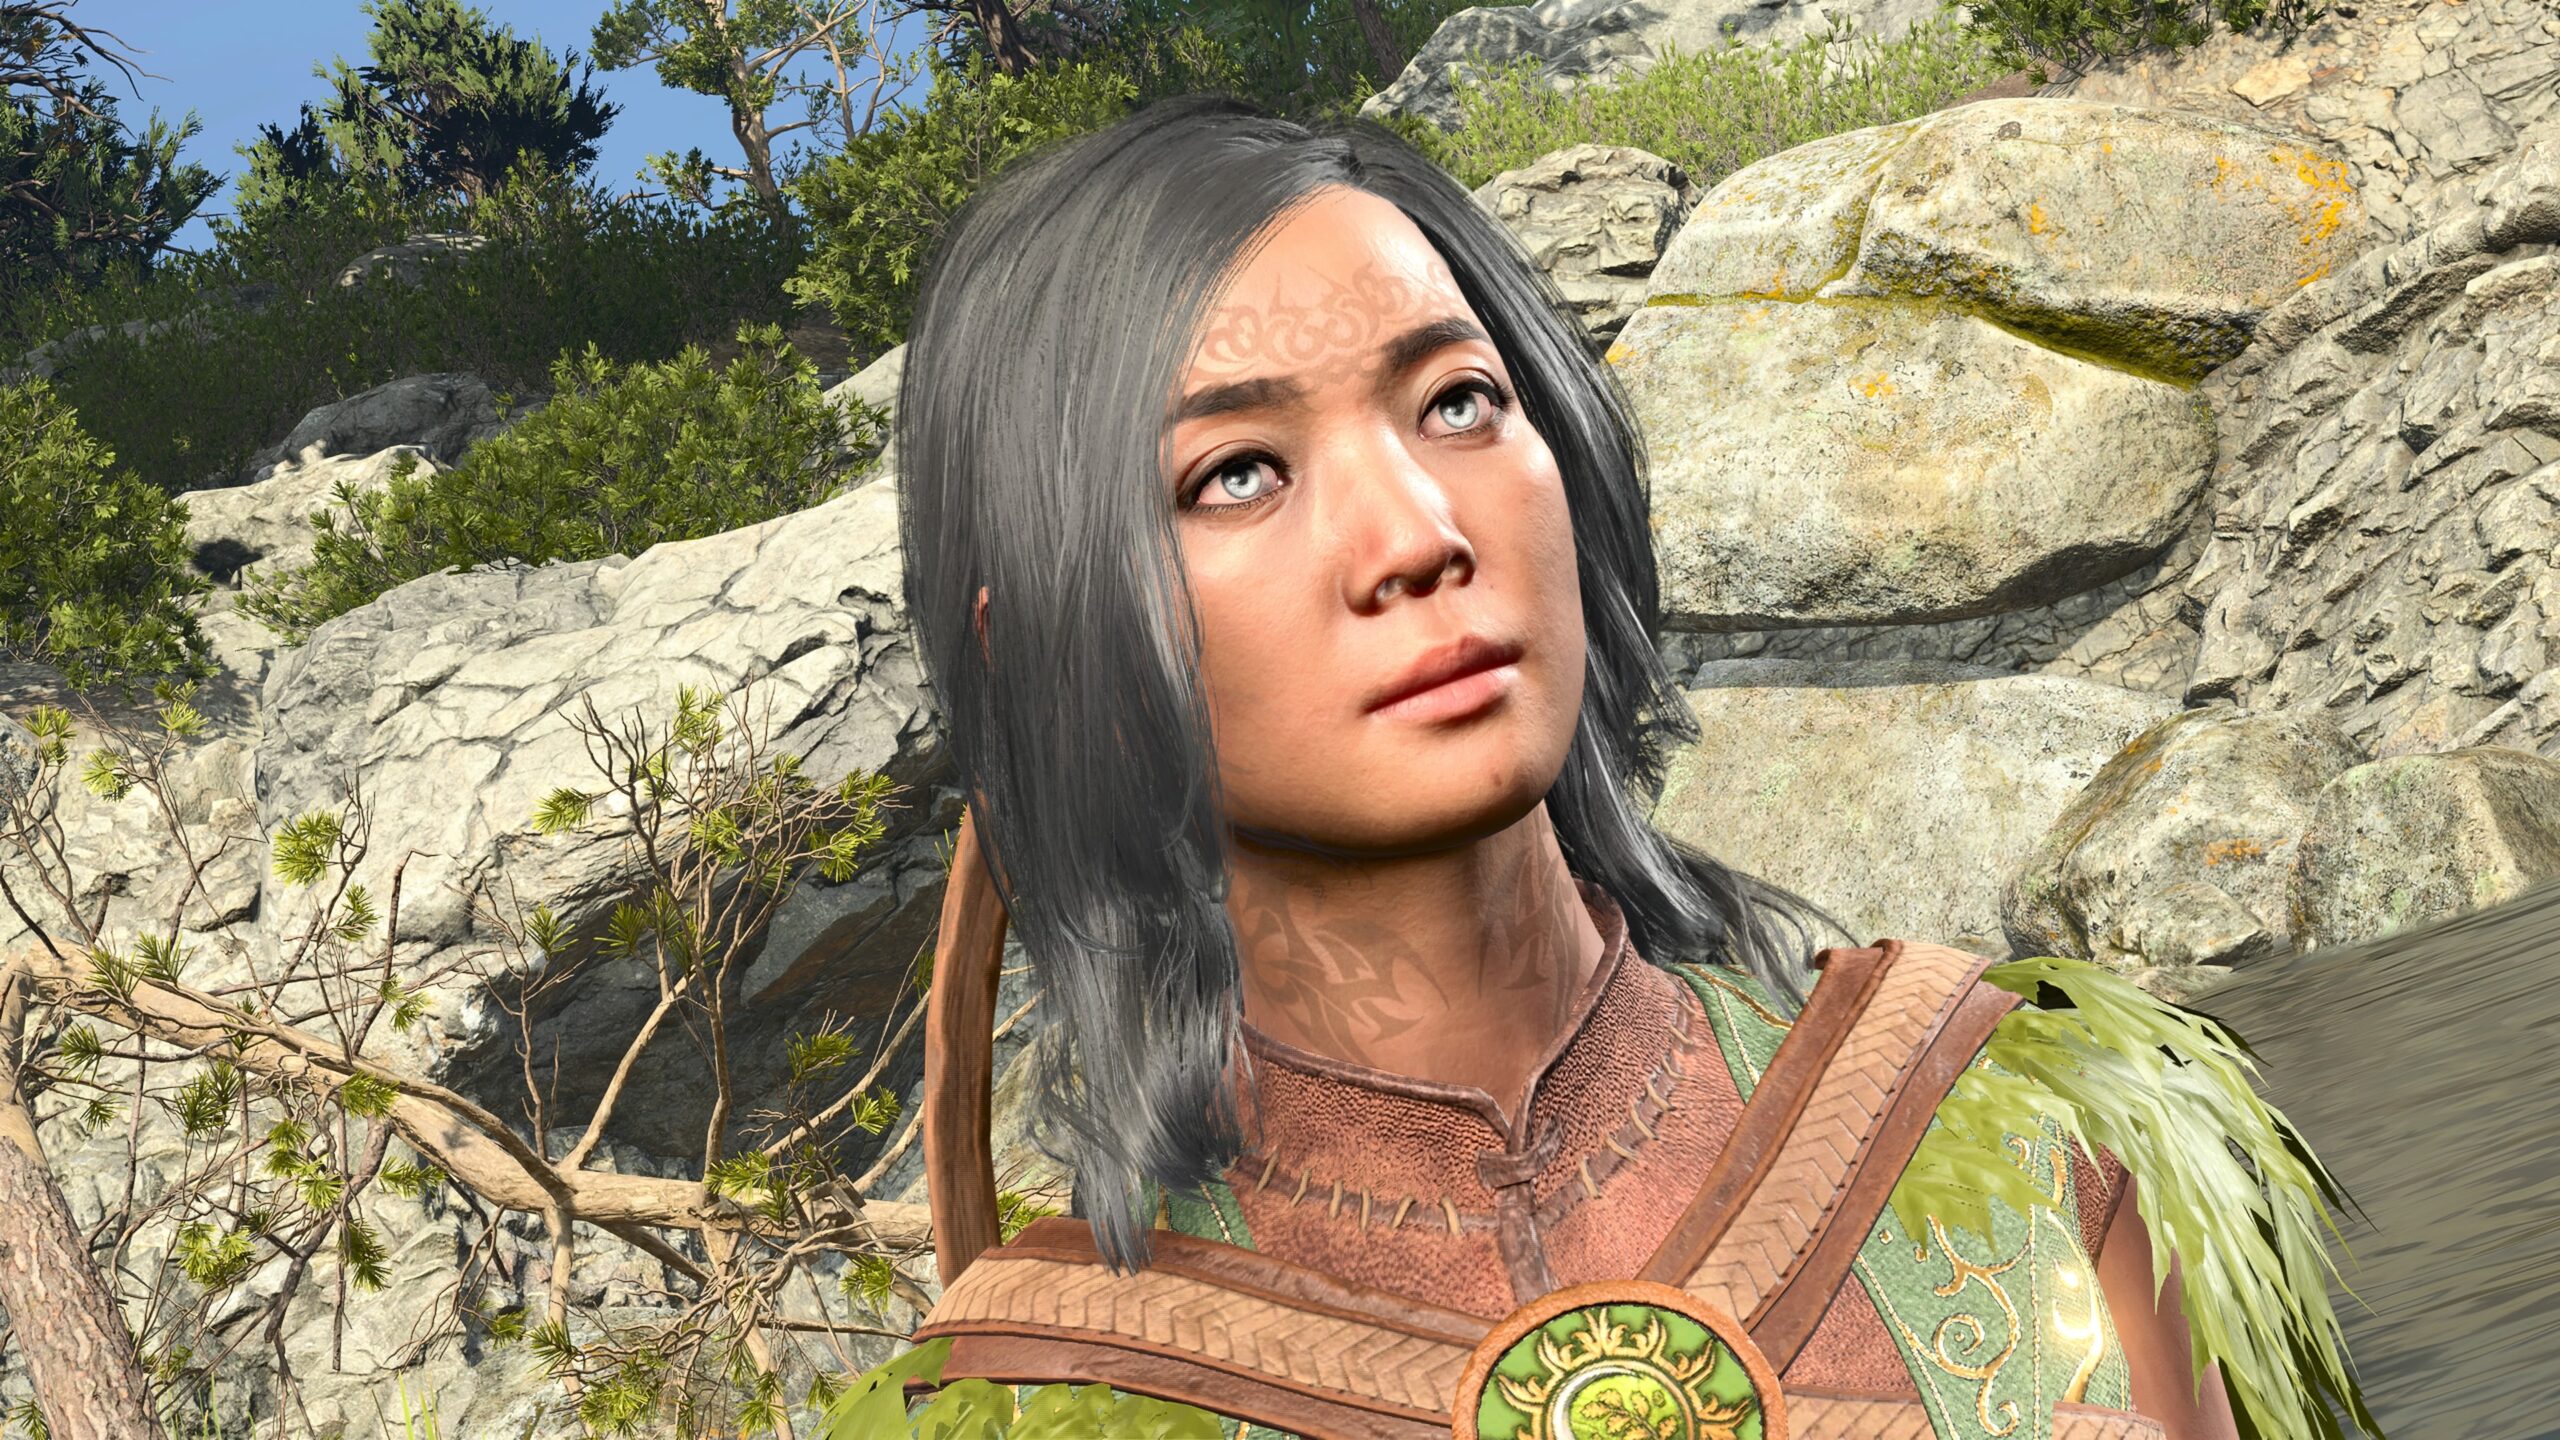
To illustrate camera movements and perspective, let’s start from this base image. - Position Offset Y makes the camera move up and down.
For this pair of images, I moved the camera Y position from +40% (on the left) to -40% (on the right). The right image demonstrates another potential issue: other scenery (like blades of grass) can get in the way. -
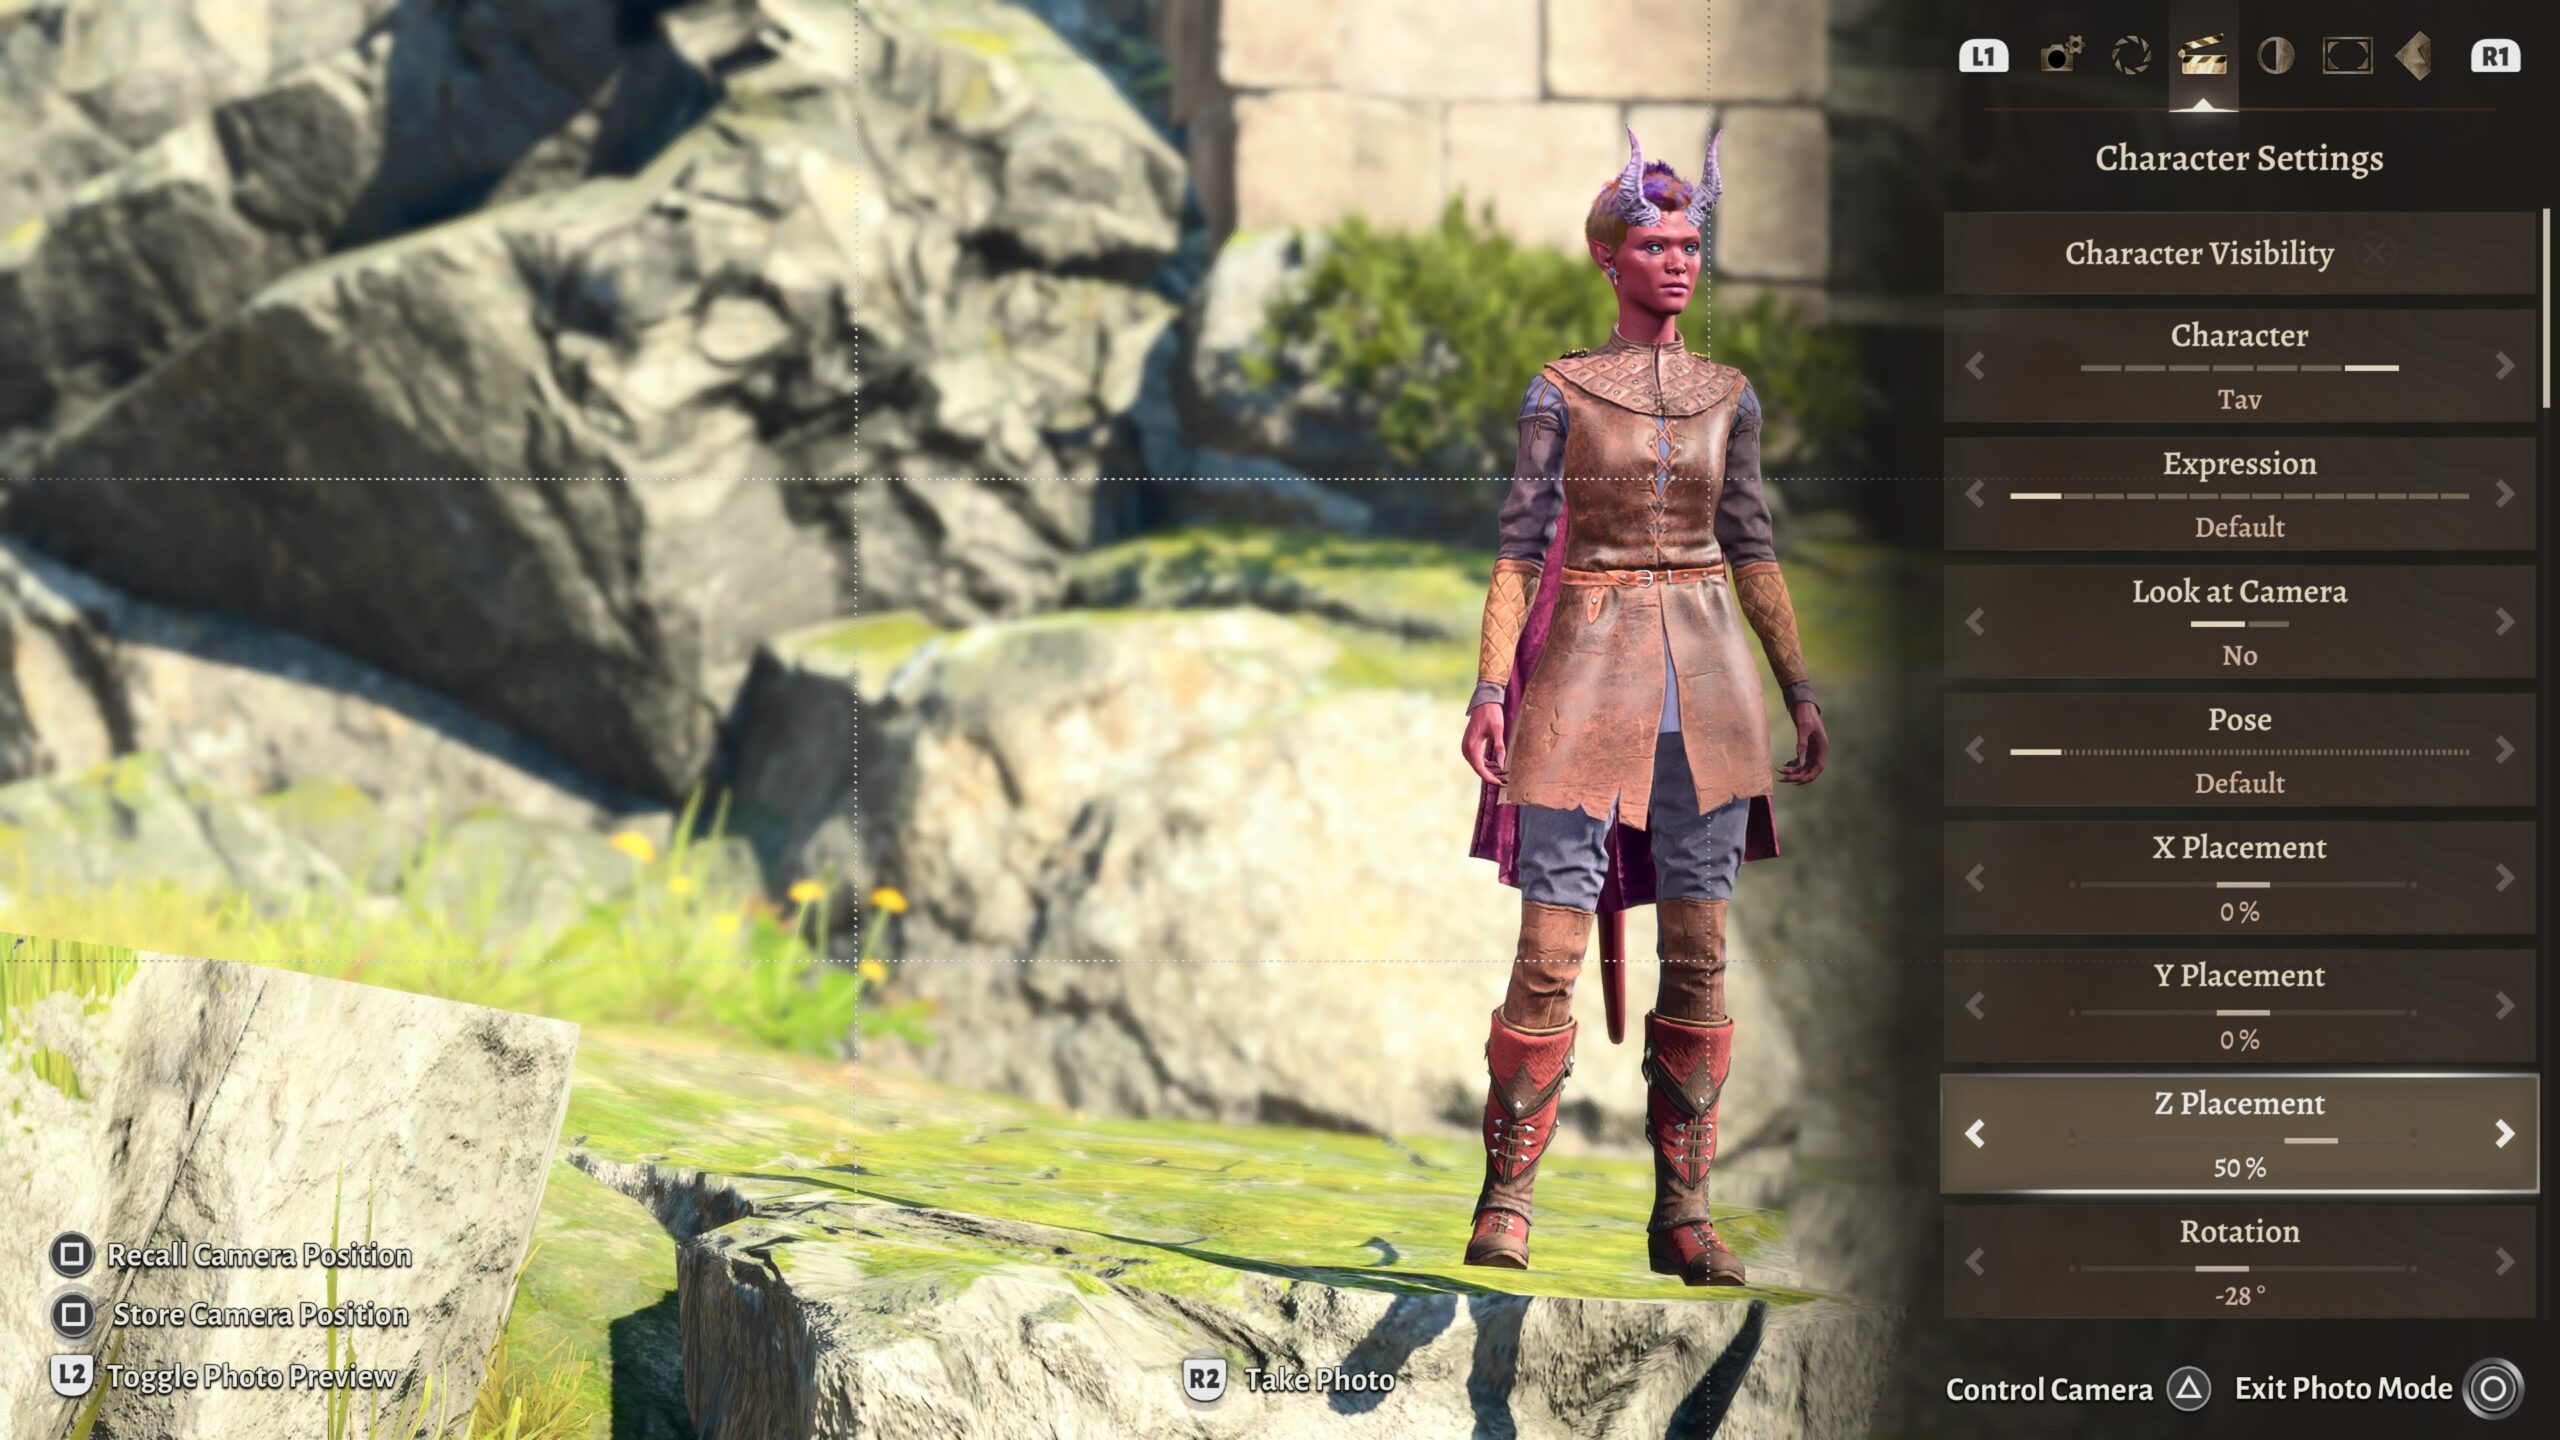
Position Offset Z moves the camera forward and backward. It’s not exactly the same thing as Zoom (perspective and Depth of Field still apply) but it’s close enough.
The shift from moving the camera Z position ±40% wasn’t very interesting, so this pair of images compares moving the Z position from +100% (on the left) to -100% (on the right).
Of course, by far the most common case is that I have to adjust all three to get the camera into the position I want.
Model position
Logically it would make more sense to talk about positioning the models in the section on Composition below. However, I think it might be easier if all the stuff about (x,y,z) coordinate systems were in one place.
Within Photo Mode, you can move models individually within the scene.
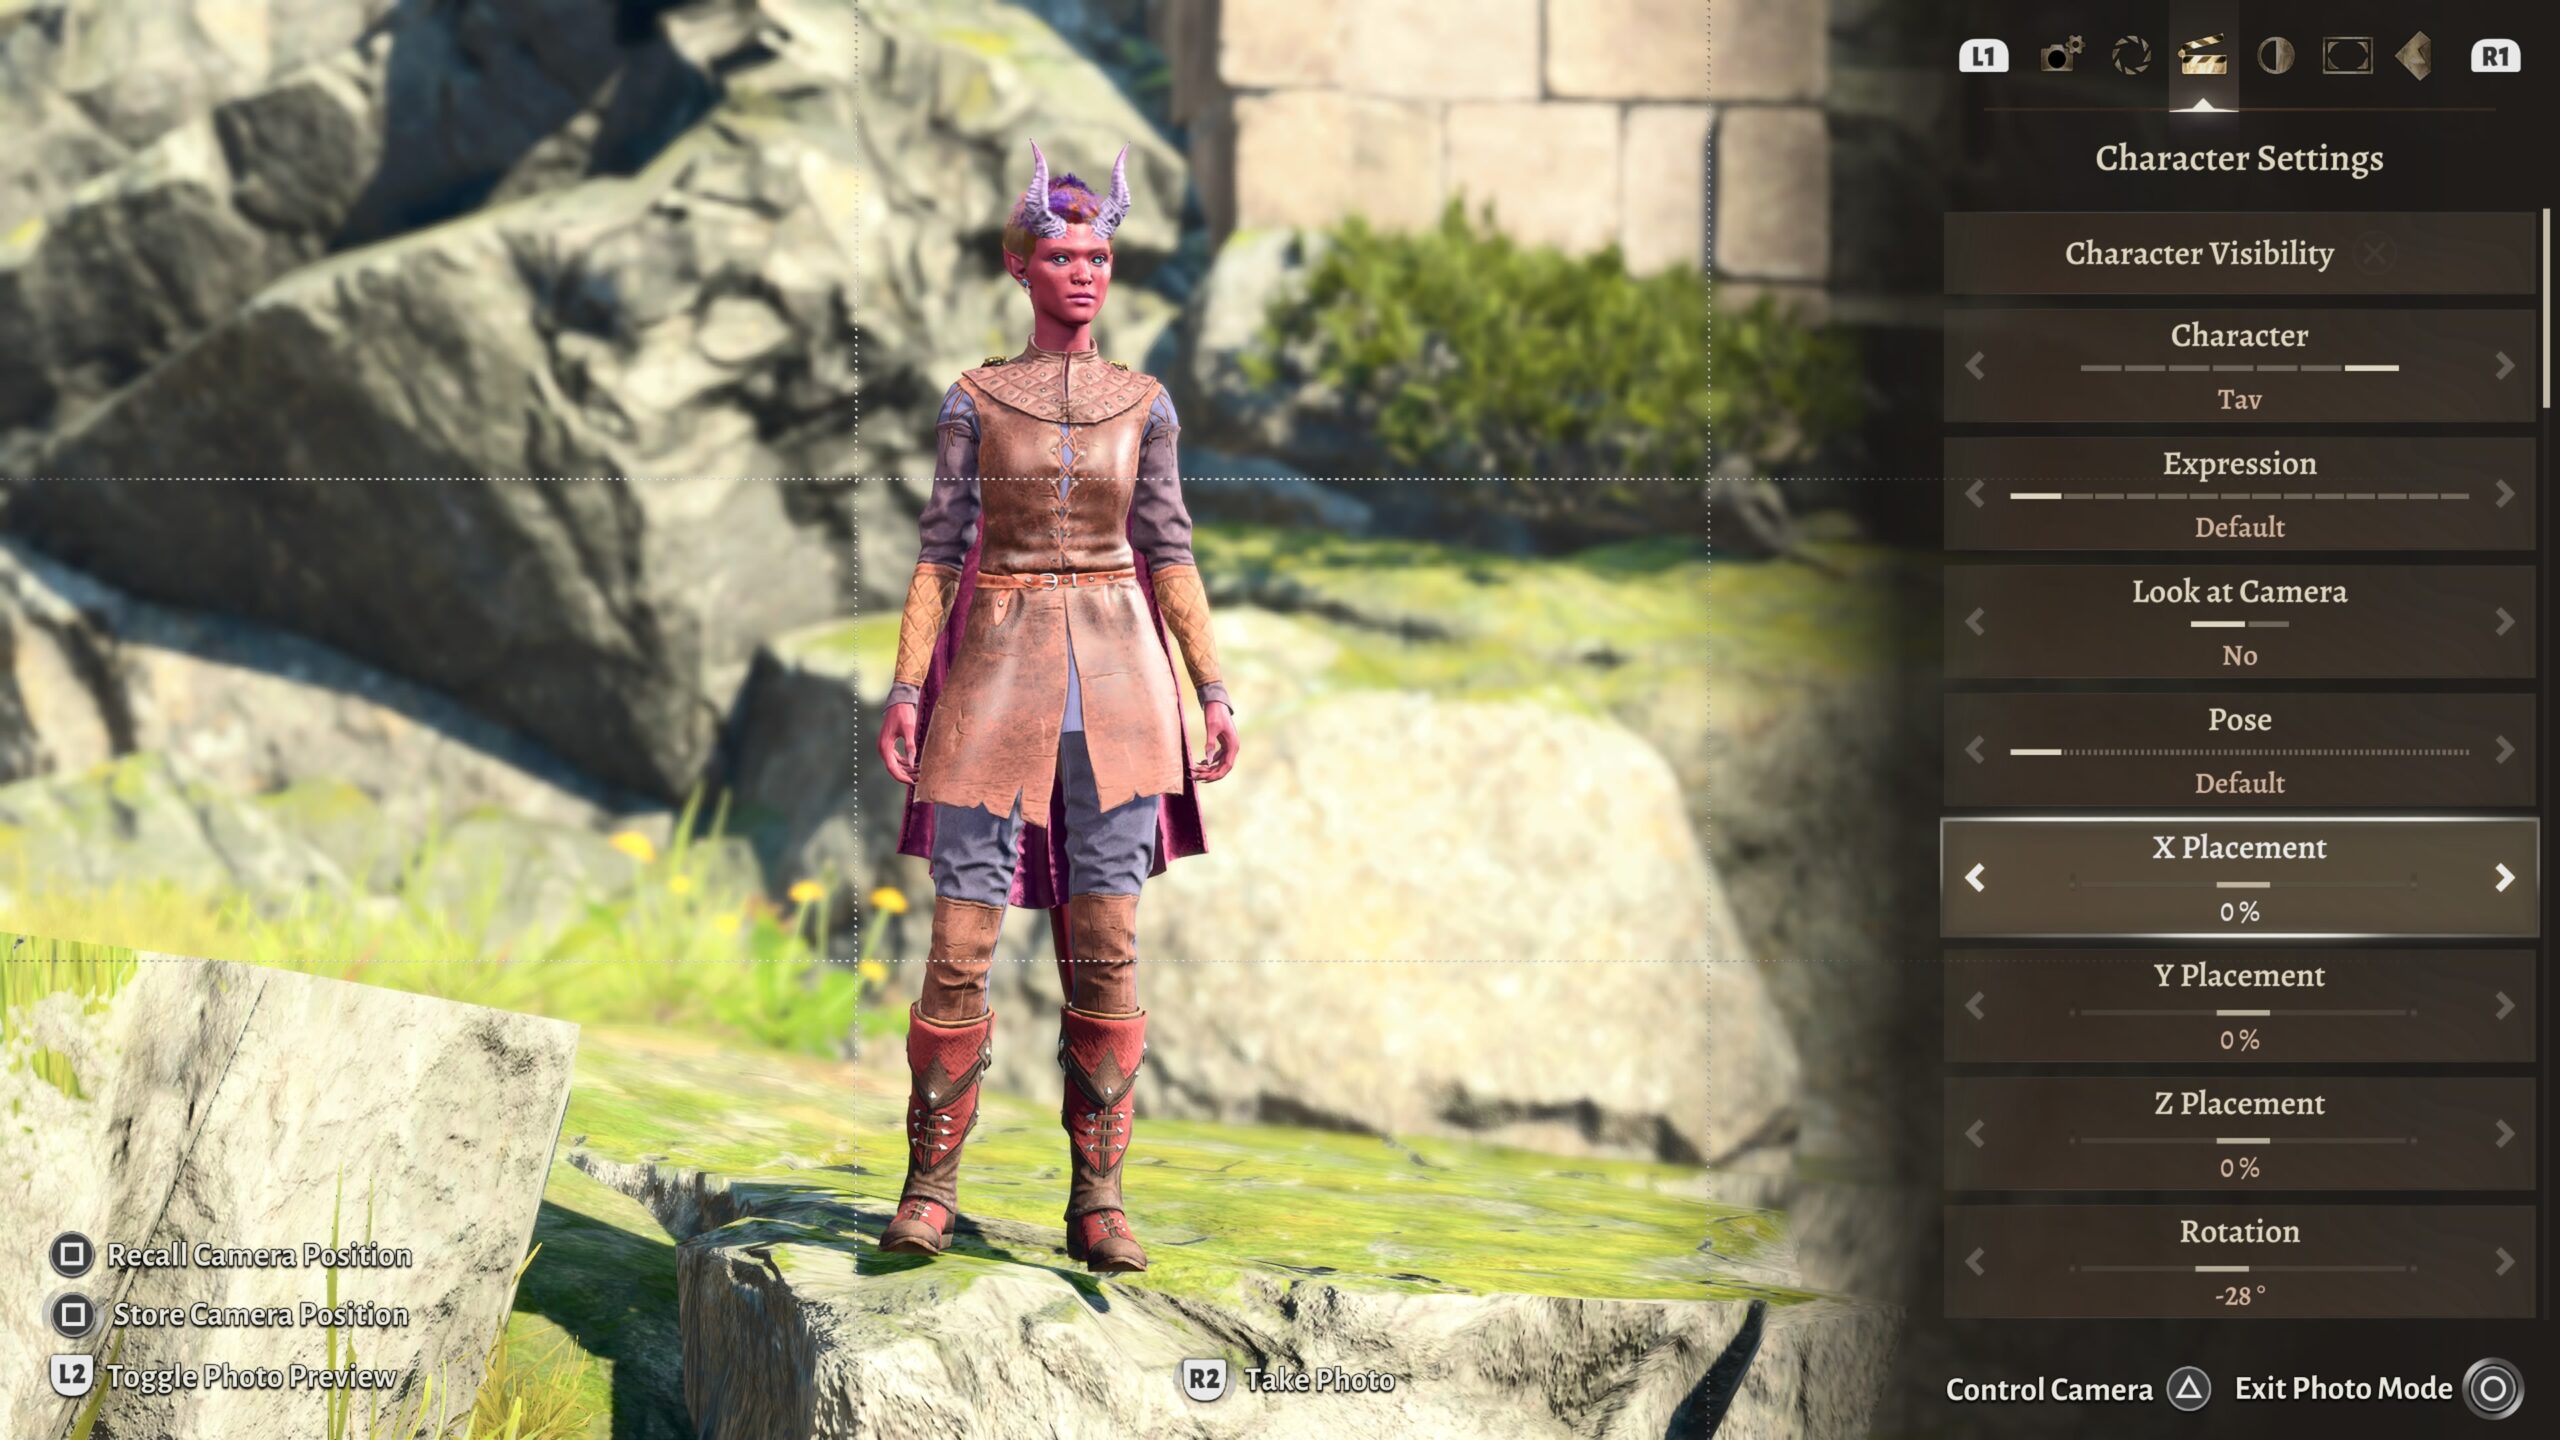
There are two immediate take-aways from the above image:
-
When you move a model’s (X,Y,Z) Placement, the game does not compensate for differences in terrain. That’s the origin of the “floating feet” you can see in a couple of the images above.
To deal with this, I either adjust the model’s Y Placement until their feet touch the ground, or move the camera so that their feet are out of frame.
-
I moved the model in X, and it goes off in an unexpected direction.
With (X,Y,Z) Position Offset, the changes are with respect to the camera. With the models, changes in (X,Y,Z) Placement are with respect to the game world.
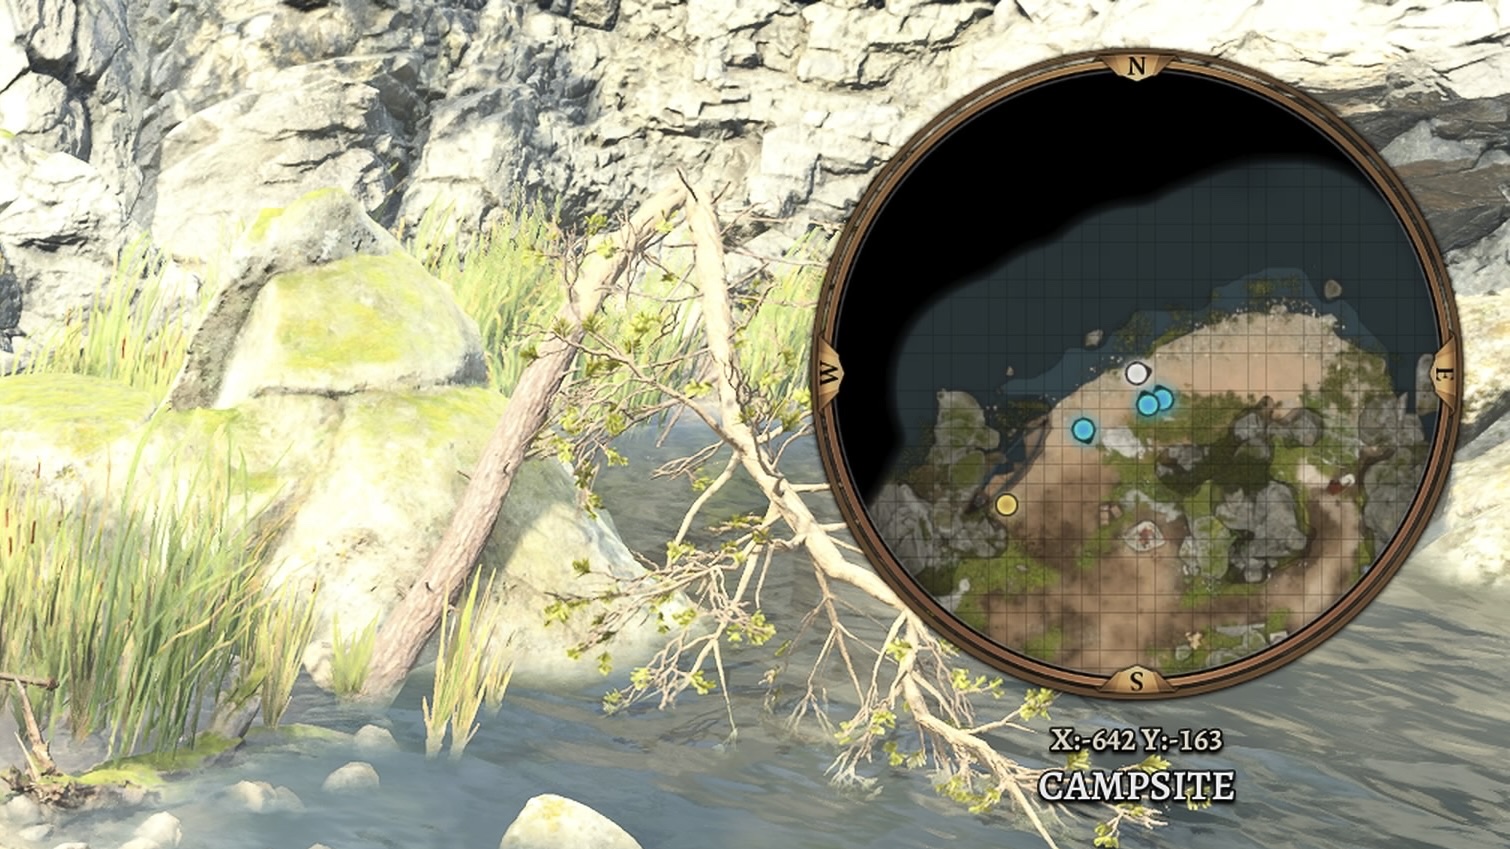
The game world’s coordinate system is that the X-axis is aligned with East-West, and the Y-axis is aligned with North-South. Confused? Maybe this will help.

Some more take-aways:
- Underneath the minimap is the small text “X:-642 Y:-163.” Those are the (X,Y) coordinates of the center of the minimap in the game’s world.
- I’ve set the game’s options to orient the minimap so that North is always at the top. I find this to be easier to use for navigation than the game’s default, which is to have the top of the minimap be whatever direction your character faces.
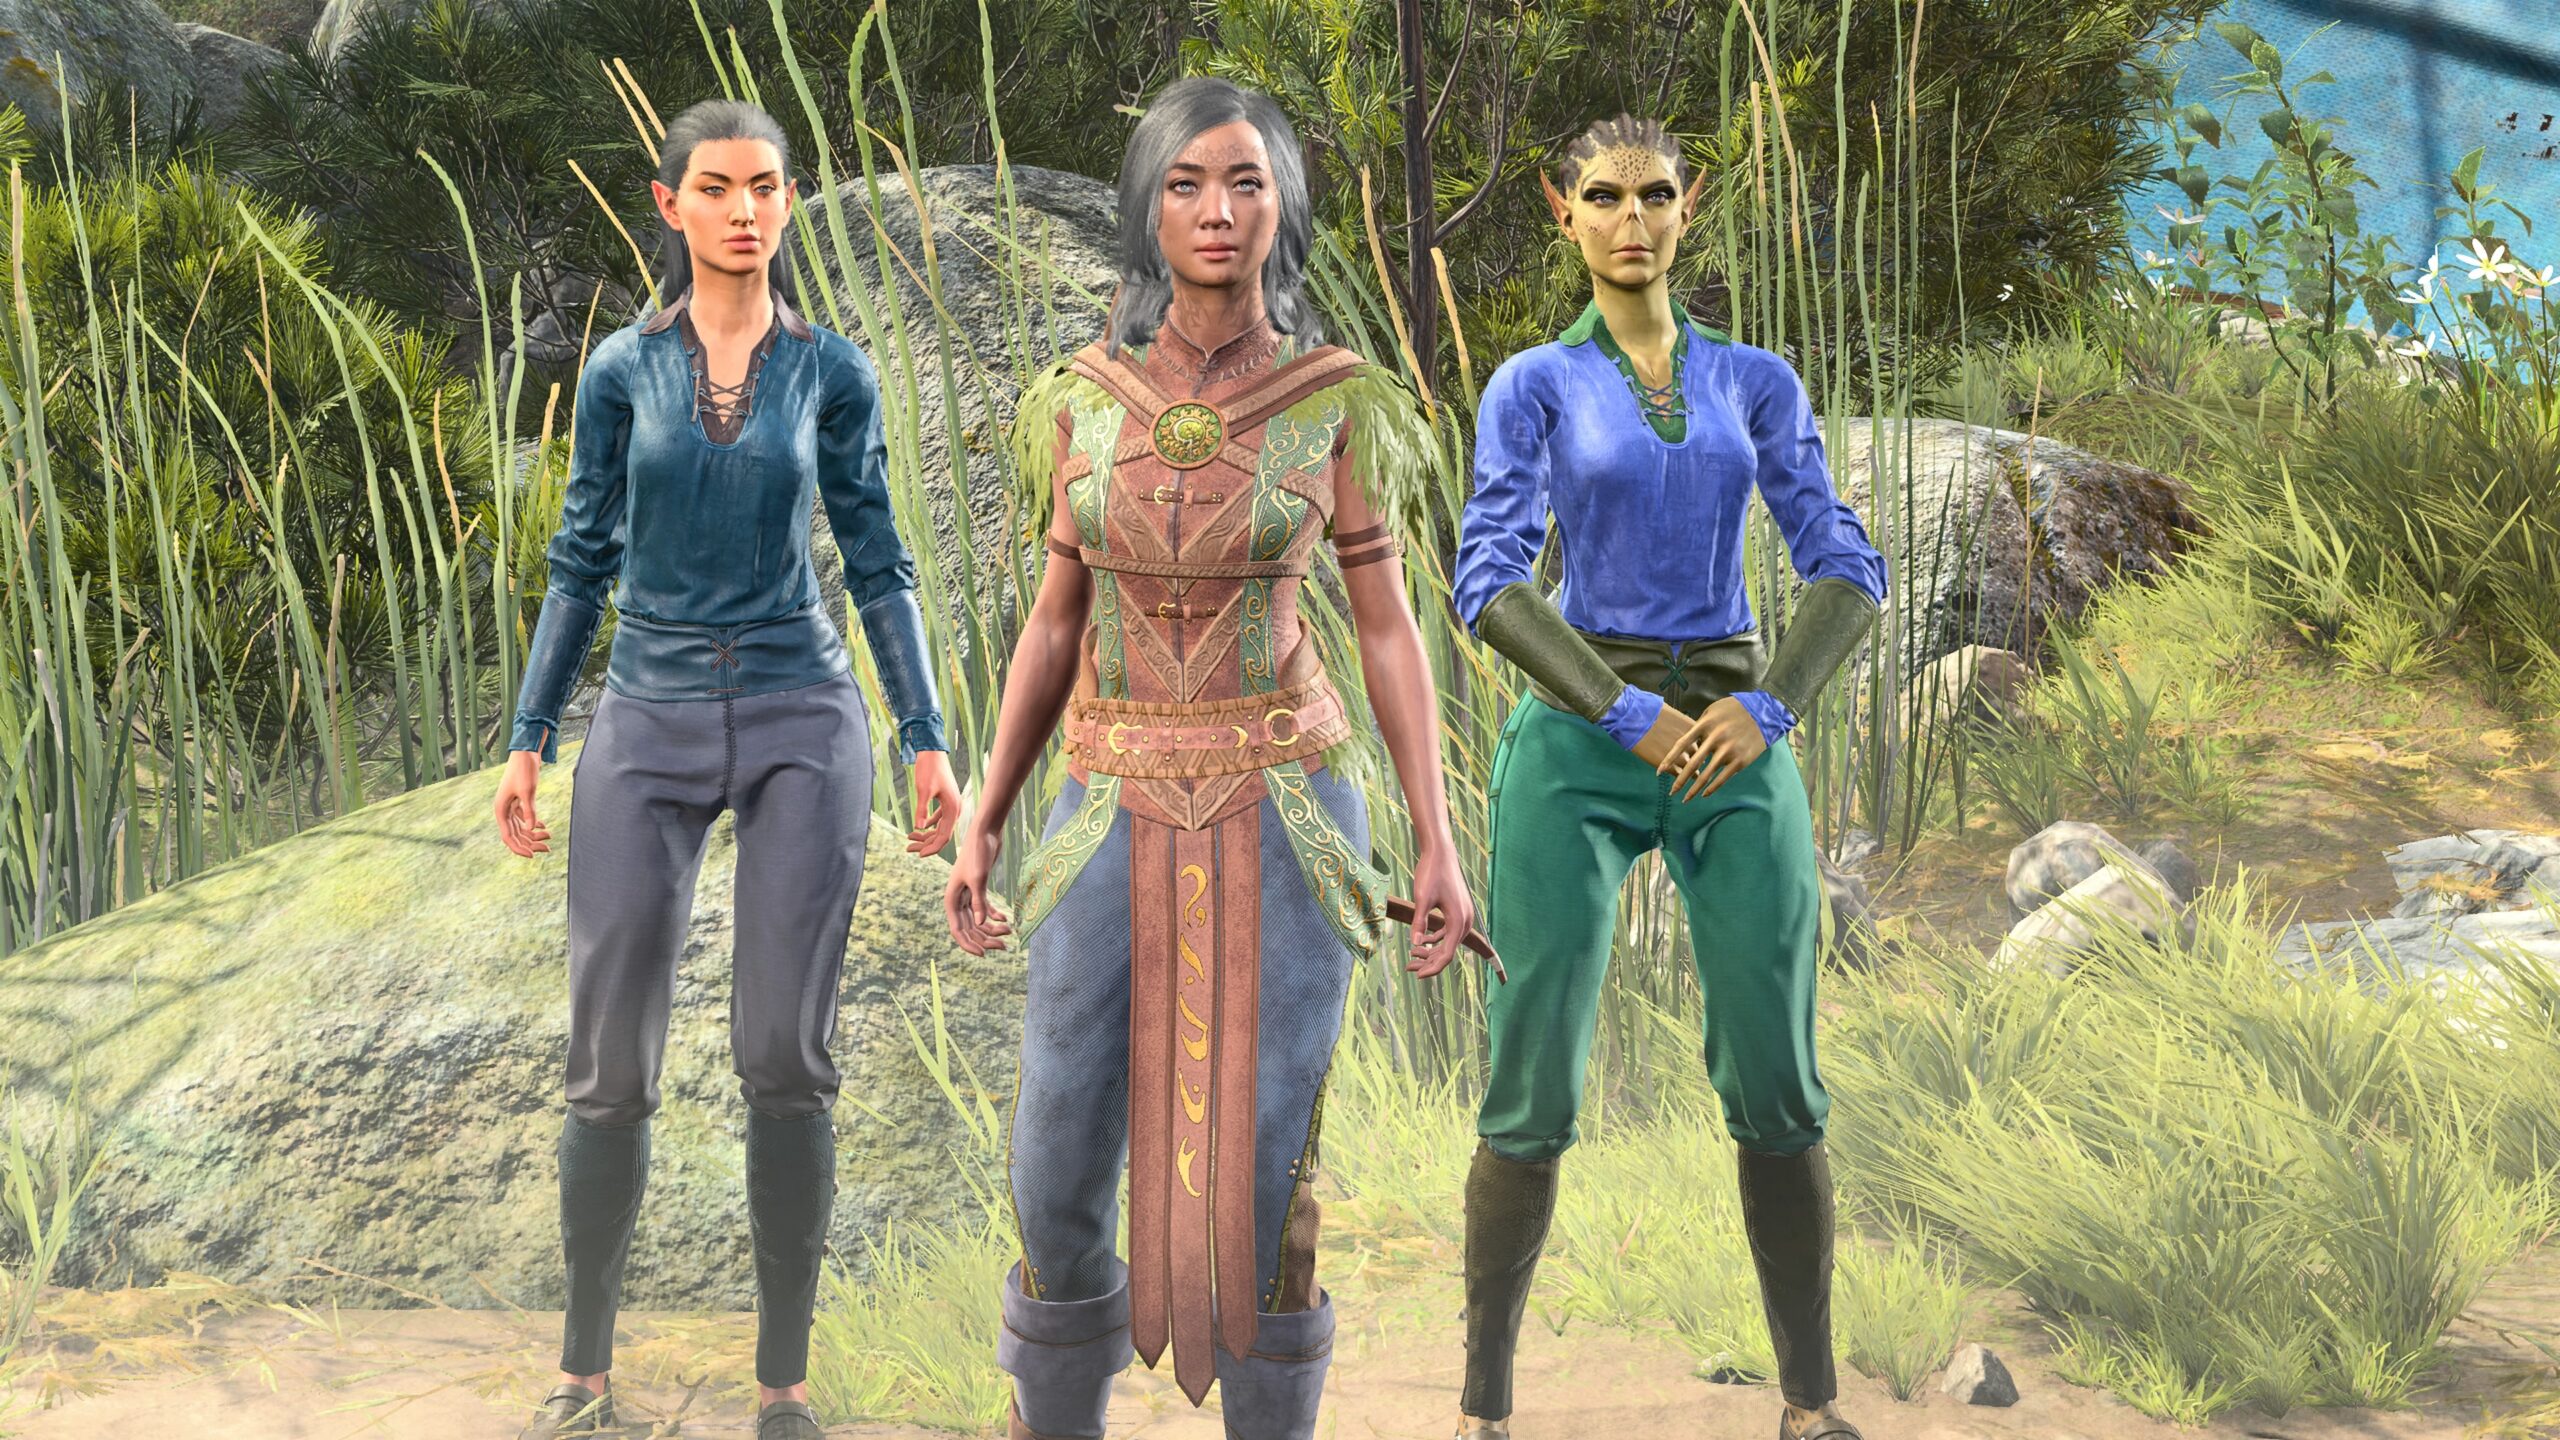
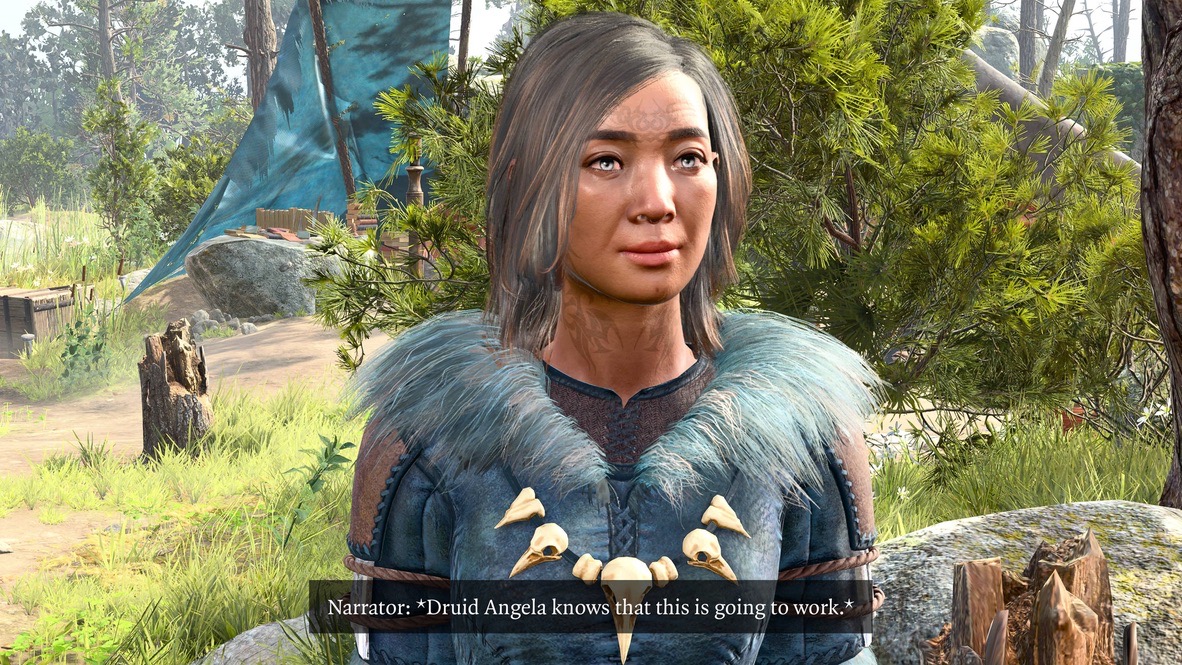
- Compare the dots on the minimap with the positions of the characters in the previous image. The white dot is Druid Angela, the character in the plant armor, whom I controlled at the time I took the photo. The two closely-placed blue dots are Karma (in the light blue shirt) and Wings (in the sea-green shirt). The blue dot offset from the others is The Chronicler (the guy in the Bard jerkin). The yellow dot off to the left is Withers.
- The difference in orientation between the scene and the minimap may give you some idea of why moving the Placement in the game world can give unexpected results.
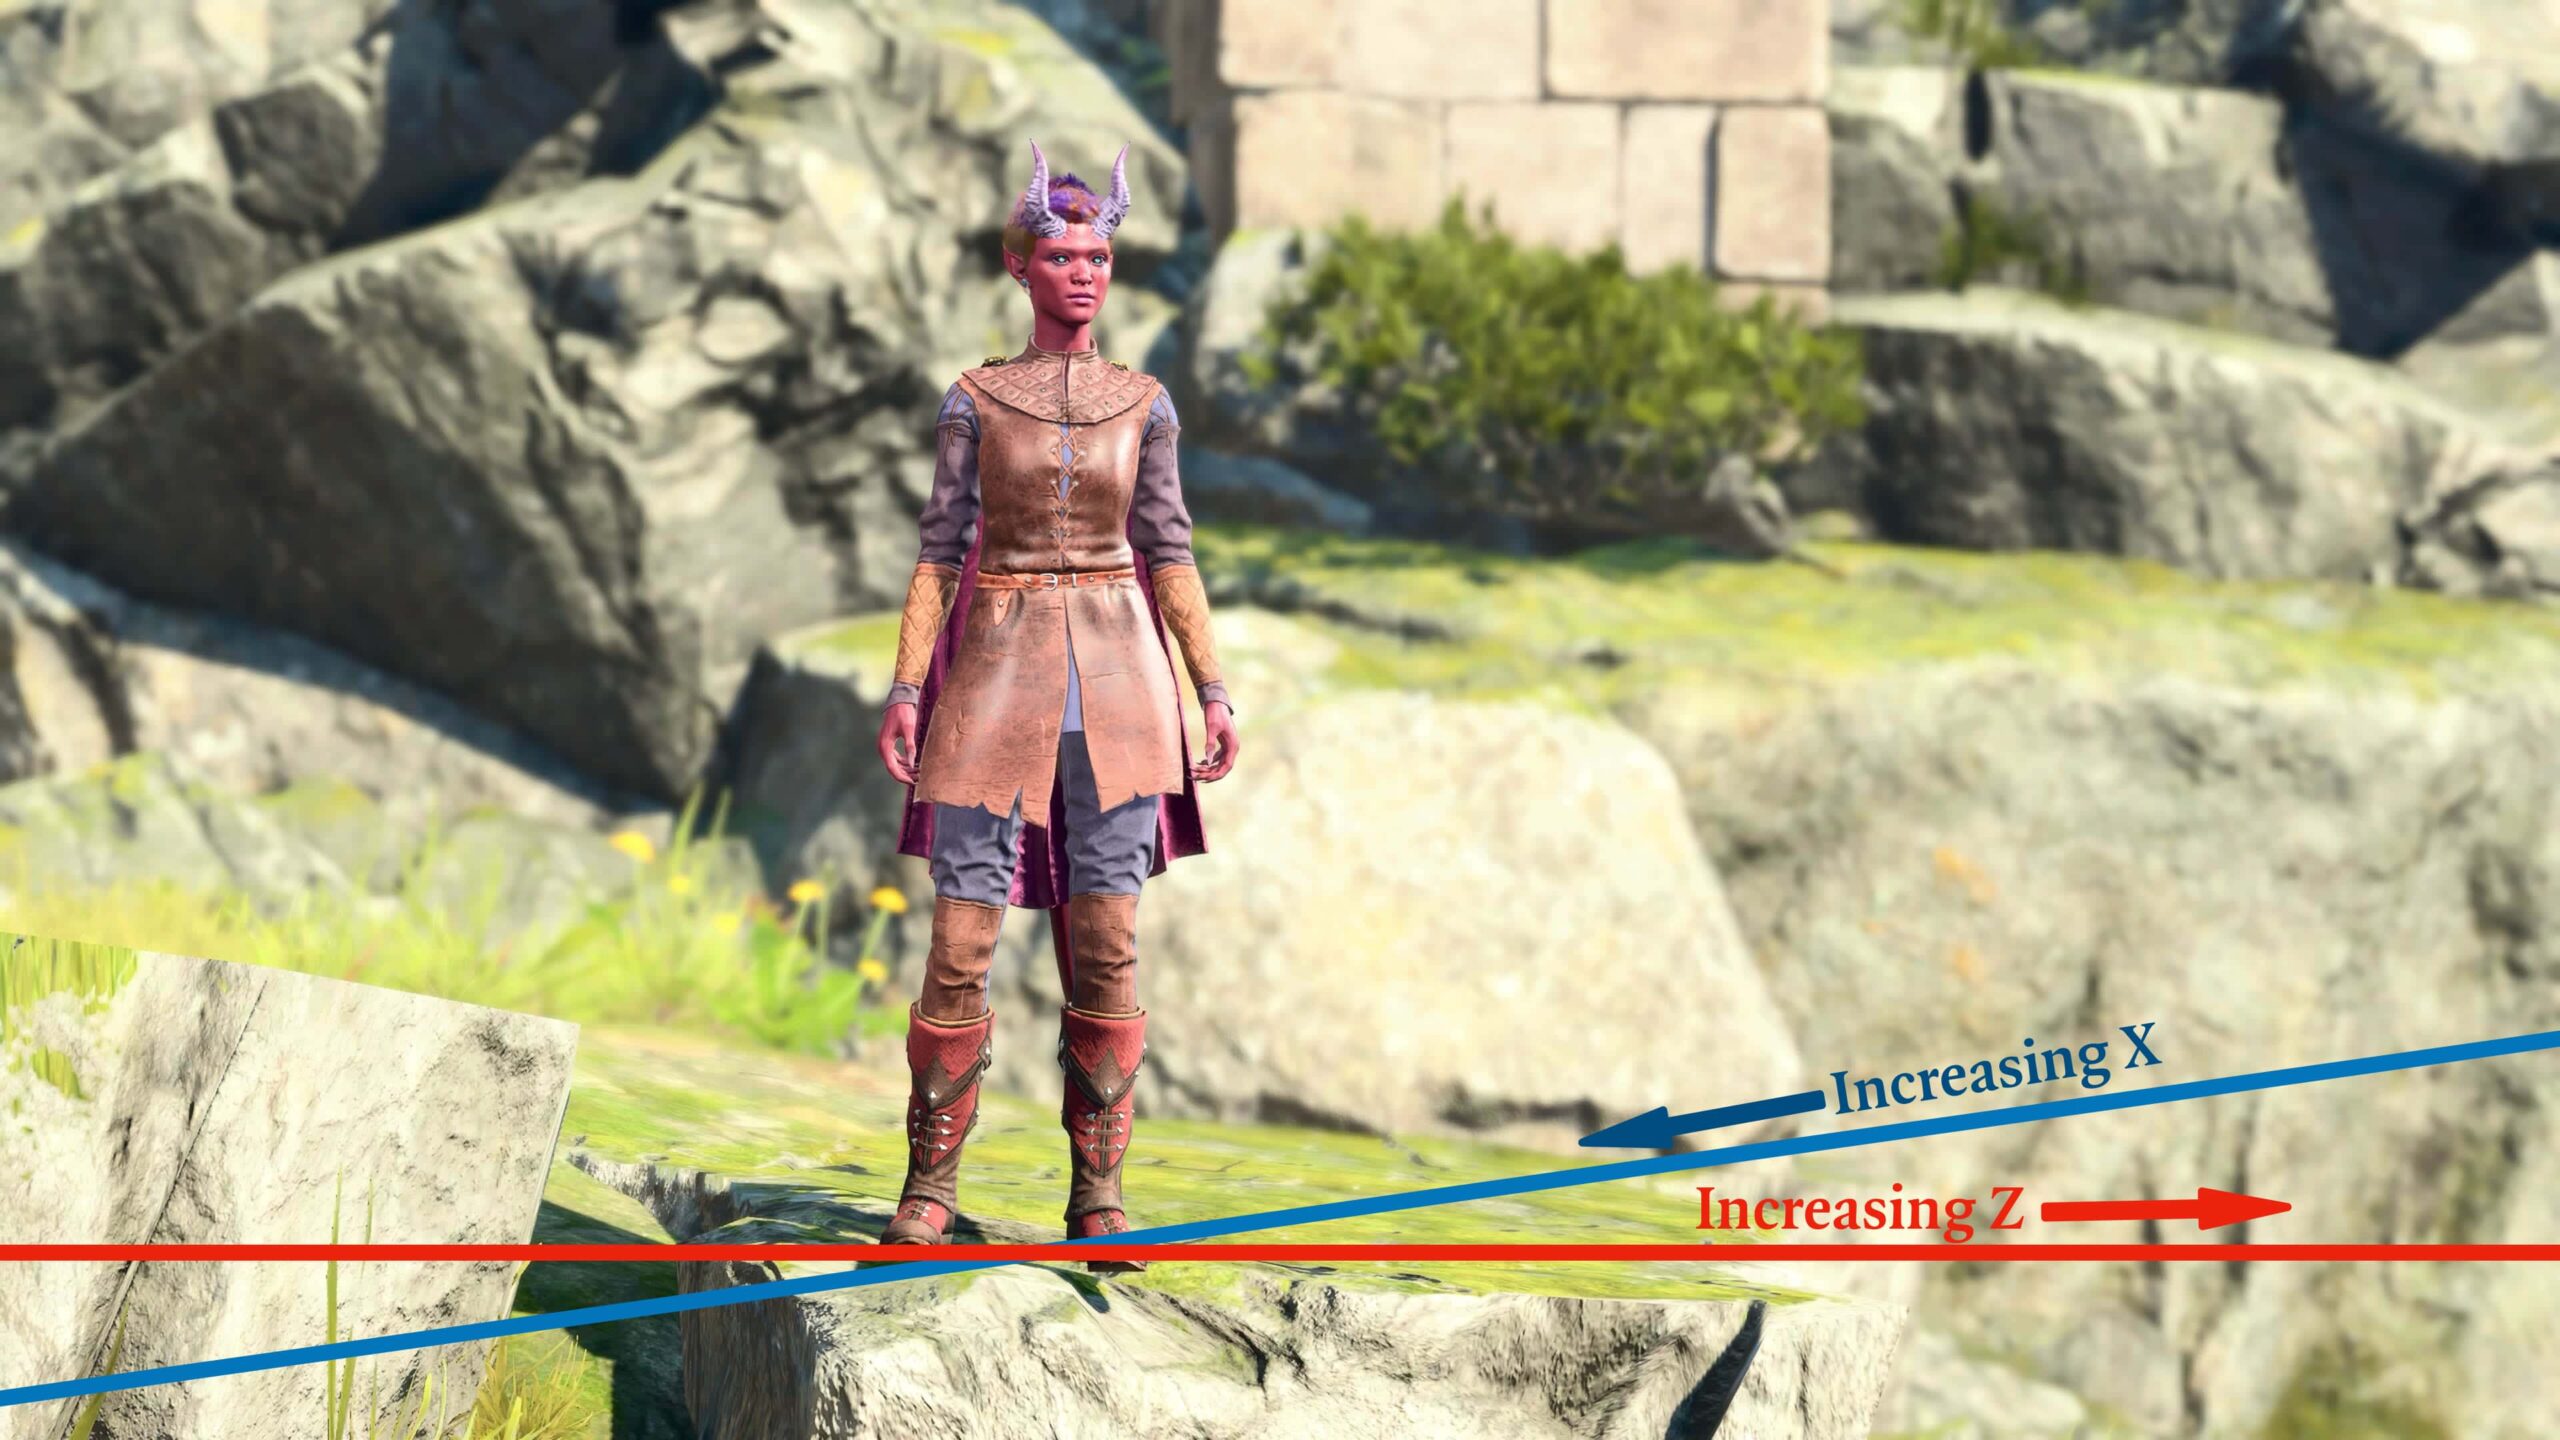
To make the above image, I moved the model around in X and Z Placement, marked how her position changed, and connected the movements. The angles and directions may seem funky; they’re the consequence of looking at the model at an angle and orientation that’s not aligned with the game’s coordinate system.
The above picture’s lines only work for that particular camera angle, and for that particular location within the game. Move anything around, and those lines change. Believe me, I don’t make a diagram like this for every picture I take!

The practical result is that, when I’m moving the models, I fiddle with the Placements and watch what changes. Typically I move the model in X, then in Z, then X, then Z… The model zig-zags along the lines of the coordinate system until I get it where I want it.
If I were better at math, perhaps I could predict the effects from first principles, but I’m not that good at translating coordinate systems. I shove the models around until I get the results I want.
Angles
Since I’m a physicist, no discussion of coordinates is complete without mentioning angles and rotation.
Camera tilt
Camera tilt is applied to an entire image. Here’s an example.

A camera tilt is also called a Dutch angle. It can be used to emphasize emotion in a scene. Let’s start with the technical adjustment:
It’s not much by itself. But move the camera a bit, give the model an angry face and a tense pose, turn the Depth of Field up high to emphasize the foregound:
I rarely use Dutch angles in my images. I don’t think my compositional skills are strong enough to judge when they’re useful and when I’d just be showing off, much like the Depth of Field with Tav above.
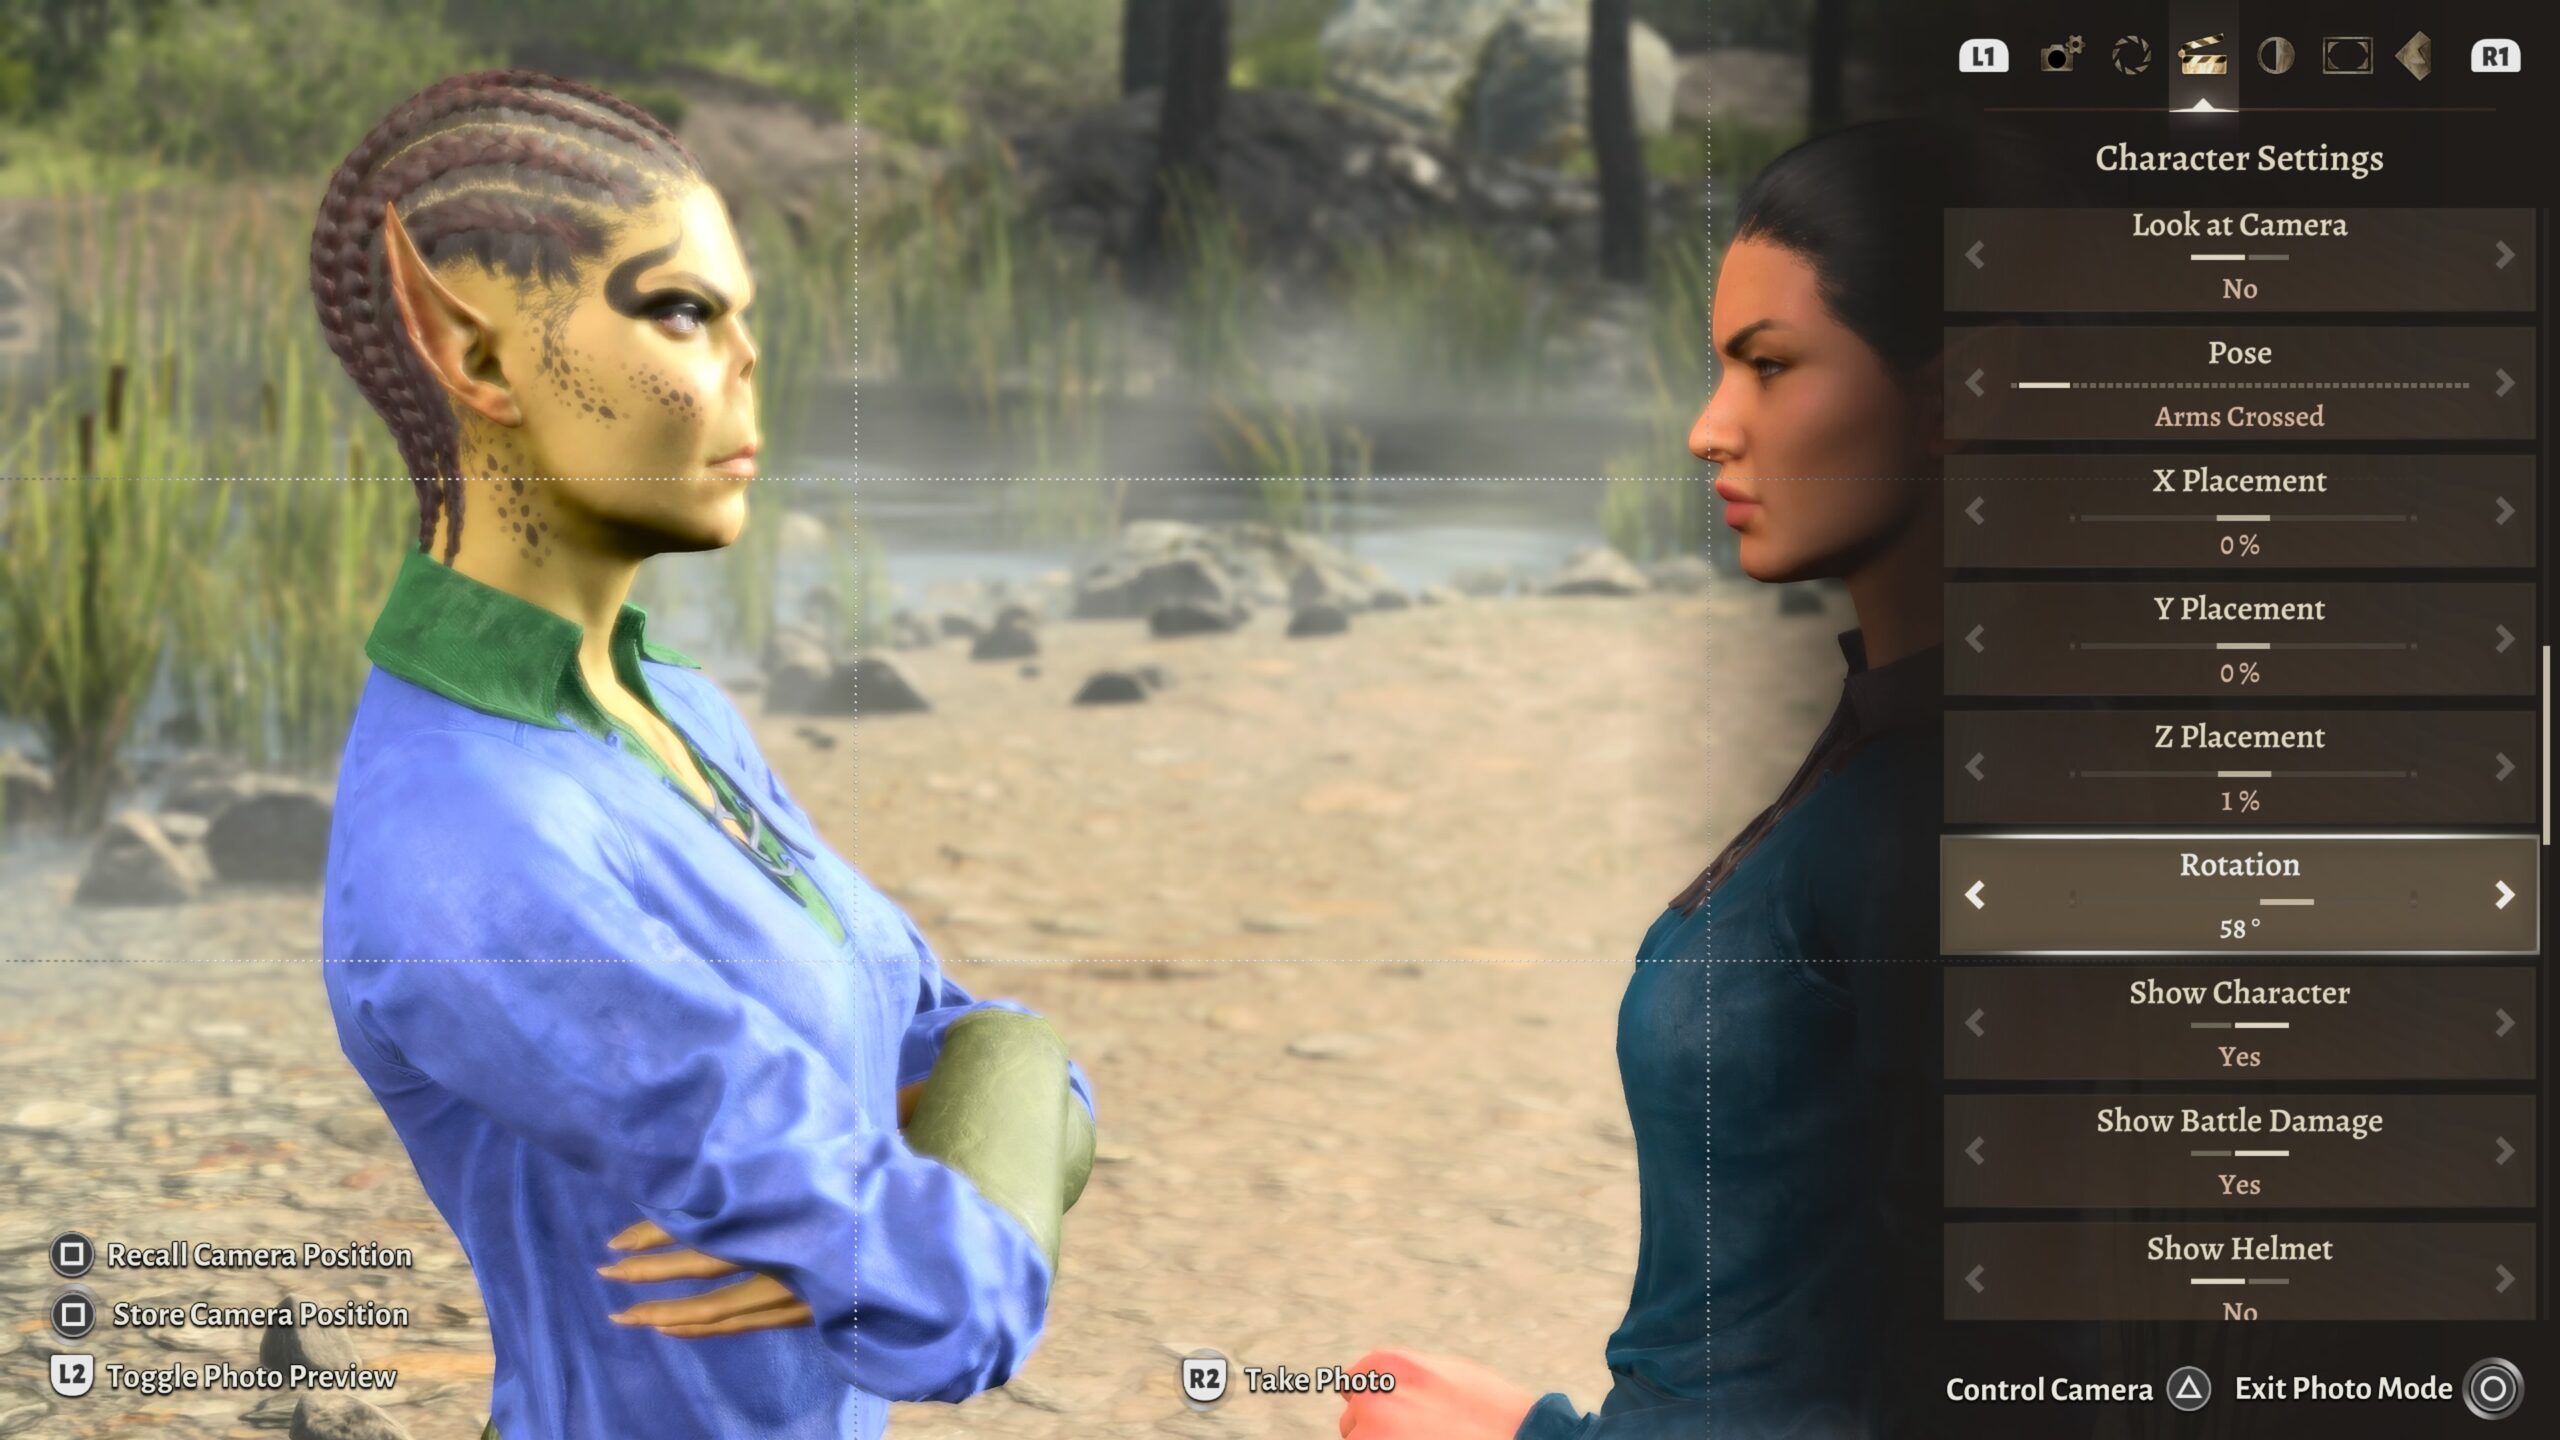
Model rotation
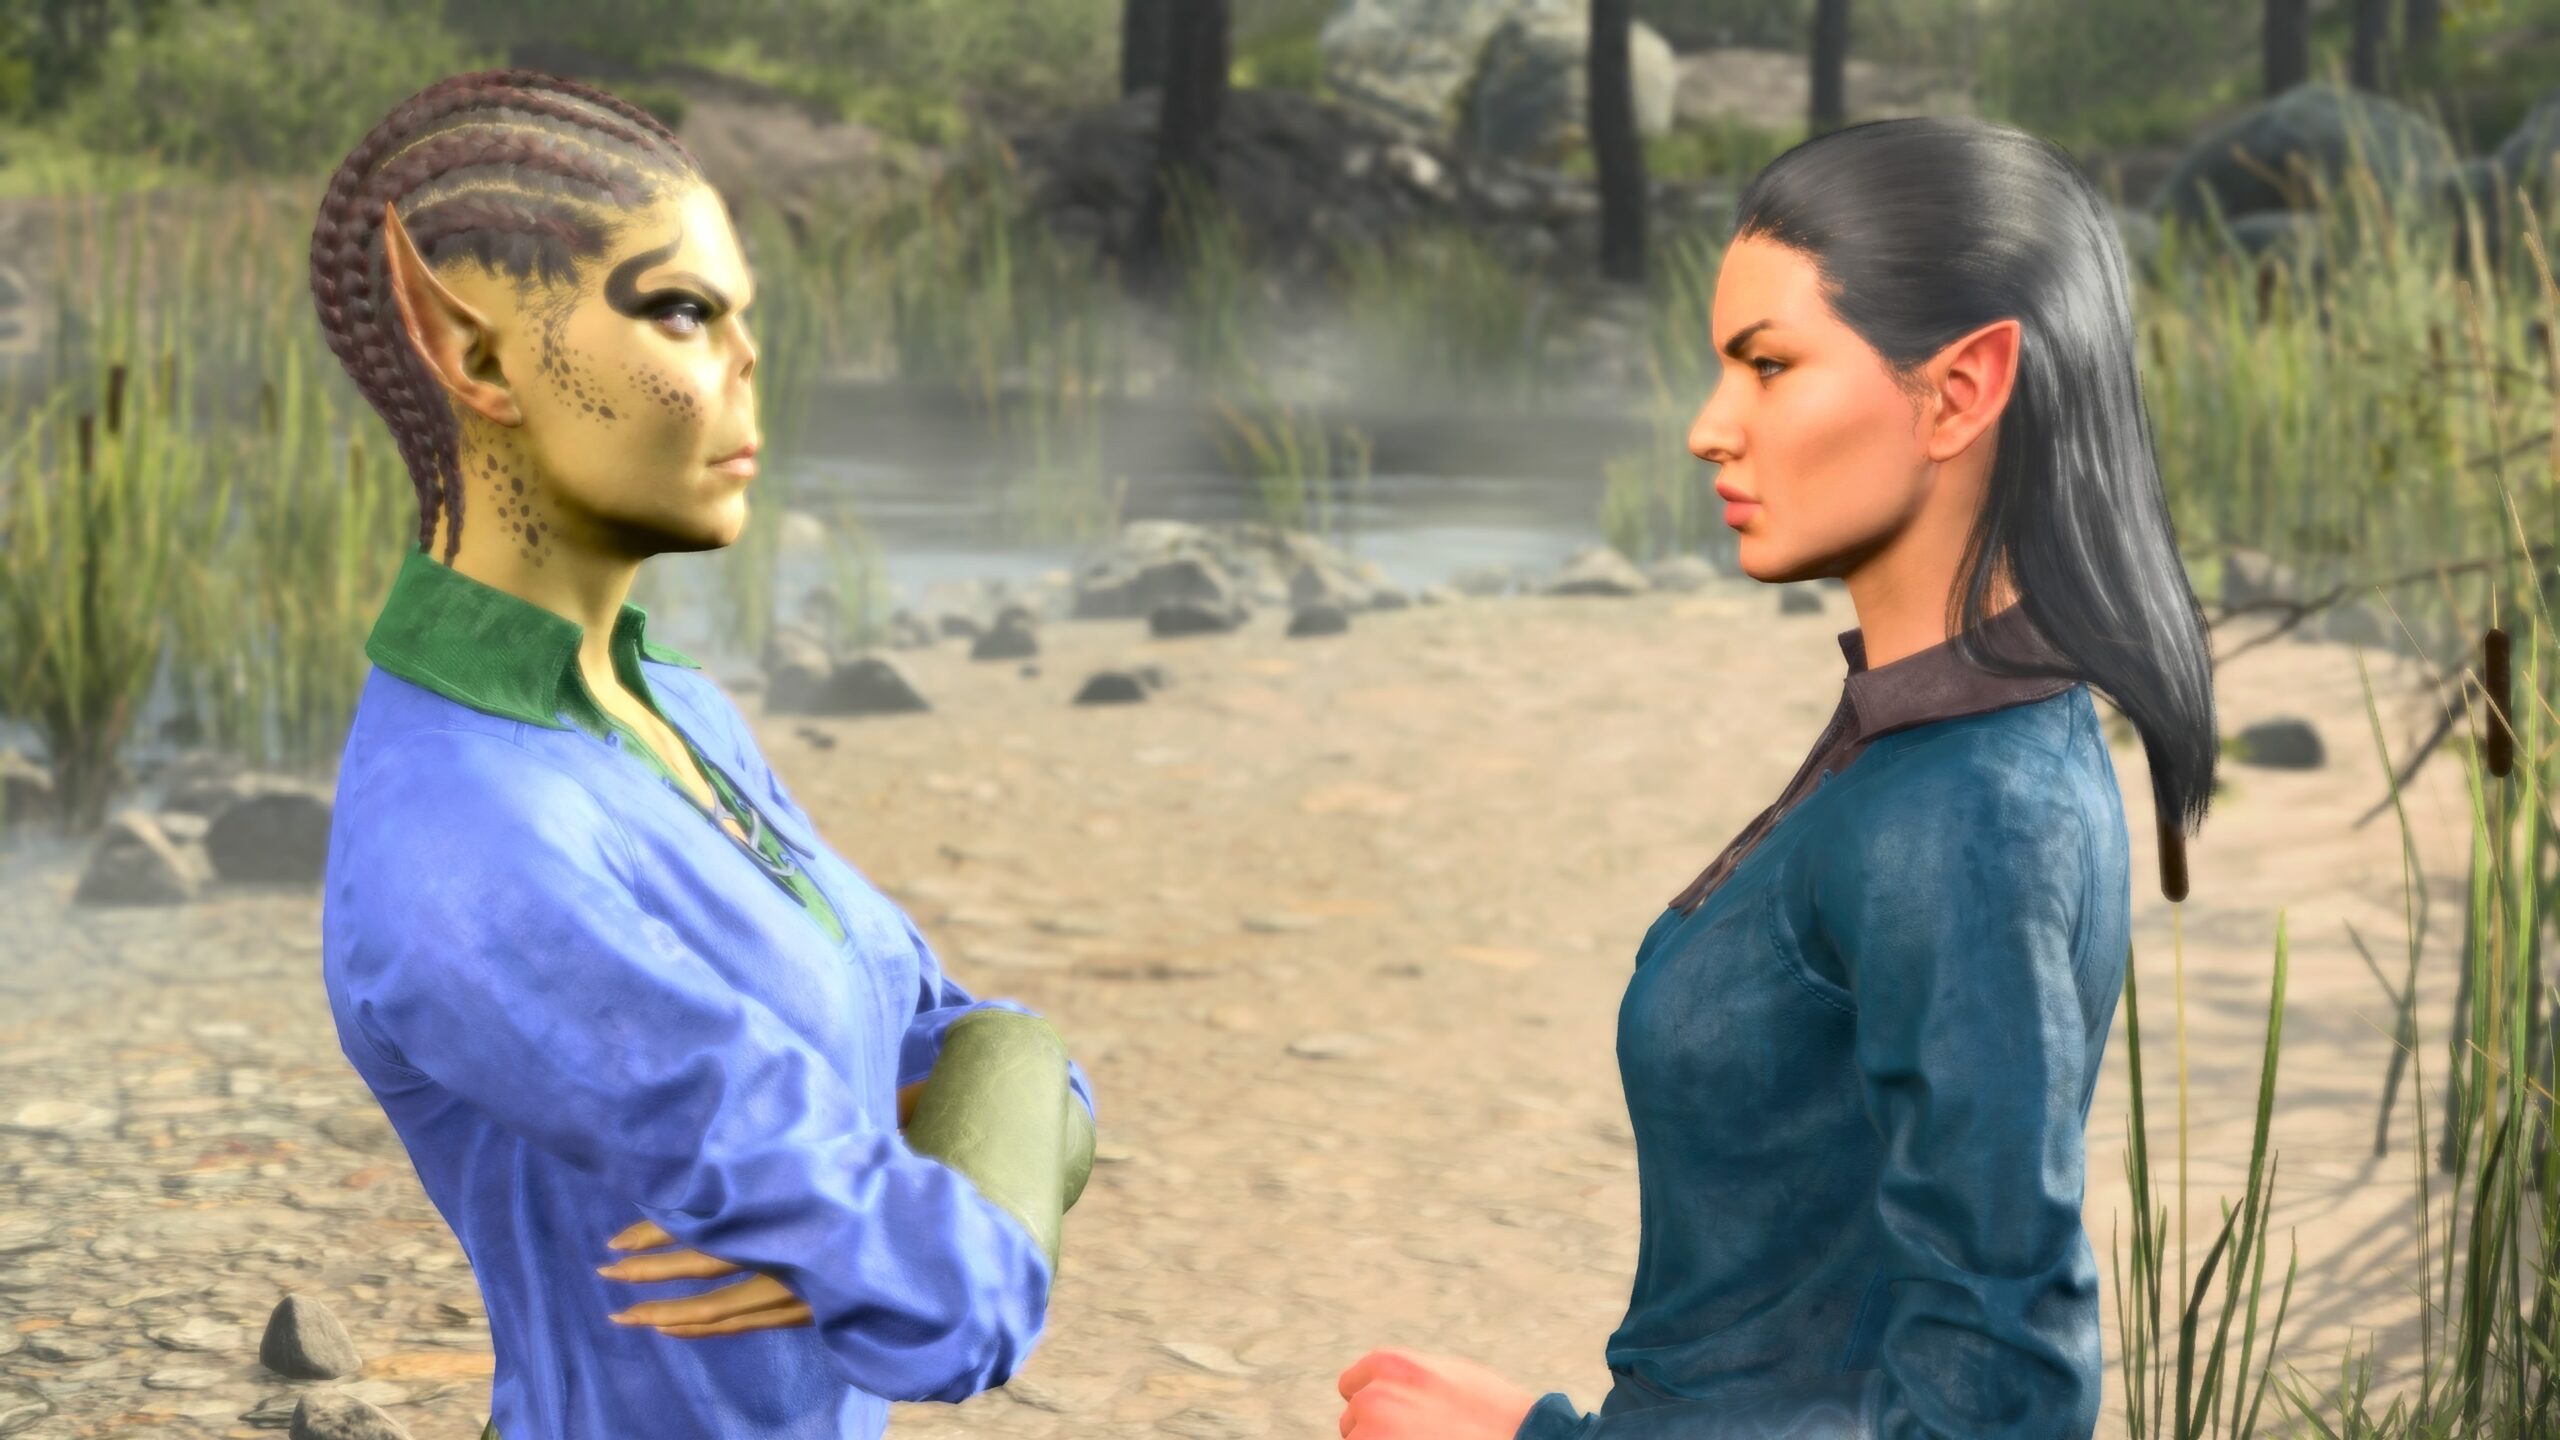
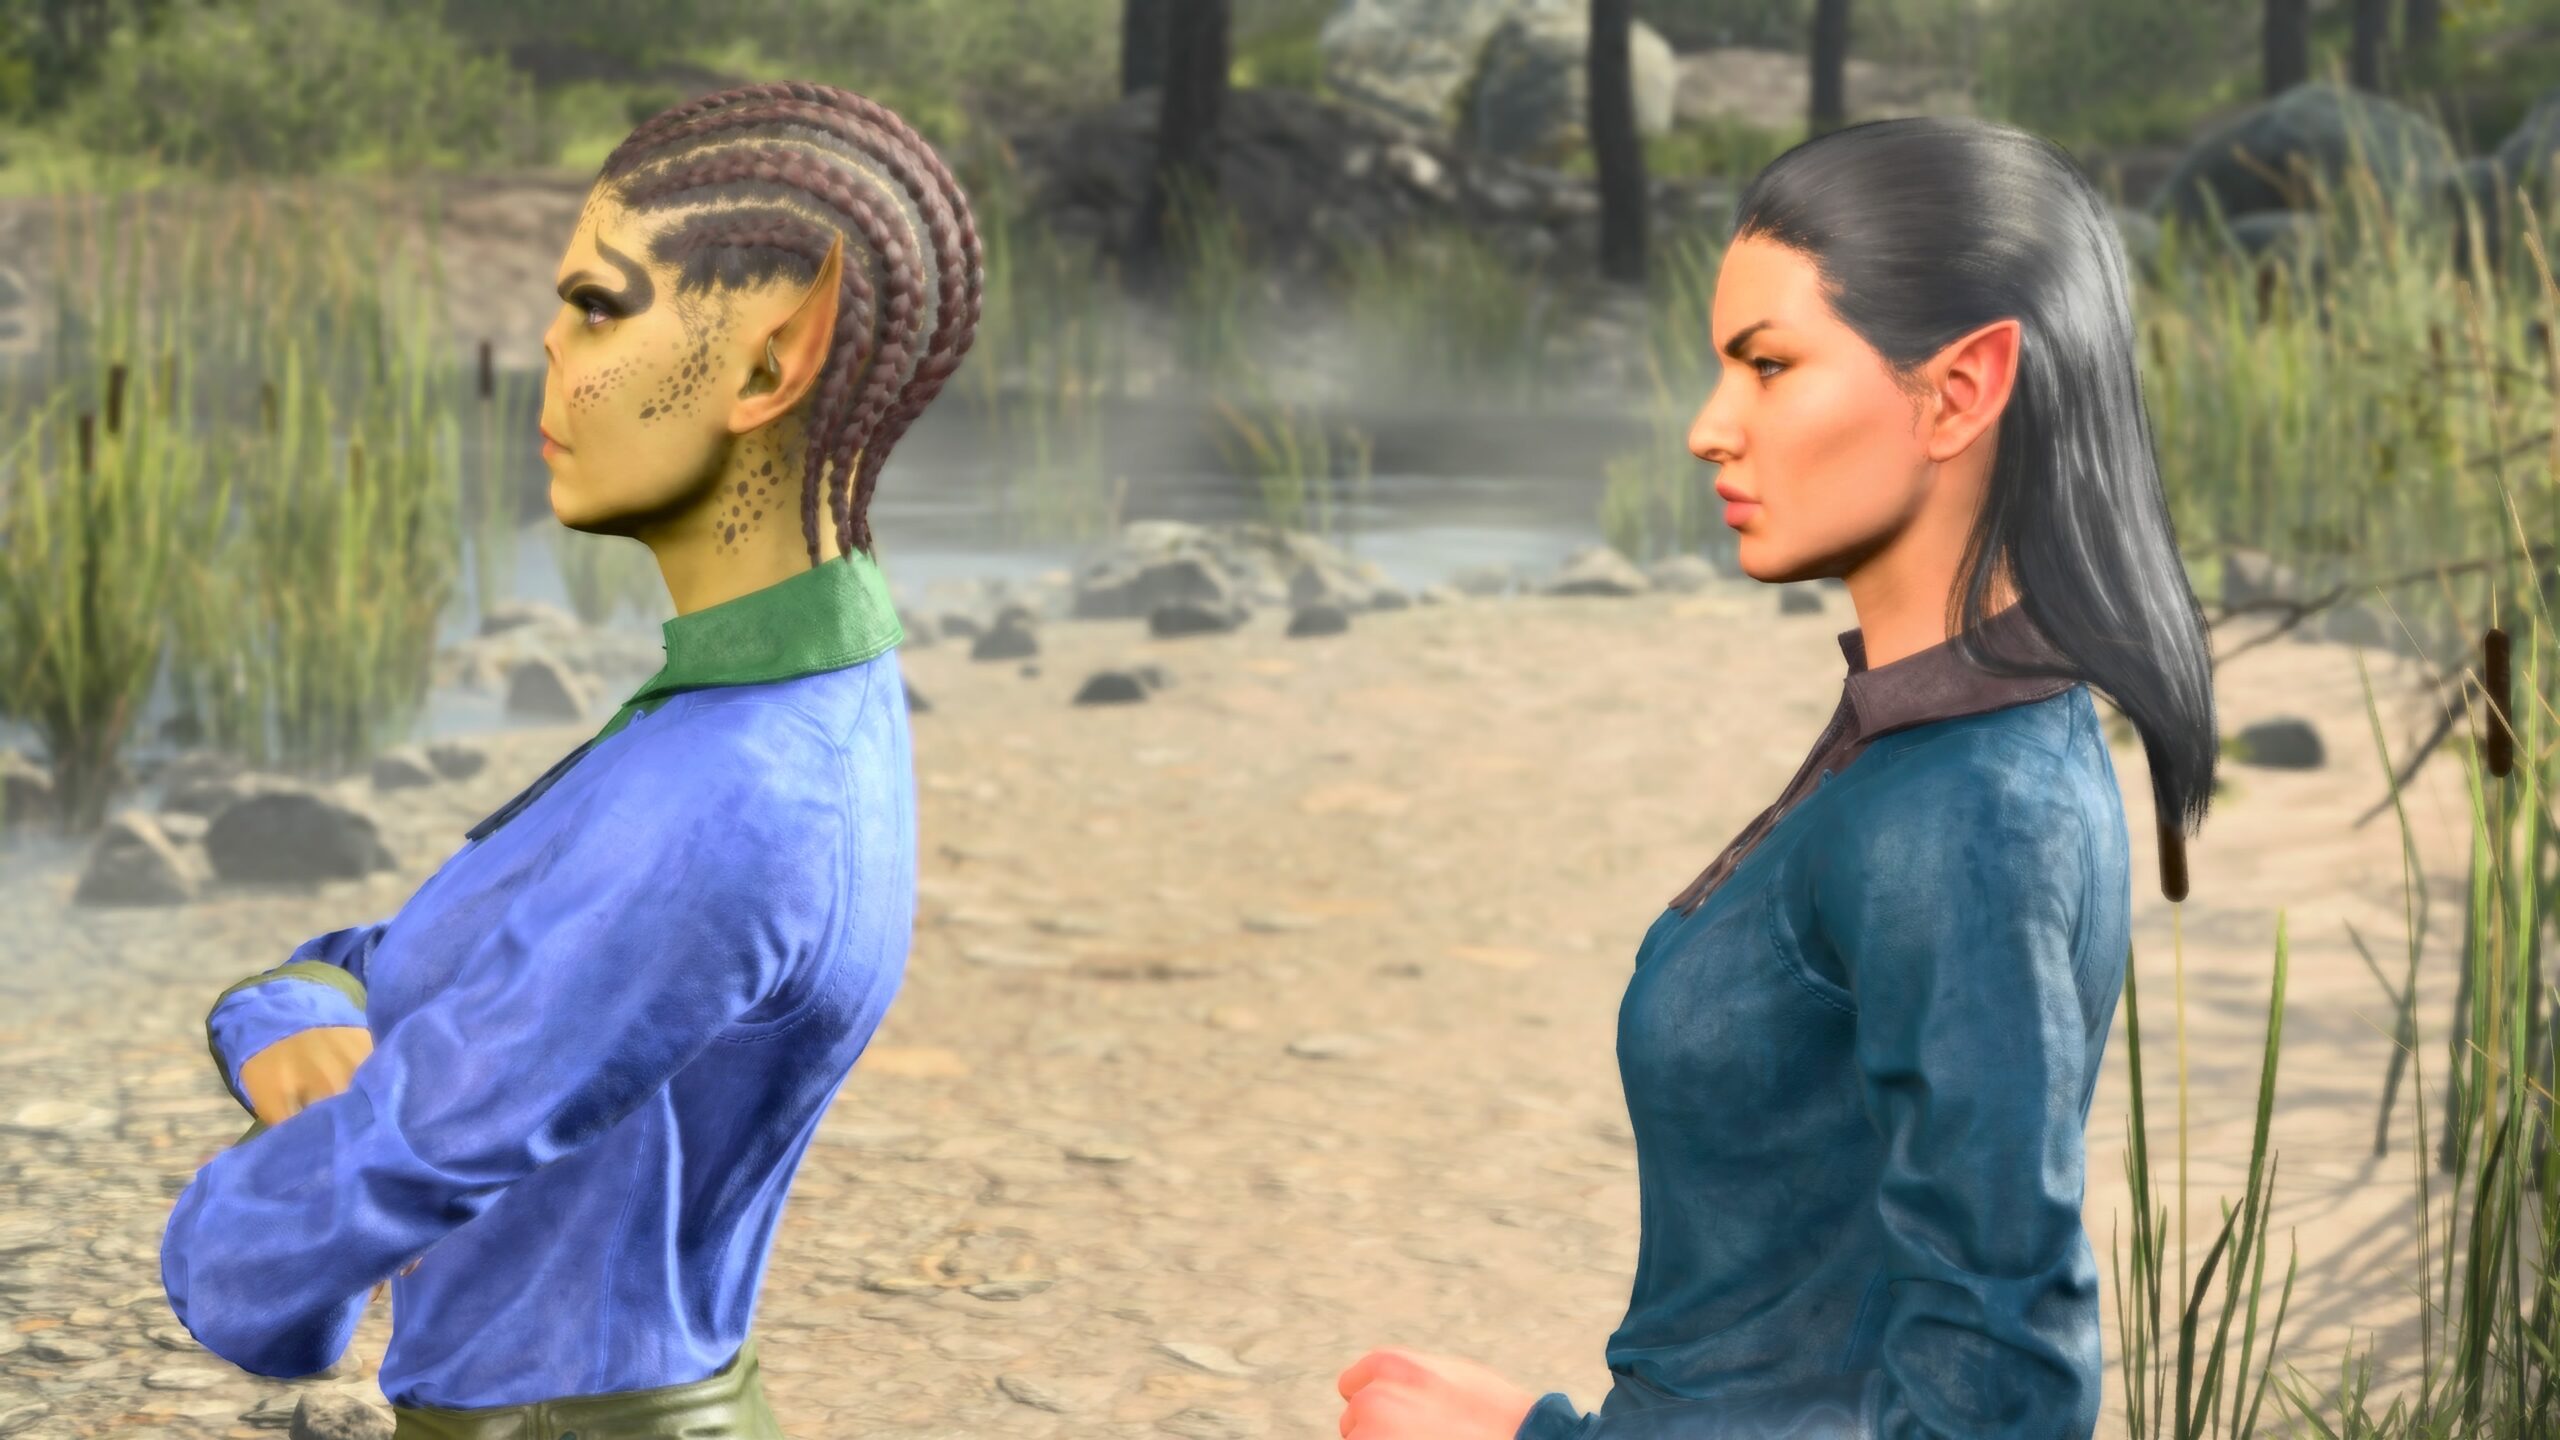
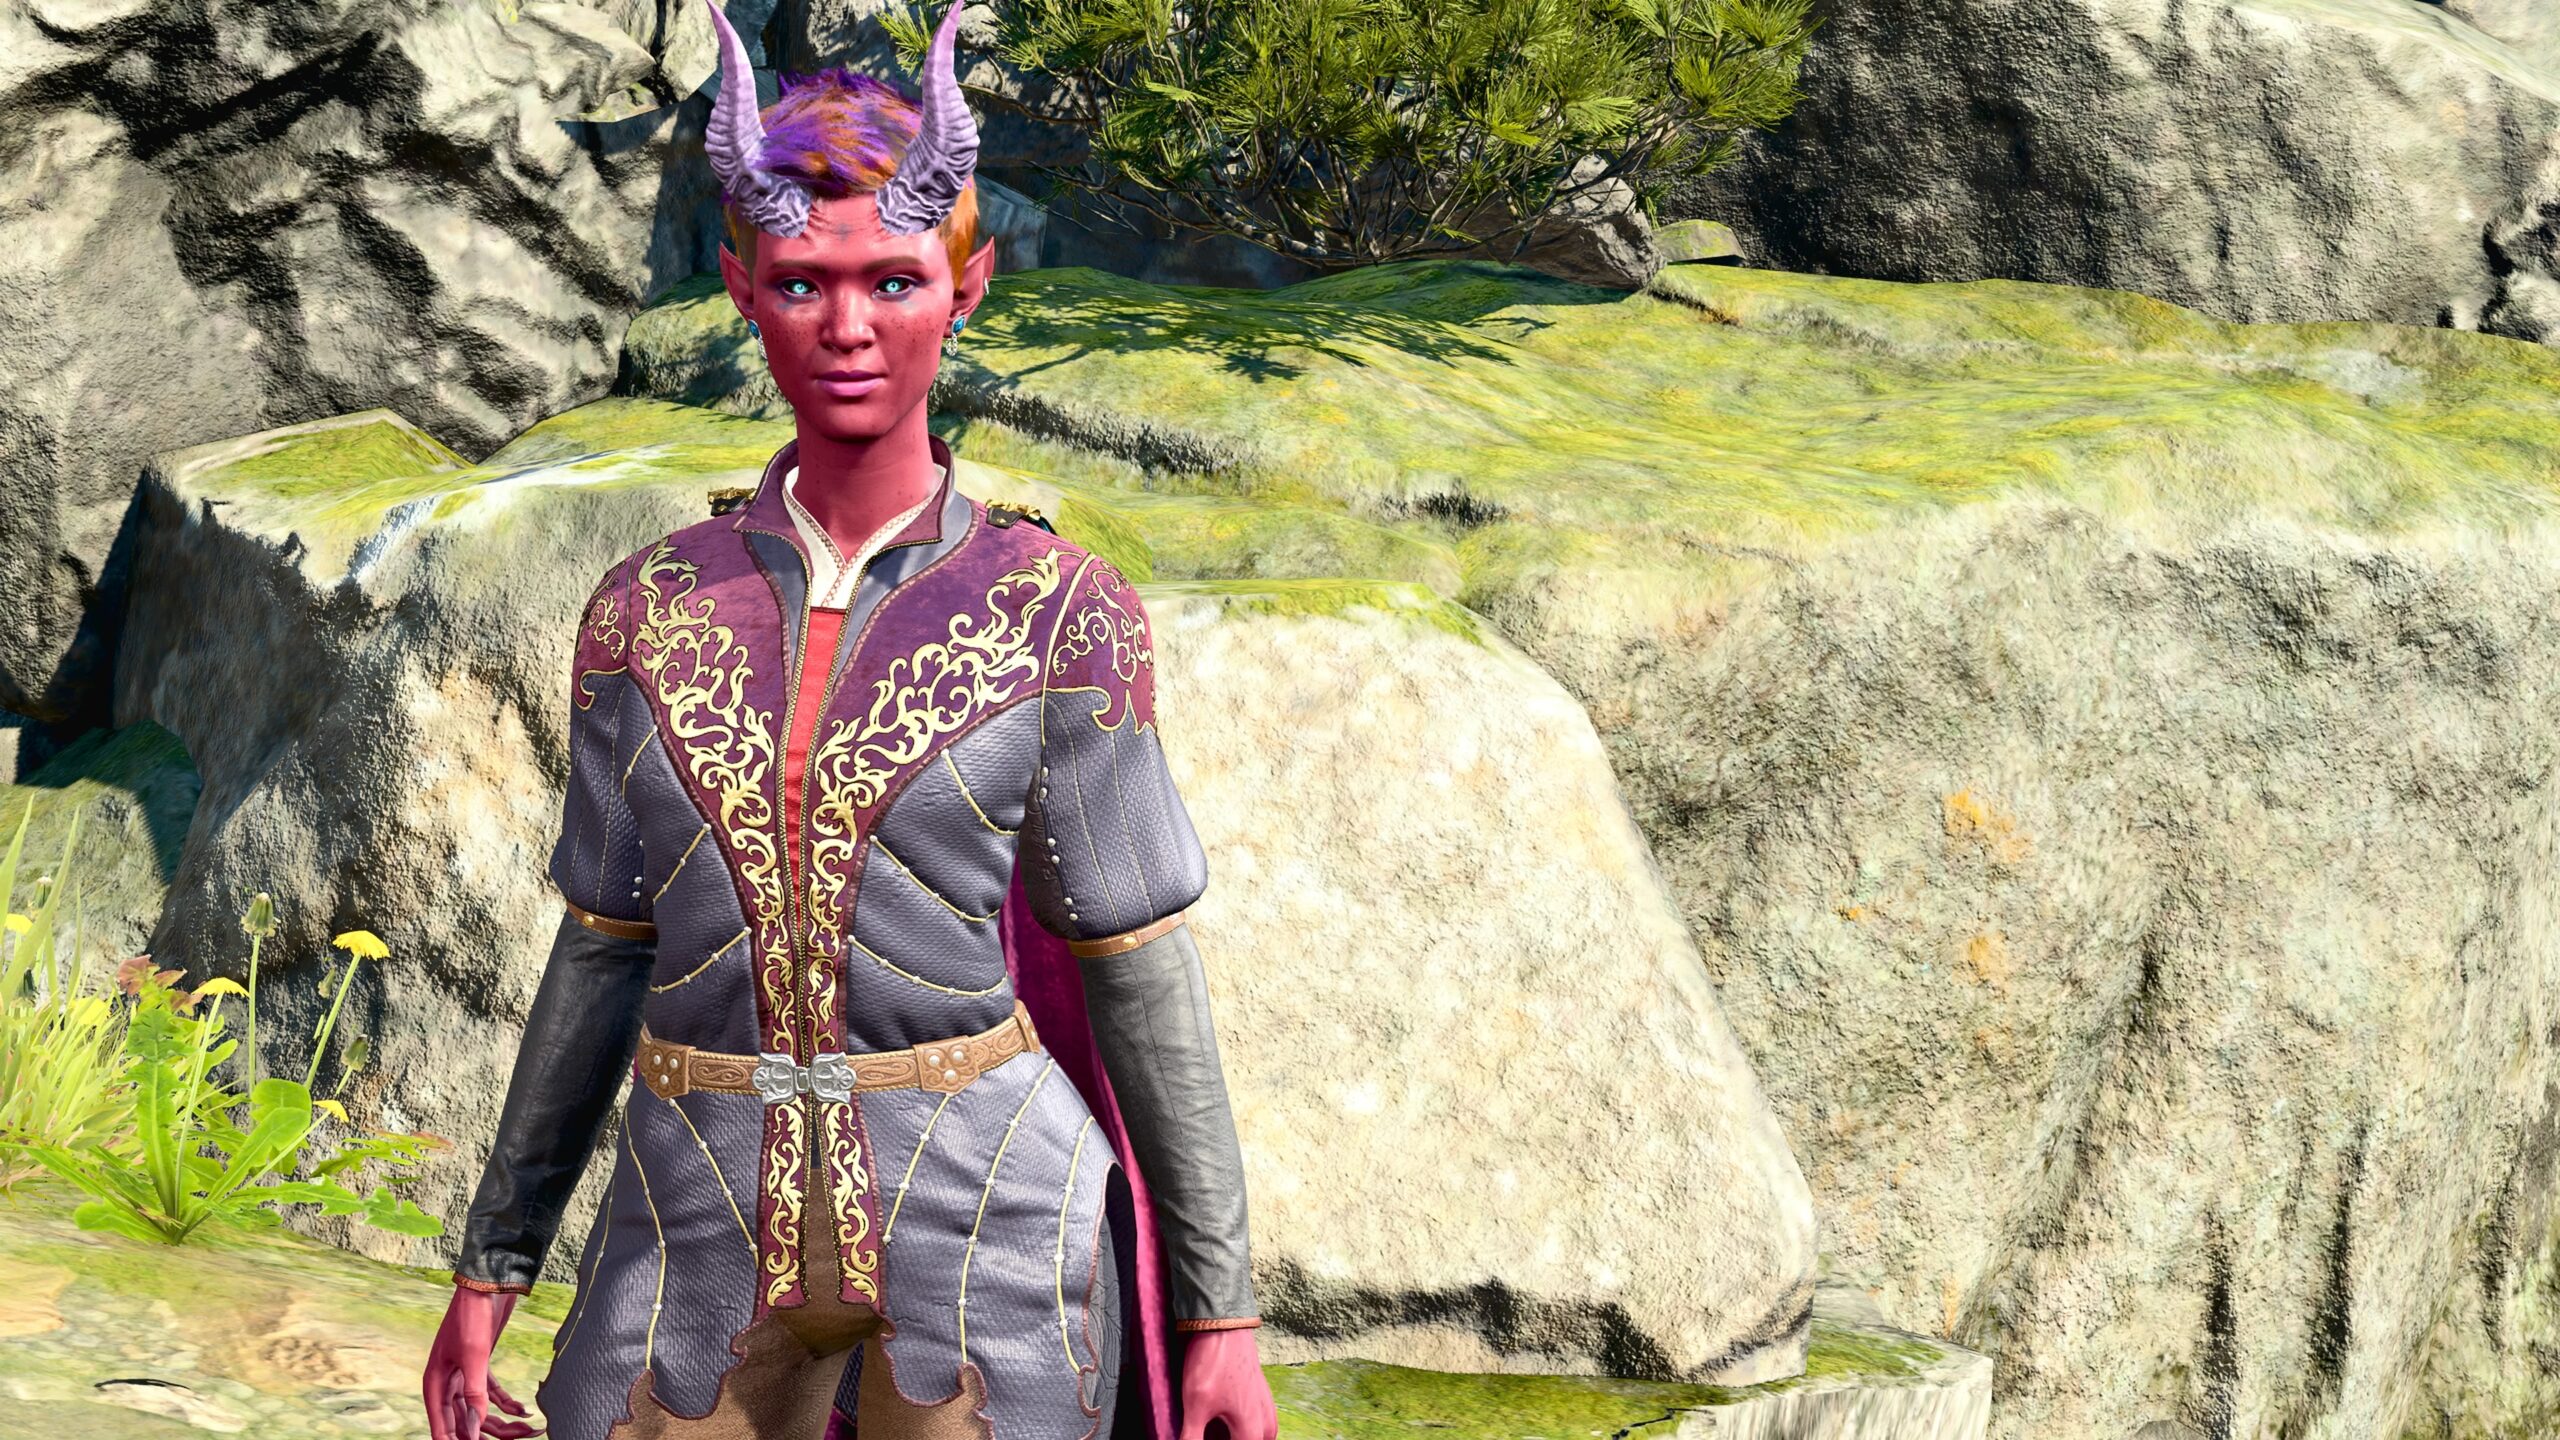
Just as models can be moved in (X,Y,Z), they can also be rotated in the X-Z plane. Here’s a quick demonstration: My intent in this shot is to show that the two characters are angry with each other.
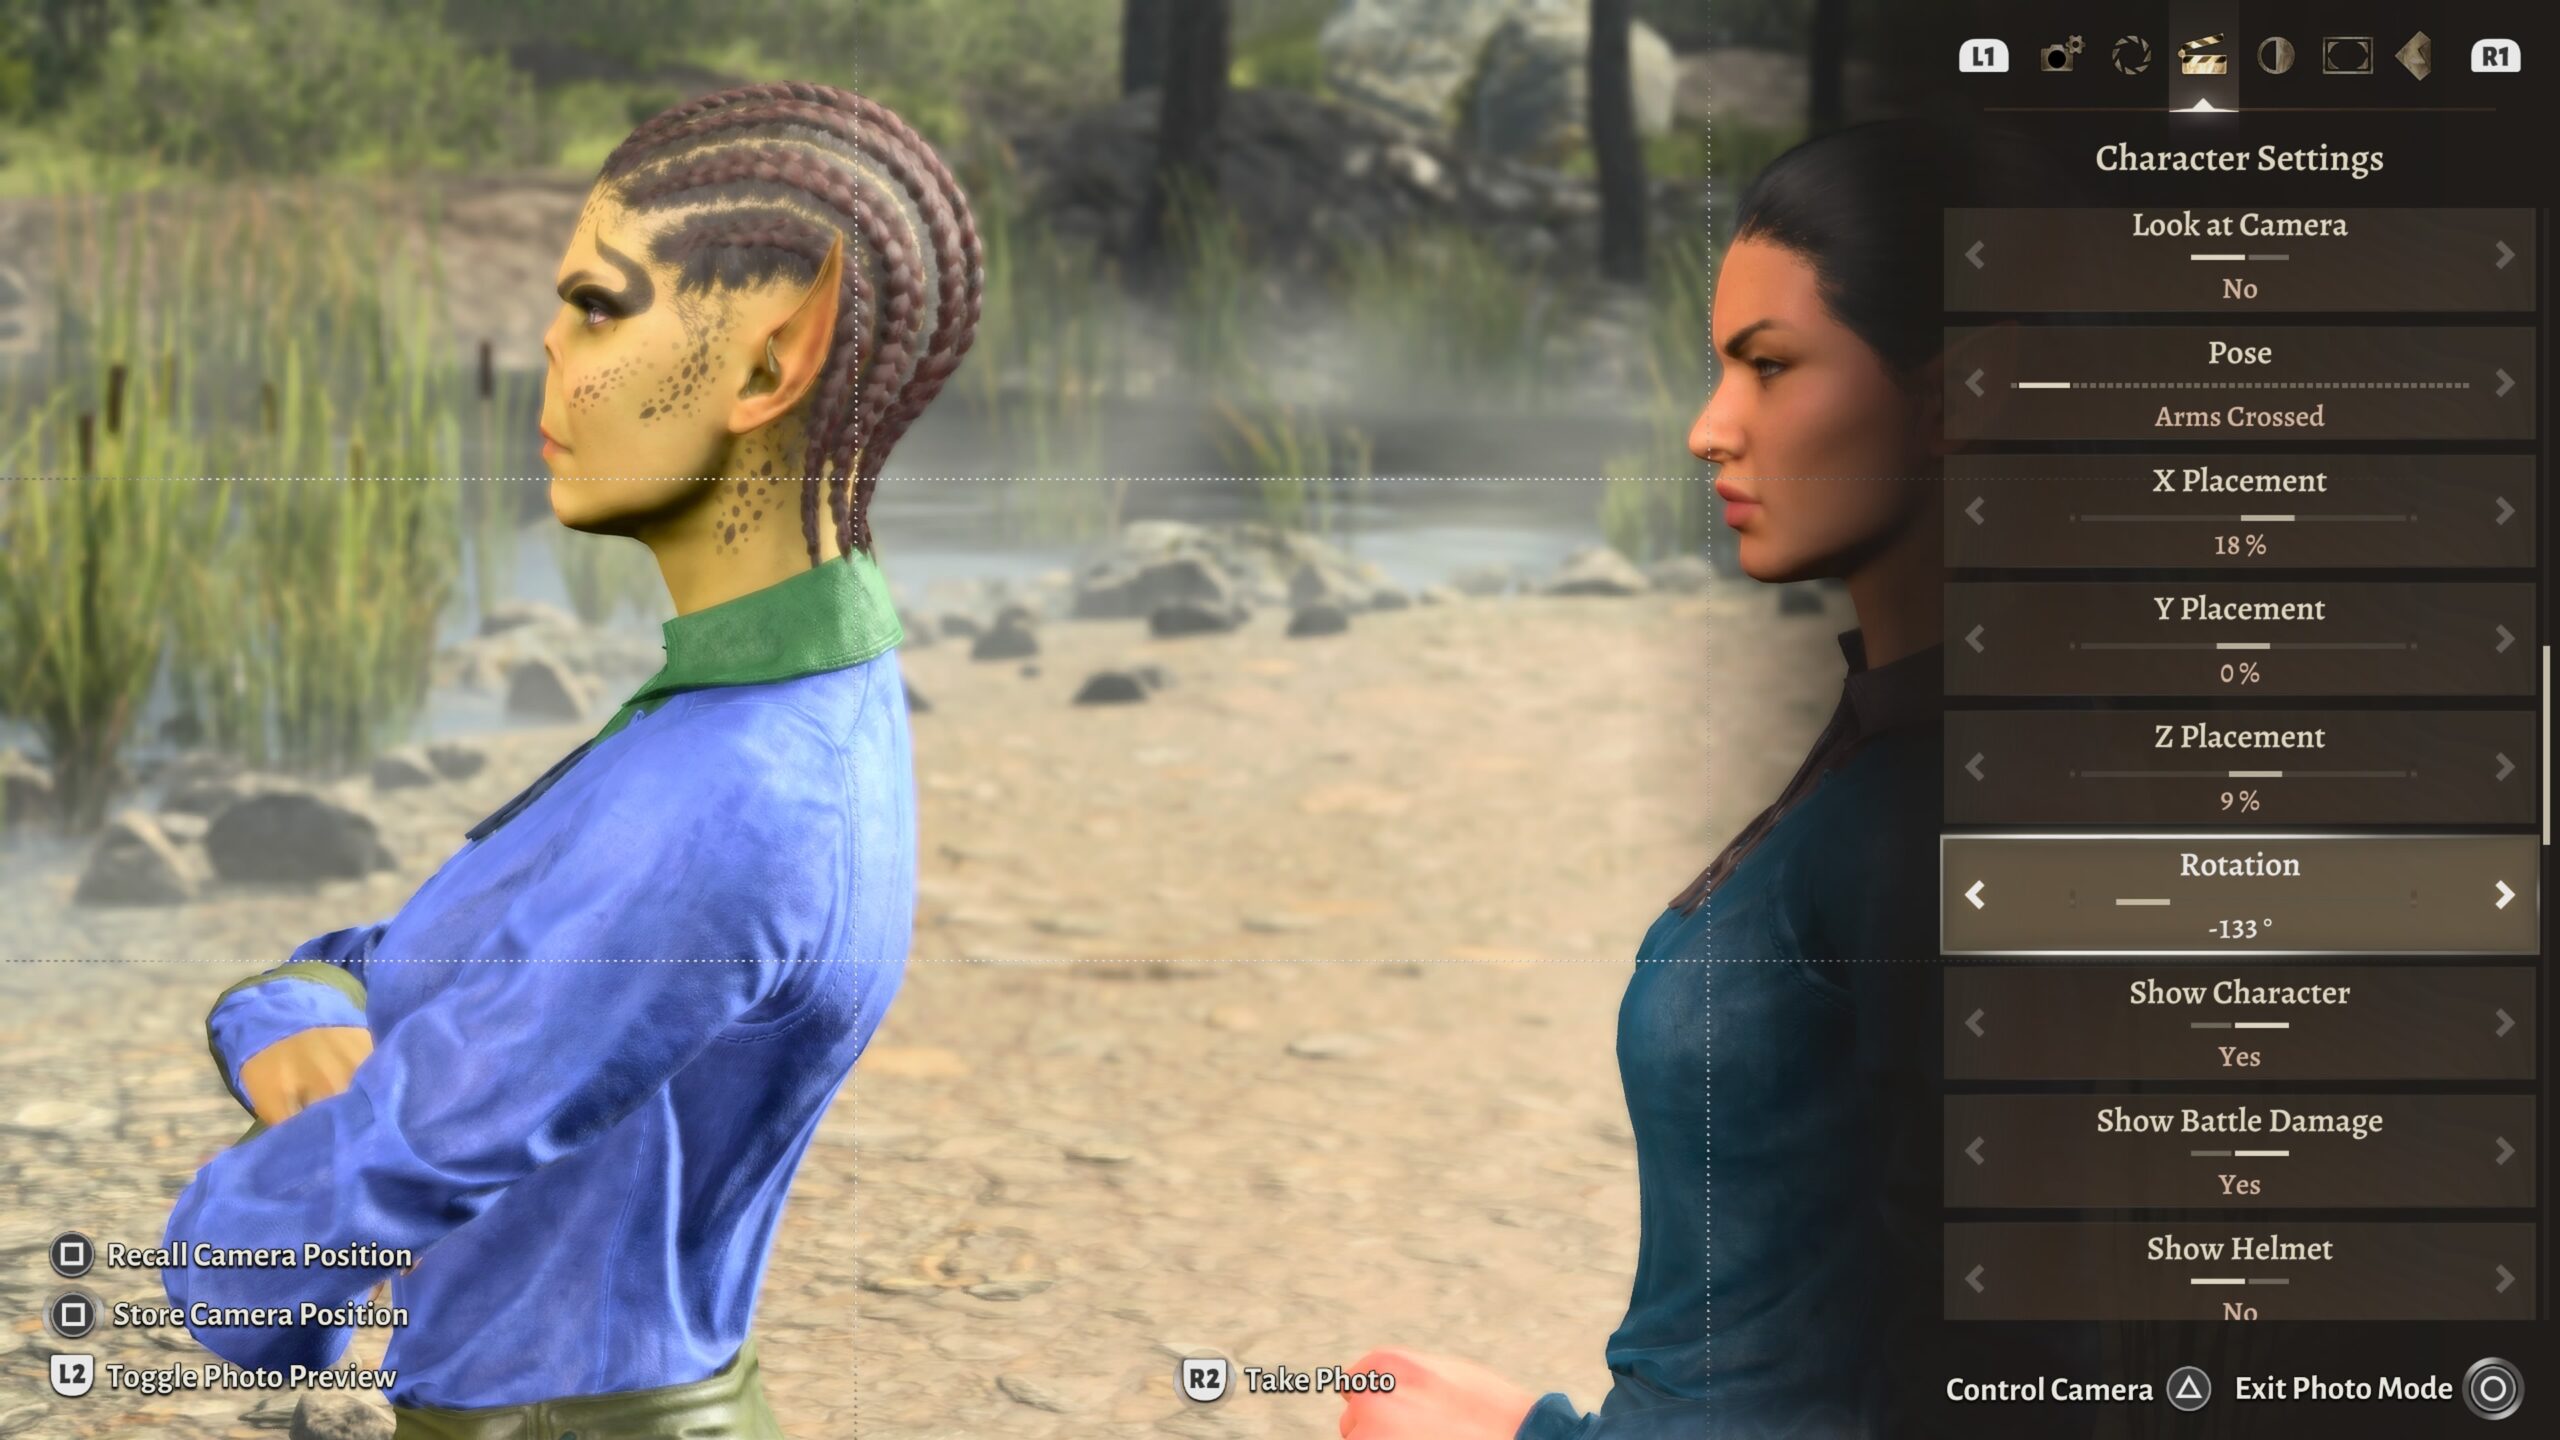
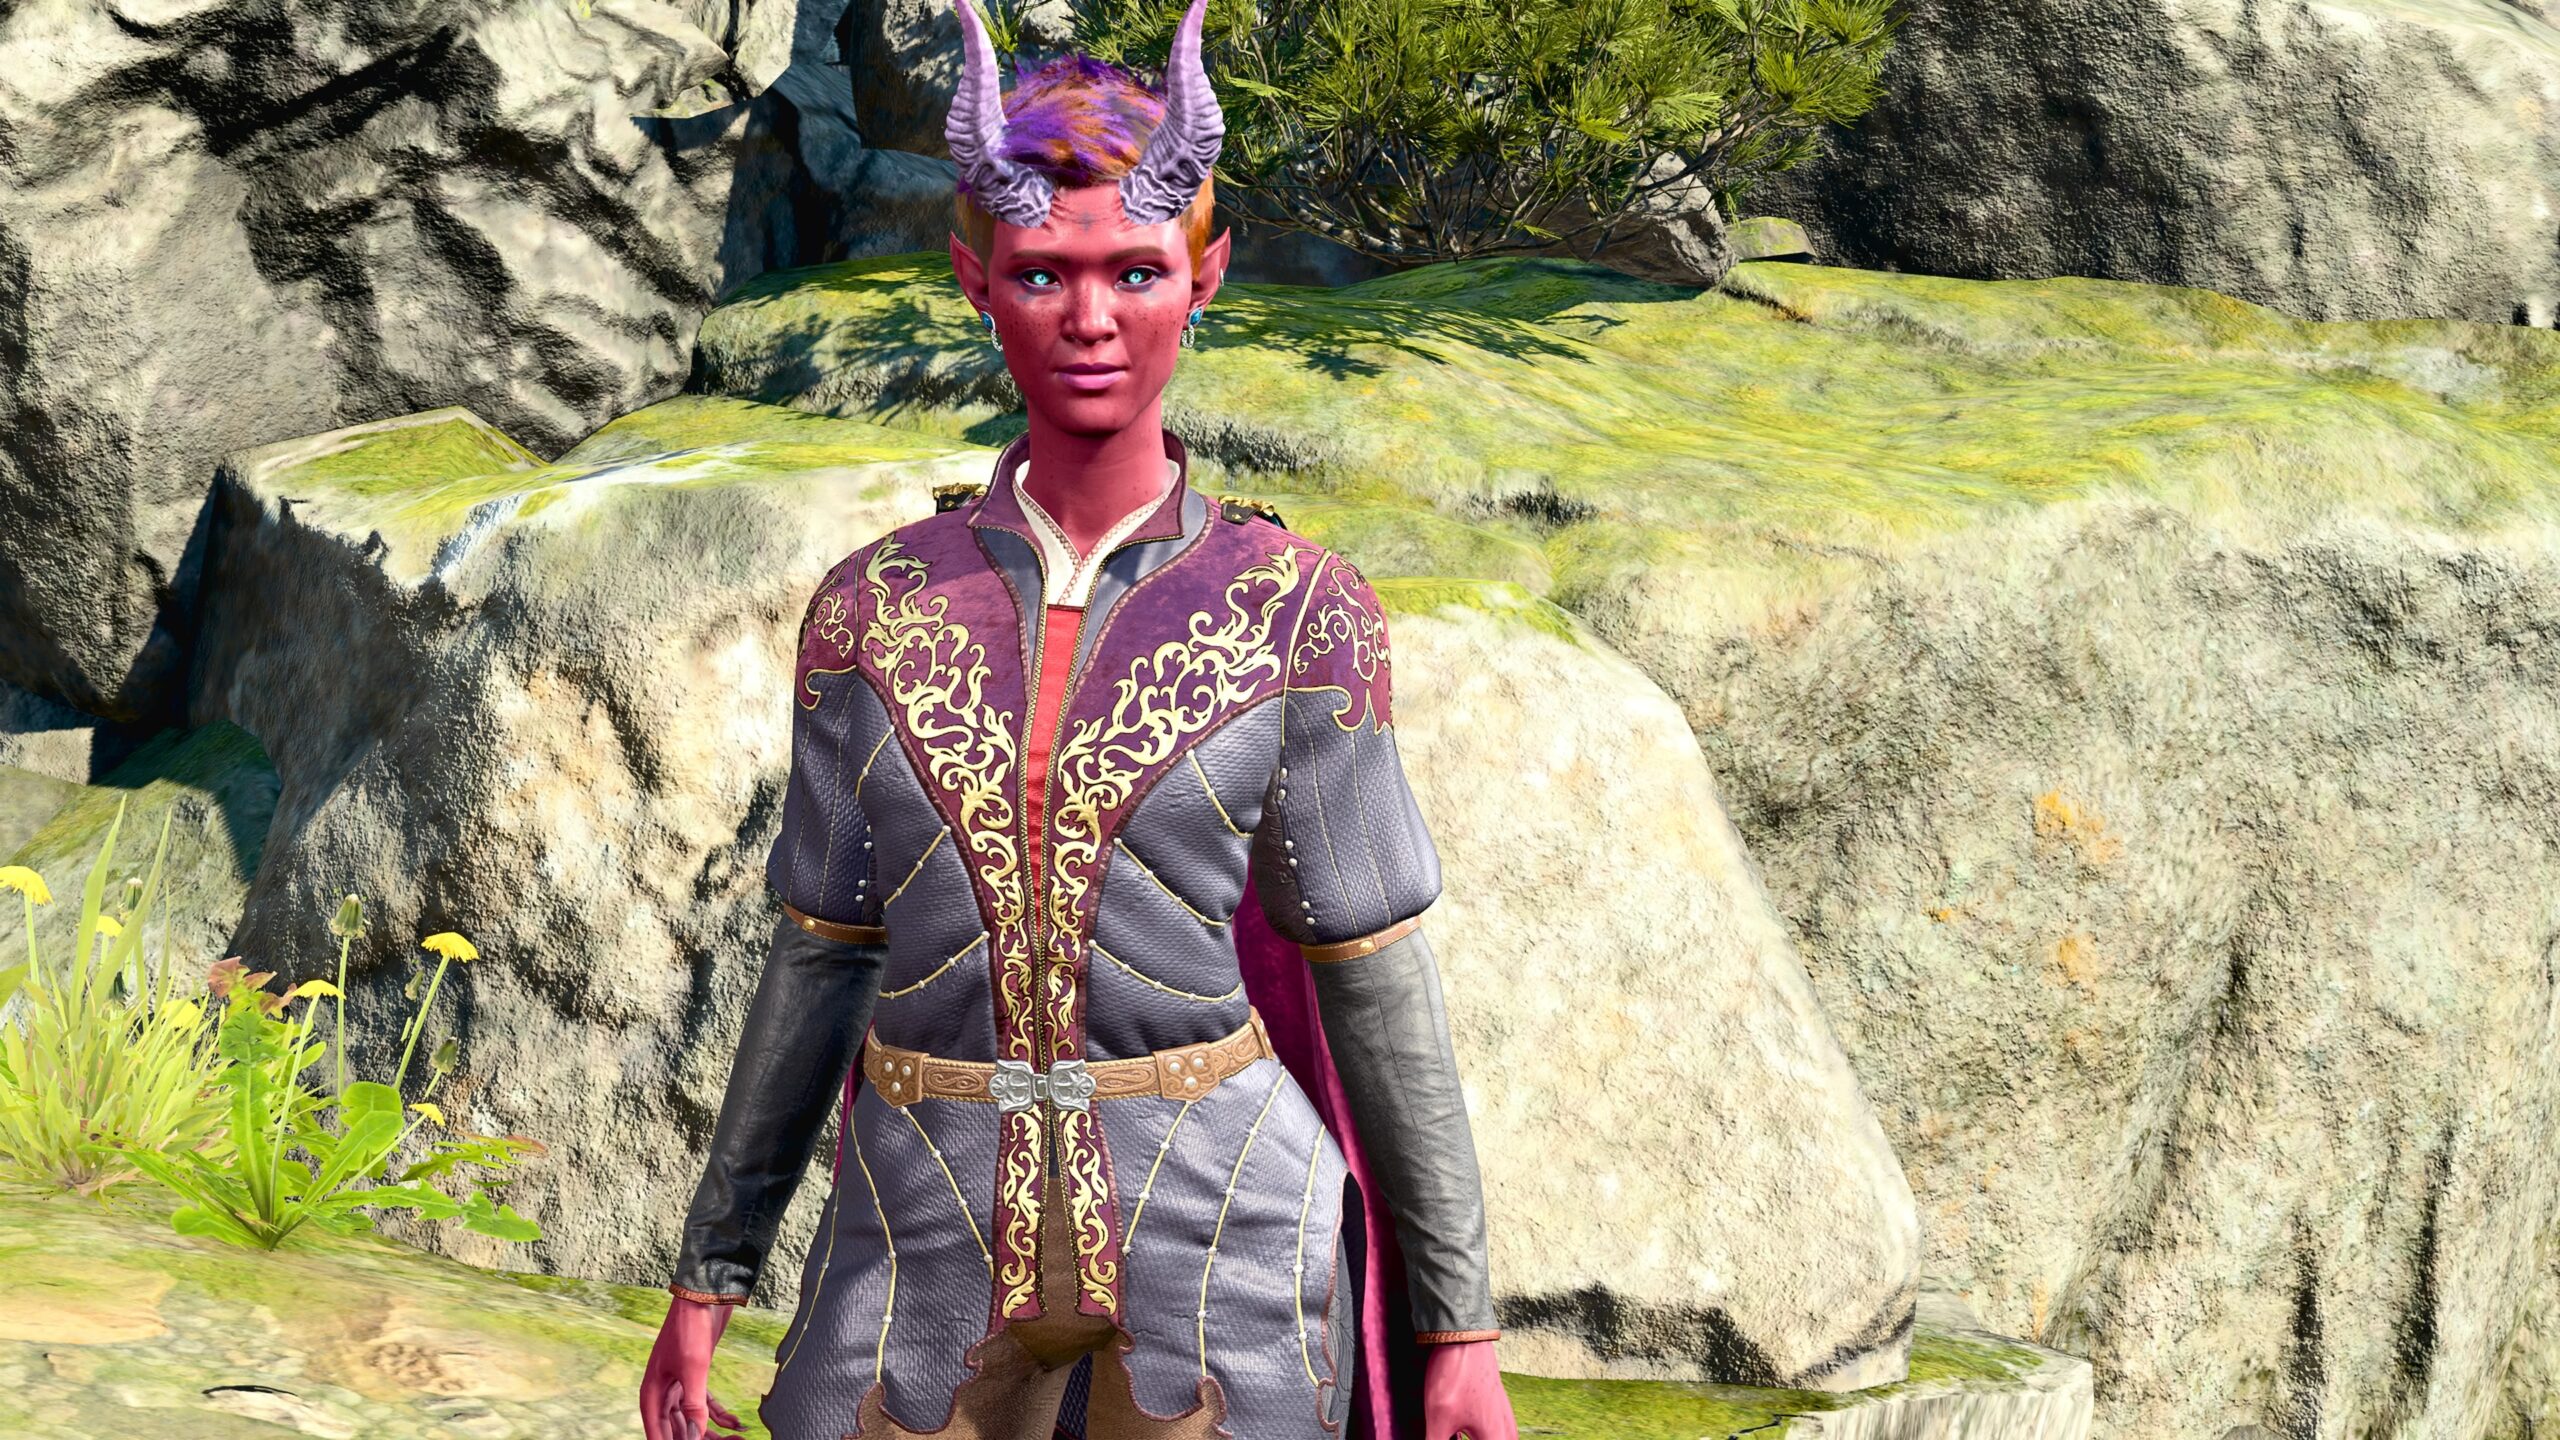
Now I want to show Karma turning her back on Wings.
Did I make my story point through those pictures? Only you can judge. My own self-judgement circuits are burned out.
In talking about tilts and rotations, I’ve introduced even more topics that belong in the next section:
Composition
I’ve explained how I use the artificial camera to take pictures. Now I’ll get into what I’m taking pictures of.
Staging
Essentially I’m putting digital dolls into pre-existing dioramas and taking pictures of them. The game offers a number of locations in which one may freely position characters.
The following is an overhead view of one of the game’s camps. I like this particular camp as a backdrop for my characters’ conversations. However, it can be hard to position the models at a camp. Outside of Photo Mode, any character you don’t actively control walks back to their default position.
Here’s an example of that limitation. This an image from a photoshoot for my playthrough 18 fanfic. The three characters on the right are confronting the one on the left. Since I picked the same camp site as the one shown in the previous photo, I can’t change the Character Placement too far from where the right-side characters (all Hirelings) normally stand.

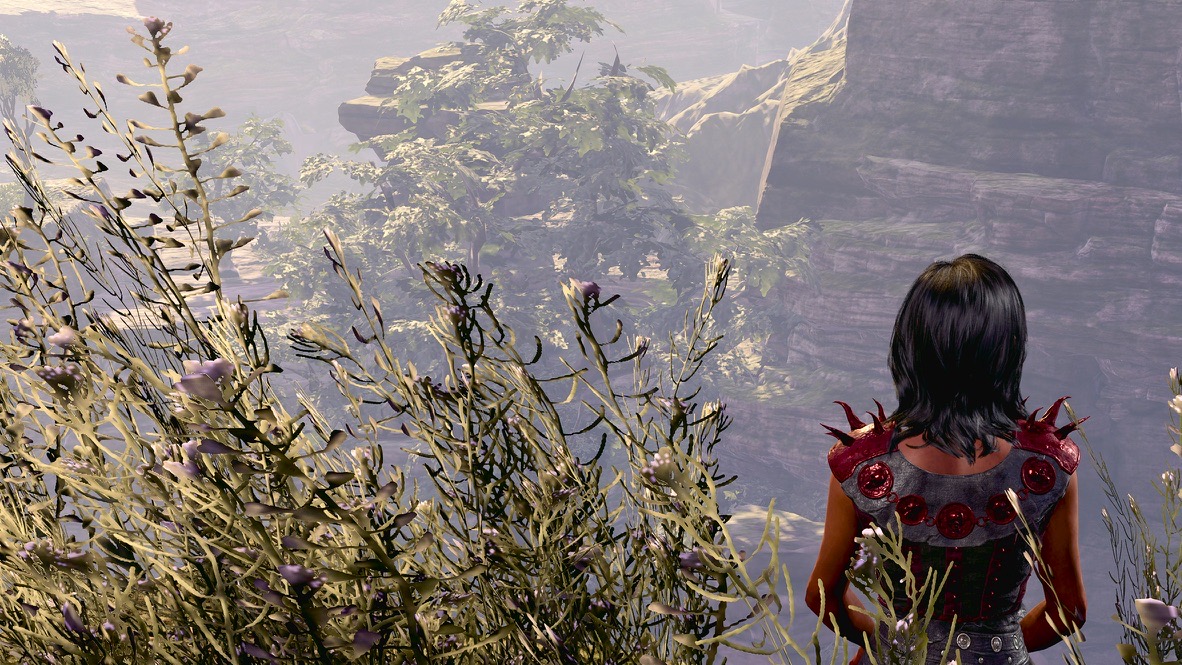
Here are a couple of examples of what I can do outside of a camp. Both are from photoshoots I did for as-yet-unwritten playthrough 15 fanfic.
Here we see the foreground character walking away from the one in the background. I wanted to convey how she’s turned her back on him, and emphasize the distance between them through Depth of Field.
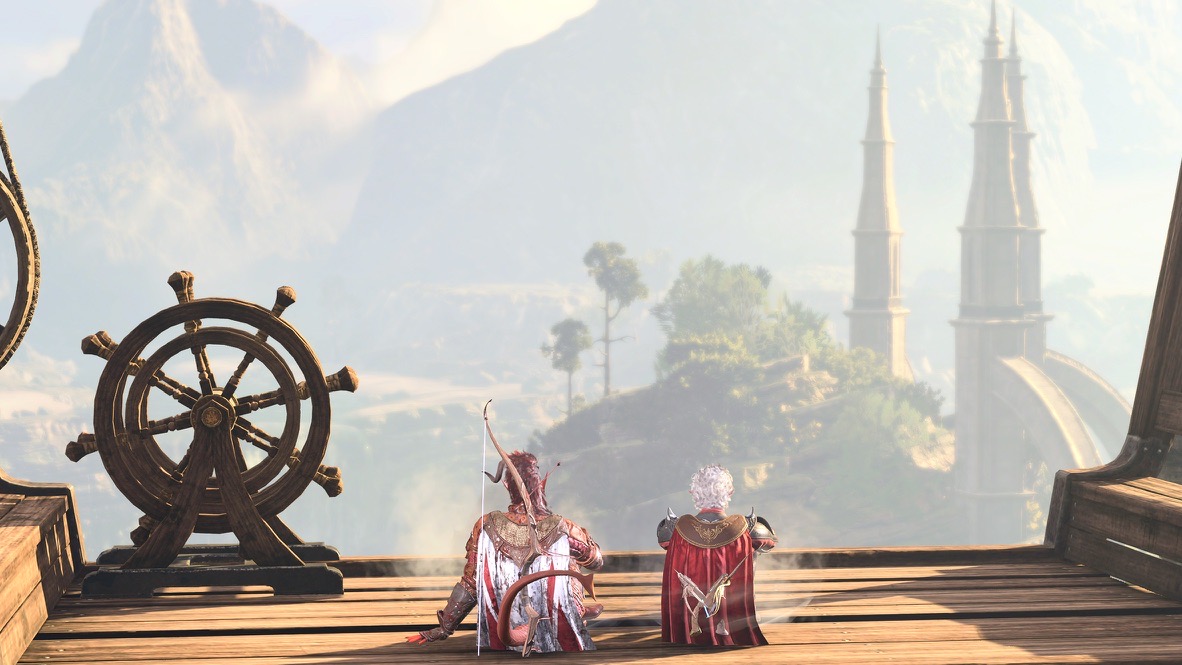
I’m probably too proud of this next shot. If you’ve played the game, you know that by the time your character gets this close to the foreground model in red, the game forces you into a cutscene. I combined Camera Position, Character Placement, and Field of View to make it look as if those these characters are much closer together.
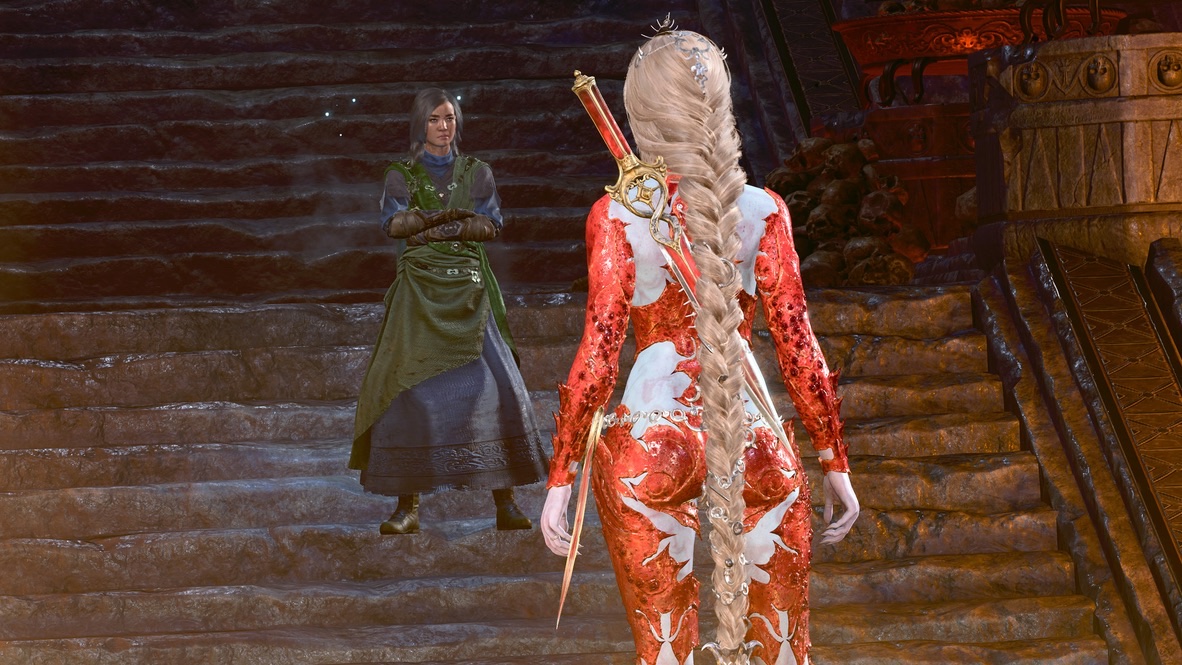
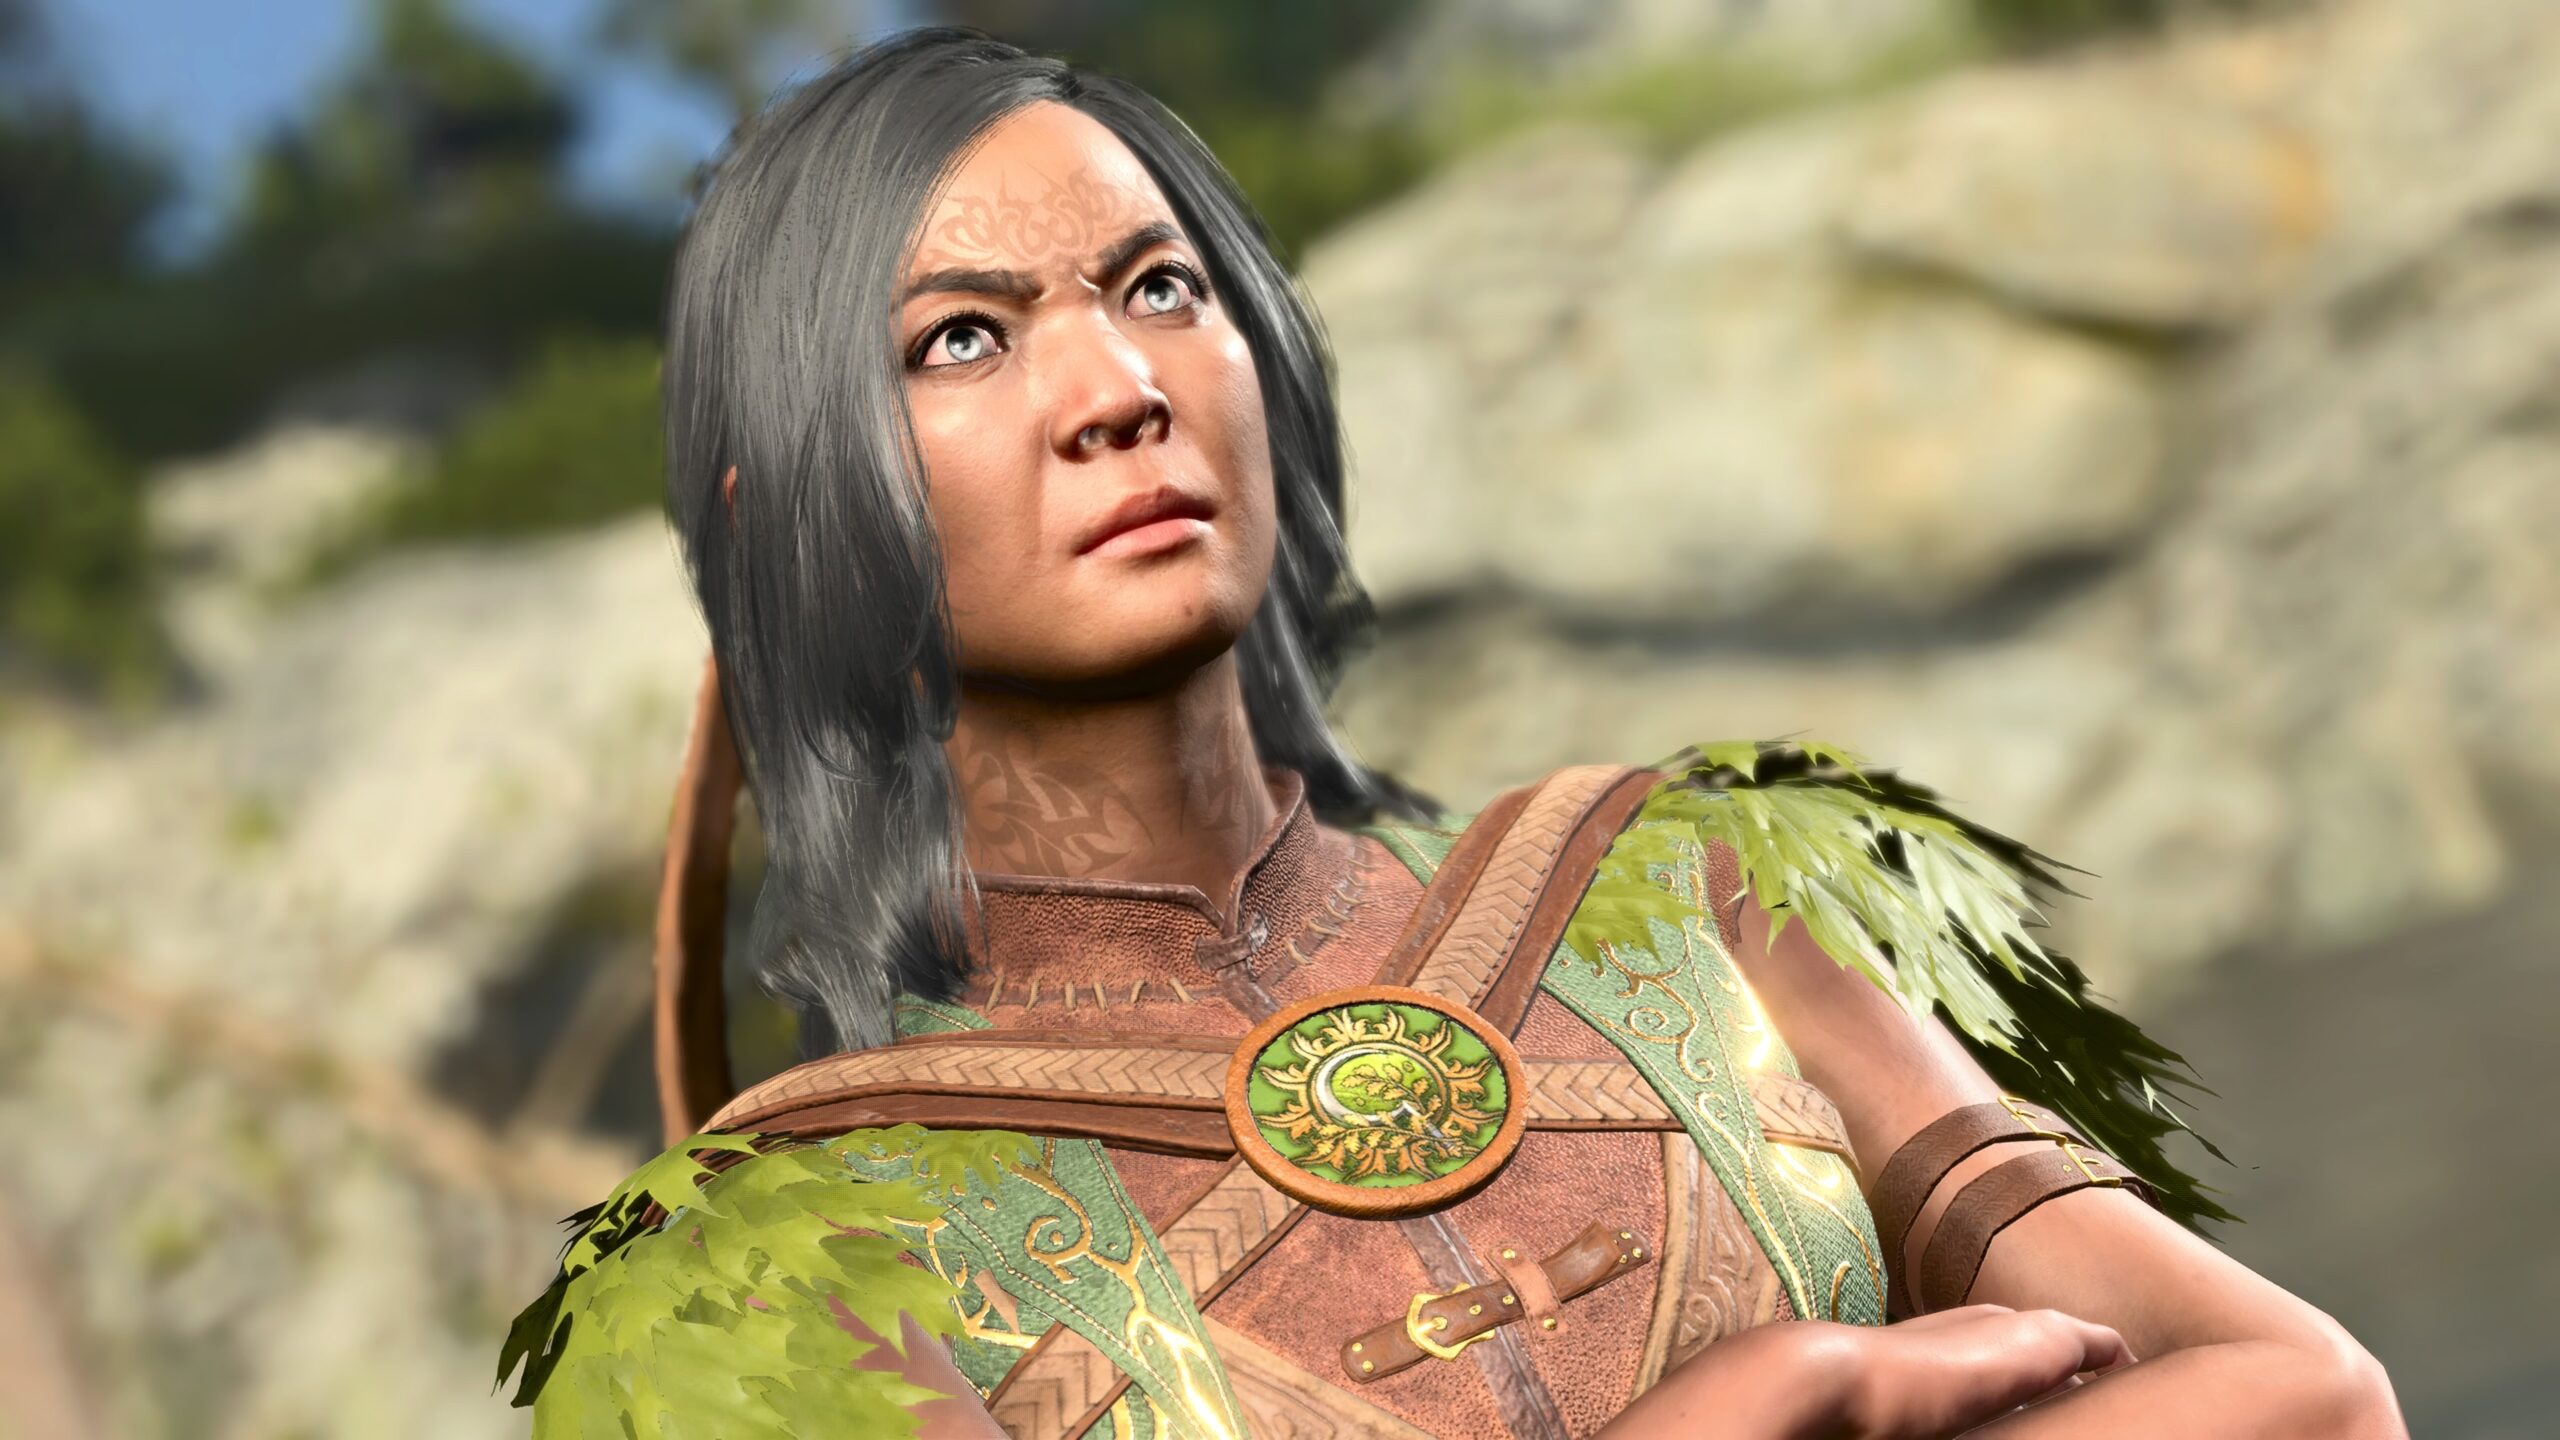
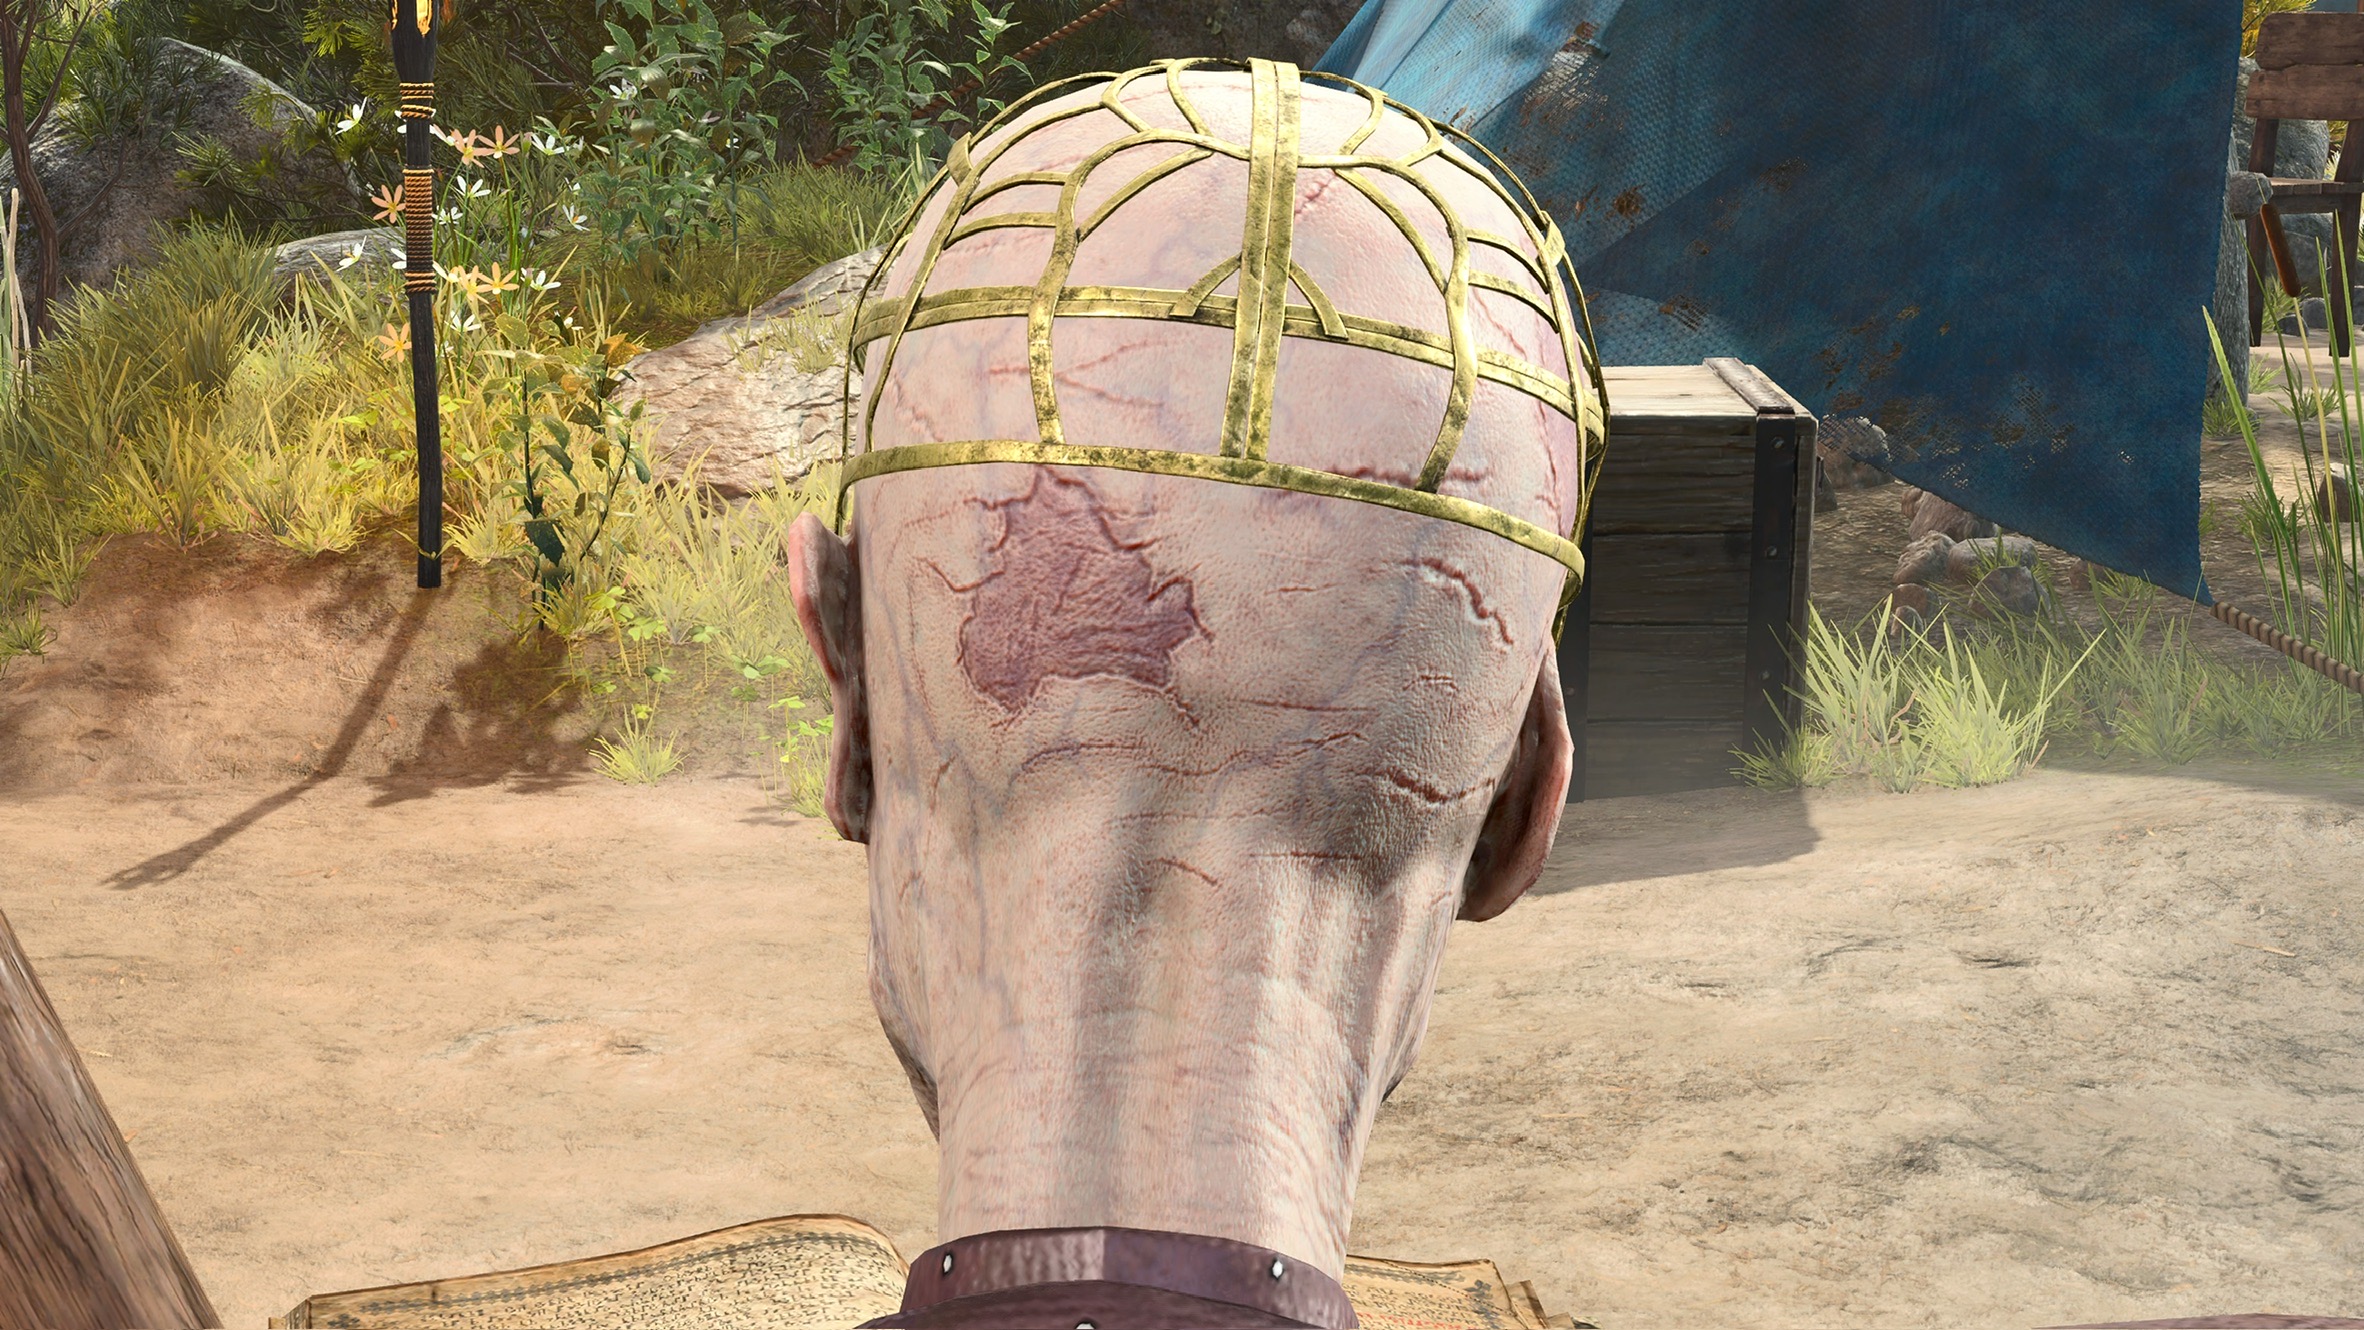
Tangent: Model details
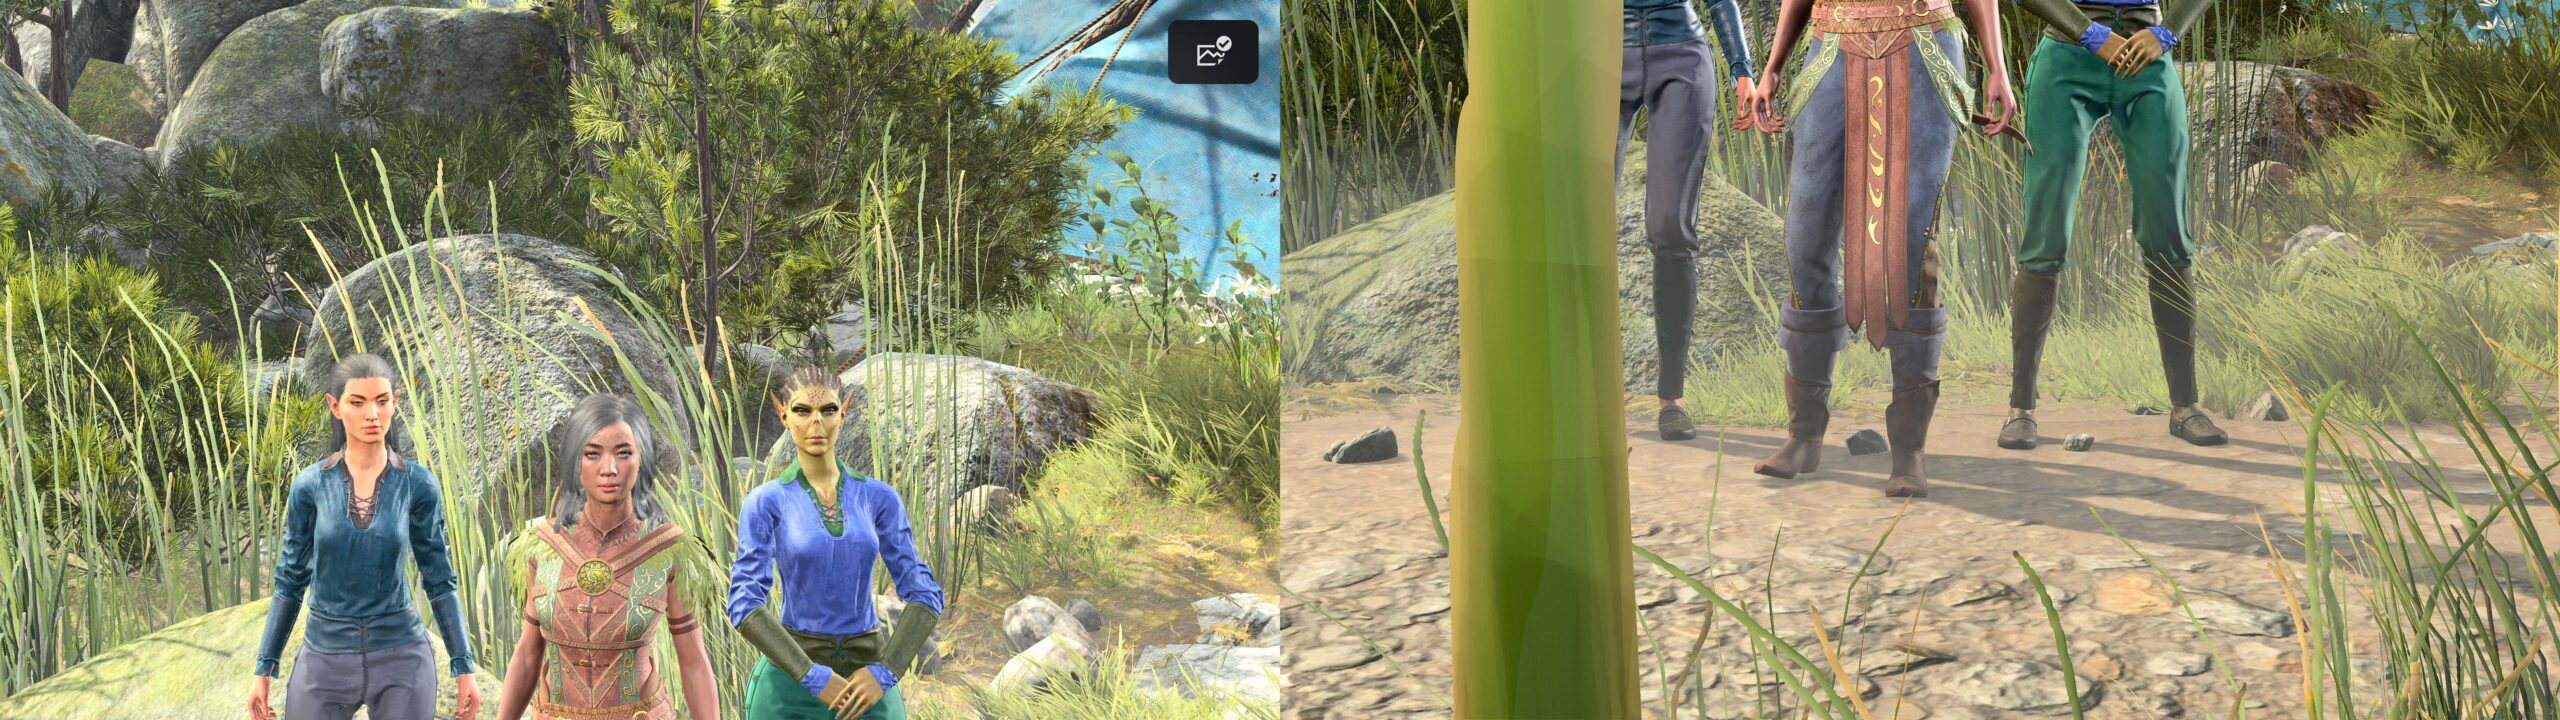
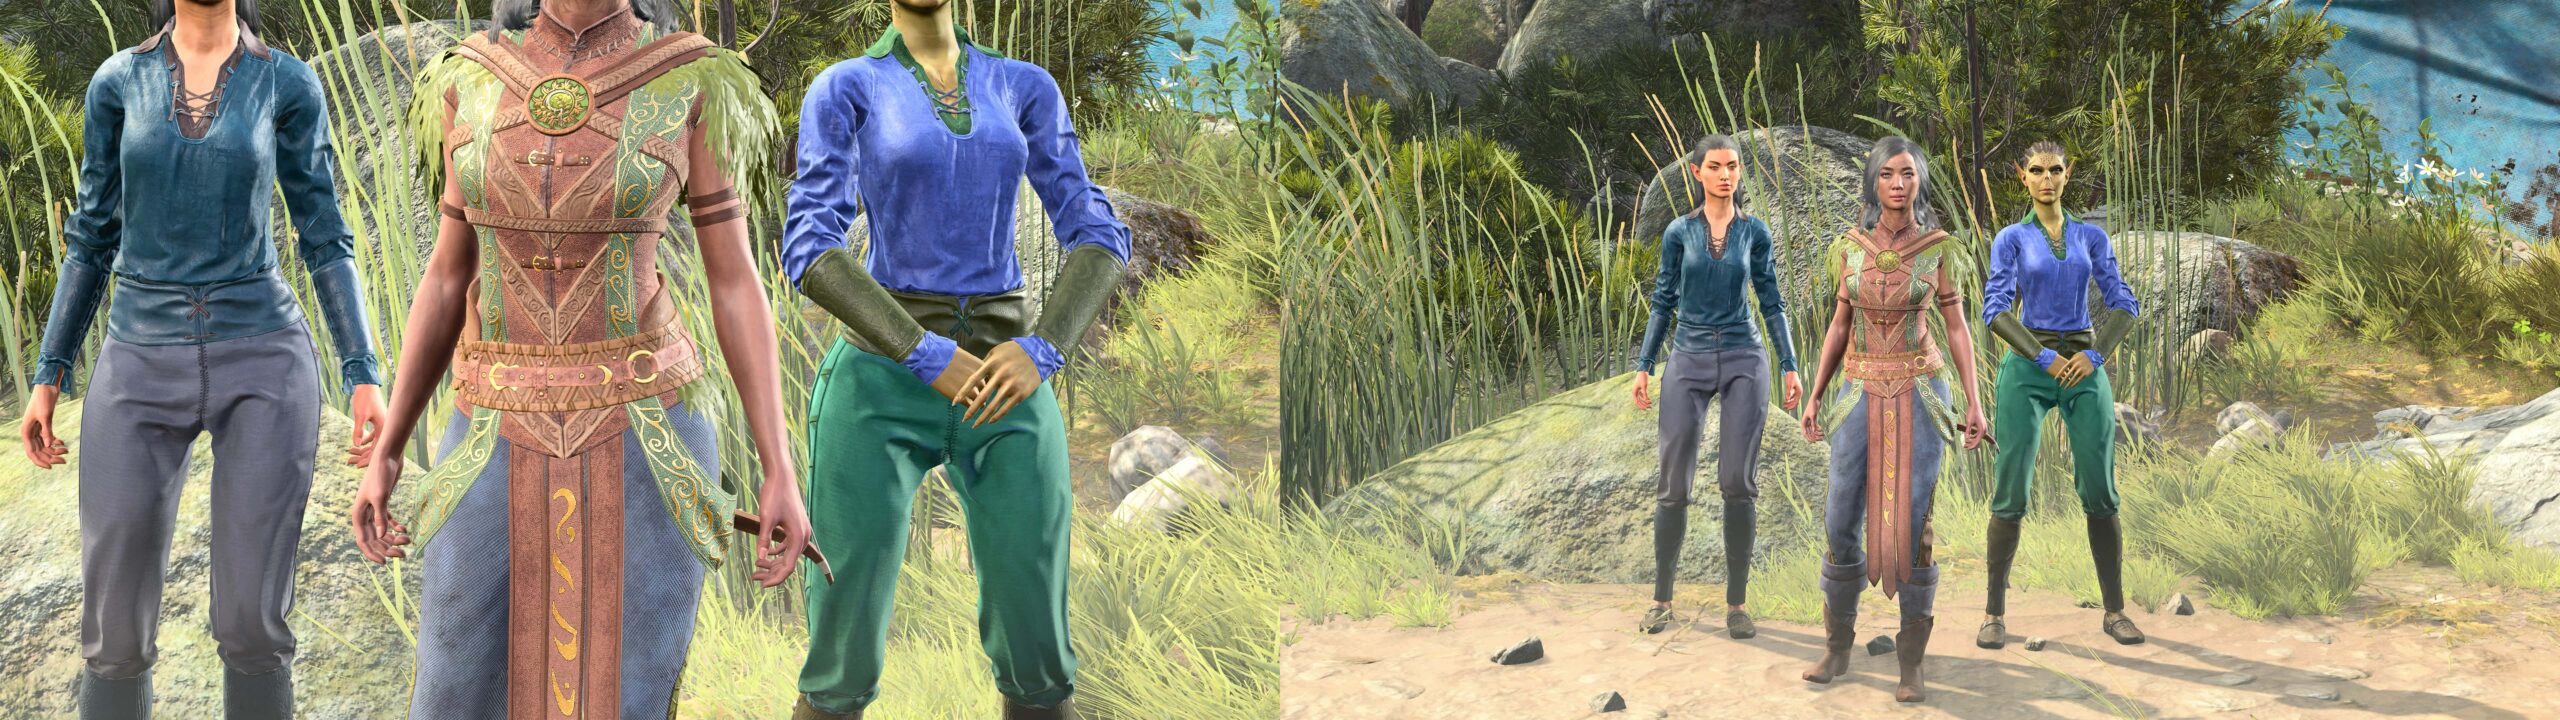
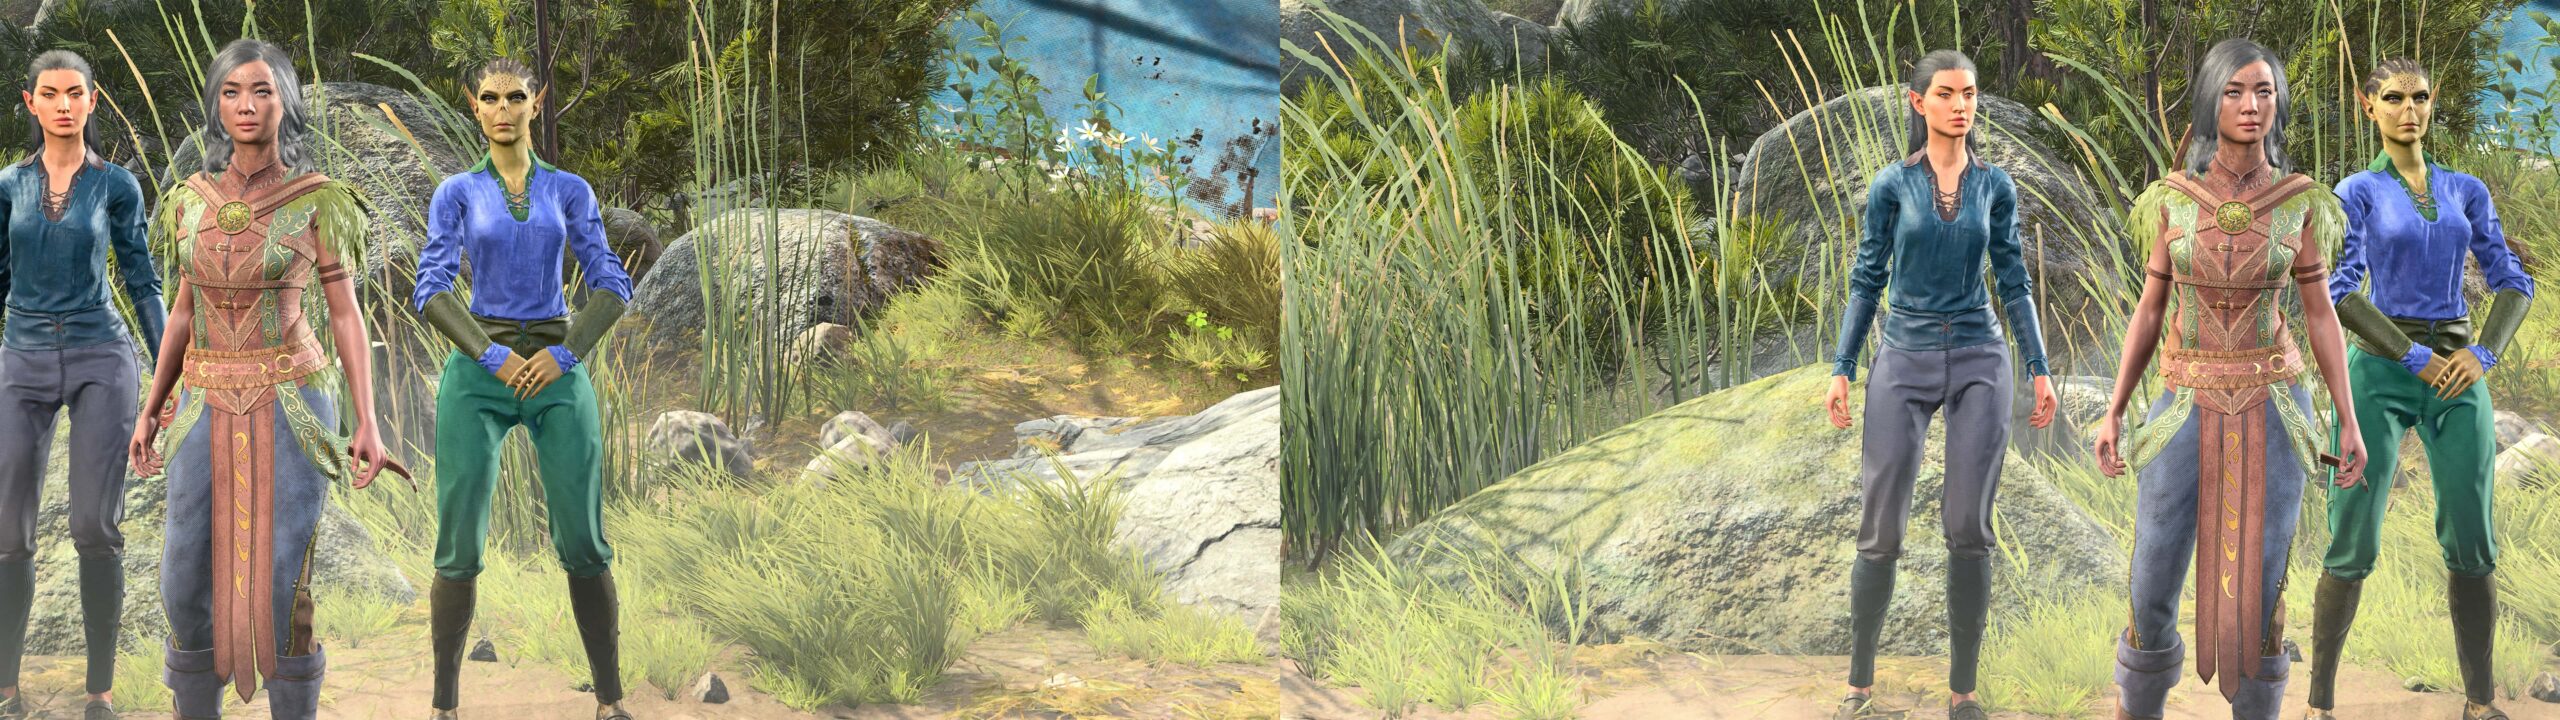
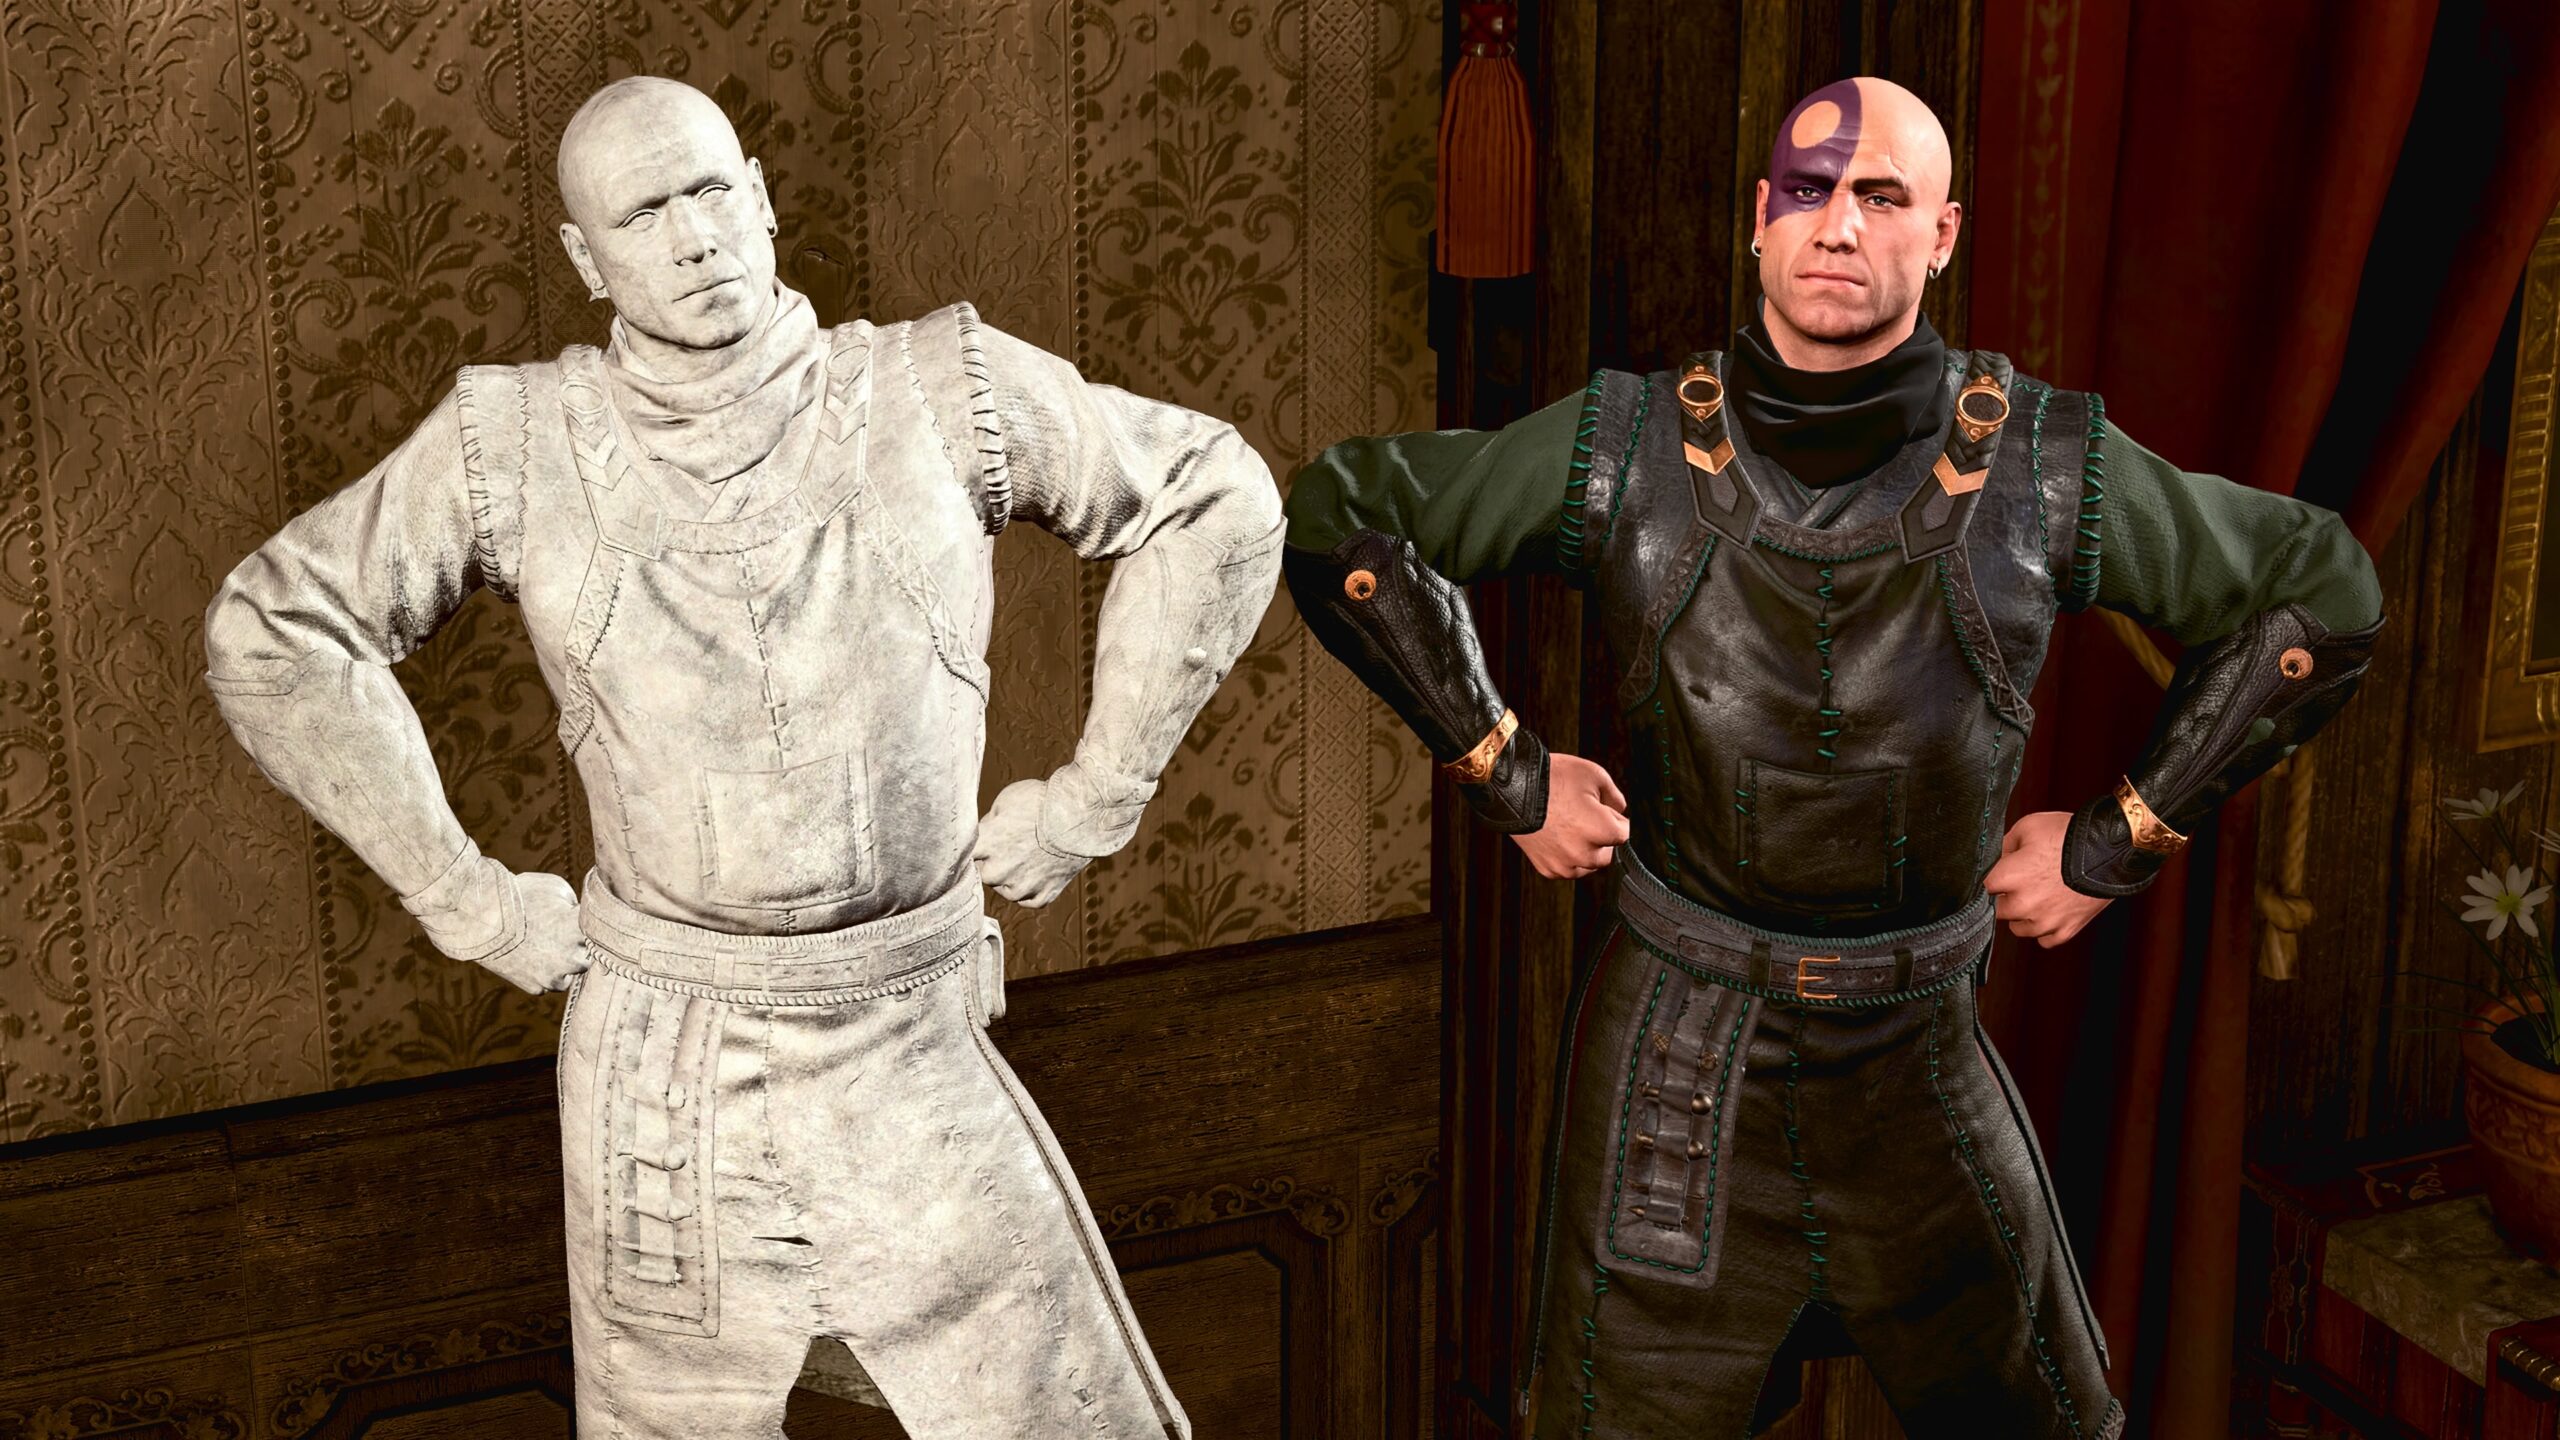
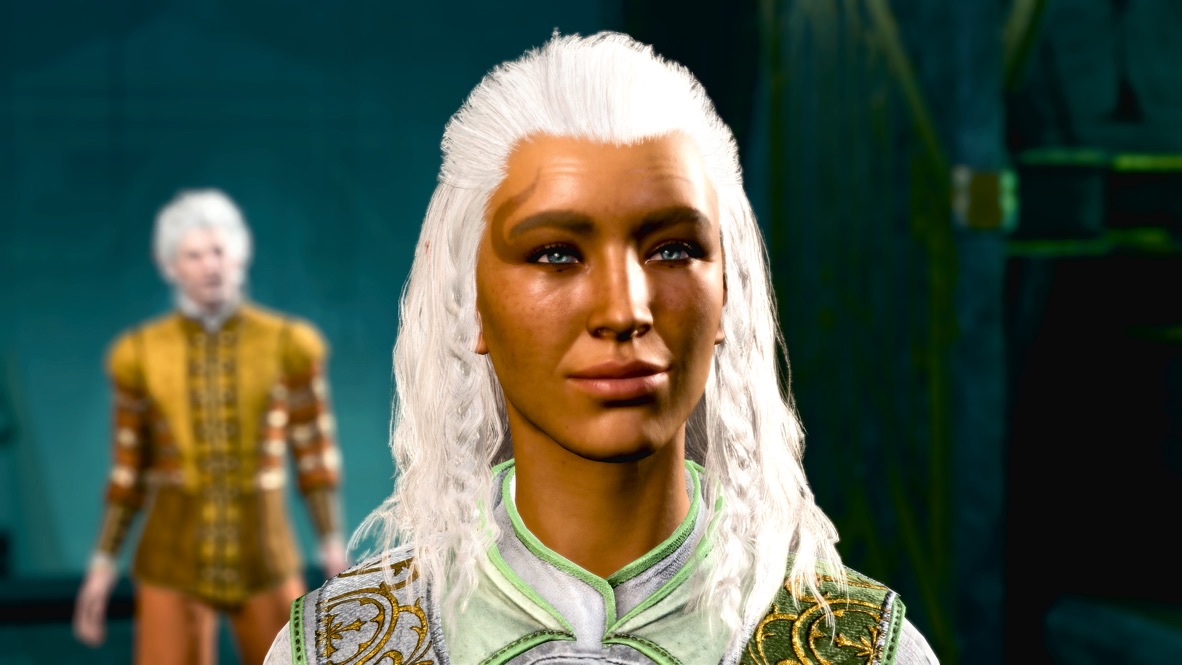
As I worked to get shots like the one above, I was in awe of the level of detail applied to the model’s appearance. If you can, zoom this image:

In the left panel, look at the metal jewelry woven into the braid. In the middle panel, there are detailed headpieces. One the right, look at the intricate chains of her belt. That hair braid and the belt chains all sway as the character moves.
Almost none of this is visible during the cutscenes that feature this character, which mostly show her from the front and from the waist up. You have to use Photo Mode and move the camera to see these details.
This character is not unique in this regard. This level of detail can be found almost everywhere you look in the game, especially on featured characters like this one. It’s probably not seen or noticed by most of the players, but it’s there for those who look.
This is on a PS5. I wonder how it would look on a desktop with a very high-end graphics card?
Kudos to Larian’s artists, designers, and graphics engineers!
This is one more reason why it’s worth thinking about how to include models like this in my fanfic photos.
Posing NPCs
I’m going to discuss character poses in just a moment. However, the previous photo brings up another issue: You can only pose characters you can control. NPCs (like the model in red above, or Withers) are never under the player’s control. I have to “freeze frame” in the middle of a non-player character’s (NPC’s) animation to get a particular pose.
To get that “I’m too proud” photo, I had to wait in the cycle of the red model’s idle animation until she stood in a way that matched the position of the Druid Angela model.
That point may not be clear, even if you played an advanced graphics game like BG3 before. Character models in the game don’t just stand motionless. They move a bit, going through repetitive sequences, waiting for you to interact with them (or attack them, or whatever). These motions are called “idle animations.” They can look so natural that our minds simply accept them without noticing.
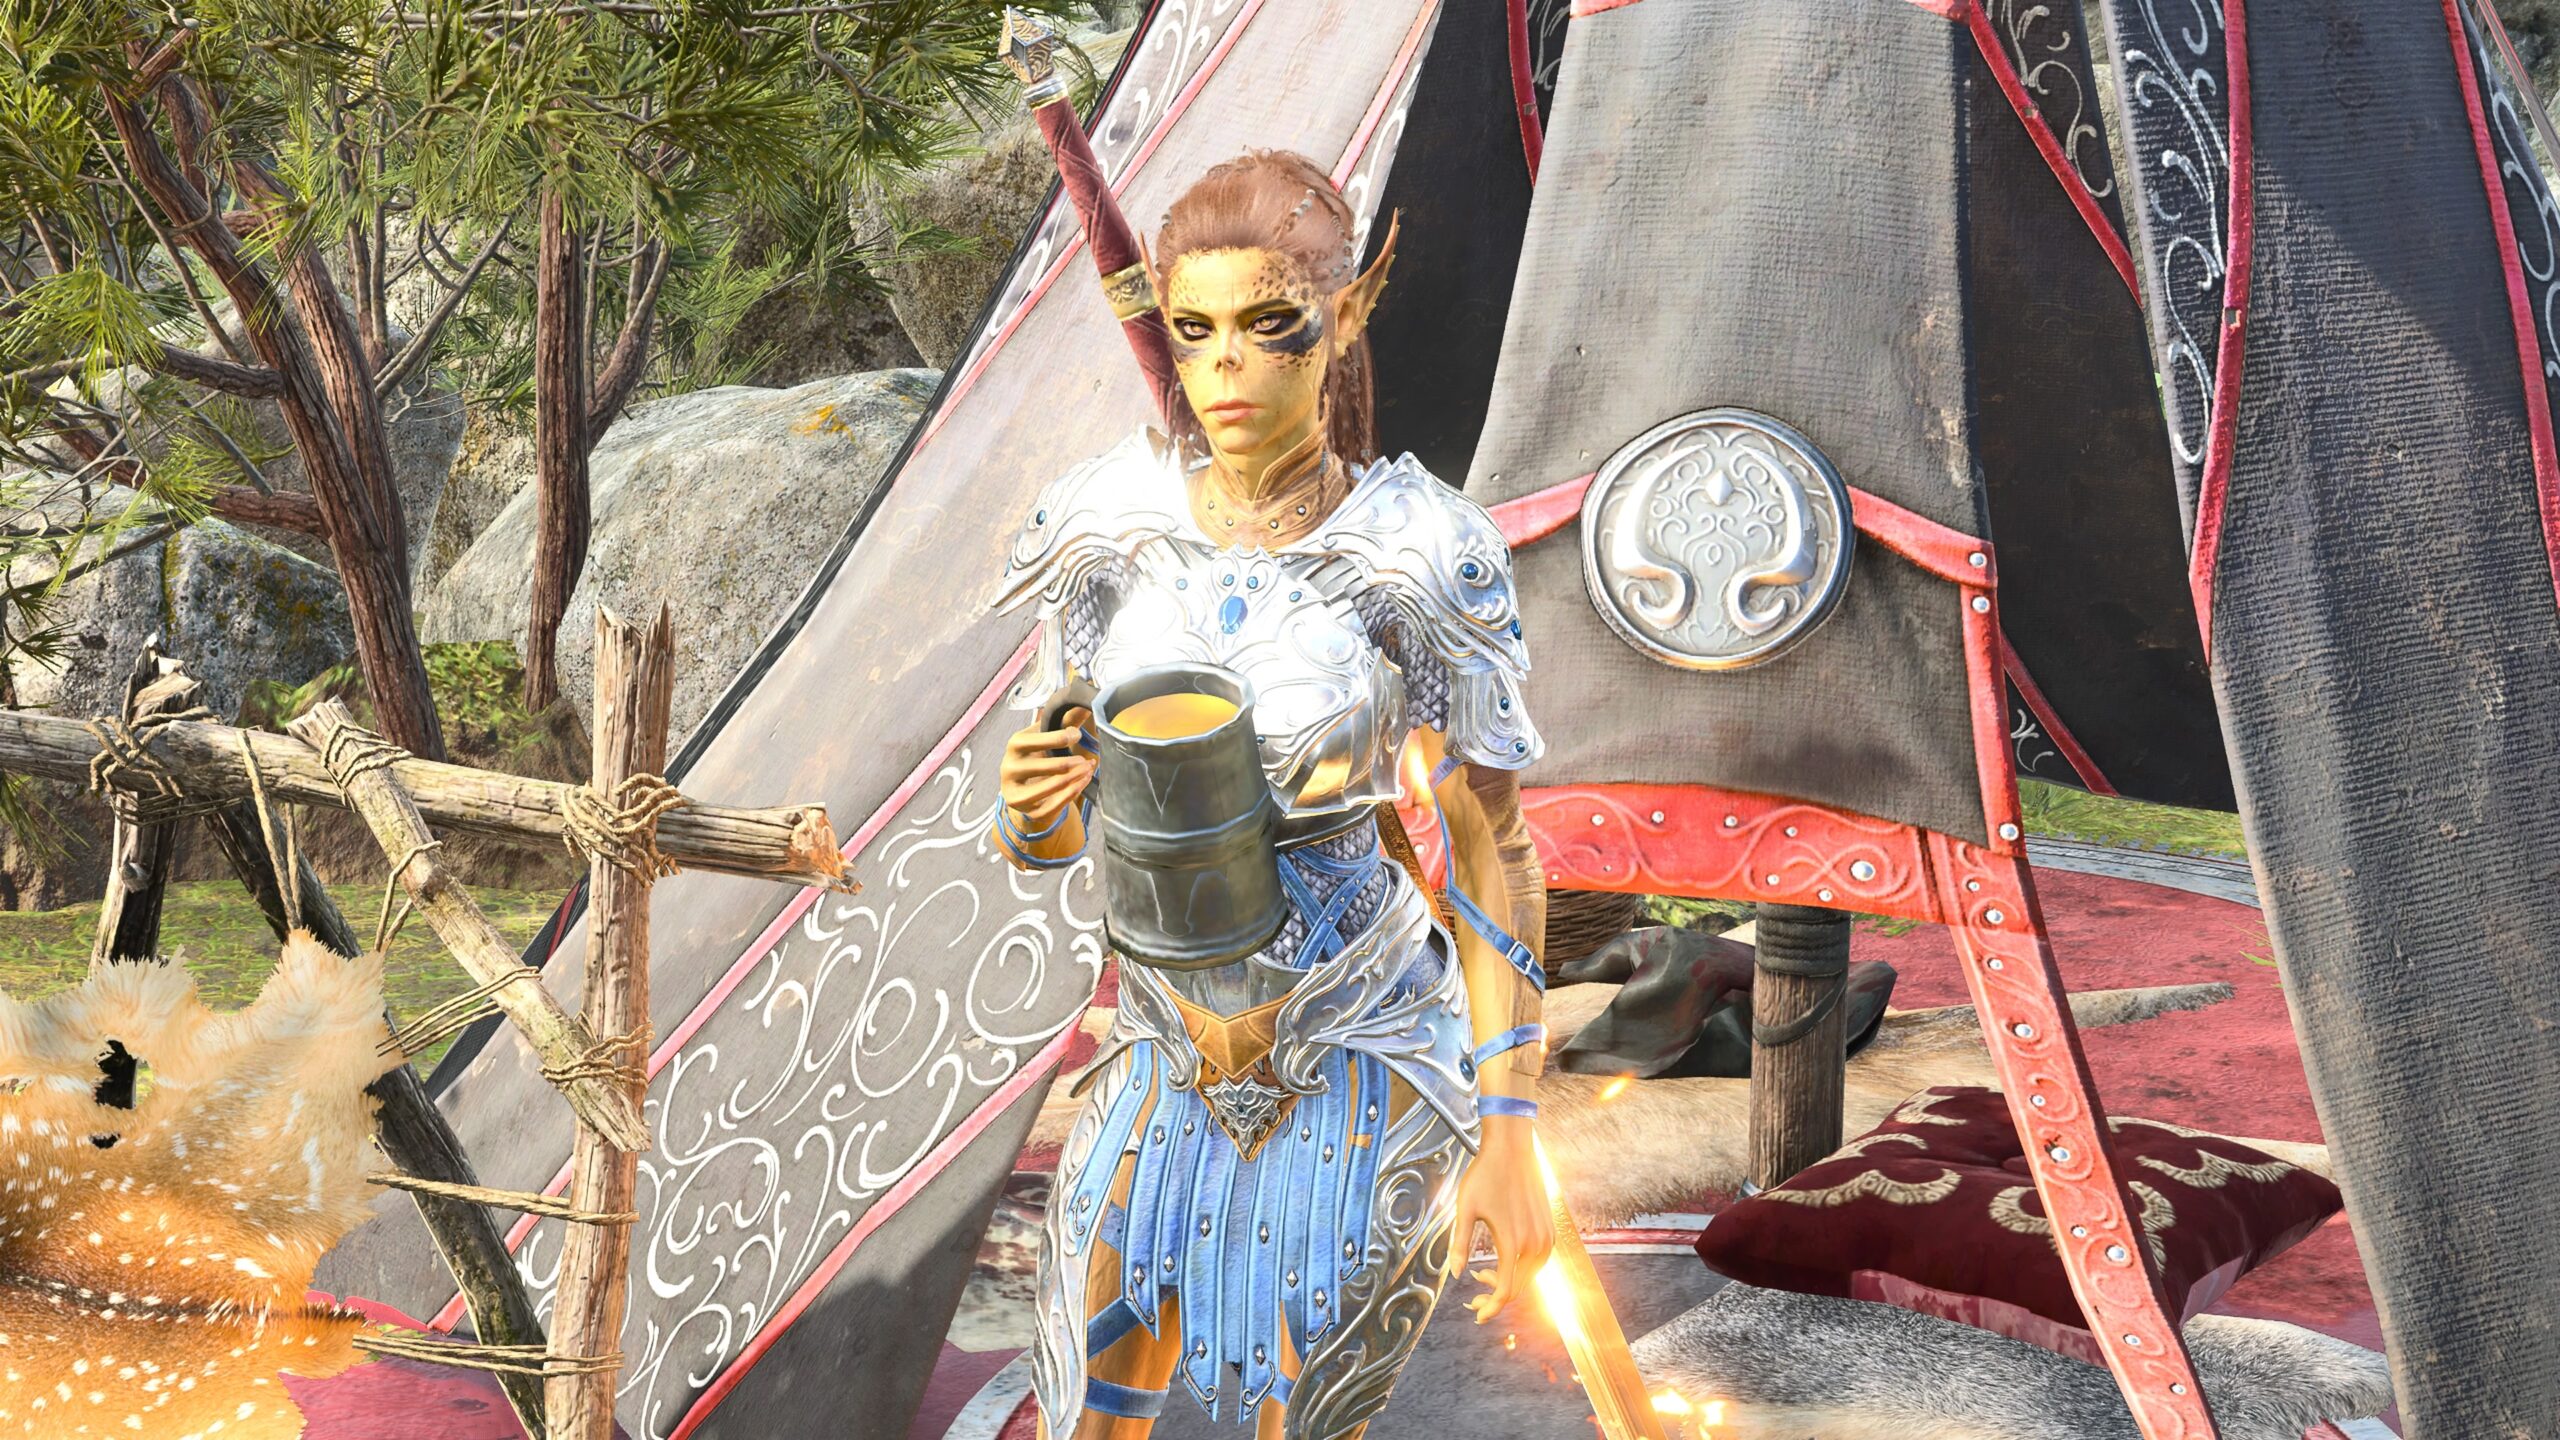
If you’re not familiar with idea, here are some videos I captured from BG3. This first one is of Team Angela just standing. I’m controlling Druid Angela (the one in front), so she doesn’t move much… but she still moves a little, to give the impression of a breathing, fidgeting person. The other three display typical casual animations for characters that are not under a player’s direct control.
All of the Origin characters have fun idle animations, especially when hanging out in camp. Here we see Karlach gesticulating. In another of her idle animations, she dances, but I didn’t capture that.
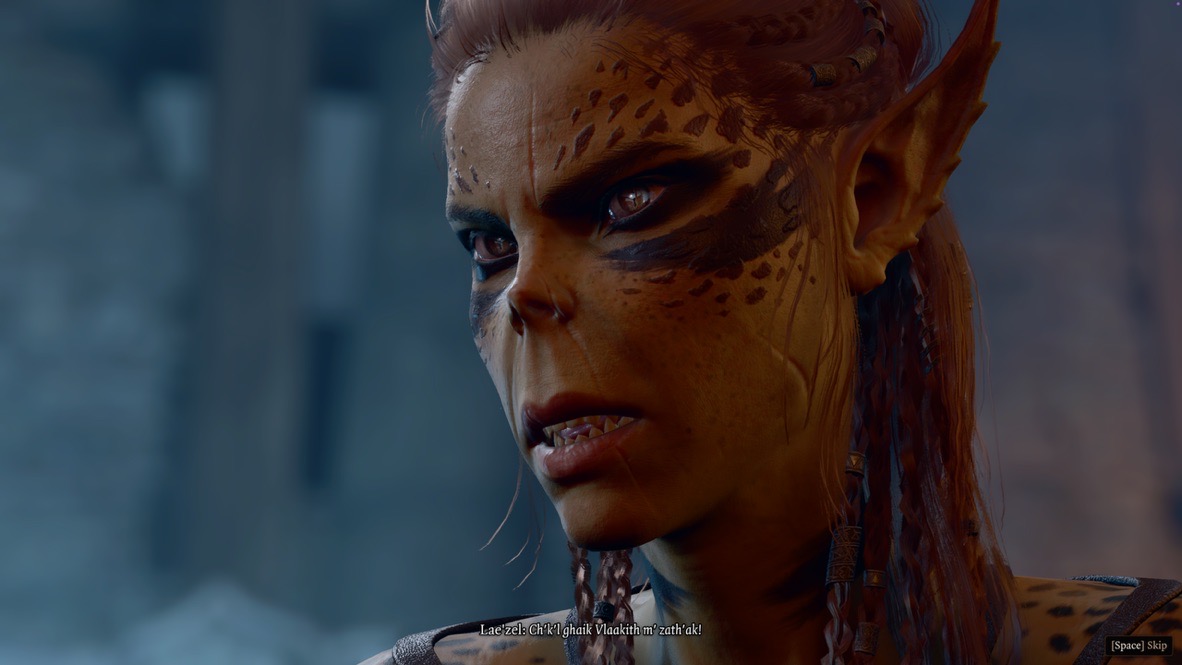
Here’s a portion of Lae’zel’s idle animation. During the sequence, I entered Photo Mode. You’ll see me adjusting Field of View, then taking a snapshot.
Here’s that snapshot.
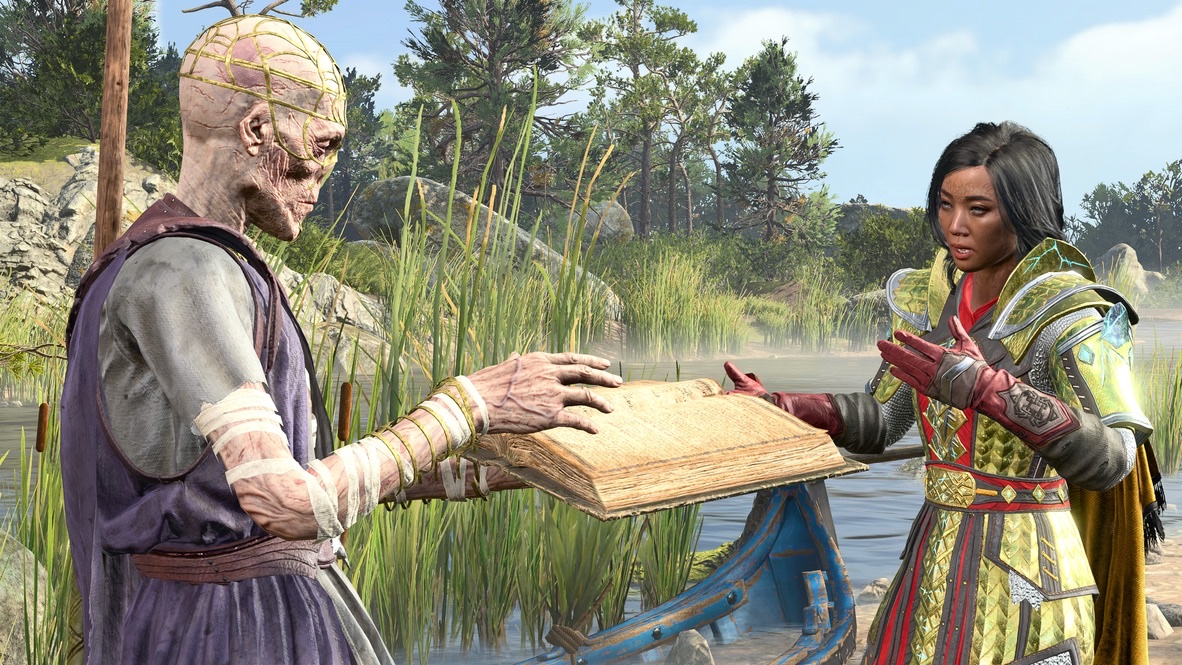
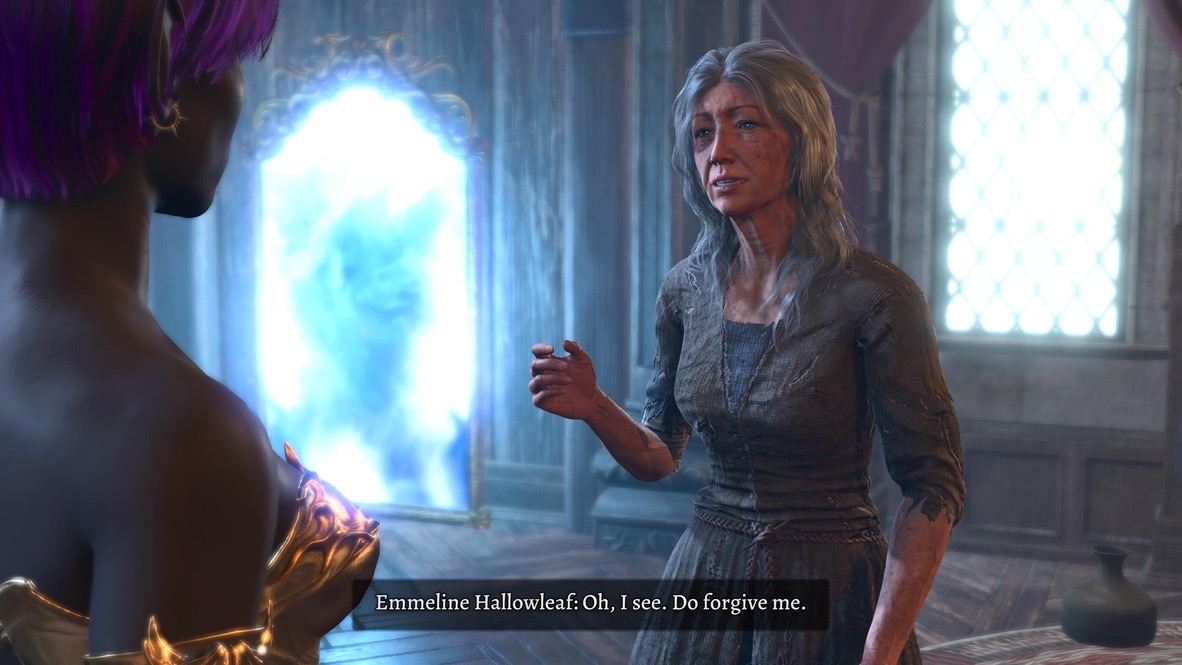
Here’s another example. Outside of Photo Mode, I moved the Druid Angela model on the right to stand near Withers. I waited. Eventually Withers went into his “looking through a book” animation. I entered Photo Mode at that moment, then positioned Druid Angela into the pose you see. My intent was to show that Druid Angela was begging Withers to look up something that’s personal for her. As I’ve said before in this essay (and will probably say again), whether I succeed in conveying that idea is up to you.
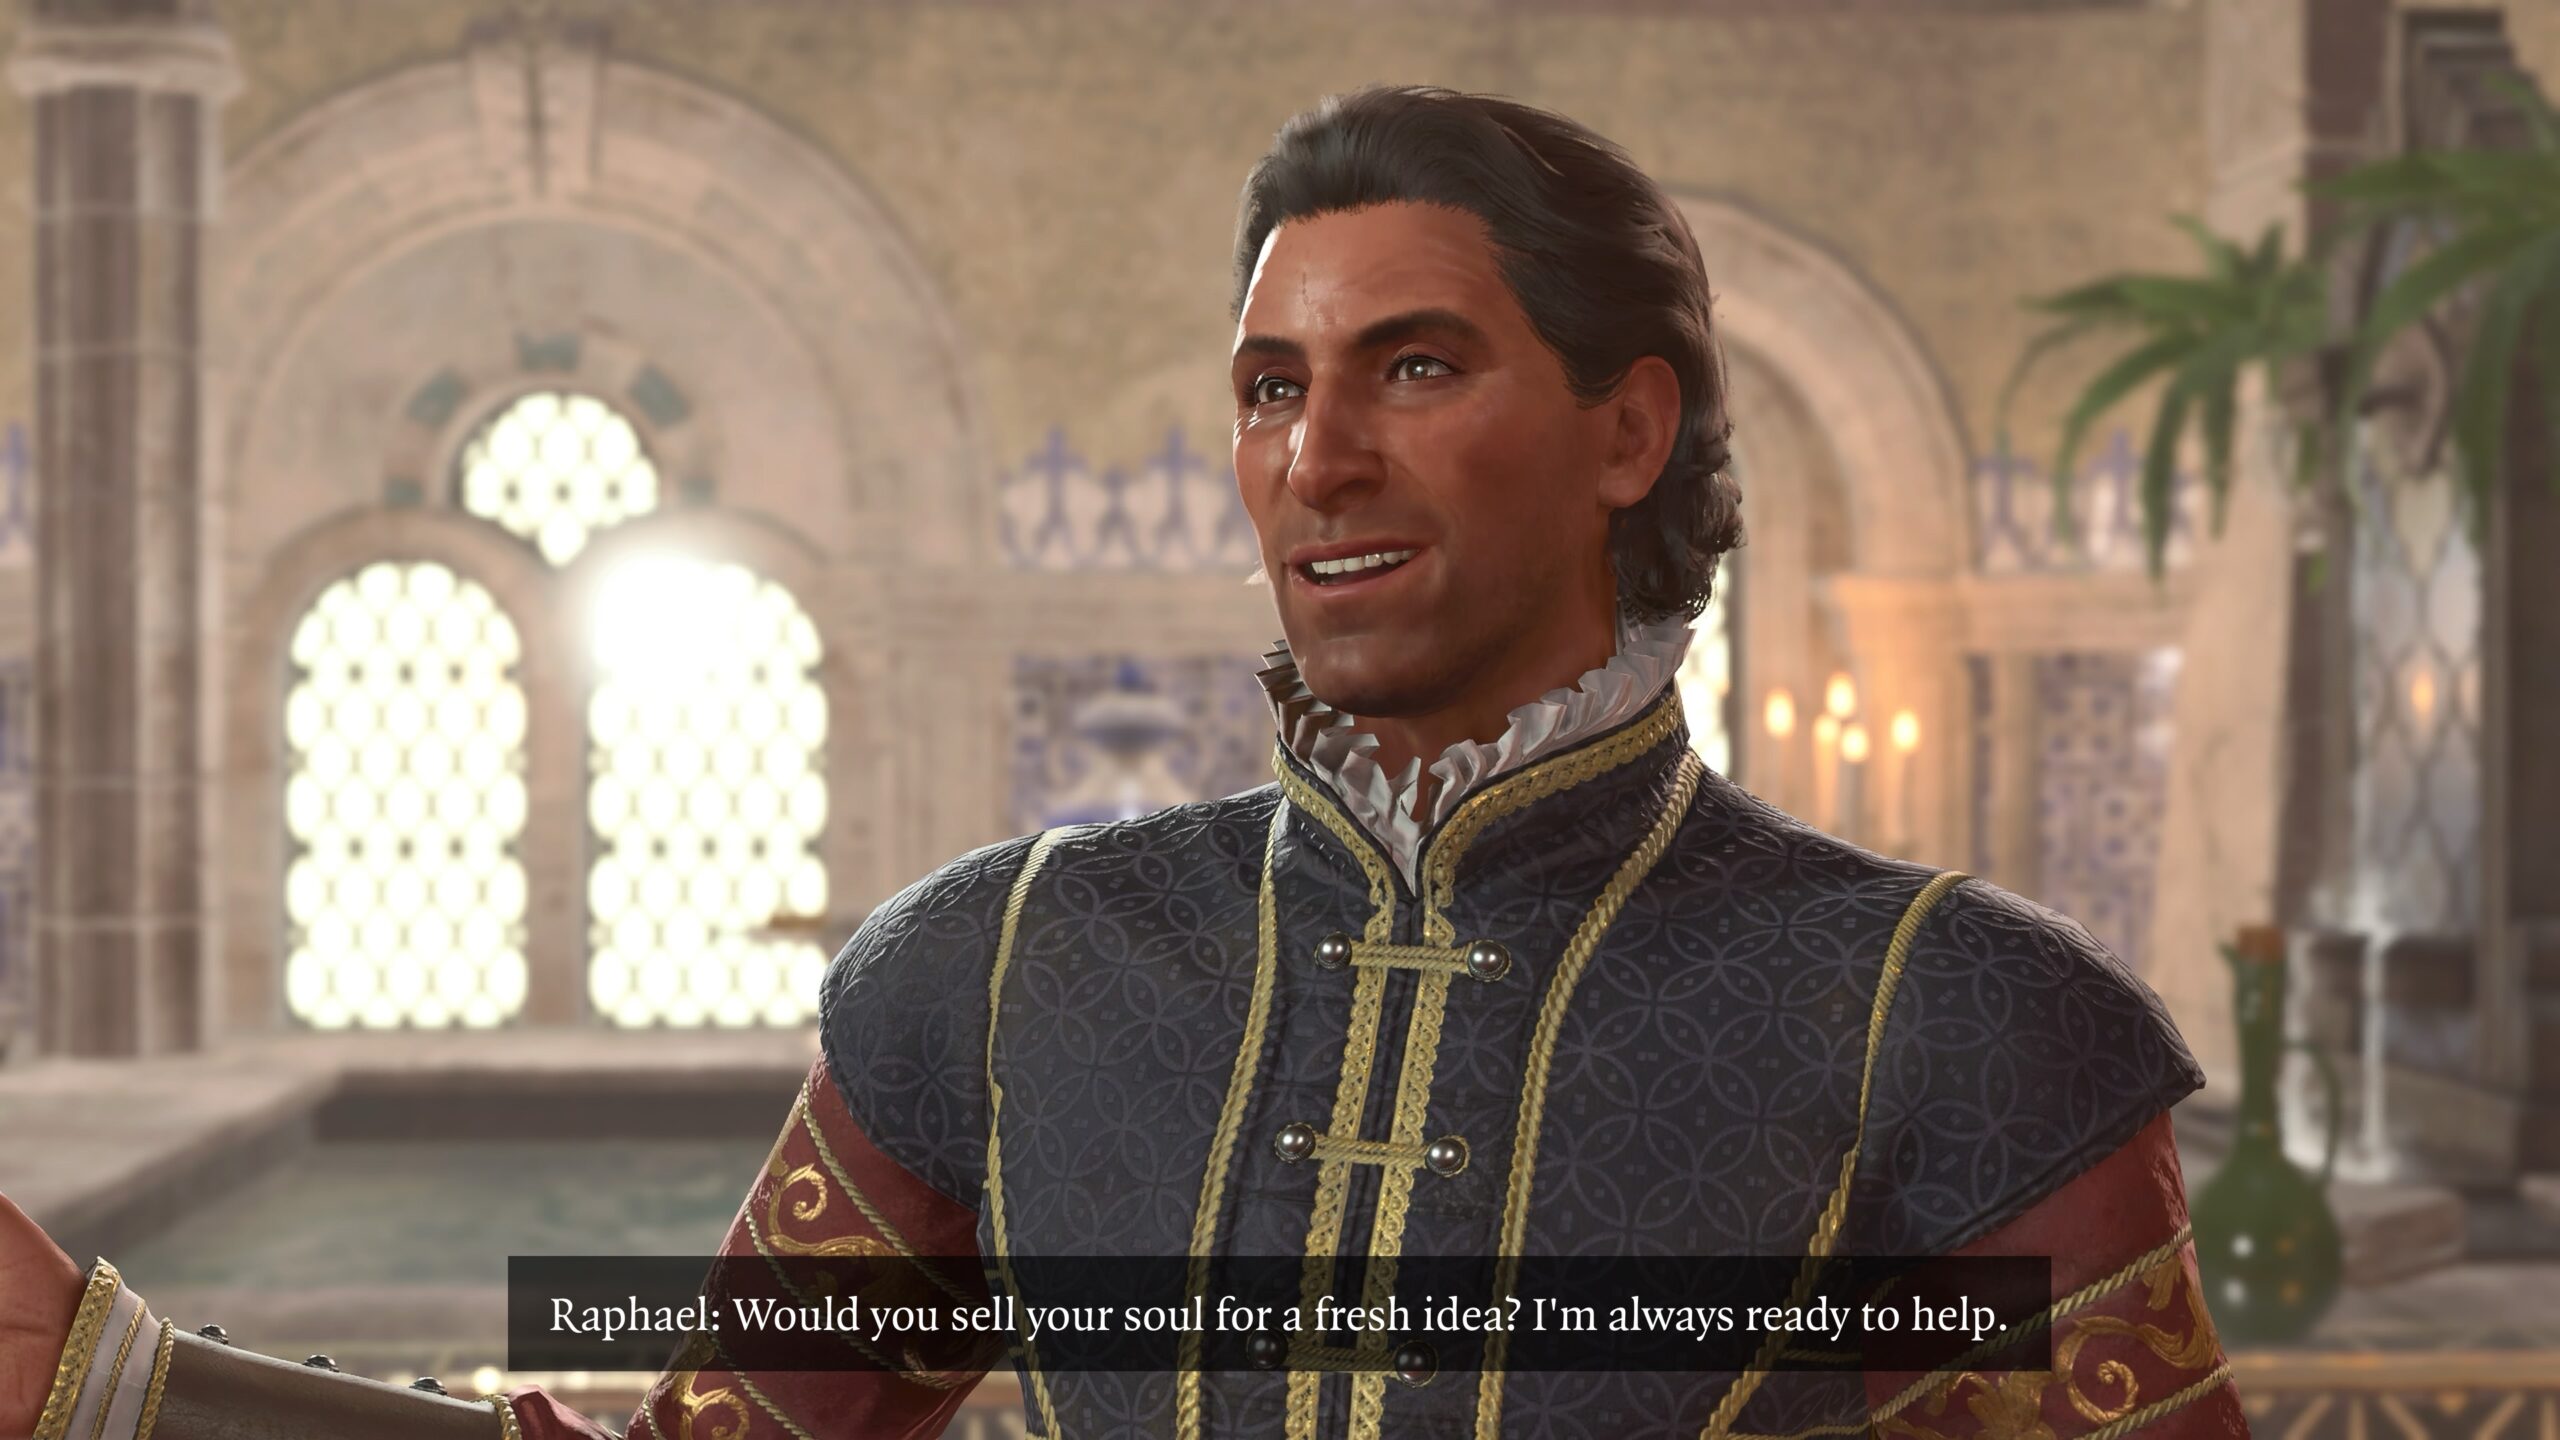
Another solution to being unable to pose NPCs is to take lots of photos during cutscenes. Here we see images of your best friend in the entire game, Raphael (there may be a superfluous “r” in one of those words). I took lots of photos in one of the cutscenes featuring him. This gives me a pool of photos that I can reorder and caption to fit in with any fanfic I choose to write.
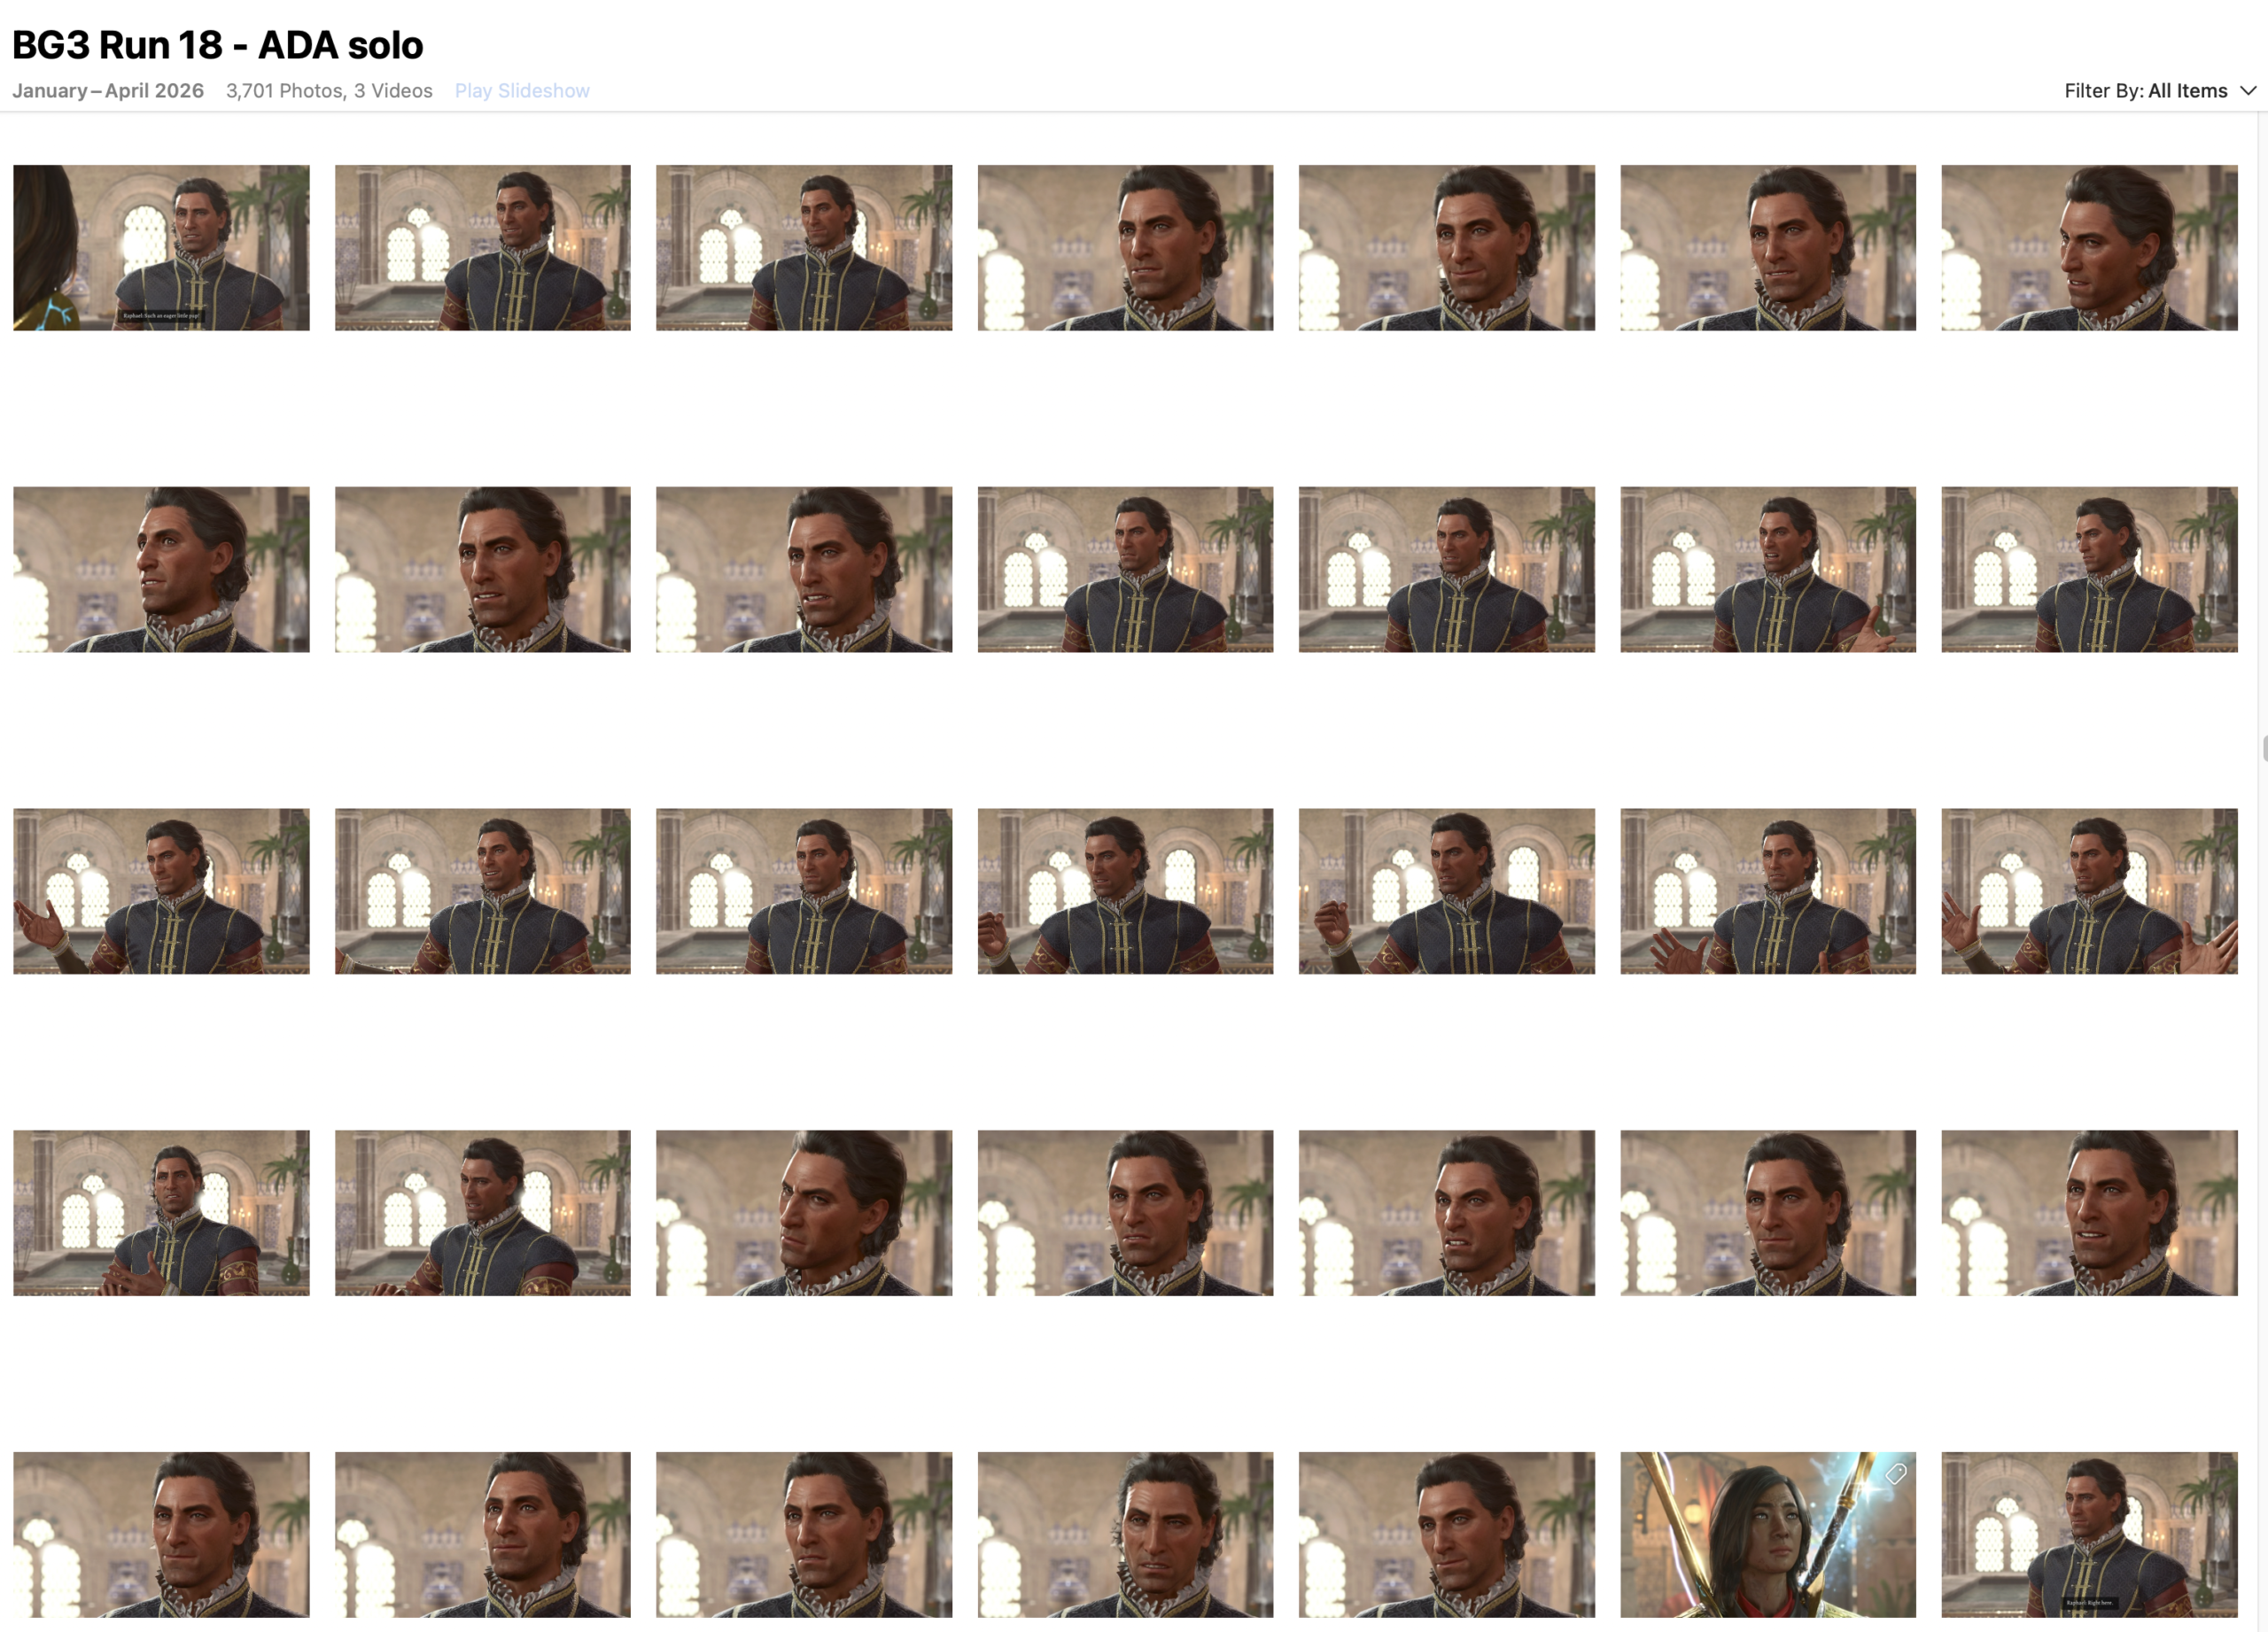
You can see 35 images in the above picture, out of about 80 that I took during that cutscene in that playthrough. For each image:
- I enter Photo Mode with L3+R3;
- click on L2 (to get rid of the image controls);
- hold down SELECT to save the image;
- click L2 again to bring back the camera controls;
- hold the Close button to exit Photo Mode.
I do this every couple of seconds to get a good selection of images.
That’s how I get a good percentage of those thousands of images I make for every playthrough.
If you were in the same room with me, or playing the game with me in multiplayer mode, you’d be bored beyond belief.
As it happens, I don’t have any fanfic in mind that involves Raphael. But you never know. An idea may occur to me at any moment. It’s best to be prepared.
The Rule of Thirds
In this section, I shall speak with an authoritative voice about a topic I don’t understand and know little about.
The Rule of Thirds is an accepted guideline for composing images. It says that, if you draw imaginary lines that divide a picture into thirds horizontally and vertically, the images becomes more interesting if you align elements along those lines.

I asked a couple of experienced and skilled photographers about this. One said that you don’t have to pay attention to it, because it happens naturally. Another said that it’s a guideline to avoid, to create more tension in an image.

Here are the three pictures again, without the grid lines. Which looks more attractive to you?
Which do I think is more interesting? You’re asking someone with the compositional sense of an oyster. They all look pretty much the same to me.
If you glance over the images in my BG3 captures, you’ll see that screenshots from the game mostly (not always!) follow the Rule of Thirds, as composed by the game’s designers. My own creations mostly place their subjects in the center.
In the light fanfic within this essay, I experiment with following the Rule of Thirds. I get the sense as I look over the pictures that the Rule is fine for individual images, but when you’re looking at a sequence of almost-identical images the Rule doesn’t make much sense.
Or maybe I’m wrong, and I’m just too oyster-like to see it.
Or perhaps the Rule of Thirds doesn’t just mean to put a subject one-third away from the edge of the picture.
You tell me!
Captions
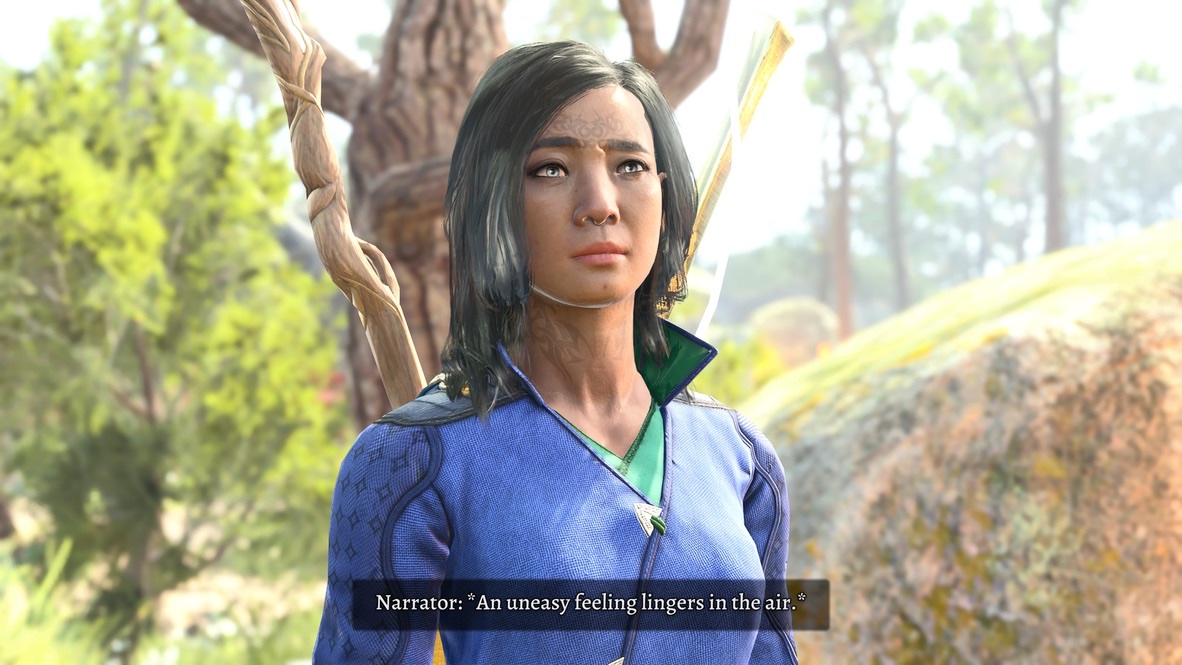
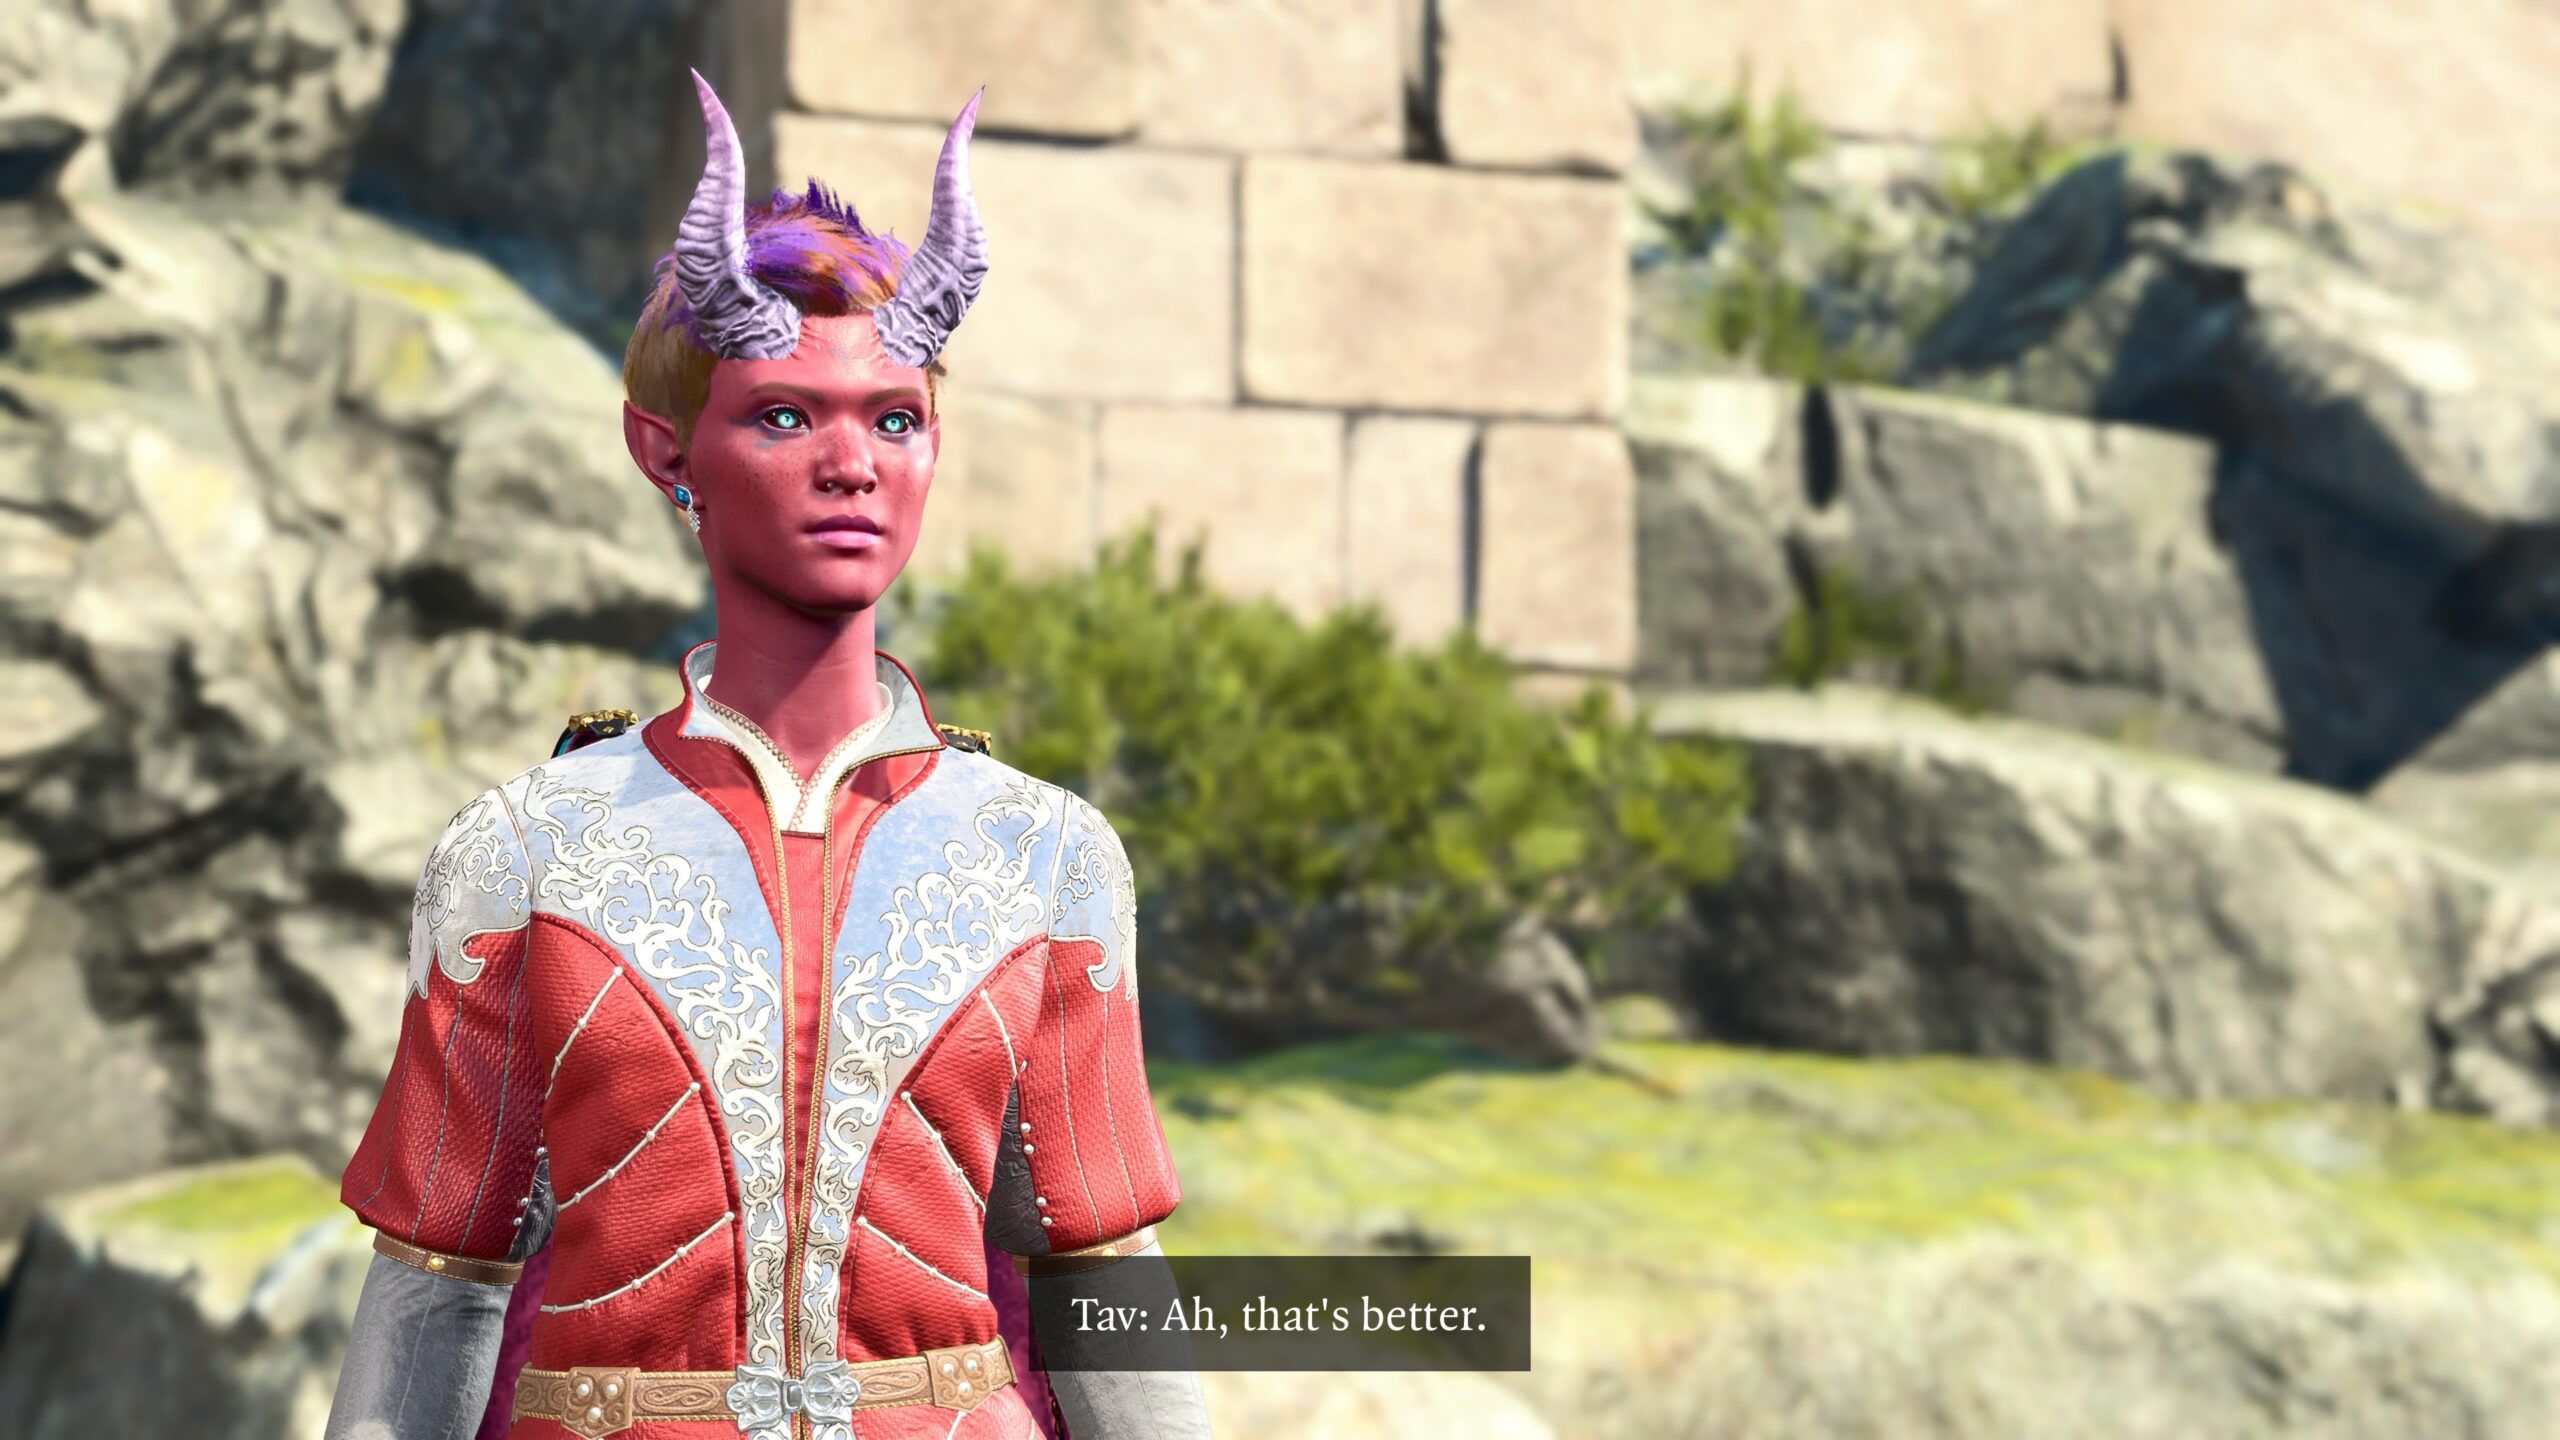
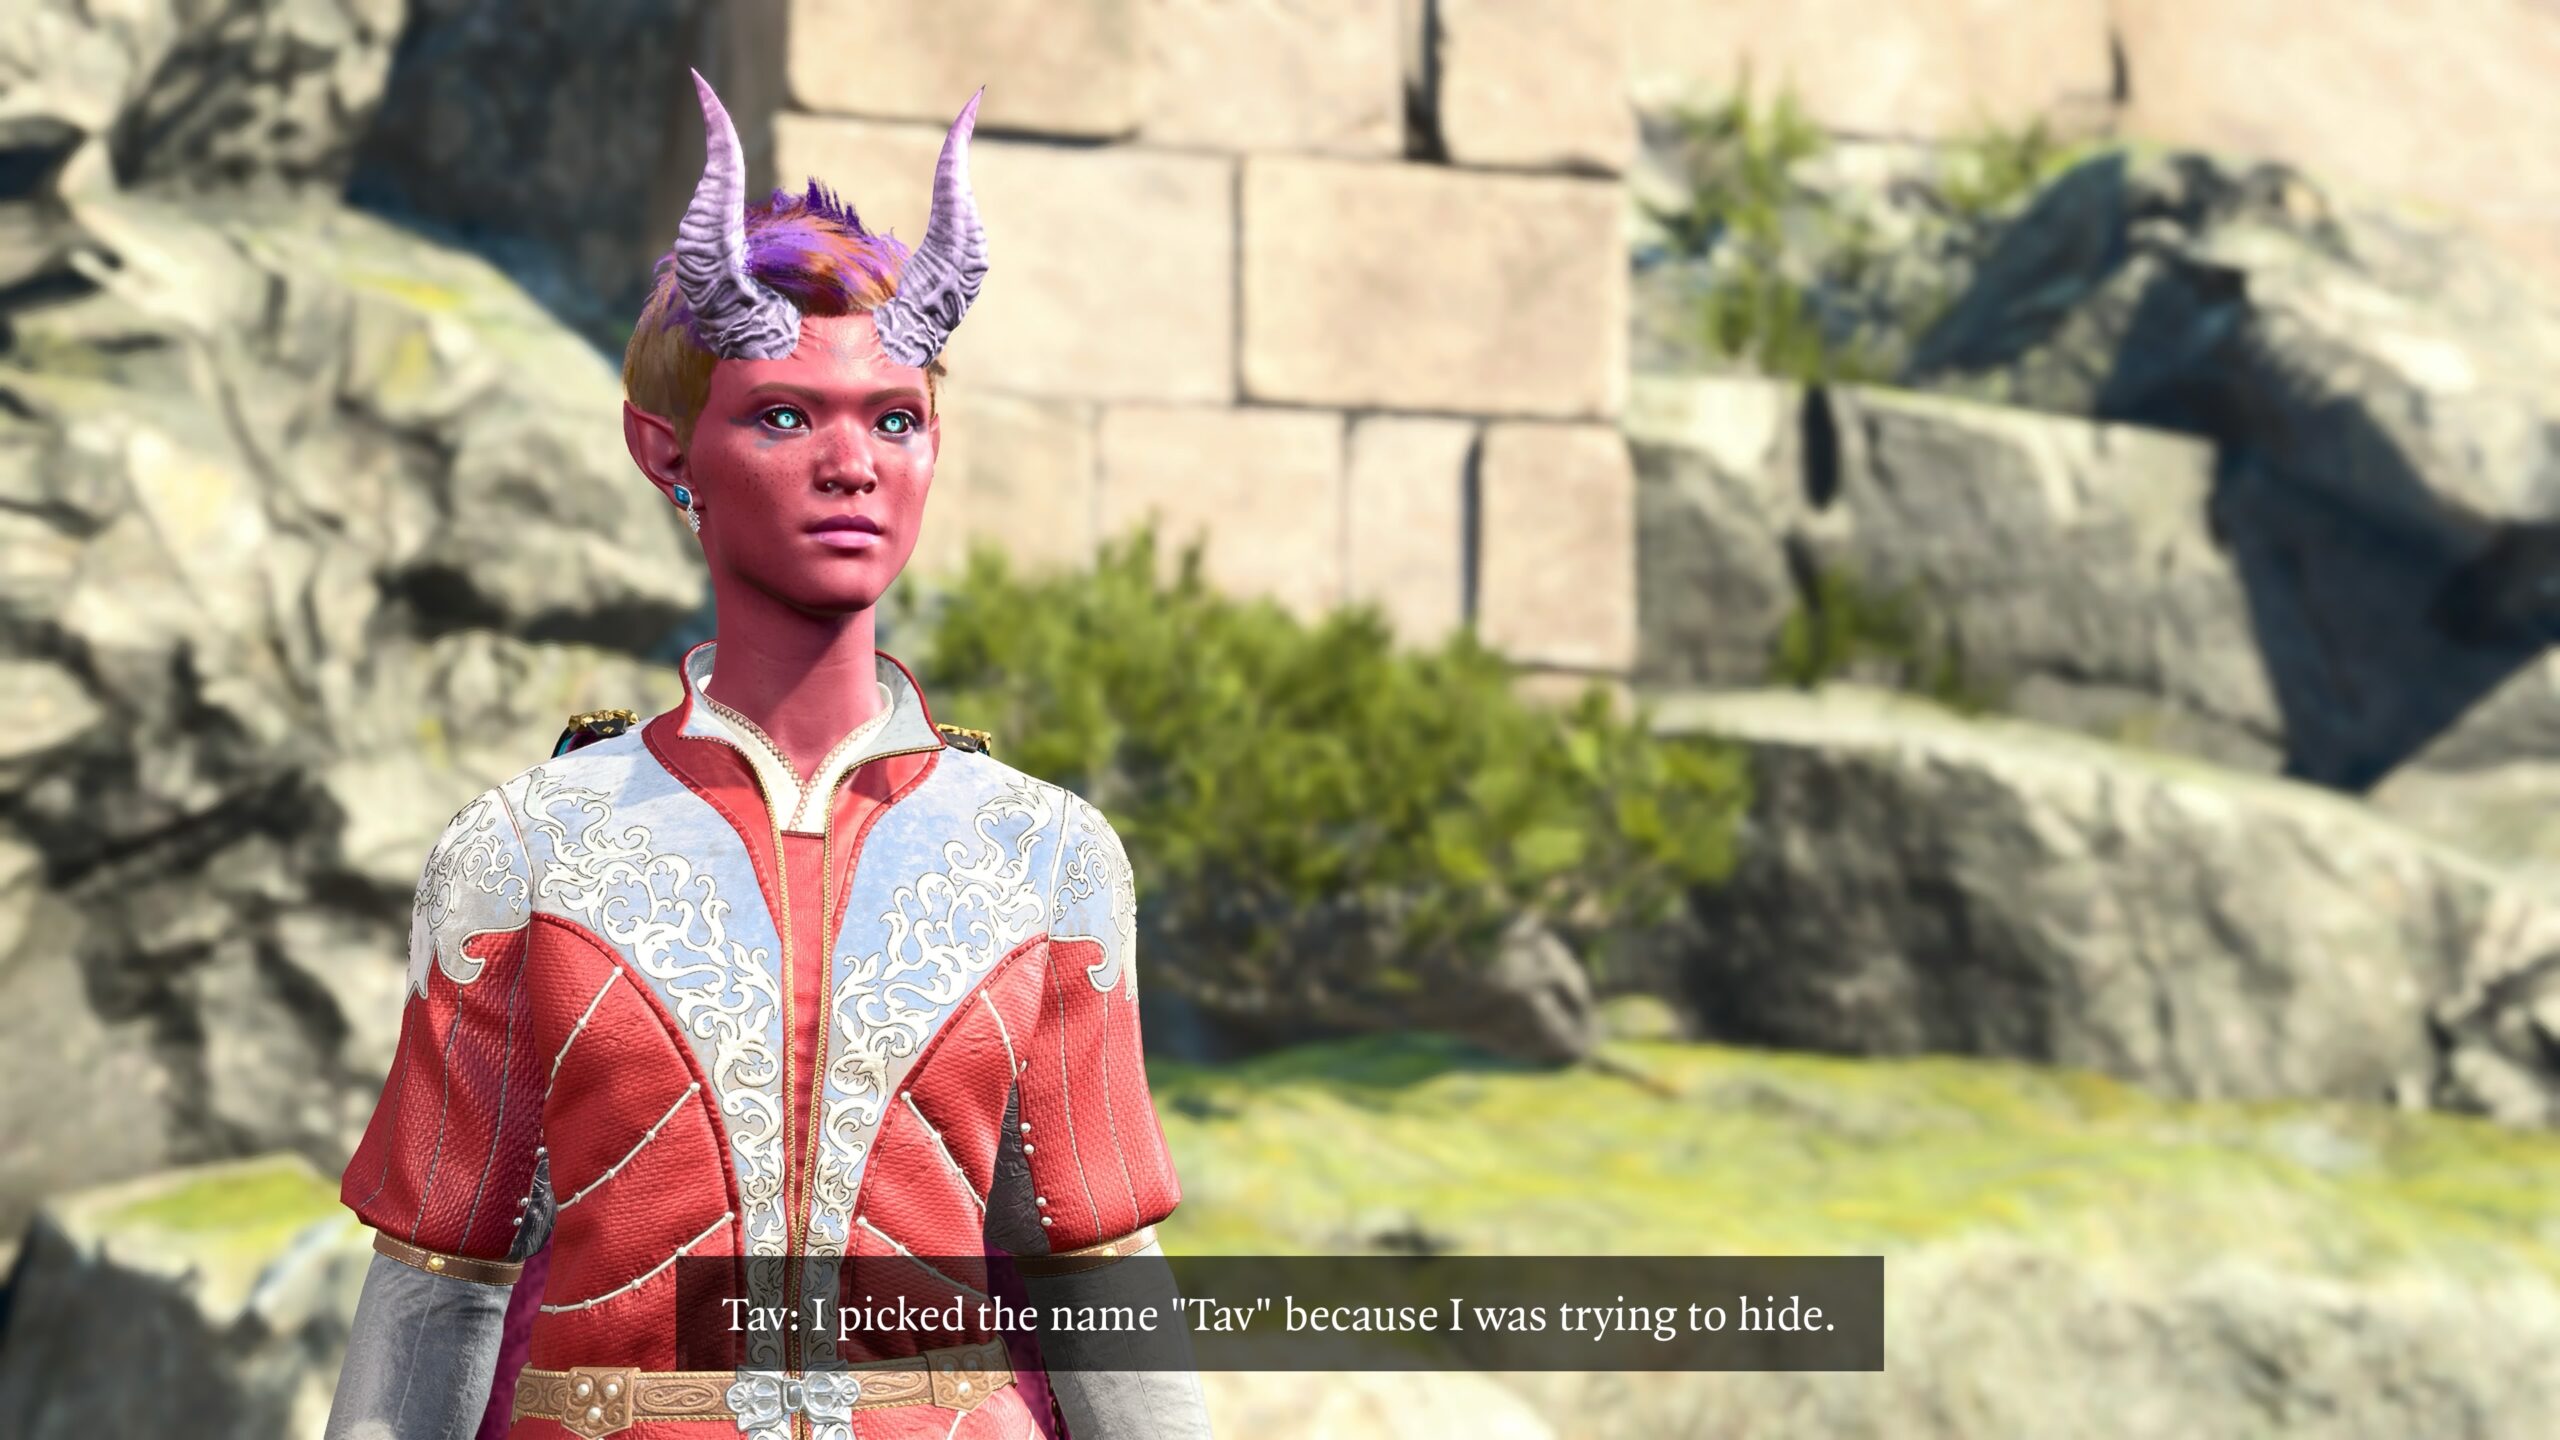
Let’s evolve a piece of fanfic. For the rest of this essay, any pictures with Tav in the red-silver armor are part of the story.

For the moment, let’s set aside that I’ve just shown you the same photo four times. Let’s talk about the captions, the only serious post-processing I do to my screenshots.
Those captions were put in using my WordPress theme’s formatting. That’s good enough for blog-post explanations, and for the fictional back-and-forth with basic screen captures I mentioned earlier.
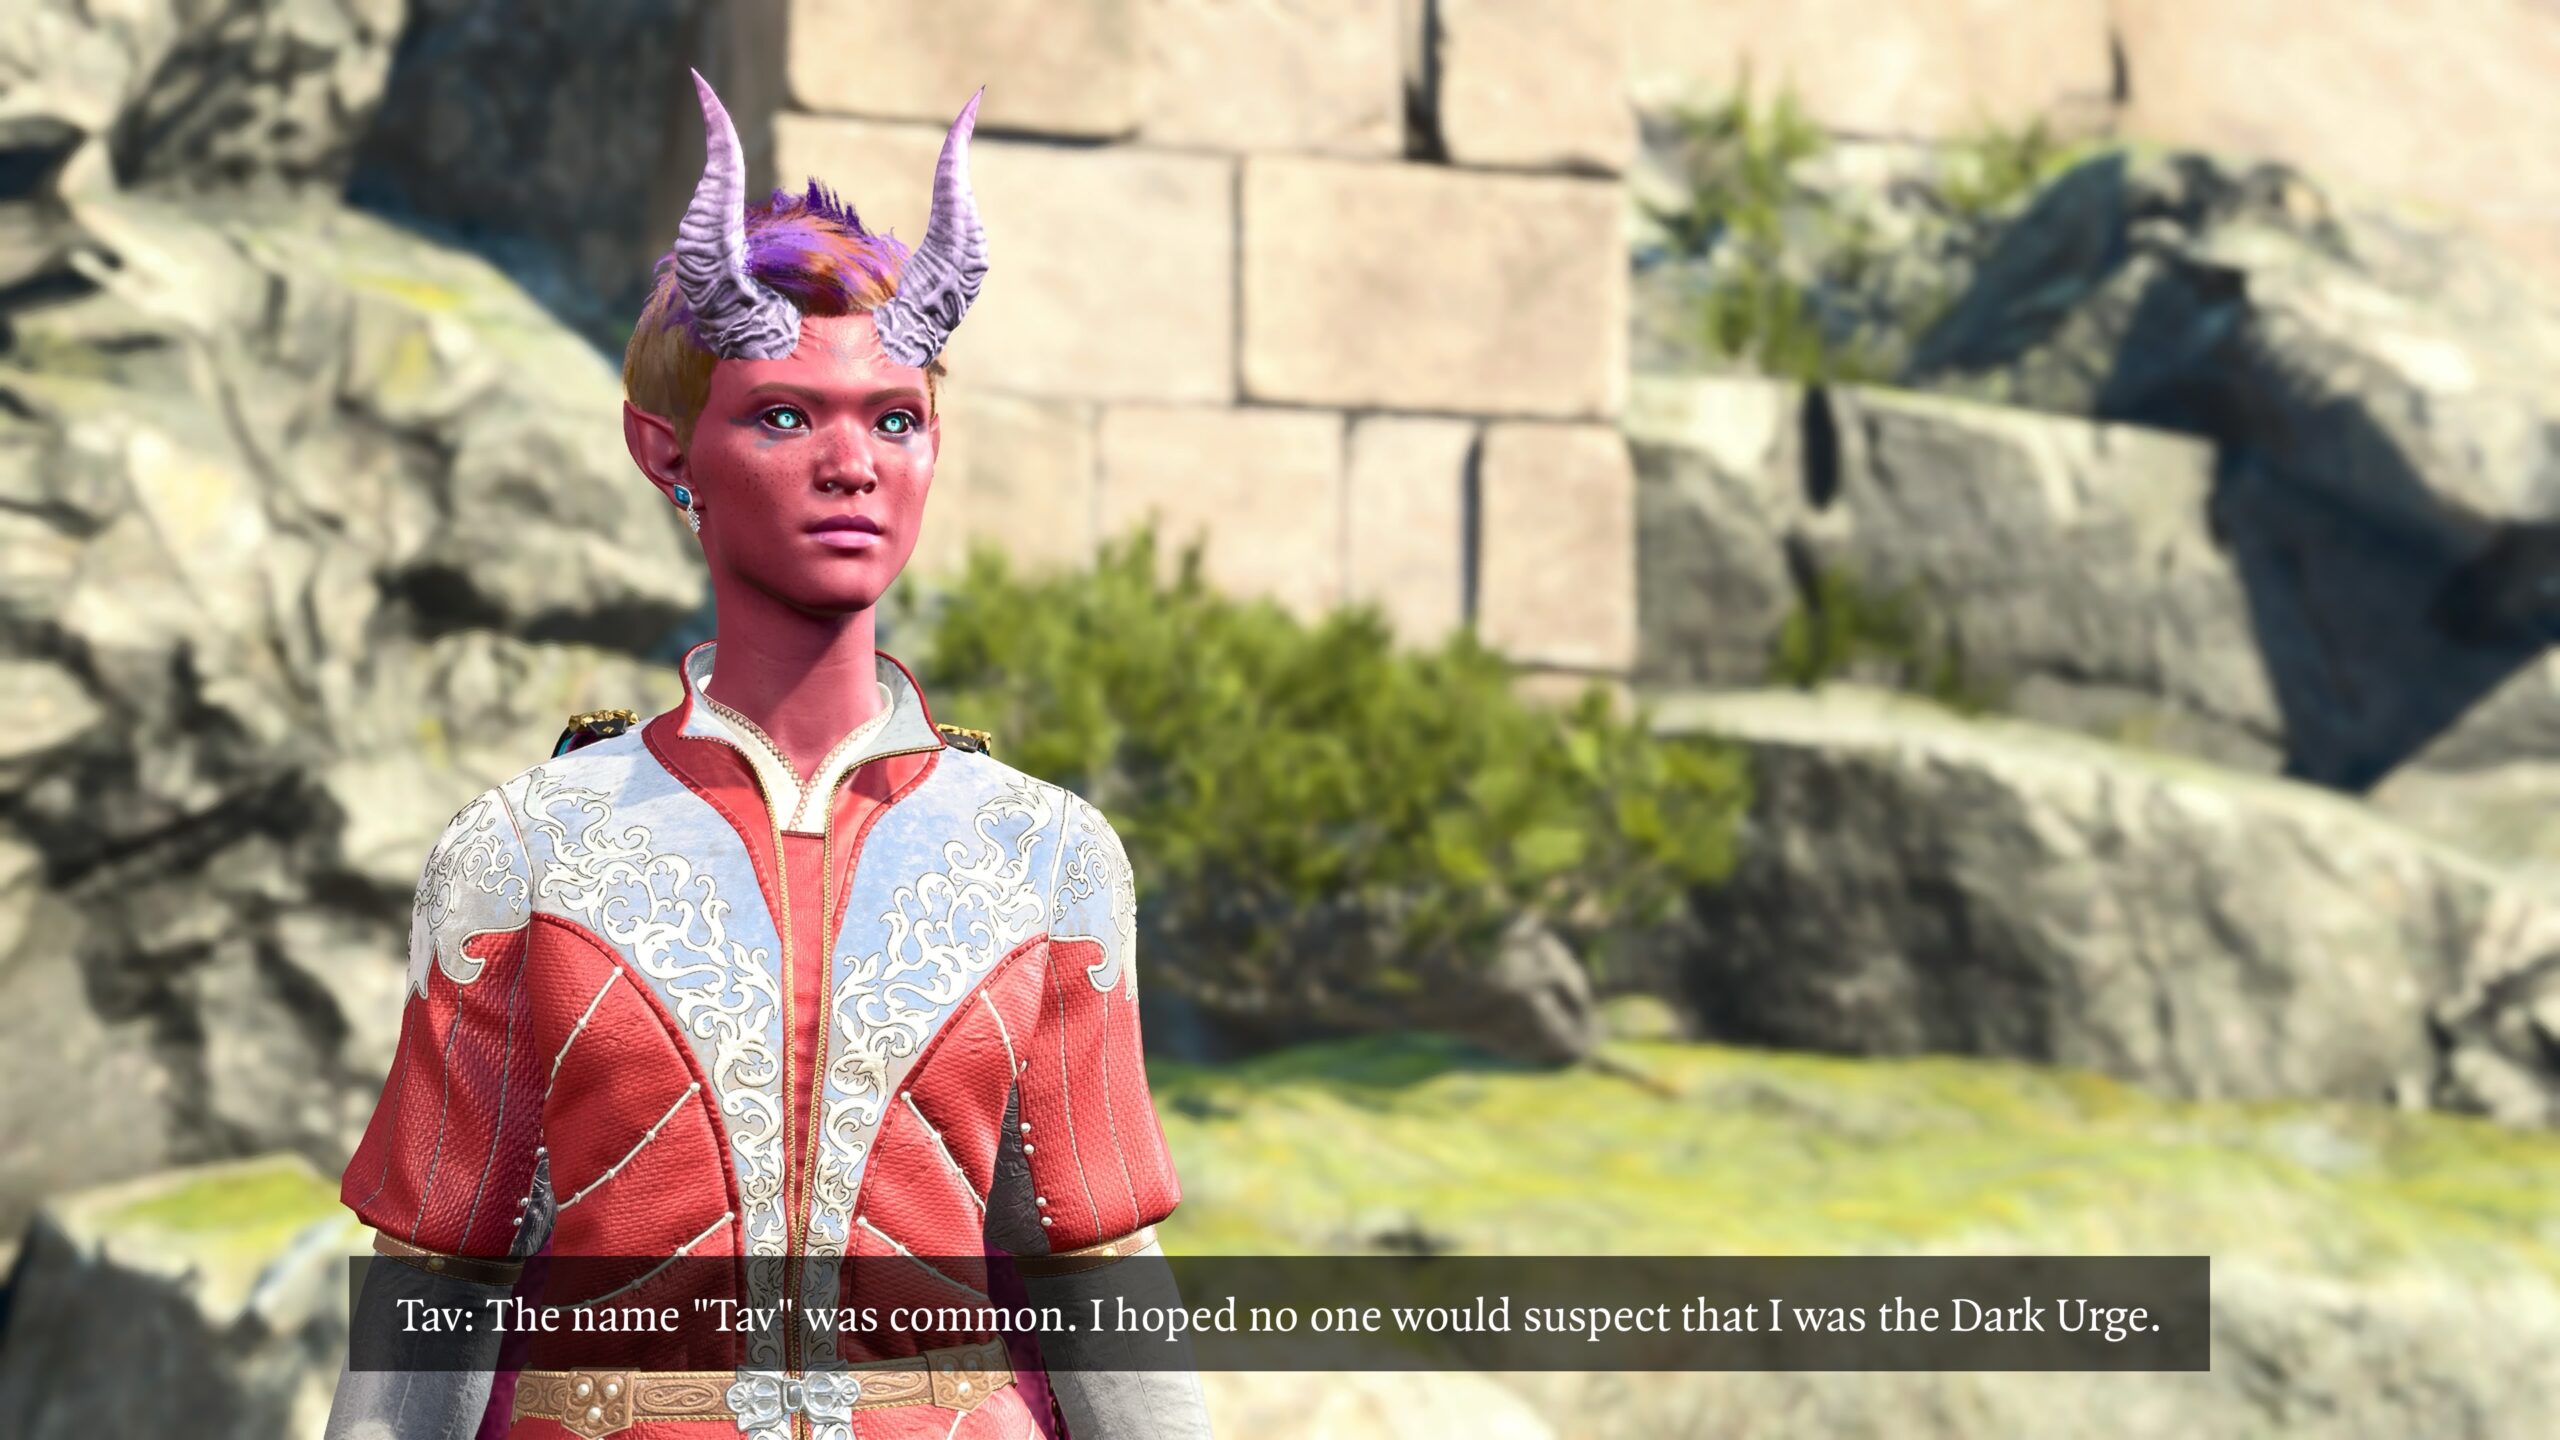
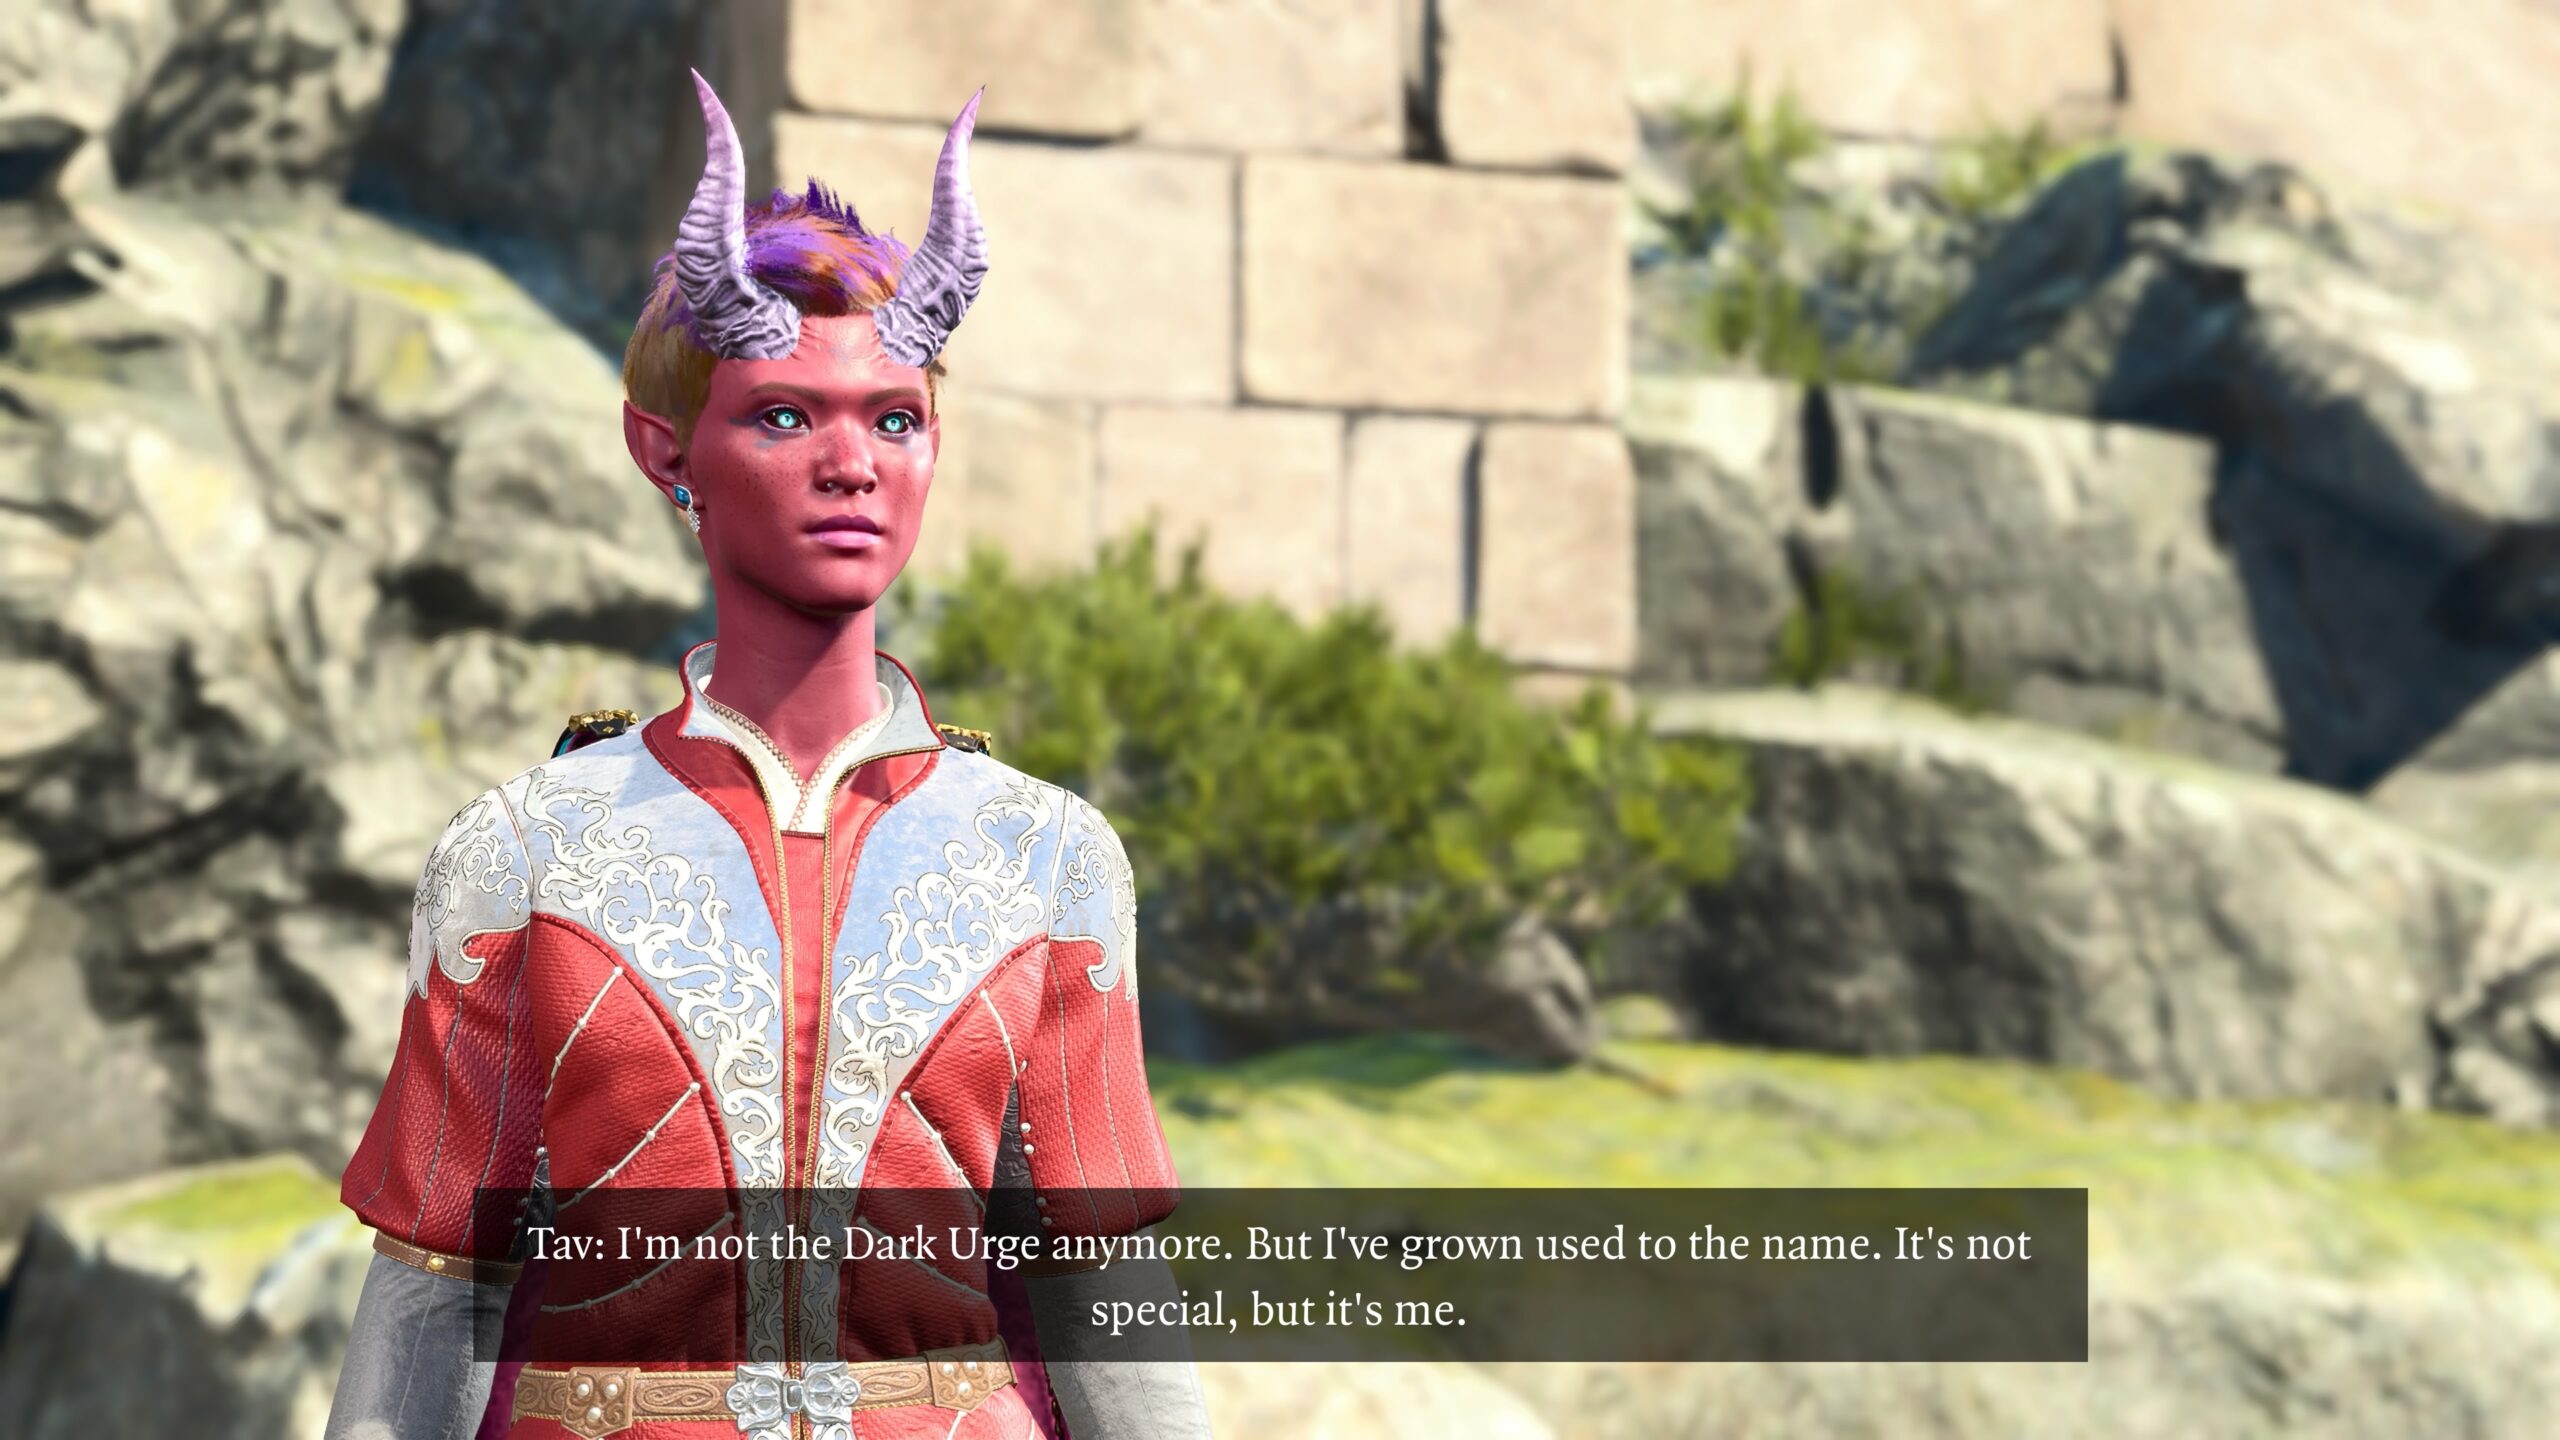
I want to pretend that my fanfic pictures take place in the “universe” of BG3. In my mind, that means giving my images captions that have the same style and appearance as the screen captures of the game’s cutscenes.
In a way, that’s impossible. Players can choose the font size and text background opacity. They can even turn subtitles off.
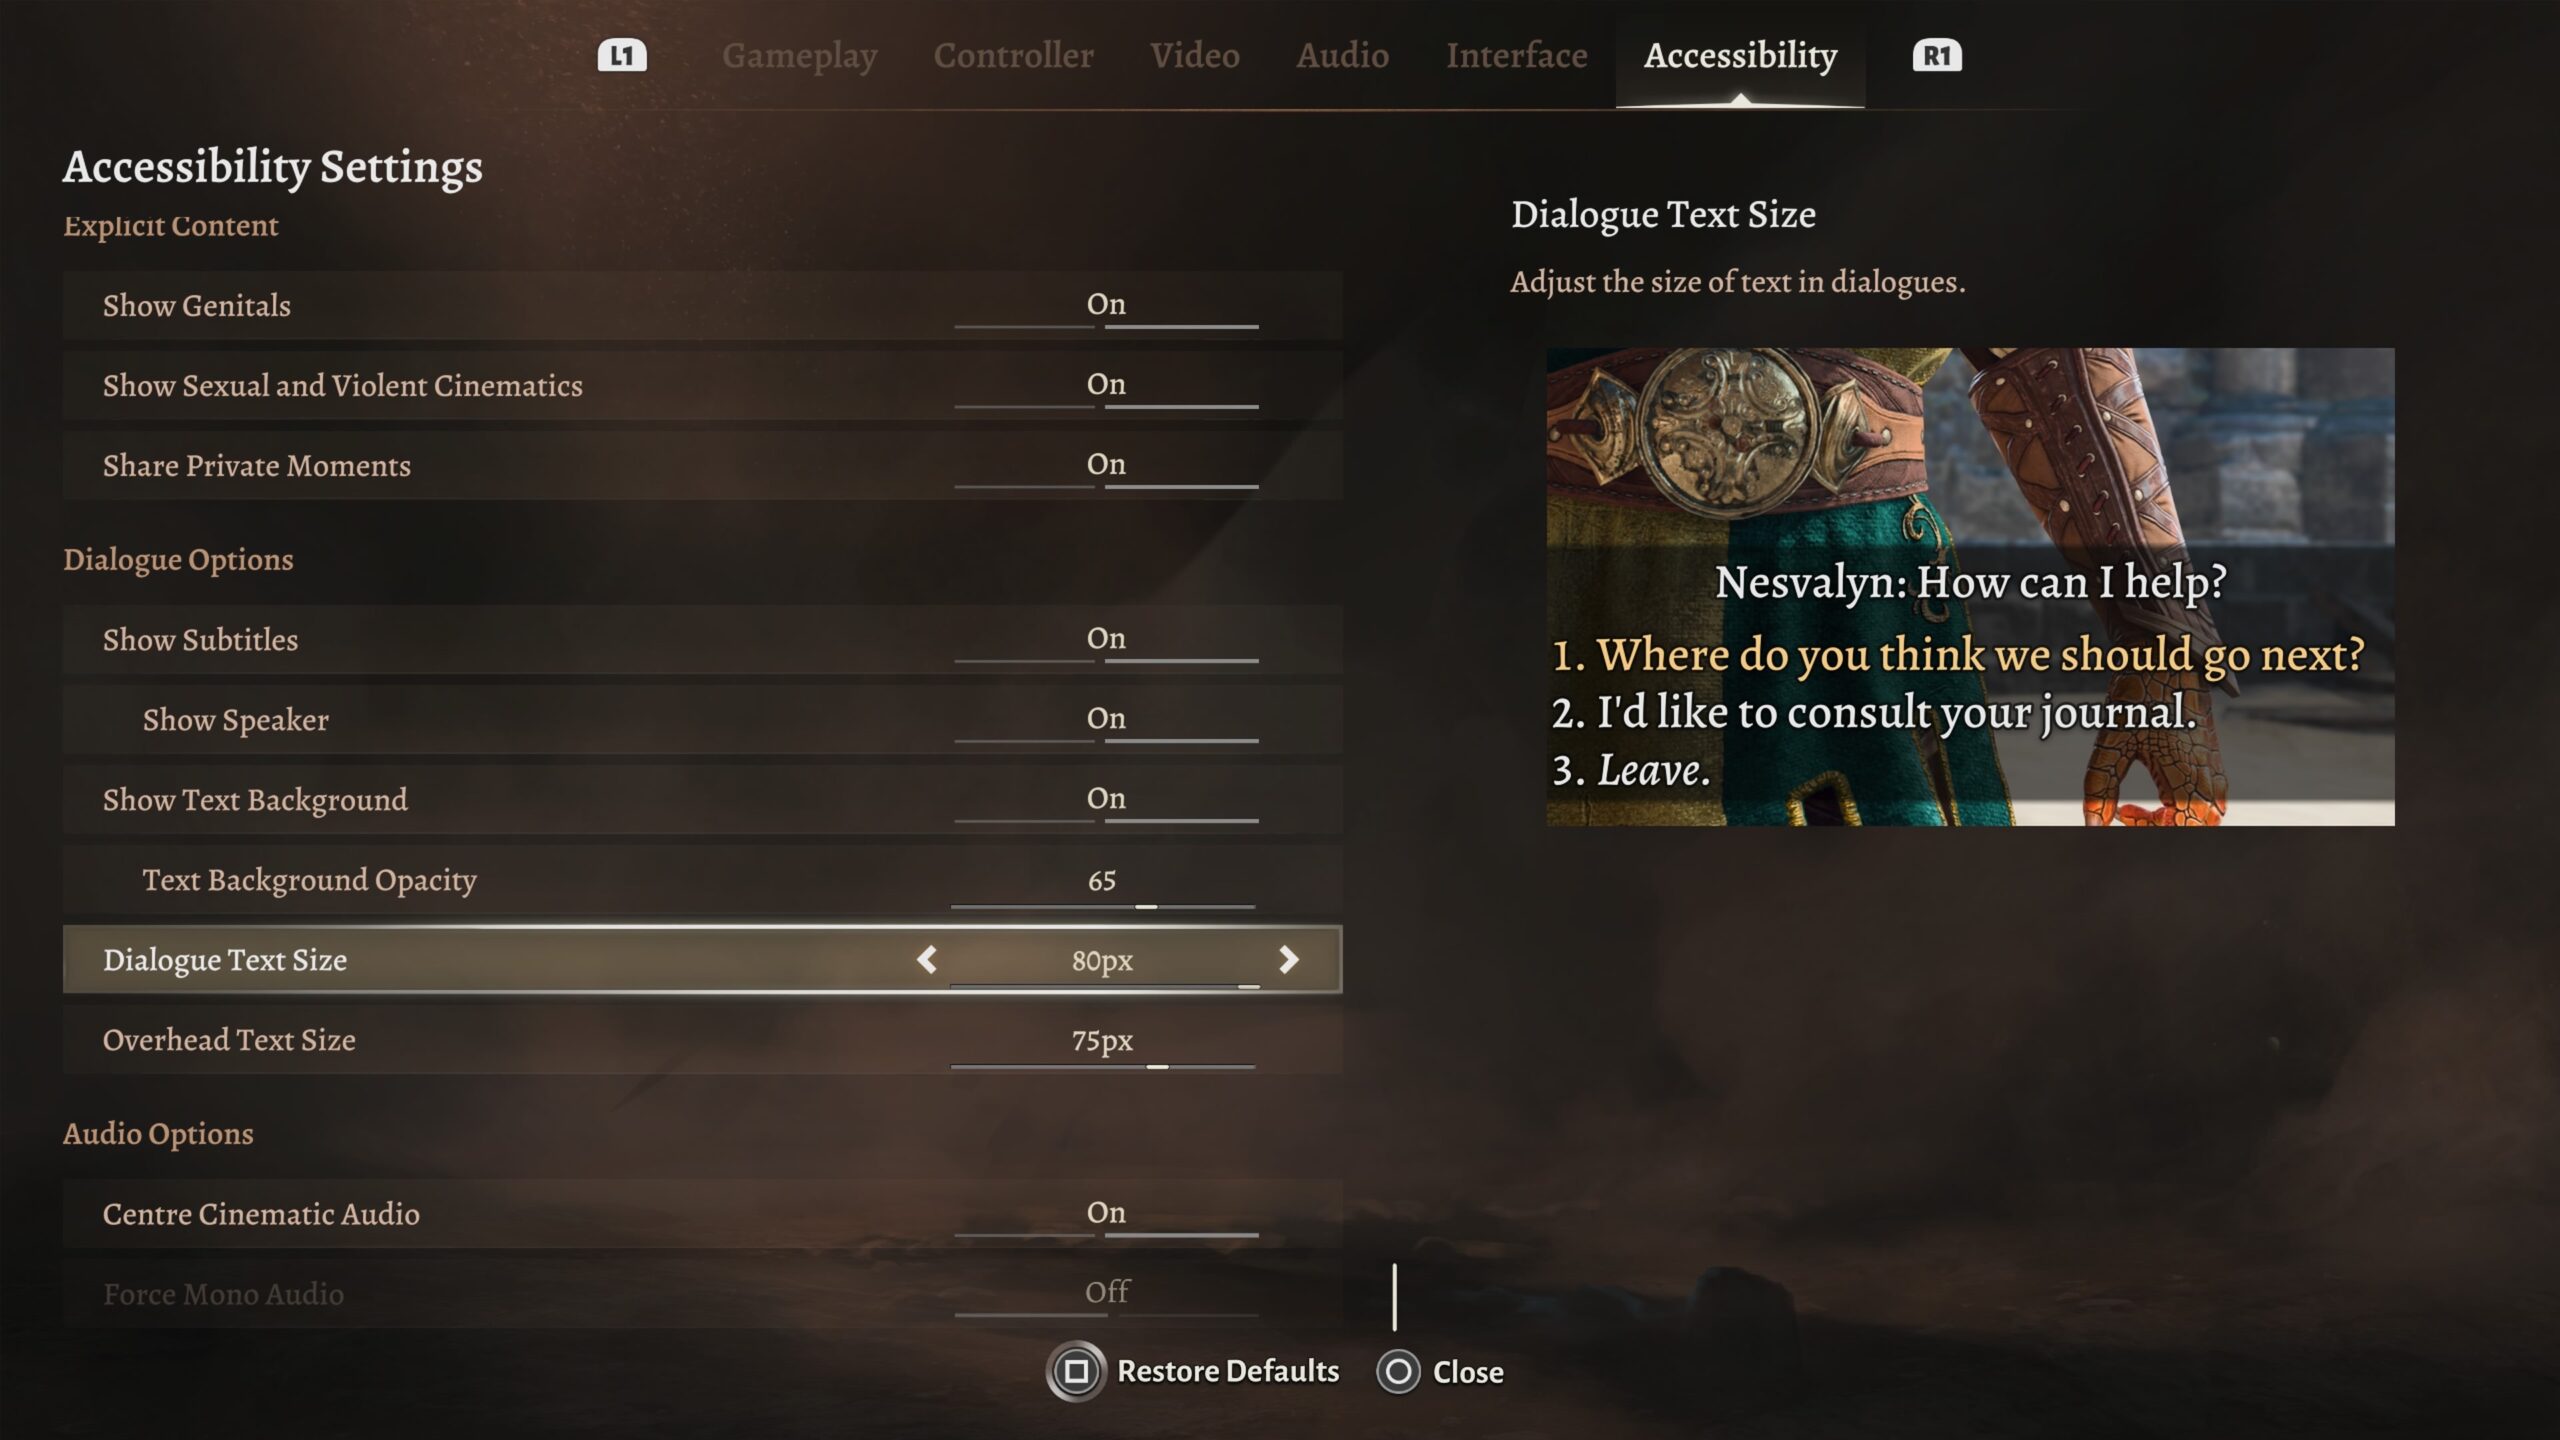
The best I can do is adopt a consistent appearance between what the game displays on my screen and the fake captions I add. If you have different font-size settings when you play BG3, my captions may not trigger the “That’s from the game!” signal in your brain as they do in mine.
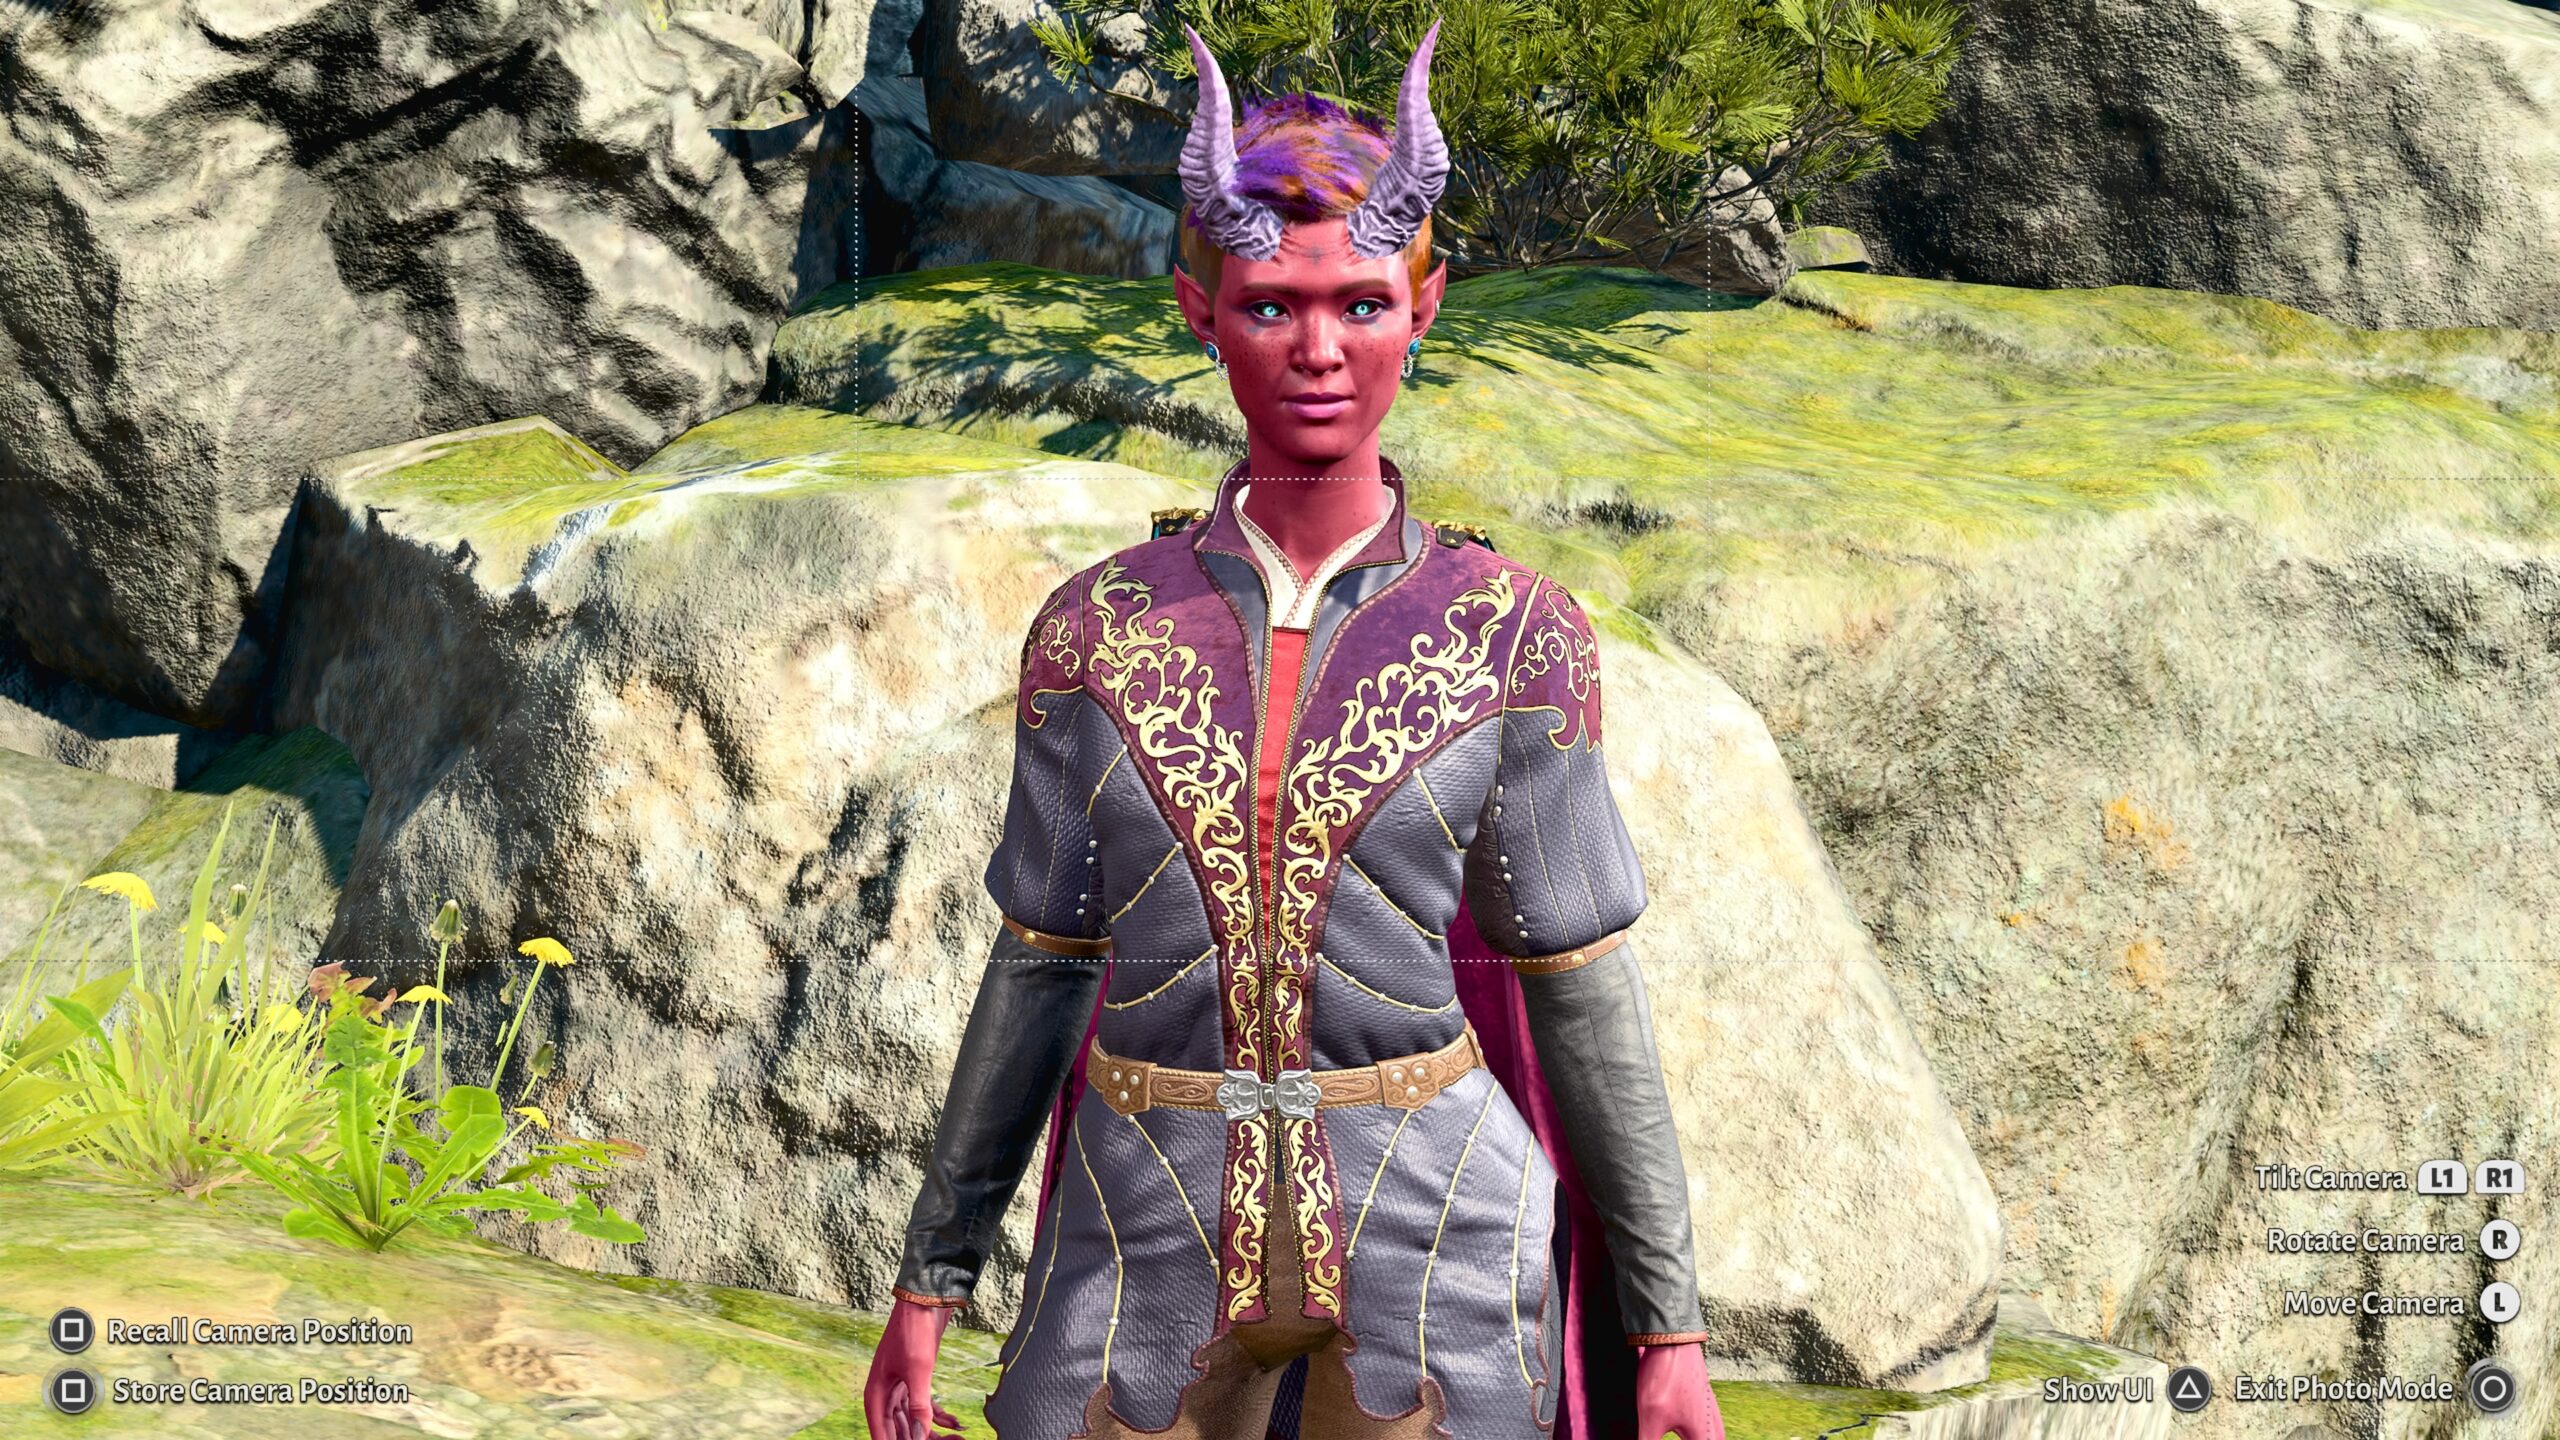
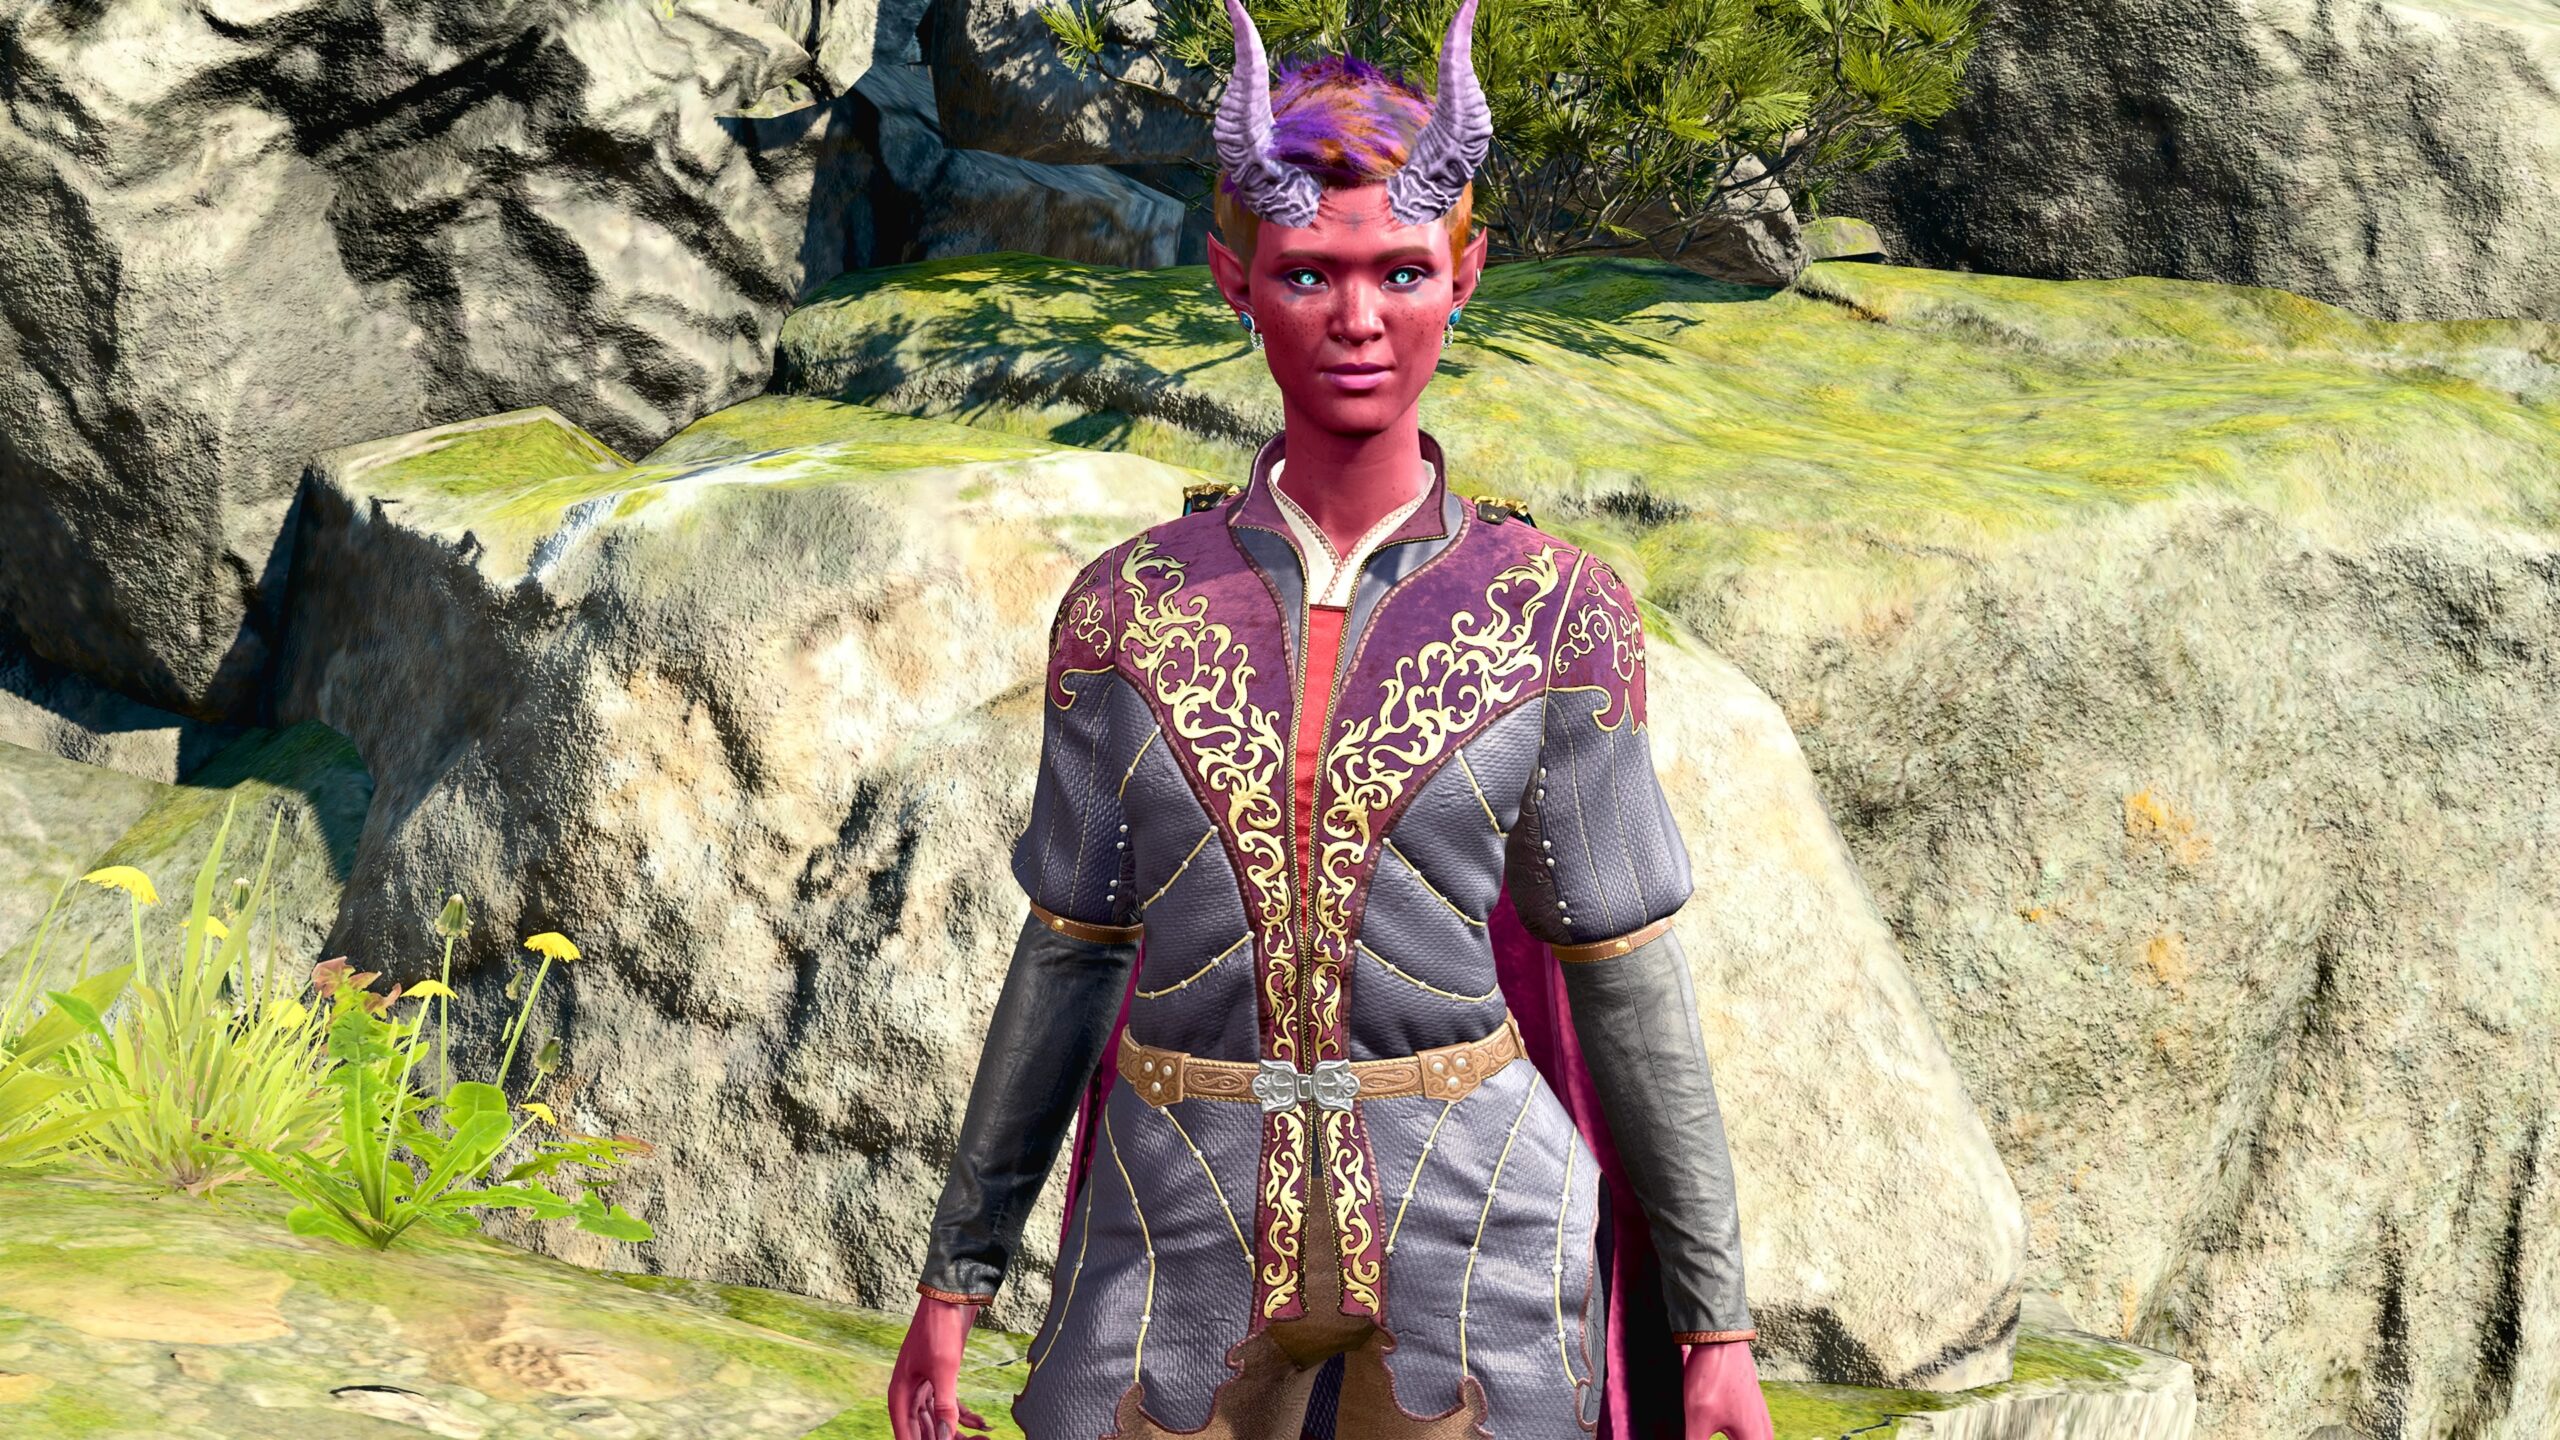
Withers, would you please show the readers a screen I captured directly from the game?
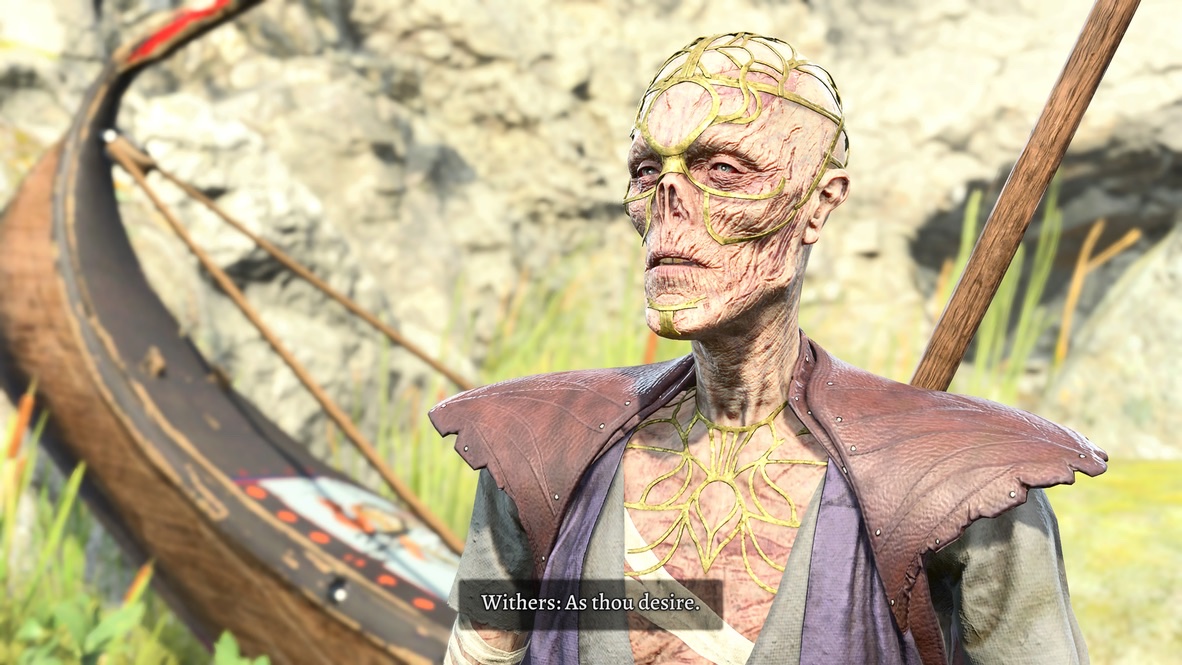
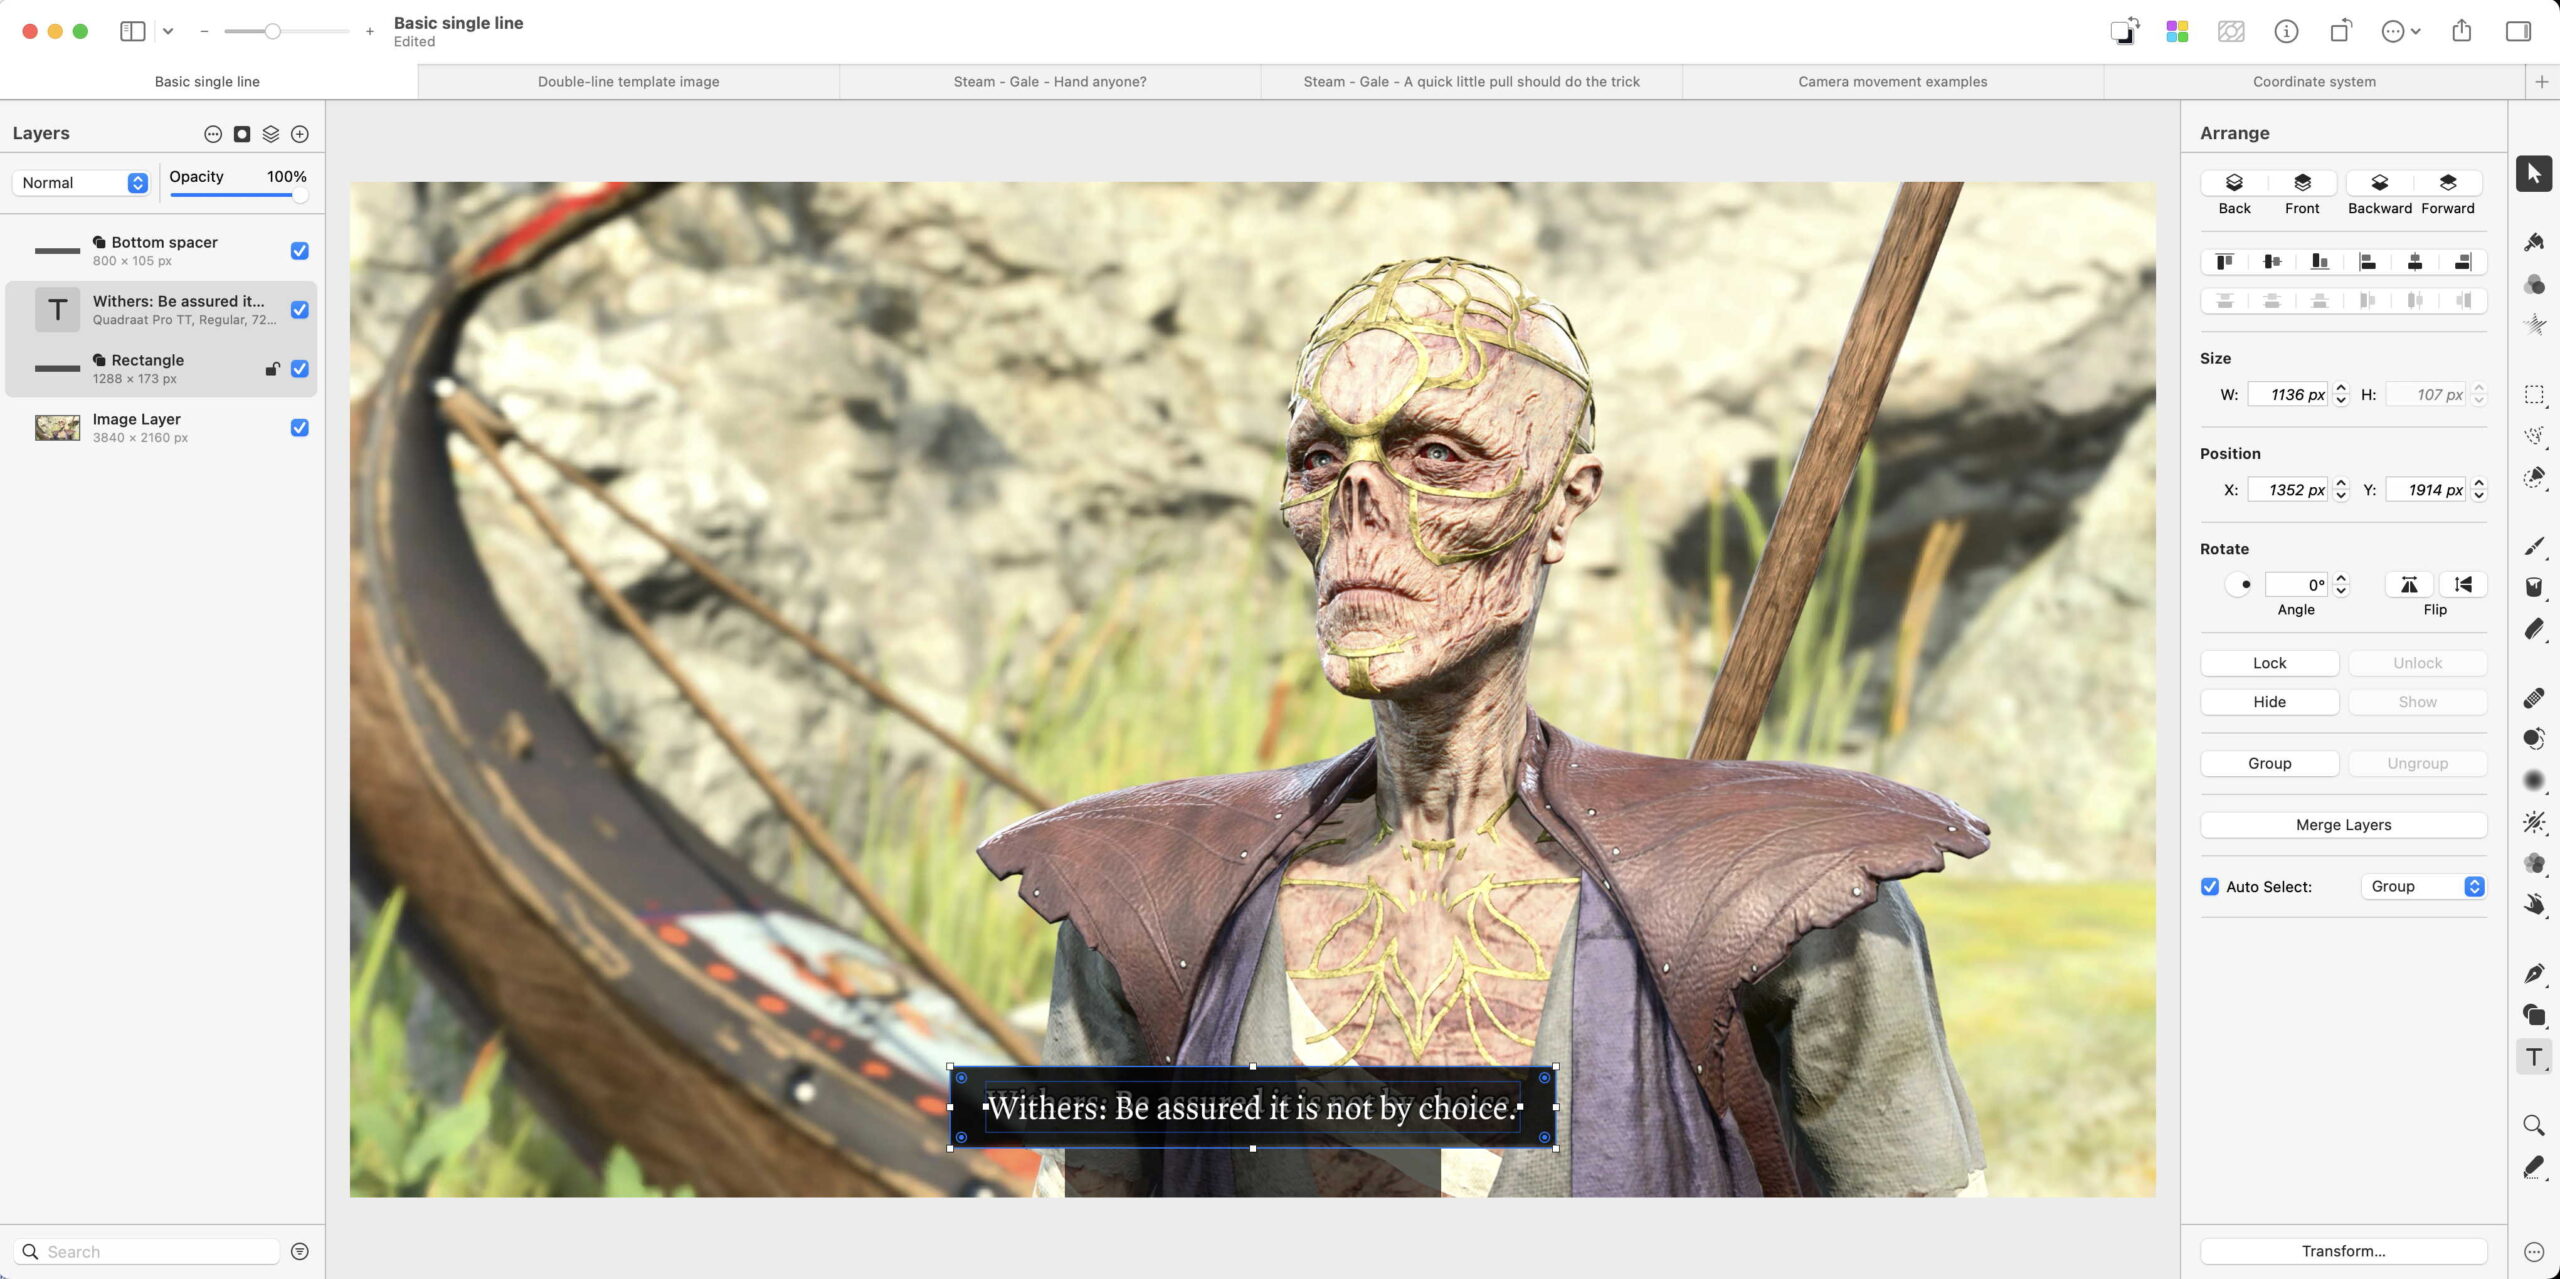
Thank you. Now would you please show them a different screen capture, originally without any caption, in which I’ve manually inserted the caption text?
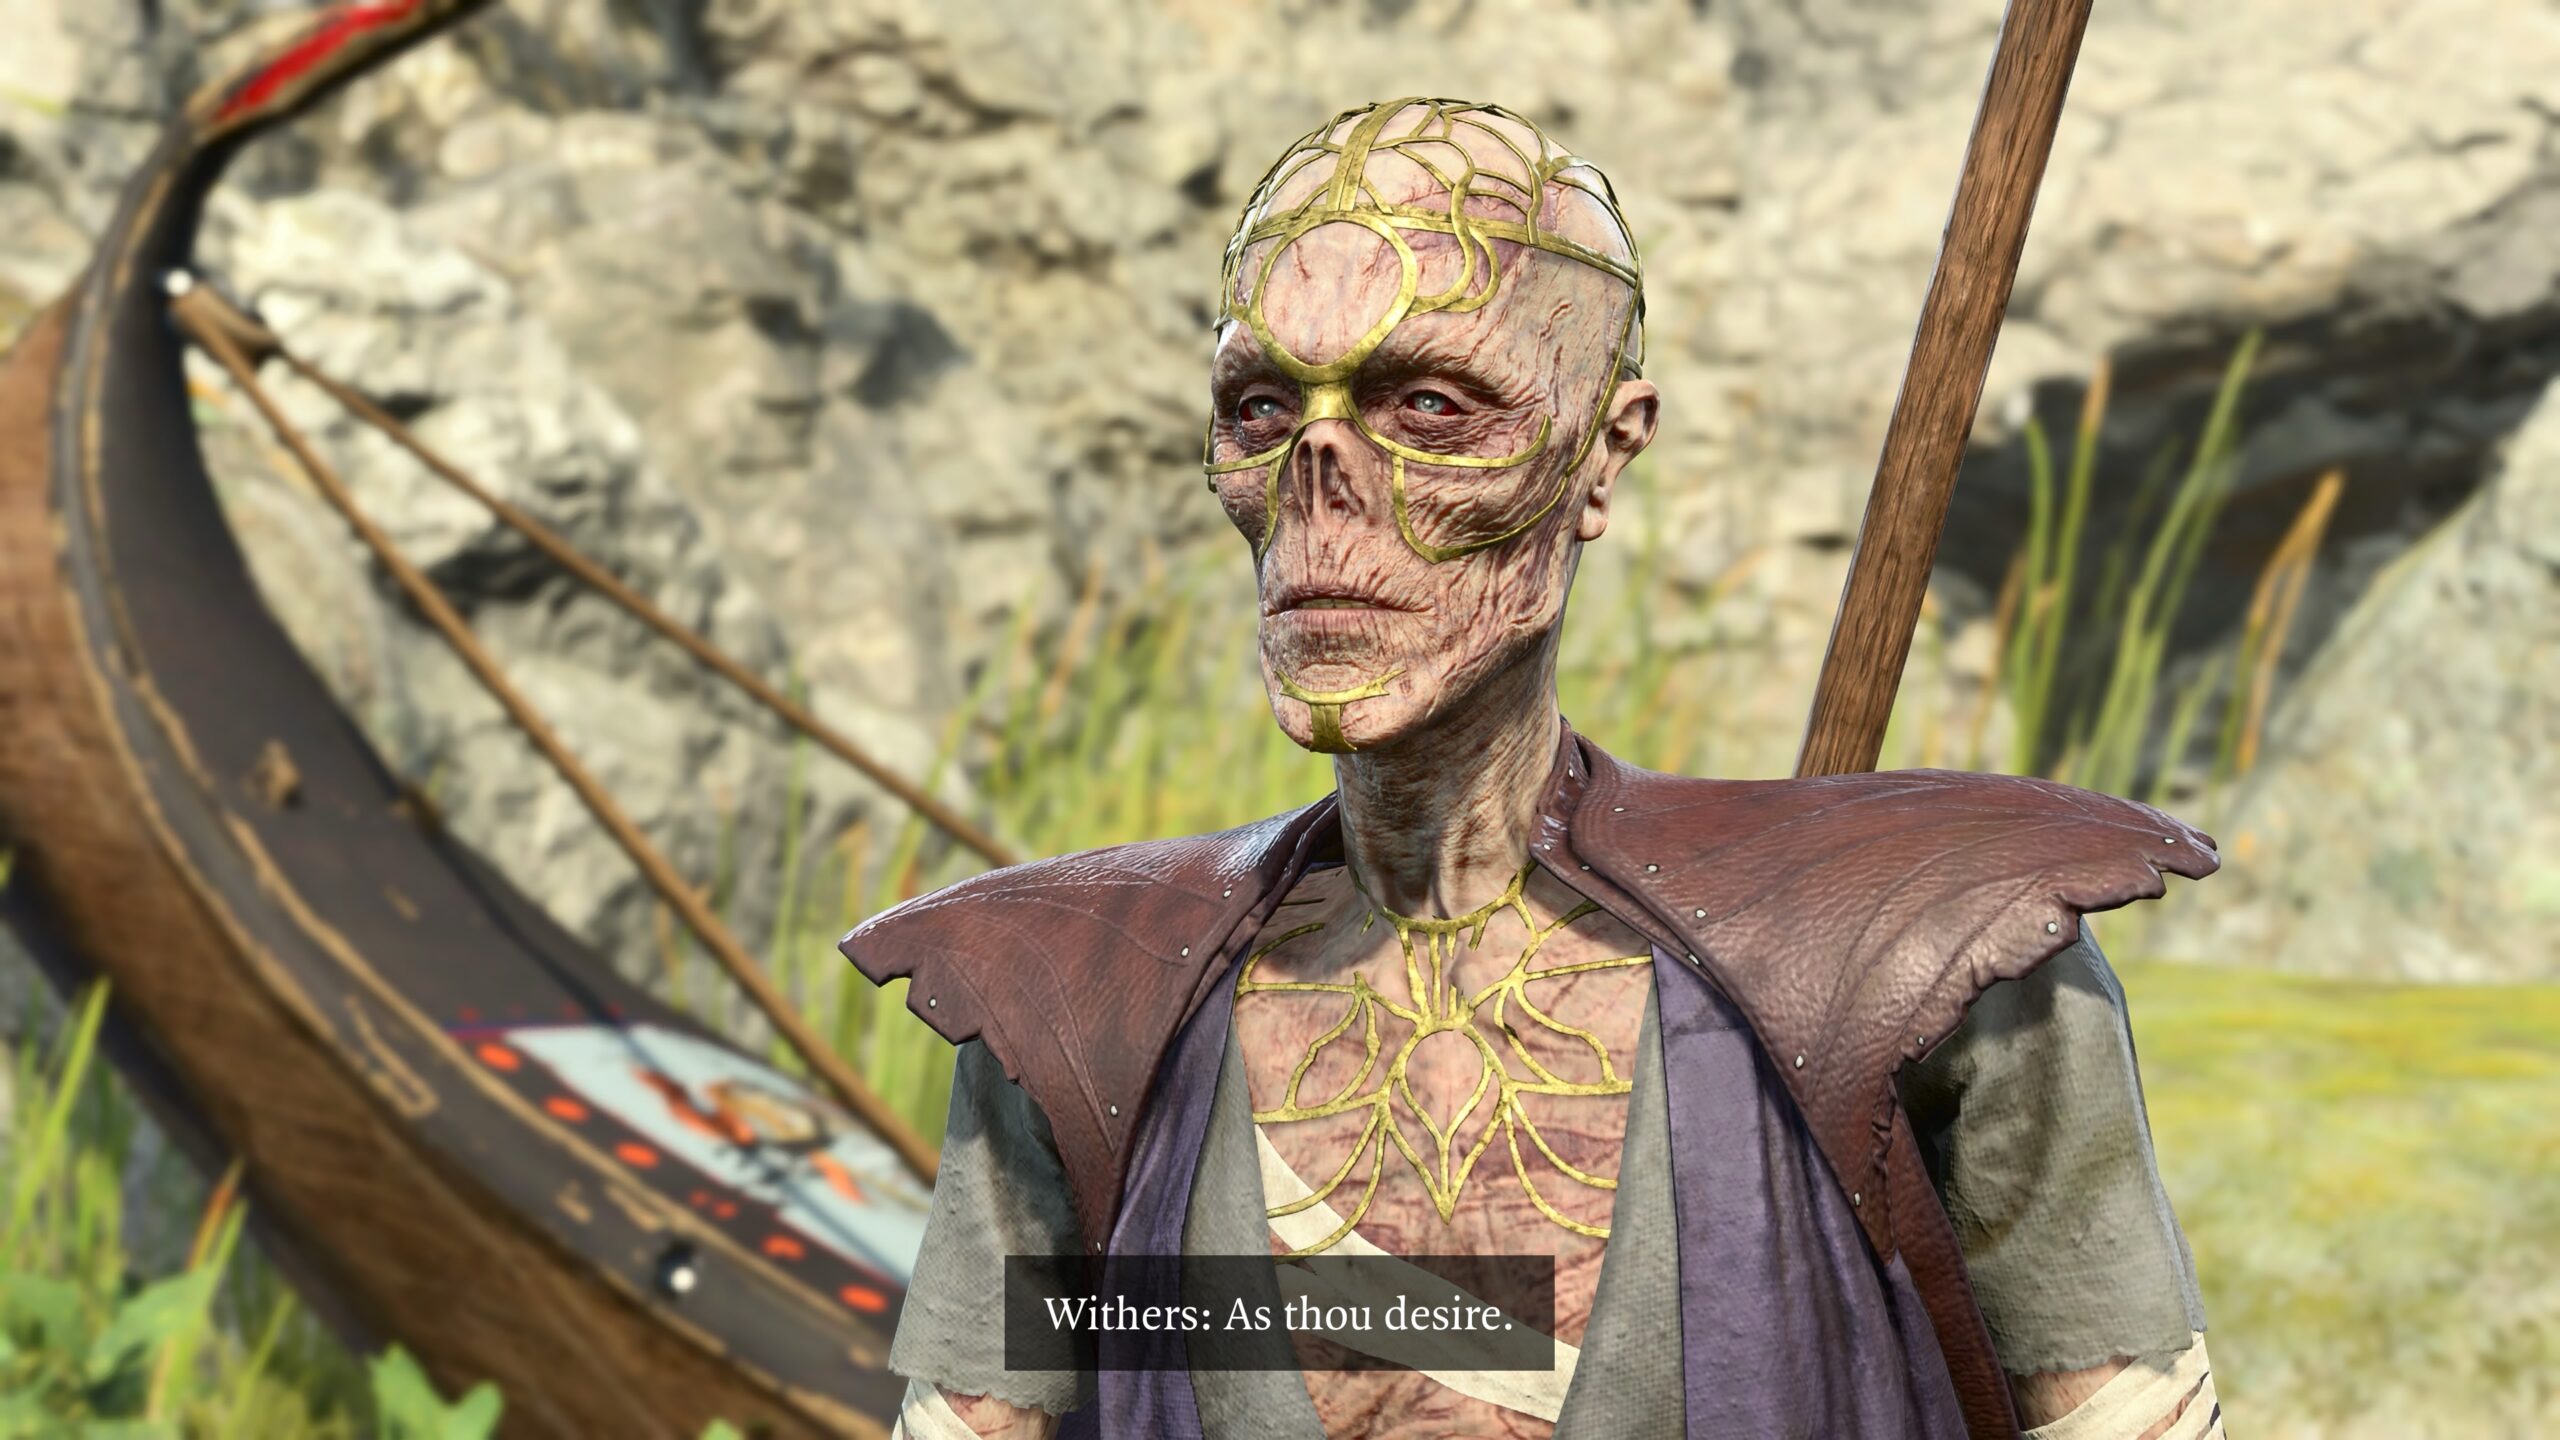
It’s not a perfect match, but it’s good enough. Remember, I’m not trying to fool anyone. My goal is make the captions from BG3 screen captures form a consistent whole with images I’ve added my captions to.
A bit of web research showed that BG3 uses the font Quadraat Pro. I’ve linked to a free version, but it’s not quite the same as the one the game uses; the character spacing is slightly different. Because I’m insane, I purchased a professional version that matched better. As my insanity grew, I purchased the bold and italic versions as well.

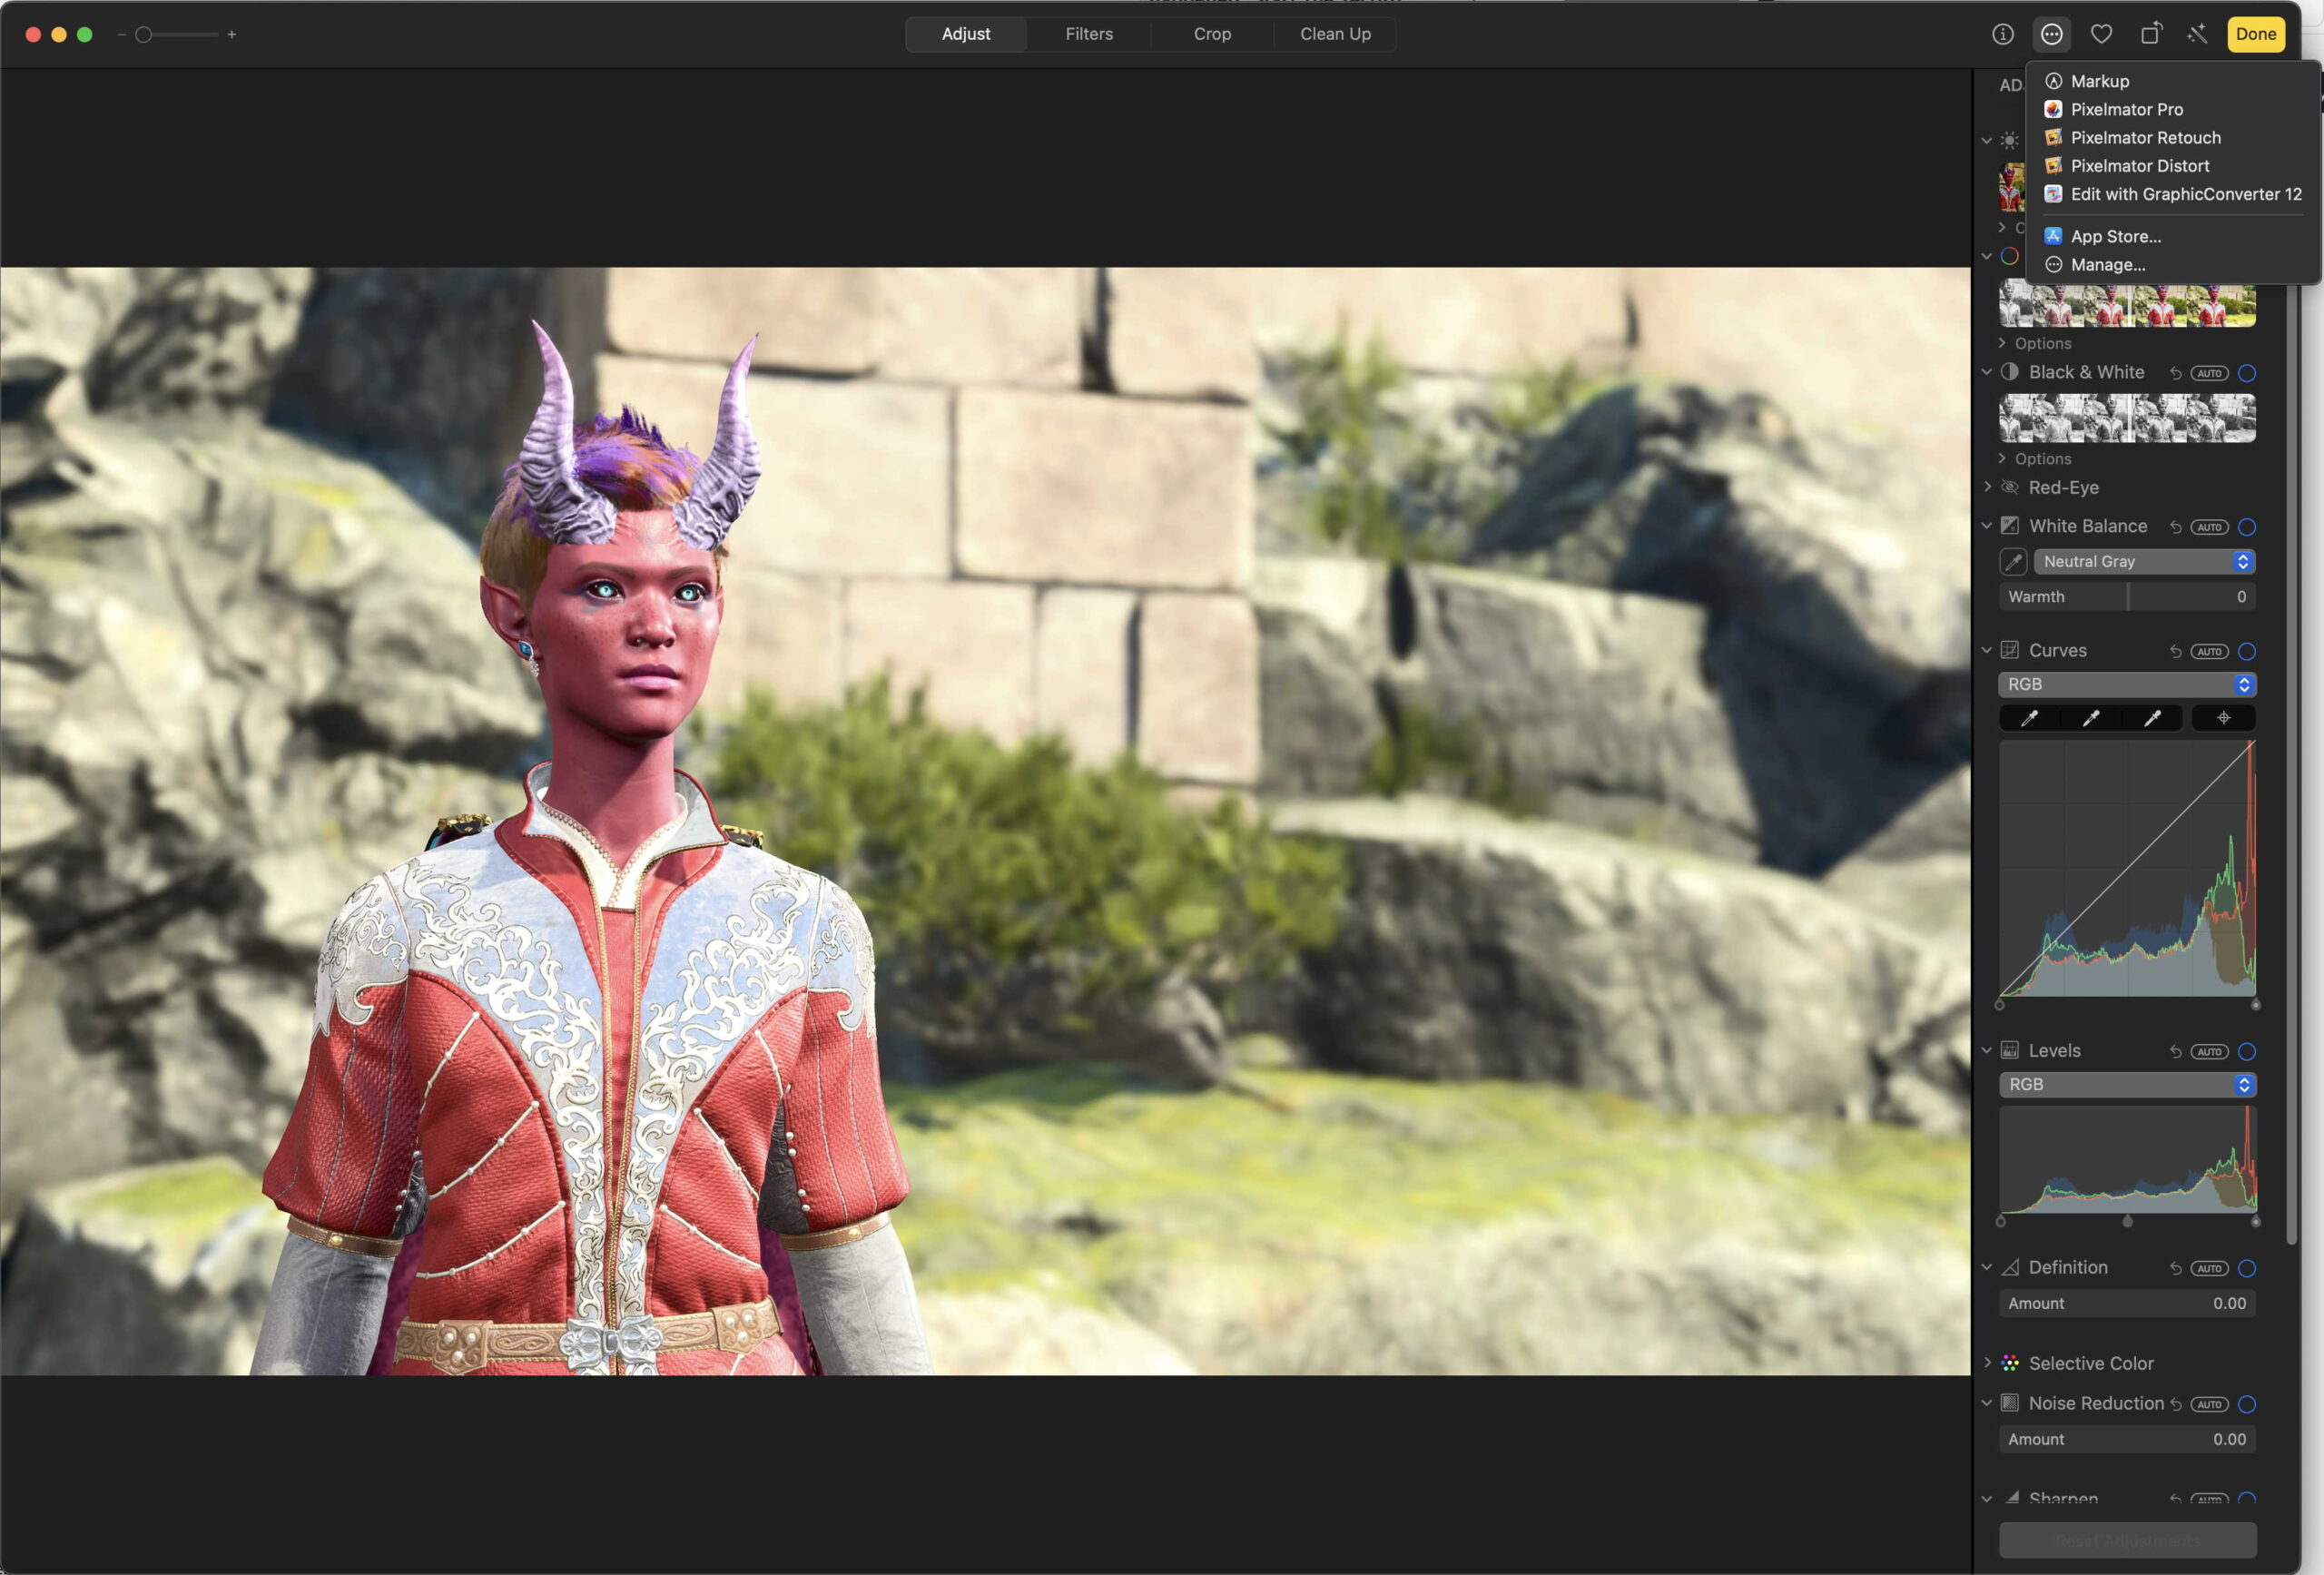
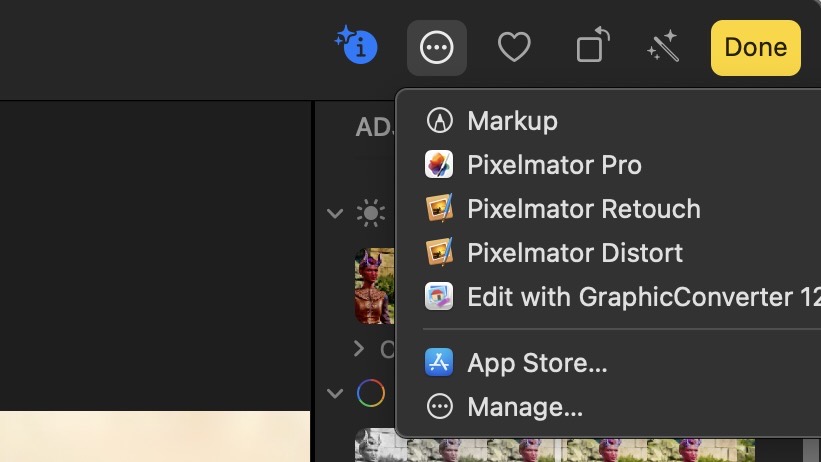
The software tool I use to add the captions is Pixelmator Pro, Apple’s inexpensive equivalent to Adobe Photoshop. The main reason I picked it is that it integrates well with Apple Photos’ editing tools.
In part three we’ll learn about poses, the mods I use, watch a dryad make faces at you, get started on the fanfic, and find out why my characters rarely kiss.