In what turned to be Part One of an adventure in the Internet of Things, I talked about wanting to control my air conditioner via Apple’s Homekit.
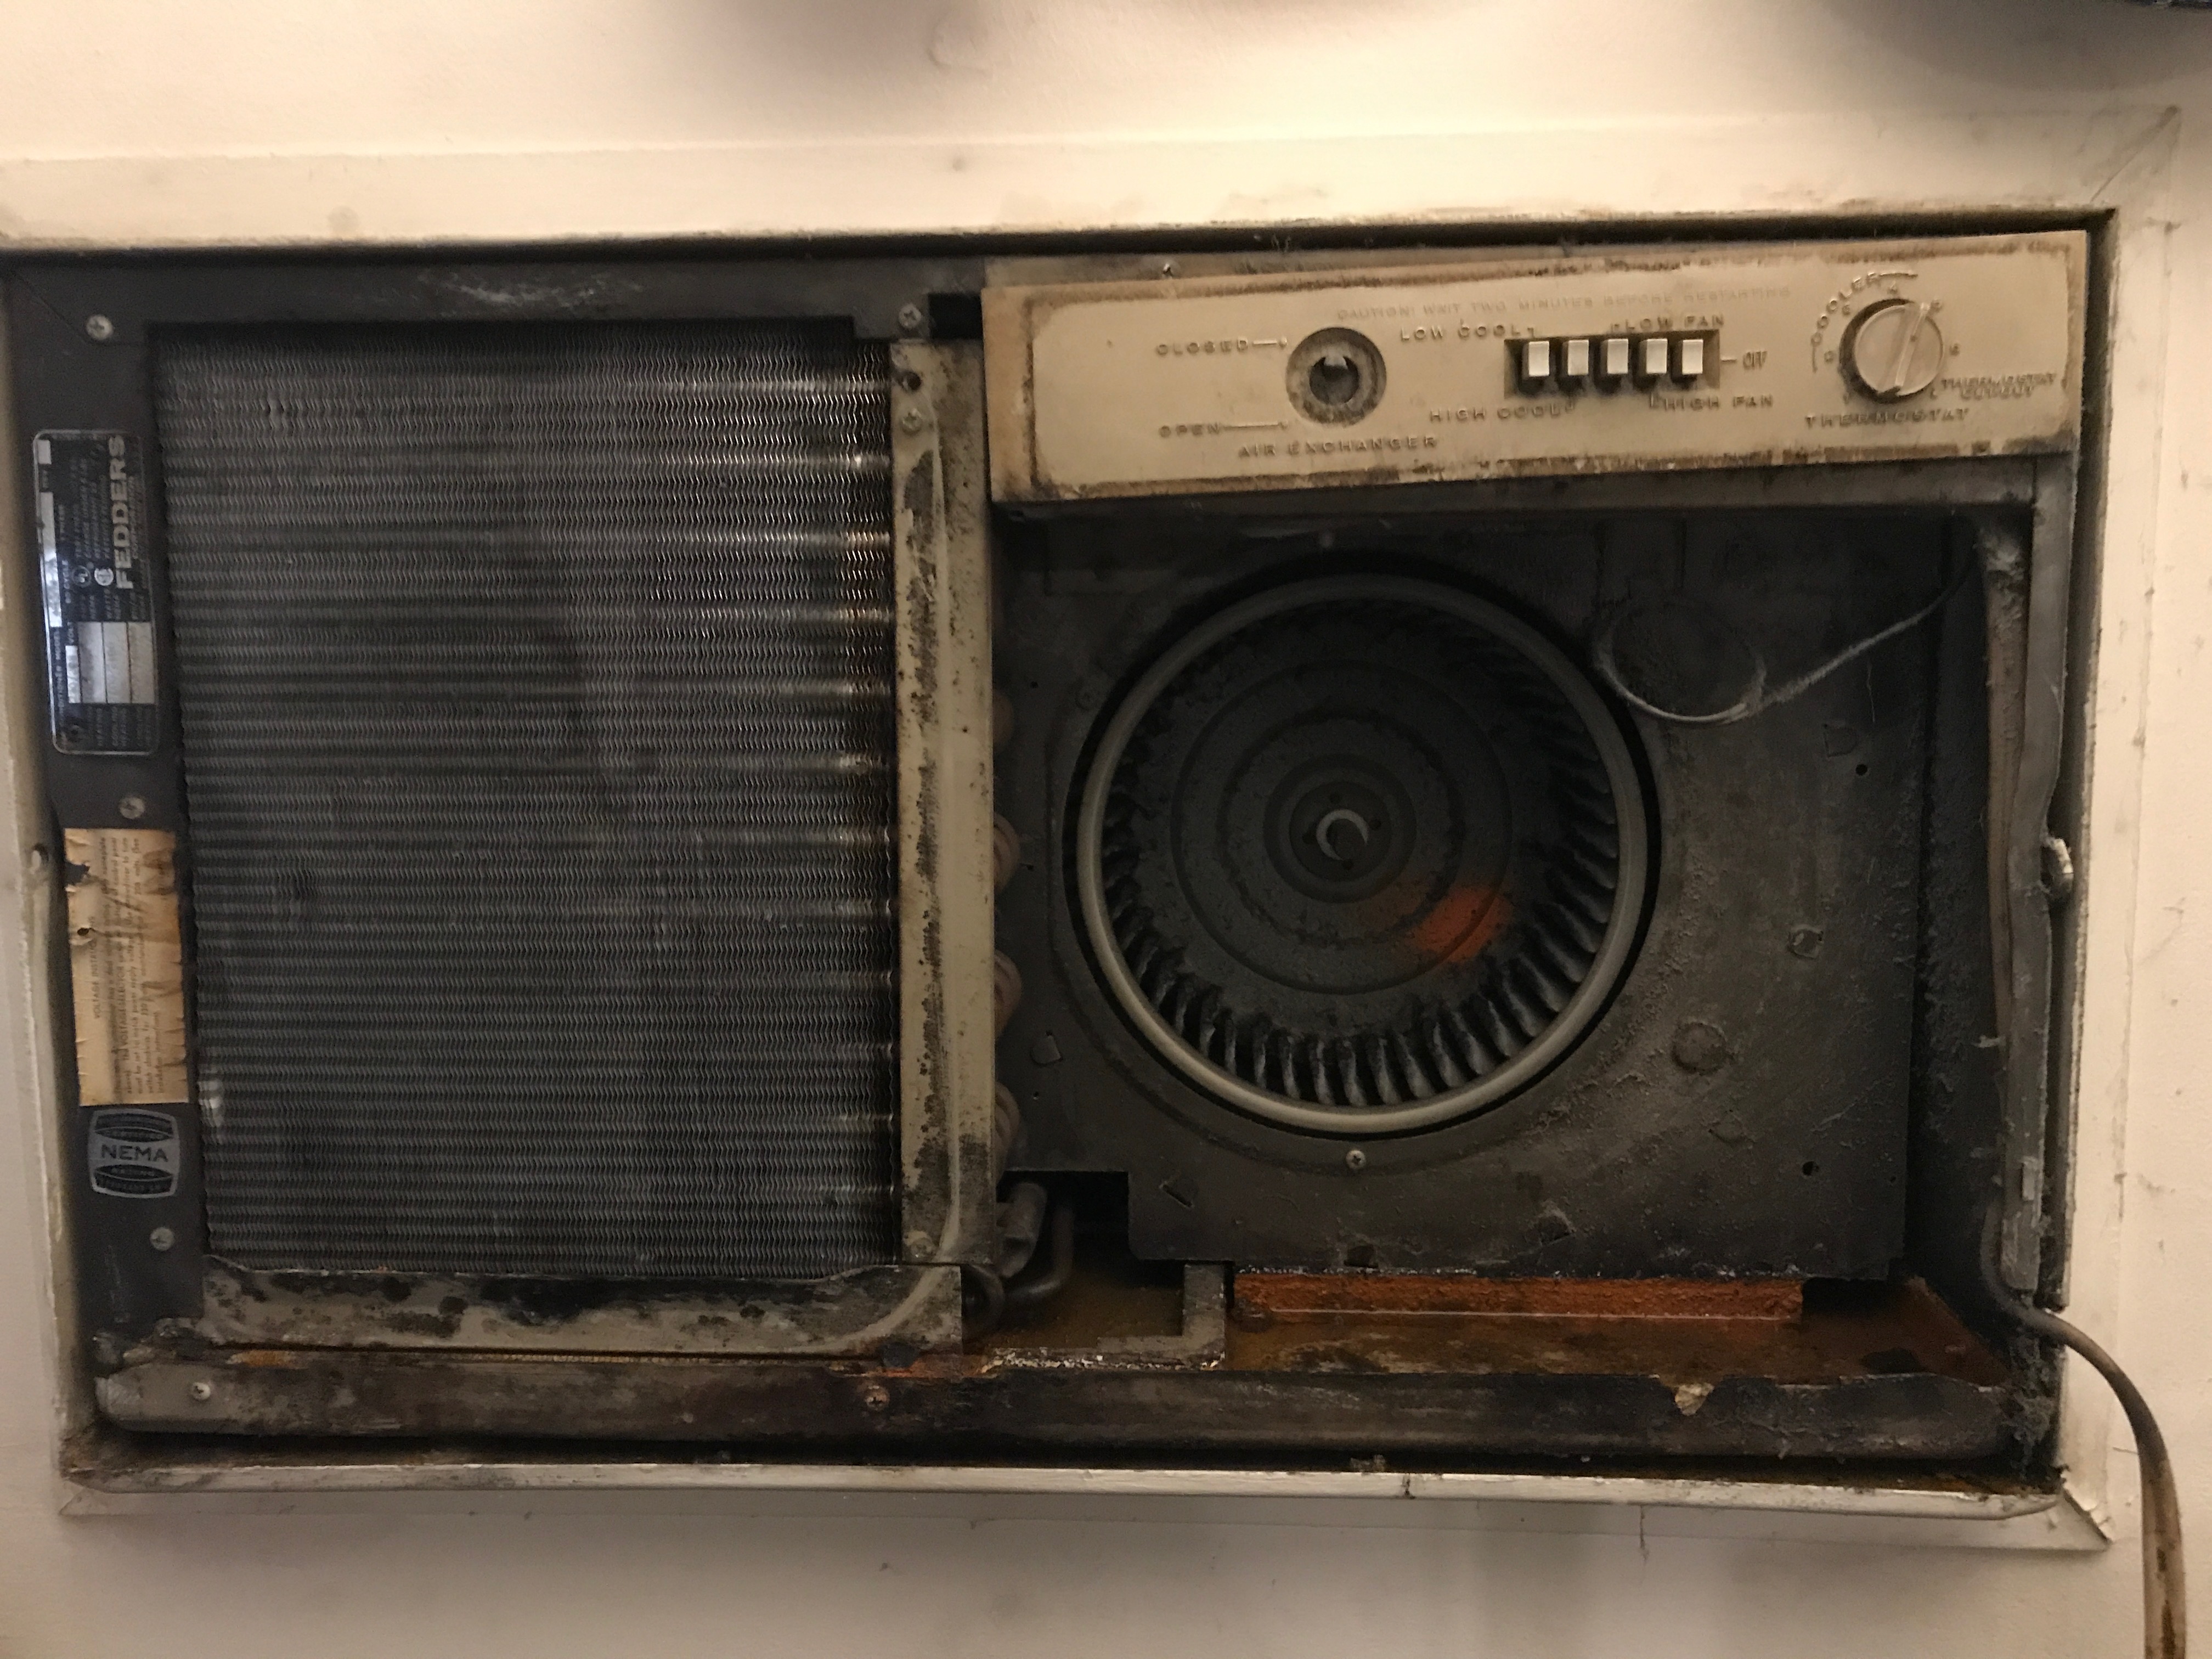
One option I contemplated was replacing my existing air conditioner. To get some idea of what it would take, I removed the front cover, which I’ve done every mumblety-mumble years to clean the filter. Here’s what I saw:

It’s old and rusty, just as I remembered. It looks like replacing it might be a good idea. I had investigated the procedure for replacing a through-the-wall air conditioner; the instructions begin “Lift the old air conditioner out of the sleeve.” No way. The air conditioner is rusted into place.
To replace the air conditioner would require hiring a contractor. My guess is that it would cost $2000 minimum. I don’t begrudge contractors their money; I charge $120/hour for computer consulting, and that fee is on the very low end. But it’s more than I can afford to replace an appliance that works well, and whose only flaw is being old and unattractive. If we replaced everything that was old and unattractive, I’d find myself in a landfill sooner or later.
Another web site I checked said that old air conditioners were more robust than modern models. The site suggested that you could take an old unit through a car wash to restore it. I’d consider that if I could get the unit out of the wall. But if I could do that, I’d replace the unit anyway.
You can see in the picture that the A/C is missing the knob that controls whether the air exchanger is open or closed. I wrote in my previous blog post that the switch was frozen shut. I tried turning it with a pair of pliers, and it rotated easily. All I need is a new knob. I ordered a cheap knob; if it doesn’t fit, it’s no big deal.
I saw something I hadn’t noticed before: the sticker with the model information for the A/C:

Now I knew that I had a Fedders model 4320W. I did a web search, and found nothing. You can give it a try, but I have a hunch that the only significant positive search result you’ll find is this blog post.
That fit in with what I suspected: This A/C has been in the apartment since the complex was built in the 1970s.
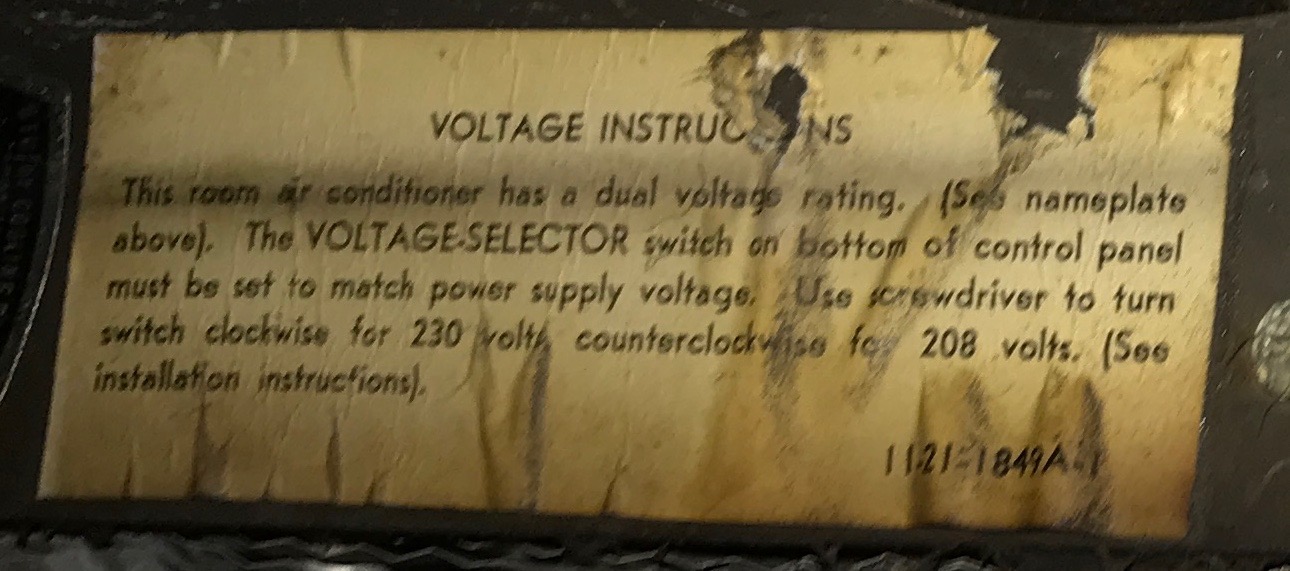
The label also gave me some pertinent information for using Homekit switches: Its maximum draw is less than 11 amps and 2100 watts. It also provides about 12000 BTU; no wonder it does such a good job cooling a 400-square-foot living room! I can’t tell whether it’s using 230V or 208V, because apparently it can handle both:

I don’t want to fiddle with that switch. The only way to know for sure is to use a voltmeter on the outlet providing the power, and that’s difficult for me to reach.
11 amps is well within the capabilities of typical Homekit-style switches and relays. I had a discussion with Dr. Sam Groveman, and emerged with a plan and a Bill of Materials to order. Those parts should arrive during the coming week. I’ll describe the project and assembly in future blog posts.
If you’d to get some idea of what I’m doing without being exposed to my verbosity or waiting for those posts, here’s a description of a similar project. The main difference between that and what I plan to do is that Sam recommended I don’t bother with an Arduino for my setup.
Pingback: 20A Air Conditioner and Homekit, part 3: Raspberry Pi – The Argothald Journal
Pingback: 230V Air Conditioner and HomeKit, part 5: GPIO – The Argothald Journal
Pingback: 230V Air Conditioner and HomeKit, part 6: Solid-State Relays – The Argothald Journal
Later, I learned another reason why it would be hard to replace my air conditioner on my own: When you replace an A/C, you need to have a professional drain the old refrigerant from the A/C before you dispose of it. Since my A/C has the old type of ozone-destroying (it’s on the label above), this procedure and the disposal costs would be much more than I could afford.
Pingback: 230V Air Conditioner and HomeKit, part 8: Power Cords – The Argothald Journal